By integrating your Android apps with the Google Play Services, you can access Google services, such as Maps, Drive, and Google+. Once you have your apps set up to use these services, accessing them is typically straightforward. The setup process does require a few steps, but you only need to carry them out once. In this tutorial we will go through the process of integrating Google Play Services with Android apps.
Introduction
Throughout the tutorial, we will outline what you need to do to integrate apps with Play Services in both Eclipse and Android Studio. You will need access to the Google Developer Console and to the Keytool utility.
Once you are set up with Play Services, the development process itself will be determined by what you want your apps to do. The the setup procedure, however, remains the same. By using the client library to access platform services, your apps will benefit from automatic updates through the Play Store.
1. Install Play Services in your IDE
Step 1
Open your IDE and start the Android SDK Manager. In Eclipse, choose Window > Android > SDK Manager. In Android Studio, click the SDK Manager toolbar button. Scroll through the list, expand the Extras folder and select Google Play Services.
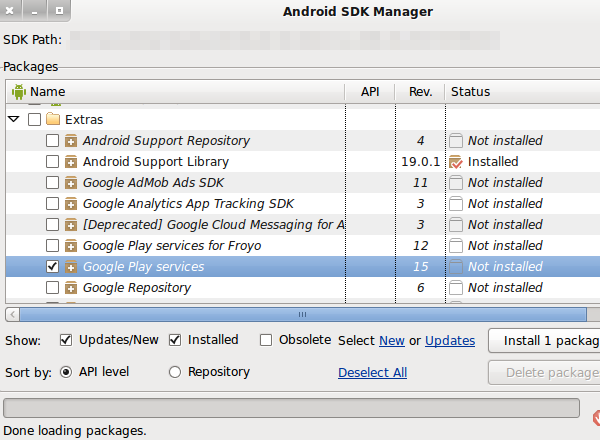
Click to install the package and accept the license when you are prompted. If you are developing in Android Studio, you will also need to install the Google Repository.
Step 2
When you test apps in which you use the Google Play Services APIs, ideally, you should run them on physical devices. However, it is possible to test in the emulator. To do this, you will need to install the Google APIs Platform. You will find this inside the directory for any of the API levels 17 and up.
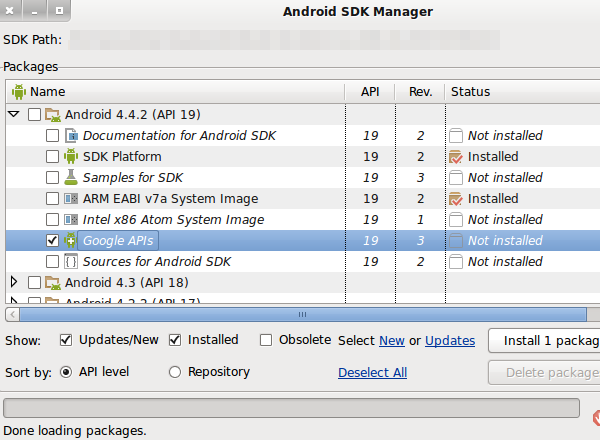
Find the platform in your SDK Manager, install it, and accept the license. When you create an AVD (Android Virtual Device) to test an app using Google Play Services, choose Google APIs as the target.
Step 3
If you are developing in Eclipse, you will also need to copy the Play Services library into your workspace. First, browse to it on your computer using a file explorer. You will find it in the folder you downloaded your Android SDK into, at /extras/google/google_play_services/libproject/google-play-services_lib/.
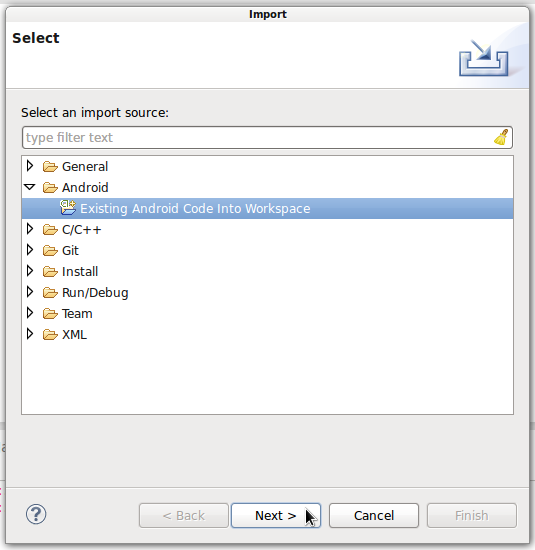
Copy it to a location on your computer that you use for Android development files. Once you have copied the library (you must copy it rather than using the version in the SDK directory), go back to Eclipse. Choose Import from the File menu. Expand the Android folder, select Existing Android Code Into Workspace, and click Next.
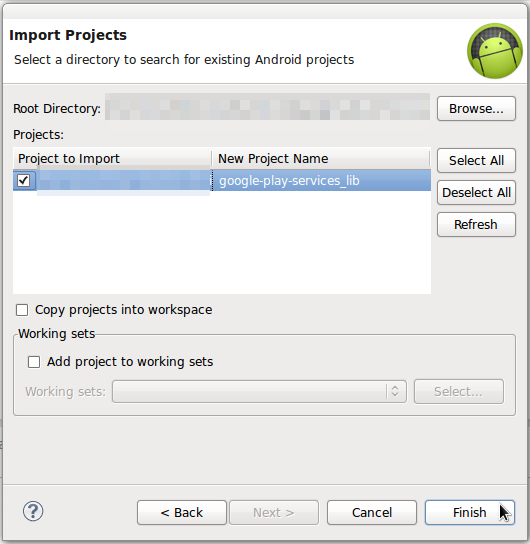
Click the Browse button and navigate to the location you copied the Play Services library into. Select the folder you copied and click Finish to import it. The package will appear in your Package Explorer.
2. Create an Android Project
Step 1
You can now start developing with the Play Services resources. Create a new Android project in your IDE. Once you have a project in your workspace, you need to reference the Play Services resources within it.
In Android Studio, you will need to add a build rule to the build.gradle file in the module for your application project. In the dependencies section, use the following syntax:
compile 'com.google.android.gms:play-services:4.1.32'
Make sure you use the number for the most recent version of Play Services. You will need to update this as the library is updated. Save the file and click the Sync Project with Gradle Files button.
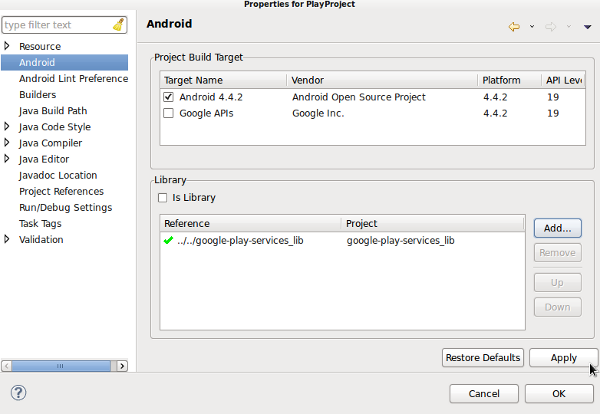
In Eclipse, select the project in your Package Explorer, right-click or select the Project menu, and choose Properties. Select the Android option on the left and click Add in the Library section.
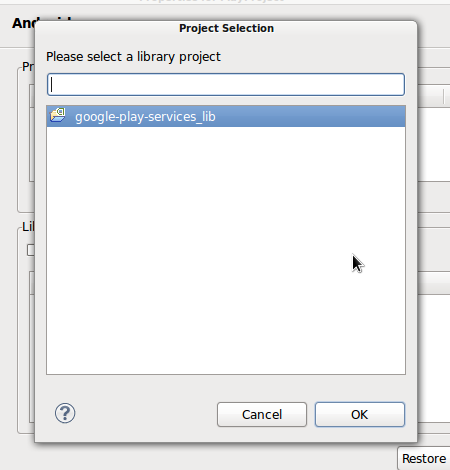
Select the Google Play Services library from the pop-up window and click OK to add it. Click Apply and the OK.
Step 2
Whichever IDE you are using, you will need to add Play Services meta-data to your manifest file. Open the project's manifest file and add the meta-data element inside theapplication element:<meta-data android:name="com.google.android.gms.version"
android:value="@integer/google_play_services_version" />
If you are using Proguard, you will need to create an exception. See the Developer Guide for more details. For an overview of the Google Play Services APIs, check out the Package Index.
3. Connecting with Play Services in your Apps
Step 1
The processing steps you need to take within your application code will depend on what functionality you want to implement with Play Services. The following sections outline some general considerations and steps.
Although updates are pushed through the Google Play Store, it is still advisable to check what version the user device has installed before you attempt to carry out any processing with Google Play Services.
See the Implementing GCM Client example code in the Developer Guide for an overview of how to implement these checks within an Activity class. The method call to look for is isGooglePlayServicesAvailable, which you can add to a helper method as in the following excerpt:
private boolean checkPlayServices() {
    int resultCode = GooglePlayServicesUtil.isGooglePlayServicesAvailable(this);
    //...
}
You could call the method in onCreate, before attempting to create the GoogleAPIClient instance through which you access the Play Services resources, and within onResume. If the user device does not have the required resources installed, they will be prompted to do so through the Google Play Store.
Step 2
After checking the level of support on the user device, you can create an instance of the GoogleAPIClient class to call on the Google Play resources. The following example code demonstrates this and could be included in onCreate:
GoogleApiClient myClient = new GoogleApiClient.Builder(this)
    .addApi(Plus.API)
    .addScope(Plus.SCOPE_PLUS_PROFILE)
    .addConnectionCallbacks(this)
    .addOnConnectionFailedListener(this)
    .build();
This would prepare your application for accessing Google+ services, as you can see from the Plus.API excerpt. The addScope line will vary depending on what your app does. This code also sets up callbacks for the connection process. Your class can implement the following interfaces:
public class MainActivity extends Activity implements ConnectionCallbacks, OnConnectionFailedListener
The class can then implement the onConnected and onConnectionSuspended callbacks for handling changes in connection to Play Services.
To handle failures in connecting to Play Services, such as in cases where user sign-in is required, your class can also implement onConnectionFailed , for accessing various standard methods for resolving typical errors. Some of these methods will cause the onActivityResult method to execute when the user returns to the app, so you can reattempt to connect there.
In general, your Activity class should connect to Play Services in onStart and disconnect in onStop via the GoogleAPIClient class as in the following excerpt:
myClient.connect();
4. Using Play Services Resources
Step 1
For certain Play Services, including Google+, you need to register for access. To do so, log into the Google APIs Console, click Create Project, and enter a name. After creating the project, you should be redirected to the project in the console.
Select the APIs menu item, find Google+ API in the list, and click the button to enable it. The status should change to ON after accepting the license. Clicking the API listing will give you an overview of what you can do with it.
Step 2
Next, select Credentials and click Create New Client ID. Select the Installed application radio button, select Android as the type, and enter your app details. Now you need to use the Keytool resource to generate a SHA1 certificate.
During development, you can use the debug keystore, entering the following code in a terminal:
keytool -exportcert -alias androiddebugkey -keystore ~/.android/debug.keystore -list -v
You'll need to make sure this is the correct location for your debug keystore, alter the path if it isn't. When you execute this command, you'll be prompted for the password. Enter android for the debug keystore and the fingerprint should be output to the terminal.
Copy the SHA1 line and paste it into the Signing certificate fingerprint box in the APIs Console. Enable deep linking if necessary and then click the button to create the ID. A section will appear entitled Client ID for Android Application. You do not actually need to use the ID in your app code, but you may wish to keep a copy of it for your own records.
Step 3
Before you can call on the Play Services APIs in your application code, you will need to add the appropriate permissions to your project's manifest file. The following examples demonstrate a few typical use cases, but you will need to choose the appropriate permissions for your own project:
<uses-permission android:name="android.permission.INTERNET" />
<uses-permission android:name="android.permission.GET_ACCOUNTS" />
<uses-permission android:name="android.permission.USE_CREDENTIALS" />
Your project should now be configured to call the Play Services APIs that you need. You will need to structure your Activity classes differently depending on what your apps do. Take a look at the Developer Guide for more information about this.
Don't forget to check out the following guides to get started with some of the available Play Services:
If the Google services you wish to access are not part of the Play Services library, you can access them using Google's REST API.
Conclusion
There are a lot of possibilities with Google Play Services in Android apps. From gaming to location and mapping services, your apps can take advantage of the existing platform features within the context of your own user interfaces and functionality.
The setup process may seem a little laborious, but once you're set up, you can focus on bringing these services to your users.

Comments