In this series, we are going to look at building a Bitcoin payment system into our installation of OpenCart. Before we get started, I recommend that you practice the basic OpenCart module development if you are not familiar with how to build your own modules.
Once done, you should have enough knowledge to continue with developing more advanced modules. In this series, that's exactly what we aim to do.
Getting Started
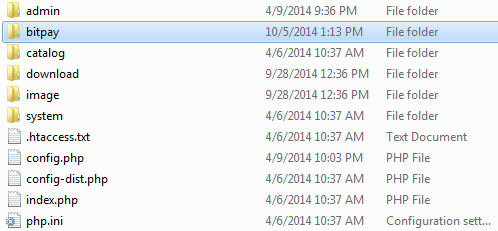
Before we begin building the extension, set up OpenCart on your local machine. Next, download the BitPay API Library from the article attachment and place it in your store root as shown in the following screenshot:
To configure and set up up our Bitcoin Payment Module, we need an admin interface. To do this, we'll follow the MVC pattern for implementing our admin panel.
1. Create the Admin Controller
- Navigate to
admin/controller/payment. - Create a PHP file and name it
bitpay.php. - Open the file in your favorite IDE and create a class following the OpenCart class naming convention, for example:
class ControllerPaymentBitpay extends Controller {}. - Inside the controller class, define the default
indexfunction. - Then, inside this function, start writing the code as featured below.
1.1 Loading Language & Models
$this->language->load('payment/bitpay');
$this->load->model('localisation/order_status'); // loading the model to get system Order Statuses
1.2 Setting Up Page Title
To set the Page Title of the document we use the following code:
$this->document->setTitle($this->language->get('text_title')); // Setting the document heading title
1.3. Parsing Controllers Elements to View
/* Assigning and parsing the from values  */

$this->data['heading_title']           = $this->language->get('text_title');
$this->data['text_enabled']            = $this->language->get('text_enabled'); // gets default language text
$this->data['text_disabled']           = $this->language->get('text_disabled'); // gets default language text
$this->data['text_high']               = $this->language->get('text_high');
$this->data['text_medium']             = $this->language->get('text_medium');
$this->data['text_low']                = $this->language->get('text_low');
$this->data['api_key']           = $this->language->get('text_api_key');
$this->data['confirmed_status']  = $this->language->get('text_confirmed_status');
$this->data['invalid_status']    = $this->language->get('text_invalid_status');
$this->data['transaction_speed'] = $this->language->get('text_transaction_speed');
$this->data['test_mode']         = $this->language->get('text_test_mode');
$this->data['status']            = $this->language->get('text_status');
$this->data['sort_order']        = $this->language->get('text_sort_order');
$this->data['button_save']             = $this->language->get('button_save'); // gets default language text
$this->data['button_cancel']           = $this->language->get('button_cancel'); // gets default language text
$this->data['tab_general']             = $this->language->get('tab_general'); // gets default language text

/* End Text Assignation */
1.4. Routing Save & Cancel Buttons
The following code is used to assign Action / Save & Cancel URLs triggers:
$this->data['action'] = HTTPS_SERVER . 'index.php?route=payment/'.$this->payment_module_name.'&token=' . $this->session->data['token'];
$this->data['cancel'] = HTTPS_SERVER . 'index.php?route=extension/payment&token=' . $this->session->data['token'];
1.5. Getting Available Order Statuses
The following code gets all the order statuses from the Localisation-Model (which is pre-coded into OpenCart) and parses it for the view:
$this->data['order_statuses'] = $this->model_localisation_order_status->getOrderStatuses();
1.6. Fetching Data From the Database
Our saving process will come in the model section. However the following code is responsible for fetching this module data (if any) and parsing it for view.
/* Fetching the Field Values saved in Database*/
$this->data['bitpay_api_key'] = $this->config->get('bitpay_api_key');

$this->data['bitpay_confirmed_status_id'] = $this->config->get('bitpay_confirmed_status_id');

$this->data['bitpay_invalid_status_id'] = $this->config->get('bitpay_invalid_status_id');

$this->data['bitpay_transaction_speed'] = $this->config->get('bitpay_transaction_speed');

$this->data['bitpay_test_mode'] = $this->config->get('bitpay_test_mode');

$this->data['bitpay_status'] = $this->config->get('bitpay_status');

$this->data['bitpay_sort_order'] = $this->config->get('bitpay_sort_order');
/* Database fields fetching ends */
1.6 Rendering the View Template
The following code adds children to our view template and renders it for the user view.
$this->template = 'payment/bitpay.tpl'; // Template Assigning
$this->children = array(
'common/header',
'common/footer'
); // Provide the list of template childeren

$this->response->setOutput($this->render(TRUE), $this->config->get('config_compression')); // Rendering the Template Output
2. Creating Admin View
- Navigate to
admin/view/template/payment. - Create a file and name it
bitpay.tpl. - You can place your own HTML. In my case, I've done that using the following steps.
2.1. Adding Header Child
To load the header that we passed as a child at 1.6:
<?php echo $header; ?>
2.2 Warning Block
Warning Block is a div section which will display user warnings if any:
<?php if ($error_warning) { ?> <div class="warning"><?php echo $error_warning; ?></div><?php } ?>
2.3 The Complete Template
The complete HTML will look something like below:
<div id="content">

<?php
/* Warning Block*/
if ($error_warning) {  ?>
<div class="warning"><?php echo $error_warning; ?></div>
<?php }
/* Warning Block Ends */
 ?>
<div class="box">
  <div class="left"></div>
  <div class="right"></div>
    <div class="heading">
      <h1><?php echo $heading_title; ?></h1>
      <div class="buttons"><a onclick="$('#form').submit();" class="button"><span><?php echo $button_save; ?></span></a><a onclick="location = '<?php echo $cancel; ?>';" class="button"><span><?php echo $button_cancel; ?></span></a></div>
    </div>
  <div class="content">
    <form action="<?php echo $action; ?>" method="post" enctype="multipart/form-data" id="form">
      <table class="form">
        <tr>
          <td><span class="required">*</span> <?php echo $api_key; ?></td>
          <td><input type="text" name="bitpay_api_key" value="<?php echo $bitpay_api_key; ?>" style="width:300px;" />
            <?php
            // API Key Error case block
            if ($error_api_key) { ?>
            <span class="error"><?php echo $error_api_key; ?></span>
            <?php }
            // Error Case Block Ends
             ?></td>
        </tr>
         <tr>
            <td><?php echo $confirmed_status; ?></td>
            <td><select name="bitpay_confirmed_status_id">
                <?php foreach ($order_statuses as $order_status) { ?>
                <?php if ($order_status['order_status_id'] == $bitpay_confirmed_status_id) { ?>
                <option value="<?php echo $order_status['order_status_id']; ?>" selected="selected"><?php echo $order_status['name']; ?></option>
                <?php } else { ?>
                <option value="<?php echo $order_status['order_status_id']; ?>"><?php echo $order_status['name']; ?></option>
                <?php } ?>
                <?php } ?>
              </select></td>
          </tr>
          <tr>
            <td><?php echo $invalid_status; ?></td>
            <td><select name="bitpay_invalid_status_id">
                <?php foreach ($order_statuses as $order_status) { ?>
                <?php if ($order_status['order_status_id'] == $bitpay_invalid_status_id) { ?>
                <option value="<?php echo $order_status['order_status_id']; ?>" selected="selected"><?php echo $order_status['name']; ?></option>
                <?php } else { ?>
                <option value="<?php echo $order_status['order_status_id']; ?>"><?php echo $order_status['name']; ?></option>
                <?php } ?>
                <?php } ?>
              </select></td>
          </tr>
          <tr>
            <td><?php echo $transaction_speed; ?></td>
            <td><select name="bitpay_transaction_speed">
                <?php if ($bitpay_transaction_speed == 'high') { ?>
                <option value="high" selected="selected"><?php echo $text_high; ?></option>
                <?php } else { ?>
                <option value="high"><?php echo $text_high; ?></option>
                <?php } ?>
                <?php if ($bitpay_transaction_speed == 'medium') { ?>
                <option value="medium" selected="selected"><?php echo $text_medium; ?></option>
                <?php } else { ?>
                <option value="medium"><?php echo $text_medium; ?></option>
                <?php } ?>
                <?php if ($bitpay_transaction_speed == 'low') { ?>
                <option value="low" selected="selected"><?php echo $text_low; ?></option>
                <?php } else { ?>
                <option value="low"><?php echo $text_low; ?></option>
                <?php } ?>
              </select></td>
          </tr>
          <tr>
            <td><?php echo $test_mode; ?></td>
            <td><select name="bitpay_test_mode">
                <?php if ($bitpay_test_mode) { ?>
                <option value="1" selected="selected"><?php echo $text_enabled; ?></option>
                <option value="0"><?php echo $text_disabled; ?></option>
                <?php } else { ?>
                <option value="1"><?php echo $text_enabled; ?></option>
                <option value="0" selected="selected"><?php echo $text_disabled; ?></option>
                <?php } ?>
              </select></td>
          </tr>
        <tr>
          <td><?php echo $status; ?></td>
          <td><select name="bitpay_status">
              <?php if ($bitpay_status) { ?>
              <option value="1" selected="selected"><?php echo $text_enabled; ?></option>
              <option value="0"><?php echo $text_disabled; ?></option>
              <?php } else { ?>
              <option value="1"><?php echo $text_enabled; ?></option>
              <option value="0" selected="selected"><?php echo $text_disabled; ?></option>
              <?php } ?>
            </select></td>
        </tr>
        <tr>
          <td><?php echo $sort_order; ?></td>
          <td><input type="text" name="bitpay_sort_order" value="<?php echo $bitpay_sort_order; ?>" size="1" /></td>
        </tr>
      </table>
    </form>
  </div>
</div>
</div>
<?php echo $footer; //loading the footer ?>
At this point, we are done with the layout of the module. Now its time to save the Module Data into the database. So we will be putting a little code inside the controller for this purpose.
Saving the Data
Inside your controller's default function, place some serialization code as shown below:
if (($this->request->server['REQUEST_METHOD'] == 'POST') && ($this->validate())) // Checking if the data is coming through post and validate it
        {
            $this->model_setting_setting->editSetting($this->payment_module_name, $this->request->post); // saving all the data into  the database
            $this->session->data['success'] = $this->language->get('text_success'); // Success Identifier
            $this->redirect(HTTPS_SERVER . 'index.php?route=extension/payment&token=' . $this->session->data['token']); // Redirecting to the payment modules list
        }
Introduction Validation
The following is the validation function that validates the required data:
private $error = array(); // All errors will be saved into this array
    private function validate()
    {
    // User Module Permission Check
        if (!$this->user->hasPermission('modify', 'payment/'.$this->payment_module_name))
        {
            $this->error['warning'] = $this->language->get('error_permission');
        }
    // User Module Permission Check Ends

    // Check if the API Key is not empty
        if (!$this->request->post['bitpay_api_key'])
        {
            $this->error['api_key'] = $this->language->get('error_api_key');
        }
    // Api Check ends here

    // If there is no error, the function returns True else False
        if (!$this->error)
        {
            return TRUE;
        }
        else
        {
            return FALSE;
        }
        // Boolean Check Ends here
    }
We are done creating the payment module layout for the dashboard, and you should be able to test-drive the admin panel. Remember to grant permission to the administration user before testing.
Conclusion
In this article, we introduced the administrative portion of the payment module. Note that it's a good idea to give the site administrator more control via an interface than, say, to require that they write in code.
In the next article, we'll implement the payment module with respect to the front-end. In the meantime, feel free to shoot any questions or comments via the form below.

Comments