In the previous article, we discussed working with post metadata in WordPress using the provided APIs. We also covered a variety of tools, the ideas of security, and what would be required in order to set up the environment in which to work with the code that would be provided throughout the tutorial.
If you haven't read that article, then I highly recommend reviewing it not only because it covers how to work with post metadata, but also because it hits on some important topics that are relevant to the remainder of the articles in this series (and it alludes to some that are to come later this year).
Assuming you're all caught up and ready to learn about another one of the metadata APIs, then let's get started with the WordPress User Meta API.
The WordPress User Meta API
Recall from earlier in this series, WordPress defines metadata in the following way:
Meta-data is handled with key/value pairs. The key is the name of the meta-data element. The value is the information that will appear in the meta-data list on each individual post that the information is associated with.
As we continue to work with the various metadata APIs, you're going to find that this definition holds true no matter which API is being explored.
The nice thing is that once you've gotten a handle on tackling one metadata API, you have a general idea for how each of the related APIs will work. Sure, there may be nuances here and there, but the general functionality will be the same.
Working With the User Metadata API
When looking at the WordPress Post Meta API, we reviewed and used the following functions:
add_post_metaupdate_post_metaget_post_metadelete_post_meta
Yes, there are idiosyncrasies among them, especially as it relates to how add_post_meta and update_post_meta work and the various ways get_post_meta and delete_post_meta work, and the APIs we're about to examine will work much in the same fashion.
For the remainder of this article, I'm assuming that you have a local web server, access to a database front-end, an IDE, and that you're comfortable working with the file tutsplus-metadata.php.
If you're curious, I'll be using the following set of tools:
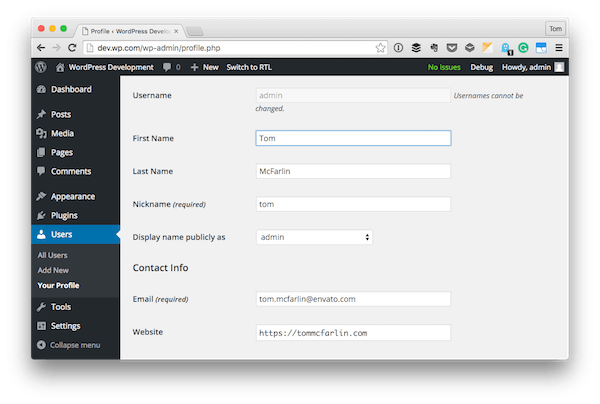
Note that the user metadata will be stored in the wp_usermeta database table, so we'll be referencing that in any screenshots of the database. Unlike the initial post metadata table, there's actually some data already in the user metadata table.

This is because of some of the data that's stored on the user profile screen:
Nonetheless, the API is going to allow us to write our own information to the table. So with all of that said, let's go ahead and take a look at how to work with the functions provided by WordPress.
Note that through all of the examples given, we are going to be passing 1 for the first parameter to the API functions since the first user is always the site administrator. This is generally guaranteed to be present in any given installation.
Adding User Meta
You can find a reference to the add_user_meta function in the Codex. The definition of the function is about as succinct as possible:
Add metadata to a user's record.
How beneficial is this? That is, if you were to be working on a plugin or a web application that's built on WordPress and you're looking to extend what a person is able to associate with their profile, then this is one way to do it.
It could be something as simple as providing a user's profile on a given social network, or it could be something more advanced where you may be associating the user with data contained in another table, an array of information, or something else.
Regardless, this is how you go about doing that. Here's the thing, though: Remember how writing metadata for a post using the add_post_meta function resulted in multiple rows being able to be written using the same key?
The same thing is possible using add_user_meta. However, the API function accepts an optional fourth parameter on whether or not a the value being inserted should be unique or not.
Non-Unique Values
So first, let's take a look at the code for adding some user metadata, and let's do so by not specifying that it should be unique.
The code for doing this will look like this:
<?php

add_filter( 'the_content', 'tutsplus_add_user_meta' );
/**
 * Determines if the current post is the default 'Hello World' post and, if so,
 * adds non-unique user meta data to the database.
 *
 * @param    	string $content		The post content.
 * @return	 string $content		The post content.
 */
function tutsplus_add_user_meta( $content ) {

	if ( 1 === get_the_ID() ) {
		add_user_meta( 1, 'twitter_account', 'https://twitter.com/tommcfarlin/' );
	}

	return $content;

}
Note that we're using the same strategy as employed earlier in this series:
- We hook into
the_content. - We check to see if we're on the Hello World post.
- If so, we add the user metadata.
- We return
$contentto WordPress.
With this code in place and with the Hello World post loaded in your browser, refresh the page a few times.
Once done, the resulting database table will look like this:

As I said, it's very similar to how the post metadata API performs.
Unique Values
Using your database front-end, delete the rows that were created or feel free to choose a new key (perhaps something like instagram_username). I'm going to be deleting the rows.
Secondly, I'm also going to be creating a second function rather than changing the one above so that I can offer the complete source code at the end of the tutorial, so read the following code closely:
<?php

add_filter( 'the_content', 'tutsplus_unique_add_user_meta' );
/**
 * Determines if the current post is the default 'Hello World' post and, if so,
 * adds unique user meta data to the database.
 *
 * @param    	string $content		The post content.
 * @return	 string $content		The post content.
 */
function tutsplus_unique_add_user_meta( $content ) {

	if ( 1 === get_the_ID() ) {
		add_user_meta( 1, 'twitter_account', 'https://twitter.com/tommcfarlin/', true );
	}

	return $content;

}
First, provide a unique value for the meta value (or the third argument) in the function call. Refresh the page a few times, and then take a look at the database. It should look something like this:

Notice what's interesting? There are still multiple values, but they are all the same.
Now try changing the meta value argument a couple of times, and then take a look at the database and you should see something like this:
Notice the difference? Exactly—there isn't one. That's because we said there could only be a unique key. So it doesn't necessarily mean that only one record is created. It means that multiple records will be created when the function is called, but it will always use the first value that it stored that's associated with said key.
If you'd like, go ahead and delete the rows that we just created as this provides a great segue into the next function.
Updating User Meta
In similar fashion to how the Post Meta API works, the update functionality works in the following way:
Update user meta field based on user ID. Use the $prev_value parameter to differentiate between meta fields with the same key and user ID. If the meta field for the user does not exist, it will be added.
When working with this function, it helps to think about this in two scenarios:
- when previous metadata has been added using the
add_user_metafunction and there are multiple records with the same information - when no metadata has been added and we're adding a new record and want it to be unique
In the first case, it helps to provide the $prev_value because you're telling WordPress which value to target and to update.
When We've Added Metadata
For example, assume that our database looks as it did earlier in the tutorial:
And we want to update the records that have the previous value of https://twitter.com/tommcfarlin/. To do that, then we'd update the code that looks like this.
<?php

add_filter( 'the_content', 'tutsplus_update_user_meta' );
/**
 * Determines if the current post is the default 'Hello World' post and, if so,
 * updates user meta data with the specified previous value.
 *
 * @param    	string $content		The post content.
 * @return	 string $content		The post content.
 */
function tutsplus_update_user_meta( $content ) {

	if ( 1 === get_the_ID() ) {
		update_user_meta( 1, 'twitter_account', 'https://twitter.com/tutspluscode/', 'https://twitter.com/tommcfarlin/' );
	}

	return $content;

}
And then the update to the database would look like this:

Note that this updates all values that are associated with this meta key. Of course, that's only one use of the function.
When Adding New Metadata
In the second case, you're not going to need to specify a previous value because you're going to be adding information for the first time.
To clarify, you can use the update_user_meta function when you want to add information to the database. It doesn't have to exist prior to using it.
This is useful whenever you want to add a single, unique record that has yet to be added to the database. Using the function is simple. Let's say we want to save the user's sibling's name.
In this case, we'd do this:
<?php

add_filter( 'the_content', 'tutsplus_unique_update_user_meta' );
/**
 * Determines if the current post is the default 'Hello World' post and, if so,
 * updates user meta data with the specified value.
 *
 * @param    	string $content		The post content.
 * @return	 string $content		The post content.
 */
function tutsplus_unique_update_user_meta( $content ) {

	if ( 1 === get_the_ID() ) {
		update_user_meta( 1, 'siblings_name', 'Ben' );
	}

	return $content;

}
And this results in the following record being entered into the database:

If you refresh the page several times and then check your database table, you'll notice that only a single instance of the value is written versus multiple values that come when using add_user_meta.
Then if we wanted to ever change that value, we'd update the meta value associated with the specified meta key and it would update that single record.
Retrieving User Meta
When it comes to retrieving user metadata, we have the get_user_meta function. At this point, it should be clear that the expected parameters will be the user ID and the meta key.
But what about the meta value?
Remember when we're retrieving information, we only need the user ID and the meta key since that's the identifying information for a specific value.
But what happens if the developer has multiple records for a single key? More specifically, what if they've used the add_user_meta function as we've done above and have multiple records?
This is where the optional fourth parameter comes into play: a boolean value that we specify if we want to retrieve a single value or an array of values. The default value (the one that's passed if it's not specified) is false so we'll always get back an array unless we specify otherwise.
Retrieving All Records
Let's assume that we're working off the same set of data from earlier in the tutorial. That is, we have multiple entries for a user's Twitter account. Recall that the database looked like this:
In order to get all of this information out of the database and displayed on the screen, we'd use the following code:
<?php

add_filter( 'the_content', 'tutsplus_get_all_user_meta' );
/**
 * Determines if the current post is the default 'Hello World' post and, if so,
 * retrieves all user meta data for the admin user and the specified key.
 *
 * @param    	string $content		The post content.
 * @return	 string $content		The post content.
 */
function tutsplus_get_all_user_meta( $content ) {

	if ( 1 === get_the_ID() ) {
		var_dump( get_user_meta( 1, 'twitter_account' ) );
	}

	return $content;

}
Assuming all went well, then you should see something like this at the top of your Hello World post:
{ [0]=> string(32) "https://twitter.com/tommcfarlin/" [1]=> string(32) "https://twitter.com/tommcfarlin/" [2]=> string(32) "https://twitter.com/tommcfarlin/" [3]=> string(32) "https://twitter.com/tommcfarlin/" }
If not, double-check the call to var_dump that you've made, and make sure that the information is in the database ready to be retrieved.
Retrieving a Single Record
In the case that you want to retrieve a single record, then you can pass true as the final parameter to the function. This will retrieve the first record that was created in string format.
<?php

add_filter( 'the_content', 'tutsplus_get_user_meta' );
/**
 * Determines if the current post is the default 'Hello World' post and, if so,
 * retrieves a single record of user meta data for the admin user and
 * the specified key.
 *
 * @param    	string $content		The post content.
 * @return	 string $content		The post content.
 */
function tutsplus_get_user_meta( $content ) {

	if ( 1 === get_the_ID() ) {
		echo esc_textarea( get_user_meta( 1, 'twitter_account', true ) );
	}

	return $content;

}
And the result of this code will print this out at the top of the Hello World post from which we've been working:
https://twitter.com/tommcfarlin/
Note that if you're using update_user_meta and you don't specify true as the final parameter, you will get a single-index array handed back to you.
array(1) { [0]=> string(32) "https://twitter.com/tommcfarlin/" }
Thus, if you're looking for a string representation of information, always pass true.
Deleting User Meta
The last thing that we need to cover is how to actually delete the data that we've written to the database. If you've followed along with this series thus far, then you're likely developing some sort of intuition as to how this particular function is going to work.
From its accompanying Codex page:
Remove metadata matching criteria from a user. You can match based on the key, or key and value. Removing based on key and value, will keep from removing duplicate metadata with the same key. It also allows removing all metadata matching key, if needed.
Note that this function is designed to work in the case where there are multiple records that exist and you want to delete them all, or when you have a single record that exists and you want to remove it.
Deleting Multiple Records
First, we'll take a look at how to use this function when there are multiple records with the same information. Let's assume, for the purposes of this example, the database looks something like this:
Here, we have multiple records. In order to delete records having the same key, we use a single call to the delete_user_meta function and pass the user ID and the meta key.
<?php

add_filter( 'the_content', 'tutsplus_delete_all_user_meta' );
/**
 * Determines if the current post is the default 'Hello World' post and, if so,
 * deletes all associated meta data with the specified key.
 *
 * @param    	string $content		The post content.
 * @return	 string $content		The post content.
 */
function tutsplus_delete_all_user_meta( $content ) {

	if ( 1 === get_the_ID() ) {
		delete_user_meta( 1, 'twitter_account' );
	}

	return $content;
}
And if you refresh the information in the database table, you'll note that all of the records have been erased:

Though this is an easy function to use, it is important to remember that it can delete multiple rows in a single call, so use it with care.
A Single Record
If, on the other hand, you have a single record to delete, then you need three pieces of information:
- the user's ID
- the meta key
- the meta value
Having all three values will allow you to delete a single record. Clearly, it allows for much more precision than the previous use of this function.
So, in our example, let's say that we have two records, both of which have the twitter_account meta key. Each key has the following value:

In our example, we're only concerned with removing the second value. To do that, we'll use the following code:
<?php

add_filter( 'the_content', 'tutsplus_delete_user_meta' );
/**
 * Determines if the current post is the default 'Hello World' post and, if so,
 * deletes a single record based on the specified meta key and meta value.
 *
 * @param    	string $content		The post content.
 * @return	 string $content		The post content.
 */
function tutsplus_delete_user_meta( $content ) {

	if ( 1 === get_the_ID() ) {
		delete_user_meta( 1, 'twitter_account', 'https://twitter.com/pressware' );
	}

	return $content;
}
And then if you refresh your database, you should see the following (or something similar):

It's nice when an API performs exactly as you expect.
The Complete Source Code
Here's a copy of all of the source code that we covered in this article. Please note that the add_action calls have been commented out as you'll need to uncomment them based on what you want to do when experimenting with the code.
<?php
/**
 * This file shows how to work with the common User Meta API functions.
 *
 * Namely, it demonstrates how to use:
 * - add_user_meta
 * - update_user_meta
 * - get_user_meta
 * - delete_user_meta
 *
 * Each function is hooked to 'the_content' so that line will need to be
 * commented out depending on which action you really want to test.
 *
 * Also note, from the tutorial linked below, that this file is used form
 * demonstration purposes only and should not be used in a production
 * environment.
 *
 * Tutorial:
 * http://code.tutsplus.com/tutorials/how-to-work-with-wordpress-user-metadata--cms-25800
 *
 * @version    	1.0.0
 * @author		Tom McFarlin
 * @package		tutsplus_wp_metadata
 */

// add_filter( 'the_content', 'tutsplus_add_user_meta' );
/**
 * Determines if the current post is the default 'Hello World' post and, if so,
 * adds non-unique user meta data to the database.
 *
 * @param		string $content		The post content.
 * @return	 string $content		The post content.
 */
function tutsplus_add_user_meta( $content ) {

	if ( 1 === get_the_ID() ) {
		add_user_meta( 1, 'twitter_account', 'https://twitter.com/pressware' );
	}

	return $content;
}

// add_filter( 'the_content', 'tutsplus_unique_add_user_meta' );
/**
 * Determines if the current post is the default 'Hello World' post and, if so,
 * adds unique user meta data to the database.
 *
 * @param		string $content		The post content.
 * @return	 string $content		The post content.
 */
function tutsplus_unique_add_user_meta( $content ) {

	if ( 1 === get_the_ID() ) {
		add_user_meta( 1, 'twitter_account', 'https://twitter.com/photomatt/', true );
	}

	return $content;
}

// add_filter( 'the_content', 'tutsplus_update_user_meta' );
/**
 * Determines if the current post is the default 'Hello World' post and, if so,
 * updates user meta data with the specified previous value.
 *
 * @param		string $content		The post content.
 * @return	 string $content		The post content.
 */
function tutsplus_update_user_meta( $content ) {

	if ( 1 === get_the_ID() ) {
		update_user_meta( 1, 'twitter_account', 'https://twitter.com/tutspluscode/', 'https://twitter.com/tommcfarlin/' );
	}

	return $content;
}

// add_filter( 'the_content', 'tutsplus_unique_update_user_meta' );
/**
 * Determines if the current post is the default 'Hello World' post and, if so,
 * updates user meta data with the specified value.
 *
 * @param		string $content		The post content.
 * @return	 string $content		The post content.
 */
function tutsplus_unique_update_user_meta( $content ) {

	if ( 1 === get_the_ID() ) {
		update_user_meta( 1, 'siblings_name', 'Ben' );
	}

	return $content;
}

// add_filter( 'the_content', 'tutsplus_get_all_user_meta' );
/**
 * Determines if the current post is the default 'Hello World' post and, if so,
 * retrieves all user meta data for the admin user and the specified key.
 *
 * @param		string $content		The post content.
 * @return	 string $content		The post content.
 */
function tutsplus_get_all_user_meta( $content ) {

	if ( 1 === get_the_ID() ) {
		var_dump( get_user_meta( 1, 'twitter_account' ) );
	}

	return $content;
}

// add_filter( 'the_content', 'tutsplus_get_user_meta' );
/**
 * Determines if the current post is the default 'Hello World' post and, if so,
 * retrieves a single record of user meta data for the admin user and
 * the specified key.
 *
 * @param		string $content		The post content.
 * @return	 string $content		The post content.
 */
function tutsplus_get_user_meta( $content ) {

	if ( 1 === get_the_ID() ) {
		var_dump( get_user_meta( 1, 'twitter_account' ) );
	}

	return $content;
}

// add_filter( 'the_content', 'tutsplus_delete_all_user_meta' );
/**
* Determines if the current post is the default 'Hello World' post and, if so,
* deletes all associated meta data with the specified key.
 *
 * @param		string $content		The post content.
 * @return	 string $content		The post content.
 */
function tutsplus_delete_all_user_meta( $content ) {

	if ( 1 === get_the_ID() ) {
		delete_user_meta( 1, 'twitter_account' );
	}

	return $content;
}

add_filter( 'the_content', 'tutsplus_delete_user_meta' );
/**
 * Determines if the current post is the default 'Hello World' post and, if so,
 * deletes a single record based on the specified meta key and meta value.
 *
 * @param		string $content		The post content.
 * @return	 string $content		The post content.
 */
function tutsplus_delete_user_meta( $content ) {

	if ( 1 === get_the_ID() ) {
		delete_user_meta( 1, 'twitter_account', 'https://twitter.com/pressware' );
	}

	return $content;
}
Additionally, feel free to add this to the file that we created in the previous tutorial. That's what I did when working on the examples; however, you may want to be careful when working on the file so that the proper add_action calls are set based on what it is you'd like to do.
Conclusion
As mentioned earlier in the article, you can review each of the functions in the WordPress Codex, which should always be a click away for a WordPress developer.
In the final article in this series, we're going to take a look at how to deal with comment metadata. Given what we've learned so far, it should be something that's relatively easy to pick up.
Of course, that still leaves us with metadata related to taxonomies. Because of the nature of taxonomies, terms, and the APIs, we'll be reviewing those in follow-up series.
For now, continue to experiment with the code that's been provided in this article. Remember that it's meant for demonstration purposes only and should not be run in a production environment.
Throughout this series, we're trying to lay a foundation for future WordPress developers to build from when they go forward and work on solutions for their employer, their clients, or for their own projects.
With that said, I'm looking forward to continuing this series. Remember if you're just getting started, you can check out my series on how to get started with WordPress, which focuses on topics specifically for WordPress beginners.
In the meantime, if you're looking for other utilities to help you build out your growing set of tools for WordPress or for code to study and become more well-versed in WordPress, don't forget to see what we have available in Envato Market.
Finally, you can see all of my courses and tutorials on my profile page, and you can read more articles about WordPress and WordPress development on my blog. Feel free to follow me on Twitter as well at @tommcfarlin where I talk about various software development practices and how we can employ them in WordPress.
Please don't hesitate to leave any questions or comments in the feed below, and I'll aim to respond to each of them.

Comments