If you're asking, "What's Yii?" check out my earlier tutorial: Introduction to the Yii Framework, which reviews the benefits of Yii and includes an overview of what's new in Yii 2.0, released in October 2014.
In this Programming With Yii2 series, I'm guiding readers in use of the newly upgraded Yii2 Framework for PHP.
In part one, we set up Yii2 locally, built a Hello World application, set up a remote server and used Github to deploy our code. In part two, we learned about Yii's implementation of its Model View Controller architecture and how to build web pages and forms that collect and validate data.
In part three, we used Yii's database and active record capabilities to automate code generation for a basic web application. In part four, we learned how to integrate user registration. And in part five, we explored localization with I18n to prepare your application for global users.
In this tutorial, I'm going to show you how to implement access controls to ensure that only the right users can access the parts of our application that we wish them to.
For these examples, we'll continue to imagine we're building a framework for posting simple status updates, e.g. our own mini-Twitter.
Just a reminder, I do participate in the comment threads below. I'm especially interested if you have different approaches, additional ideas, or want to suggest topics for future tutorials.
What Is Access Control?
Access control integrates with the framework's authentication features to allow or restrict access to specific features or pages of your website.
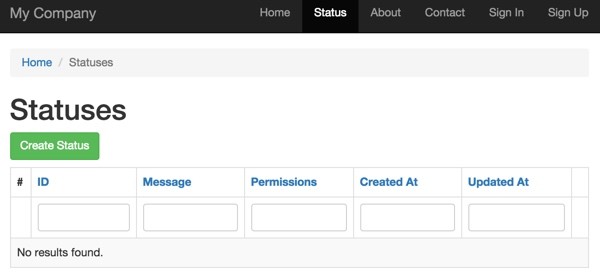
The code we've written thus far allows anyone to create posts even if they haven't signed in. For example, in our sample application, you can visit the Status page and post items without signing in.
We can use Yii2's simple access control features to ensure that users register and sign in before adding and viewing status posts.
Yii2 also offers more advanced (and complex) Role Based Access Control (RBAC) which we will not be implementing at this time. With RBAC, you define a sophisticated hierarchy of permissions for each possible activity within your application.
Yii2's built in Access Control supports only two roles by default: guest (not logged in), represented by '?', and authenticated, represented by '@'. With simple access controls, we can just limit access to specific pages or controller actions based on the login state. If users are not logged in when they visit the place pages, Yii will redirect them to the login page.
In this tutorial, I'll introduce you to using Yii2's simple access controls for our sample application. Then we'll extend simple access with additional roles such as moderator and administrator.
Implementing Simple Access Controls
Currently, our application allows access to the StatusController even without signing in. Let's fix that.
The framework makes it quite simple to implement these controls. We just add behaviors to StatusController.php which define the access rules for each action, e.g. index, create, view, etc.
Here we'll review the access behavior but if you're interested, Yii's verb filters allow you to restrict http request operations based on your controller action.
public function behaviors()
    {
        return [
            'verbs' => [
                'class' => VerbFilter::className(),
                'actions' => [
                    'delete' => ['post'],
                ],
            ],
            'access' => [
                        'class' => \yii\filters\AccessControl::className(),
                        'only' => ['index','create','update','view'],
                        'rules' => [
                            // allow authenticated users
                            [
                                'allow' => true,
                                'roles' => ['@'],
                            ],
                            // everything else is denied
                        ],
                    ],
        ];
    }
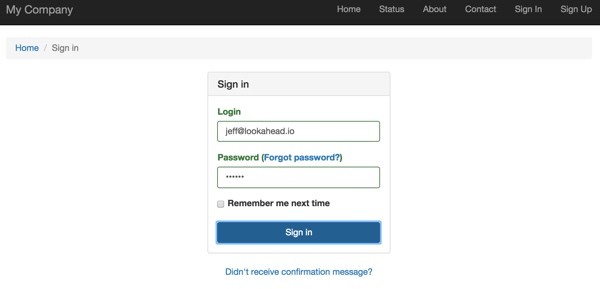
Once added, if you click the Status menu, you'll be redirected to the login page:

Yii also handles the redirect back to the Status index page once login is complete.
Adding Model Ownership
Now, when users access the Status pages, we can find the current user with this code:
Yii::$app->user->getId();
And we can associate Status posts with their creator in the model.
In order to do this, we have to extend the Status table with a new table migration:
./yii migrate/create extend_status_table_for_created_by
Yii Migration Tool (based on Yii v2.0.1)

Create new migration '/Users/Jeff/Sites/hello/migrations/m150128_003709_extend_status_table_for_created_by.php'? (yes|no) [no]:yes
New migration created successfully.
Here's the migration code which adds a column for created_by. We also add a foreign key to create a relation between the Status->created_by field and the User->id table.
<?php

use yii\db\Schema;
use yii\db\Migration;

class m150128_003709_extend_status_table_for_created_by extends Migration
{
    public function up()
    {
      $tableOptions = null;
      if ($this->db->driverName === 'mysql') {
          $tableOptions = 'CHARACTER SET utf8 COLLATE utf8_unicode_ci ENGINE=InnoDB';
      }
      $this->addColumn('{{%status}}','created_by',Schema::TYPE_INTEGER.' NOT NULL');
      $this->addForeignKey('fk_status_created_by', '{{%status}}', 'created_by', '{{%user}}', 'id', 'CASCADE', 'CASCADE');
    }

    public function down()
    {
      $this->dropForeignKey('fk_status_created_by','{{%status}}');
      $this->dropColumn('{{%status}}','created_by');
    }
}
Let's run the migration:
./yii migrate/up
Yii Migration Tool (based on Yii v2.0.1)

Total 1 new migration to be applied:
    m150128_003709_extend_status_table_for_created_by

Apply the above migration? (yes|no) [no]:yes
*** applying m150128_003709_extend_status_table_for_created_by
    > add column created_by integer NOT NULL to table {{%status}} ... done (time: 0.009s)
    > add foreign key fk_status_created_by: {{%status}} (created_by) references {{%user}} (id) ... done (time: 0.007s)
*** applied m150128_003709_extend_status_table_for_created_by (time: 0.020s)

Migrated up successfully.
I re-ran the Gii code generation with the new Status table and copied and pasted the new additional elements. Most were minor but you'll notice it adds a new ActiveQuery for the relation:
    /**
        * @return \yii\db\ActiveQuery
        */
       public function getCreatedBy()
       {
           return $this->hasOne(User::className(), ['id' => 'created_by']);
       }
So, just before new status items are saved, we can update the created_by field to the currently logged in user. And we can trust access controls to ensure the create method is accessed only by authenticated users:
public function actionCreate()
    {
        $model = new Status();

        if ($model->load(Yii::$app->request->post())) {
          $model->created_by = Yii::$app->user->getId();
          $model->created_at = time();
          $model->updated_at = time();
           if ($model->save()) {
             return $this->redirect(['view', 'id' => $model->id]);
           }
        }
        return $this->render('create', [
            'model' => $model,
        ]);
    }
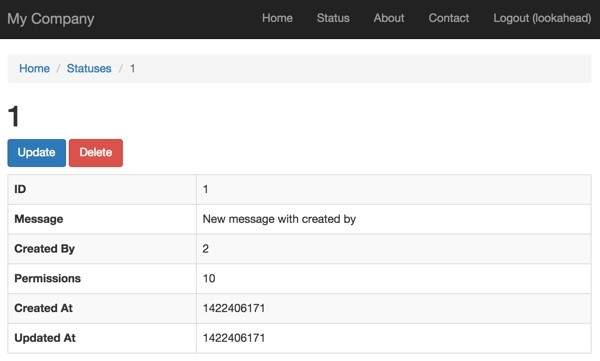
We'll also extend the view widget to include the created_by field:
    <?= DetailView::widget([
        'model' => $model,
        'attributes' => [
            'id',
            'message:ntext',
            'created_by',
            'permissions',
            'created_at',
            'updated_at',
        ],
    ]) ?>
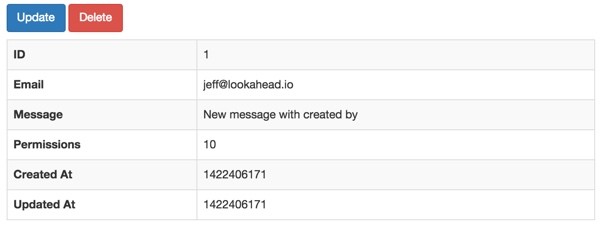
We can also use the created_by relation to display the email address:
    <?= DetailView::widget([
        'model' => $model,
        'attributes' => [
            'id',
            'createdBy.email',
            'message:ntext',
            'permissions',
            'created_at',
            'updated_at',
        ],
    ]) ?>
The createdBy.email accesses the Status::getCreatedBy relation method. This displays the user's email address:
However, in order to support this capability with the Yii2-user extension we implemented in part four, we had to make two modifications. First, in our app\config\web.php configuration array, we added a model override to app\models\User.php:
...
'user' => [
            'class' => 'dektrium\user\Module',
            'enableUnconfirmedLogin' => true,
            'confirmWithin' => 21600,
            'cost' => 12,
            'modelMap' => [
                    'User' => 'app\models\User',
              ],
            'admins' => ['admin']
        ],
We also created this model in app\models:
<?
namespace app\models;

use dektrium\user\models\User as BaseUser;

class User extends BaseUser
{

    public function register()
    {
        // do your magic
    }
}
?>
These two changes provided support for the relation.
Extending Simple Access Controls
What if we wanted to have additional capability around controller actions? For example, what if we want to restrict delete operations to moderators or administrators? Yii2's simple access control doesn't have a moderator or administrator concept unless you create one with RBAC.
Note that Yii2-user extension does have an admin identifier for specific users, but it too lacks the flexibility for additional roles.
The Code Ninja wrote up a nice example of extending simple access controls to support moderators and administrators (Simpler Role Based Authorization in Yii 2.0) without having to resort to using RBAC. Their example works with the Yii2 advanced application template.
Our application is different in that we're using Yii's basic application template and we're using the Yii2-user extension. Therefore, I've made some changes to their guide:
First, we create an app\components directory and and an AccessRule.php file which extends Yii's built-in AccessRule model:
<?php

namespace app\components;

use app\models\User;
class AccessRule extends \yii\filters\AccessRule {

    /**
     * @inheritdoc
     */
    protected function matchRole($user)
    {
        if (empty($this->roles)) {
            return true;
        }
        foreach ($this->roles as $role) {
            if ($role == '?') {
                if ($user->getIsGuest()) {
                    return true;
                }
            } elseif ($role == User::ROLE_USER) {
                if (!$user->getIsGuest()) {
                    return true;
                }
            // Check if the user is logged in, and the roles match
            } elseif (!$user->getIsGuest() && $role == $user->identity->role) {
                return true;
            }
        }

        return false;
    }
}
Then, we add role definitions to our app\models\User model:
<?
namespace app\models;

use dektrium\user\models\User as BaseUser;

class User extends BaseUser
{
  const ROLE_USER = 10;
  const ROLE_MODERATOR = 20;
  const ROLE_ADMIN = 30;
Yii2-user doesn't implement the role column when creating new users. So you can either specify roles for moderators and administrators manually in MySQL or later build your own web user interface for granting roles.
In vendor\dektrium\yii2-user\models\RegistrationForm.php, I added this line to define the user role for default users:
Note: you'll have to make this change manually if you want it because my vendor directory doesn't get checked in to our GitHub tree—and yes, there is probably a more elegant way to do this in the core codebase after registration occurs, e.g. extend the createUser method in app/models/User.php. Best practice may be to fork the vendor repository and bring it into your own code tree.
**
     * Registers a new user account.
     * @return bool
     */
    public function register()
    {
        if ($this->validate()) {
            $user = $this->module->manager->createUser([
                'scenario' => 'register',
                'email'    => $this->email,
                'username' => $this->username,
                'password' => $this->password,
                'role'=>10, // User::ROLE_USER;
            ]);

            return $user->register();
        }

        return false;
    }
Finally, in StatusController.php, we add some libraries and these access definitions. In the example below, update actions are restricted to moderators and delete actions are restricted to administrators.
<?php

namespace app\controllers;

use Yii;
use app\models\Status;
use app\models\StatusSearch;
use app\models\User;
use app\components\AccessRule;
use yii\web\Controller;
use yii\web\NotFoundHttpException;
use yii\filters\VerbFilter;
use yii\filters\AccessControl;

/**
 * StatusController implements the CRUD actions for Status model.
 */
class StatusController extends Controller
{

   public function behaviors()
       {
           return [
               'verbs' => [
                   'class' => VerbFilter::className(),
                   'actions' => [
                       'delete' => ['post'],
                   ],
               ],
               'access' => [
                   'class' => AccessControl::className(),
                   // We will override the default rule config with the new AccessRule class
                   'ruleConfig' => [
                       'class' => AccessRule::className(),
                   ],
                   'only' => ['index','create', 'update', 'delete'],
                   'rules' => [
                       [
                           'actions' => ['index','create'],
                           'allow' => true,
                           // Allow users, moderators and admins to create
                           'roles' => [
                               User::ROLE_USER,
                               User::ROLE_MODERATOR,
                               User::ROLE_ADMIN
                           ],
                       ],
                       [
                           'actions' => ['update'],
                           'allow' => true,
                           // Allow moderators and admins to update
                           'roles' => [
                               User::ROLE_MODERATOR,
                               User::ROLE_ADMIN
                           ],
                       ],
                       [
                           'actions' => ['delete'],
                           'allow' => true,
                           // Allow admins to delete
                           'roles' => [
                               User::ROLE_ADMIN
                           ],
                       ],
                   ],
               ],
           ];
       }
Now, when you log out and visit the Status page from the navigation bar, you'll be taken to the login screen:
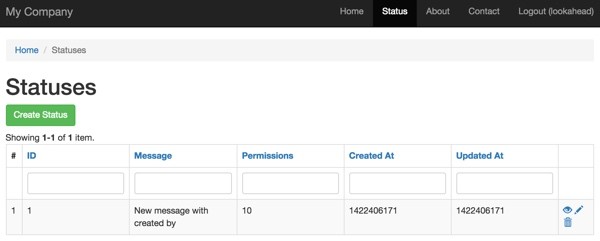
When you sign in, you'll be sent to the index view again:
However, if I click Delete, I will get this access forbidden error—because I'm a lowly user, not an administrator:
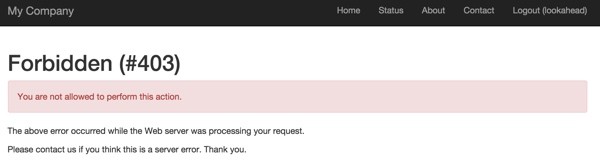
If you want to elevate yourself to administrator, you can do so in the database, changing the User table's role column for your user_id to 20 for moderator and 30 for admin. Try the update and delete operations again and you'll be permitted depending on your chosen role.
Access controls are one of the many features that make me a huge advocate for using the Yii Framework. Yii makes me a much more efficient developer, capable of delivering solutions much more quickly than I can with vanilla PHP.
What's Next?
Watch for upcoming tutorials in my Programming With Yii2 series as I continue diving into different aspects of the framework. You may also want to check out my Building Your Startup With PHP series, which is using Yii2's advanced template as I build a real world application.
If you'd like to know when the next Yii2 tutorial arrives, follow me @reifman on Twitter or check my instructor page. My instructor page will include all the articles from this series as soon as they are published. You can also email me at my Lookahead Consulting website.
Related Links
- Yii Framework Website
- Introduction to the Yii Framework (Tuts+)
- Yii2 Developer Exchange, my Yii2 resource site

Comments