If you're asking, "What's Yii?" check out Introduction to the Yii Framework, which reviews the benefits of Yii and includes an overview of Yii 2.0.
In this Programming With Yii2 series, I'm guiding readers in use of the Yii2 Framework for PHP. In this tutorial, I'll continue to guide you through integration of the built-in AuthClient, using the Google Accounts API and OAuth 2.0.
It may be helpful for you to review Programming With Yii2: Integrating User Registration, which walks through integration of the Yii2-User library for user registration and authentication, and Programming With Yii2: AuthClient Integration With Twitter, Google and Other Networks, which explores integration with Twitter authentication and the now deprecated support for Google's OpenID. This tutorial will show you how to move from our earlier Google OpenID integration to OAuth 2.0 integration with the Google Accounts API.
For these examples, we'll continue building on the framework for the series, our hello codebase. Use the GitHub links on this page to get the download for the code repository.
Before we get started, please remember, I do try to participate in the discussions below. If you have a question or topic suggestion, please post a comment below or contact me on Twitter @reifman. You can also email me directly.
If you noticed there's been a delay in this series, it's because I'm recently back from brain surgery. Thank you for your patience and support—it's nice to be writing again regularly and I'm looking forward to continuing coverage of Yii2.
Updating Yii2 User
Since I last wrote about these topics, Yii2 User has improved a great deal. The first thing we need to do is update its library. You can do this with composer at the command line:
composer require "dektrium/yii2-user:0.9.*@dev"
This will automatically update composer.json:
"minimum-stability": "stable",
    "require": {
        "php": ">=5.4.0",
        "yiisoft/yii2": "*",
        "yiisoft/yii2-bootstrap": "*",
        "yiisoft/yii2-swiftmailer": "*",
        "dektrium/yii2-user": "0.9.*@dev",
        "stichoza/google-translate-php": "~2.0",
        "yiidoc/yii2-redactor": "2.0.0",
        "yiisoft/yii2-authclient": "*",
    },
Afterwards, run the latest database migrations for Yii2 User—this will bring your database up to date with the latest library:
php yii migrate/up --migrationPath=@vendor/dektrium/yii2-user/migrations
You'll likely see something like this:
$ php yii migrate/up --migrationPath=@vendor/dektrium/yii2-user/migrations
Yii Migration Tool (based on Yii v2.0.6)

Total 4 new migrations to be applied:
    m141222_110026_update_ip_field
	m141222_135246_alter_username_length
	m150614_103145_update_social_account_table
	m150623_212711_fix_username_notnull

Apply the above migrations? (yes|no) [no]:yes
*** applying m141222_110026_update_ip_field
    > alter column registration_ip in table {{%user}} to string(45) ... done (time: 0.009s)
*** applied m141222_110026_update_ip_field (time: 0.030s)

*** applying m141222_135246_alter_username_length
    > alter column username in table {{%user}} to string(255) ... done (time: 0.010s)
*** applied m141222_135246_alter_username_length (time: 0.012s)

*** applying m150614_103145_update_social_account_table
    > add column code string(32) to table {{%social_account}} ... done (time: 0.008s)
    > add column created_at integer to table {{%social_account}} ... done (time: 0.009s)
    > add column email string to table {{%social_account}} ... done (time: 0.008s)
    > add column username string to table {{%social_account}} ... done (time: 0.009s)
    > create unique index account_unique_code on {{%social_account}} (code) ... done (time: 0.016s)
*** applied m150614_103145_update_social_account_table (time: 0.059s)

*** applying m150623_212711_fix_username_notnull
    > alter column username in table {{%user}} to string(255) NOT NULL ... done (time: 0.009s)
*** applied m150623_212711_fix_username_notnull (time: 0.011s)


Migrated up successfully.
You also have to move the component definition for yii2-user to modules in \hello\config\web.php:
'modules' => [
          'redactor' => 'yii\redactor\RedactorModule',
          'class' => 'yii\redactor\RedactorModule',
          'uploadDir' => '@webroot/uploads',
          'uploadUrl' => '/hello/uploads',
          'user' => [
                'class' => 'dektrium\user\Module',
                'enableUnconfirmedLogin' => TRUE,
                'confirmWithin' => 21600,
                'cost' => 12,
                'admins' => ['admin']
              ],
      ],
Register Your Google Project
In order for your Yii2 app users to register and log in with their Google Accounts, you'll need to register a Google Project at the Developer Console:
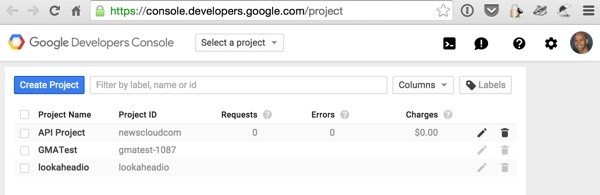
Let's Create a Project called yii2hello:
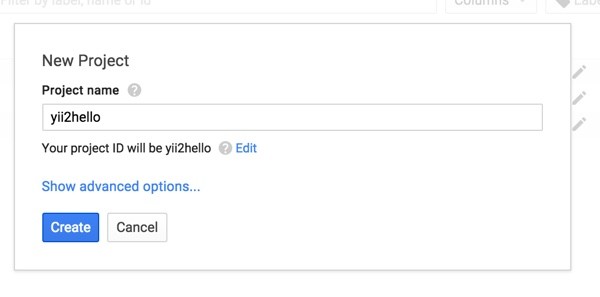
You'll be taken to the project home page with a variety of options in the left sidebar menu:

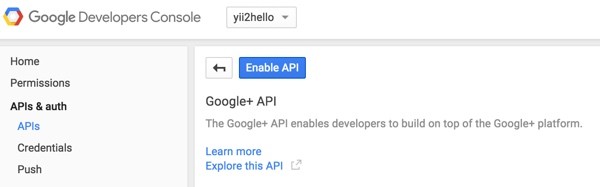
It's important to request access to whichever API groups with Google we may be using. For Yii2 User, we need to enable Google+ APIs. Click on APIs & auth > APIs and search for google+:
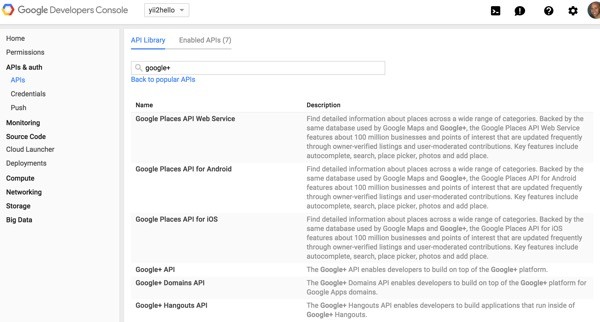
Then, click Enable API:
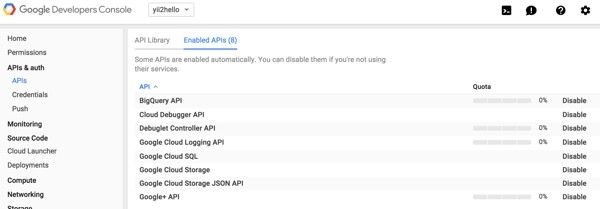
You'll see a list of the Enabled APIs which now includes the Google+ API:
Next, we need to add credentials so we can authenticate our API requests with Google for this project's activities. Click Credentials:
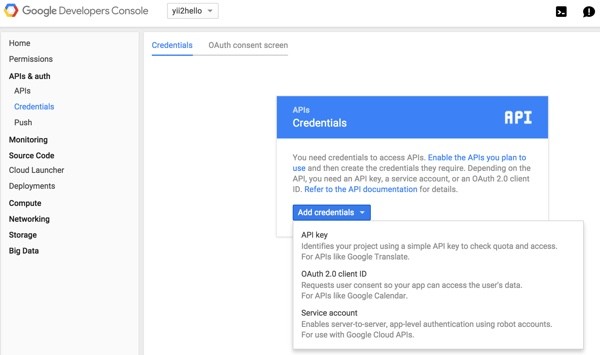
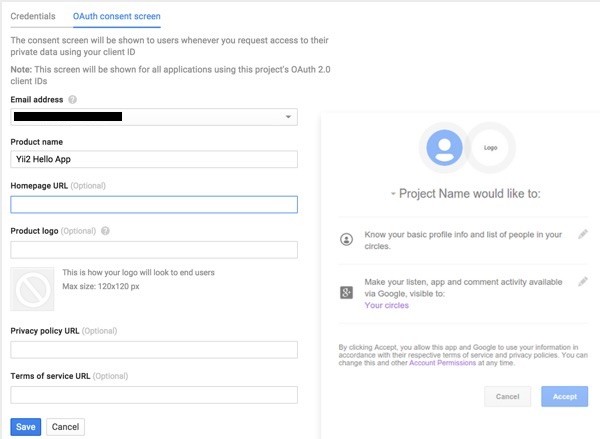
Let's use the OAuth 2.0 client ID option above. You'll then be asked to create an OAuth Consent Screen and fill in information about your application which will be presented to users trying to register or sign in with your application:
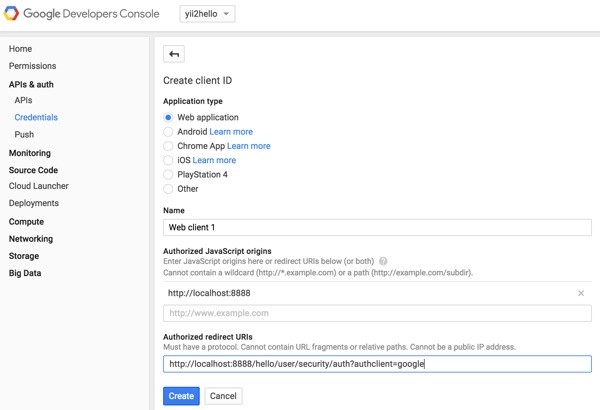
On the Credentials page, we'll choose Web application, and since we're testing locally, we'll provide two settings for authentication callbacks. I use port 8888 for my local development. So, my Authorized JavaScript origins will be http://localhost:8888 and Yii2 User requires the Authorized redirect URIs path of http://localhost:8888/hello/user/security/auth?authclient=google.
You'll be presented with API keys, also known as a client ID and client secret:
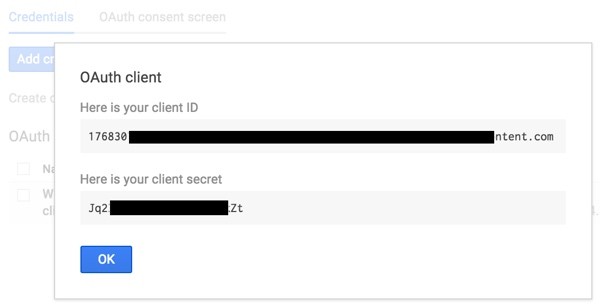
I'll review where to place those keys below.
Configuring the AuthClient Support
In Protecting Your Keys from GitHub, I described in detail how I use a configuration file to store all of my keys apart from my GitHub repository. Then, I include this file at the beginning of my Yii configuration files. This keeps me from accidentally checking in my keys to my repository and compromising my accounts.
In my /var/secure/hello.ini file, I store all the keys for my application—place your Google API keys inside here as well:
oauth_google_clientId="41xxxxxxxxxxxxxeusercontent.com"
oauth_google_clientSecret="LmxxxxxxxxxxxxxxxxxxxxxxFJ4"
oauth_twitter_key ="rxkxxxxxxxxxxxxxxxxxopjU"
oauth_twitter_secret="b7gU4twxxxxxxxxxxxxxxxxxxxxxxxxxxxxxxxxxxkLy0z2e"
smtp_host = "mailtrap.io"
smtp_username = "2xxxxxxxxxxxxxxxxx2"
smtp_password = "2xxxxxxxxxxxxxxxxx5"
mysql_host="localhost"
mysql_un="xxxxxxxxxxxx"
mysql_db="hello"
mysql_pwd="xxxxxxxxxxxx"
We need to add references to these keys in the AuthClient configuration settings in our web configuration file in \config\web.php. Add array elements for all of the third-party services that you wish to support:
<?php
$config = parse_ini_file('/var/secure/hello.ini', true);
$params = require(__DIR__ . '/params.php');
$config = [
    'id' => 'basic',
    'basePath' => dirname(__DIR__),
    'bootstrap' => ['log'],
    'language'=>'en', // back to English
    'components' => [
      'view' => [
              'theme' => [
                  'pathMap' => [
                      '@dektrium/user/views' => '@app/views/user'
                  ],
              ],
          ],
      'authClientCollection' => [
              'class' => 'yii\authclient\Collection',
              'clients' => [
                  'google' => [
                      'class'        => 'dektrium\user\clients\Google',
                      'clientId'     => $config['oauth_google_clientId'],
                      'clientSecret' => $config['oauth_google_clientSecret'],
                  ],
                  'twitter' => [
                                  'class' => 'yii\authclient\clients\Twitter',
                                  'consumerKey' => $config['oauth_twitter_key'] ,
                                  'consumerSecret' => $config['oauth_twitter_secret'] ,
                              ],
                ],
        ],
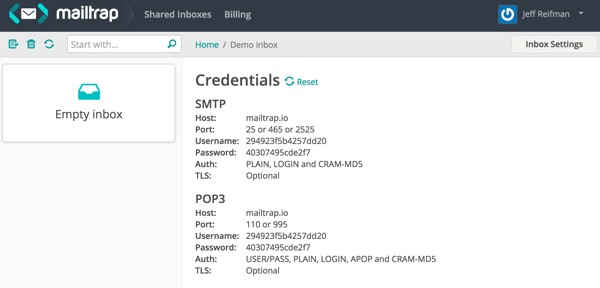
Also, in Introduction to MailTrap: A Fake SMTP Server for Pre-Production Testing of Application Email, I began integrating MailTrap's custom SMTP settings into my Yii SwiftMailer configuration for testing purposes. This will ensure we receive the registration emails when we sign up on our local development platform.
For this tutorial, I found I had to update port information for SwiftMailer to 2525 in \config\web.php:
'mailer' => [
                'class' => 'yii\swiftmailer\Mailer',
                'viewPath' => '@app/mailer',
                'useFileTransport' => false,
                'transport' => [
                    'class' => 'Swift_SmtpTransport',
                    'host' => $config['smtp_host'],
                    'username' => $config['smtp_username'],
                    'password' => $config['smtp_password'],
                    'port' => '2525',
                    'encryption' => 'tls',
                                ],
            ],
Registering With Your Google Account
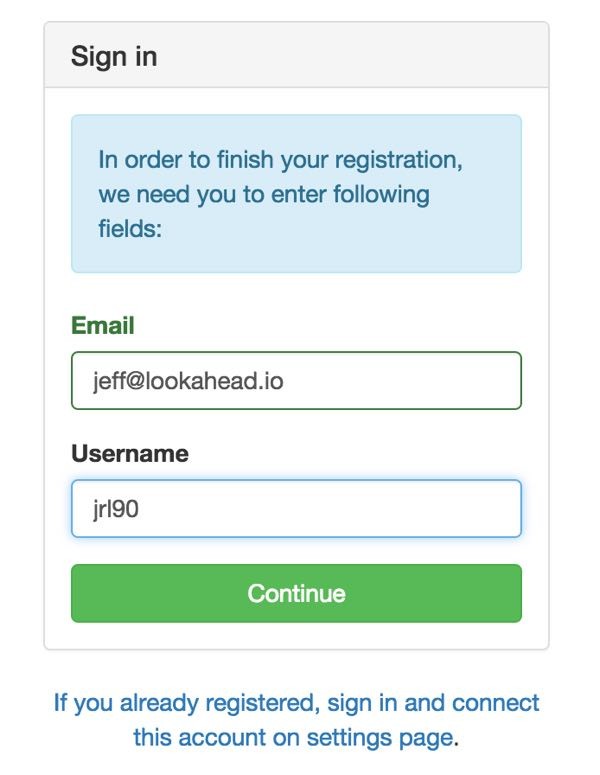
Now, we're finally ready to explore using Yii2 User's front-end interface. Let's begin with registration. Click on the Sign Up option in the menu and you'll see this form:
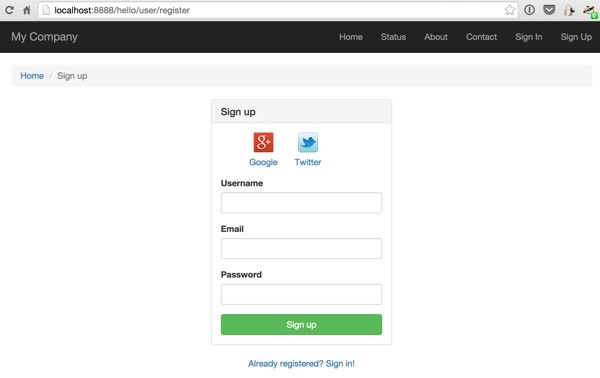
To register with all we've created today, click the Google+ icon. Because I'm only logged into one Google account, there will be a transparent popup and redirect to complete my registration:
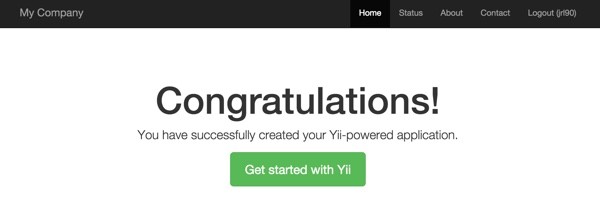
You should see the home page showing that you're authenticated in the upper right corner:
Signing In With Your Google Account
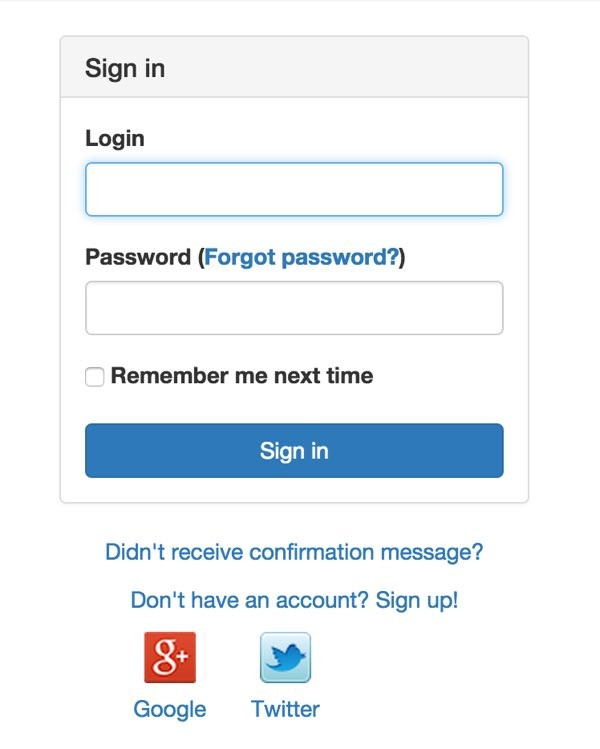
Click Logout and then we can try signing in with the Google+ icon. Click Sign In in the header menu:
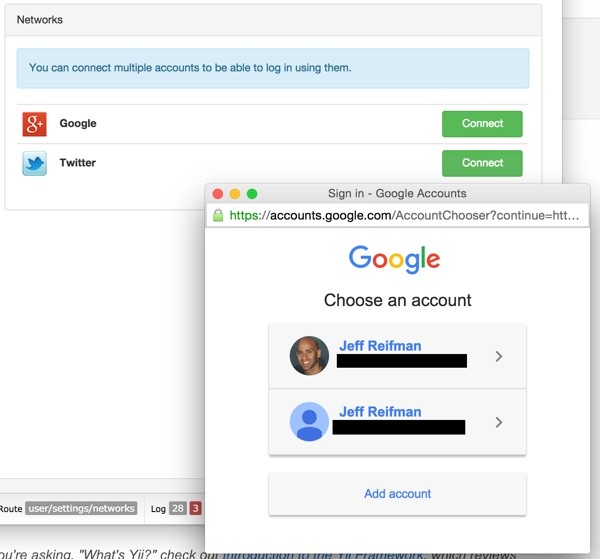
Then, click the Google+ icon again. You'll be taken right to the home screen showing that you're logged in again. Pretty cool, huh? But, what if you're logged in to two Google accounts?
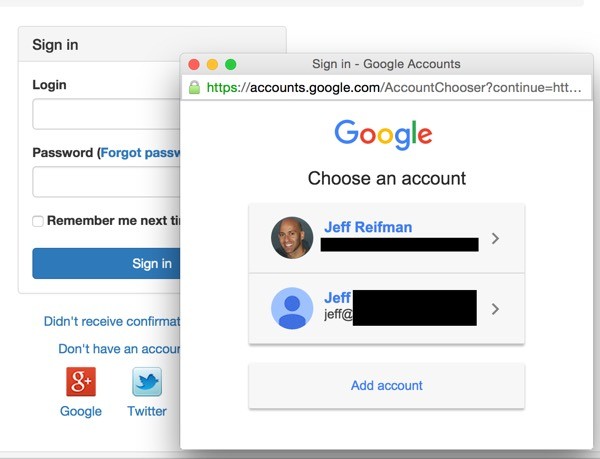
When you select your Google account to sign in with, you'll be taken back to the home page in authenticated mode.
The User Profile and Connection Area
While it's not yet configured in our Bootstrap header menu, if you visit http://localhost:8888/hello/user/settings/networks, you'll see the new connection interface for third-party accounts within Yii2 User:
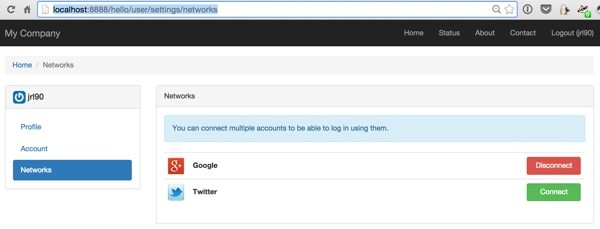
Once signed in, your users can connect and disconnect their social accounts from here. There's also an account management and user profile area. It's pretty nicely done.
You may want to check out my Building Your Startup With PHP series, which uses Yii2's advanced template with third-party integration, currently without Yii2 User. However, there is now a guide to integrating Yii2 User with the advanced template, so I may update this soon.
What's Next?
Watch for upcoming tutorials in my Programming With Yii2 series as I continue diving into different aspects of the framework.
I welcome feature and topic requests. You can post them in the comments below or email me at my Lookahead Consulting website.
If you'd like to know when the next Yii2 tutorial arrives, follow me @reifman on Twitter or check my instructor page. My instructor page will include all the articles from this series as soon as they are published.

Comments