In the web world, a FAQ page is created specifically for the viewers/customers, and contains general questions and their respective answers about a particular product or service. This tutorial details the process of creating a dedicated FAQ section in the WordPress backend with custom post types, as well as how to spice up the actual page a bit by using jQuery and CSS.
To accomplish our goal, we require a dedicated custom FAQ WordPress post type. That way, we can use the title and the content of these posts to display the FAQs in an innovative and user-friendly way.
Step 1: Installing WordPress
To begin creating the FAQ page, we, of course, must first install WordPress on our localhost. Installing WordPress is a piece of cake; however, if you're new to this, here is a guide that details the process.
The TwentyTen template is the default theme that ships with WordPress.
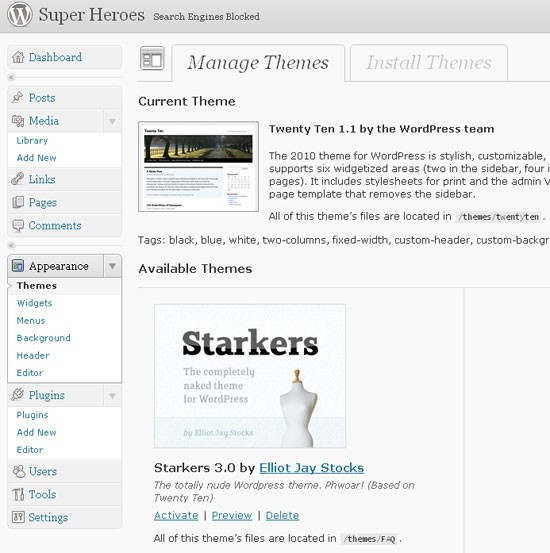
Once WordPress is ready to go, we should next create our custom theme, which will implement the FAQ functionality. There are various methods of creating a custom theme. Some prefer to create a new blank white template, while others like to create child themes of the new TwentyTen template. I have been using the Starker’s theme, by Elliot Jay Stocks for a long time now; we'll use it to create the new theme for our FAQ system.
Download the latest version of the Starker's blank theme, and move the folder into 'wp-content/themes', located within the WordPress installation folder. Also, be sure to rename it to FAQ. Next, login to the backend administration panel of WordPress, click on 'appearance/themes.' You will find that the default 'TwentyTen' theme is activated, while the new theme, 'Starkers,' is listed below it. Activate the Starkers theme.
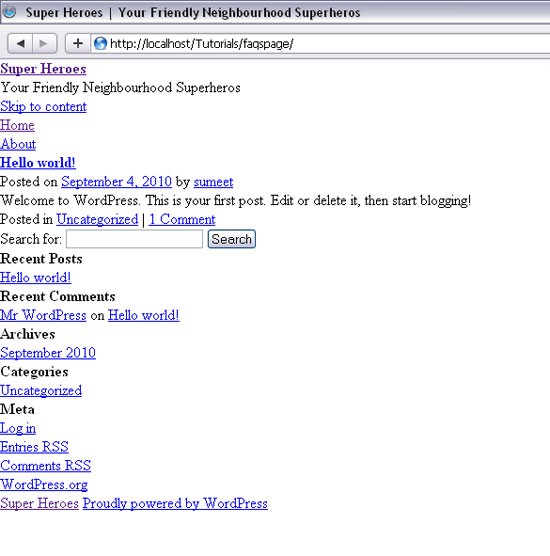
Upon activation, preview the site to verify that everything is, indeed, working properly. If all went according to plan, the site should look somewhat like the following image:
Step 2: Implementing the FAQ Custom Post
To implement the FAQ system, we are going to create a custom post type solely for this purpose. This will enable us to manage all the FAQs in one place, especially if the FAQ question base increases with time.
To implement a custom post, edit the functions.php file located in the FAQ theme folder. It will contain a good bit of code, so don’t be scared or confused. Scroll down to the bottom and append the following to add a new custom post. We begin by creating hooking a custom function to the initialization (init) action.
// ADDING CUSTOM POST TYPE FAQ
add_action('init', 'my_custom_init');
This custom function will contain all the metadata for the custom post, and will also register the custom post within the WordPress database. Now, within the function, we are first going to define the labels which will be used in the backend administration panels. By labels, I mean the text that is going to show up in the user interface for adding, editing, and searching the FAQs in the admin panel.
	 $labels = array(
	    'name' => _x('FAQs', 'post type general name'),
	    'singular_name' => _x('FAQ', 'post type singular name'),
	    'add_new' => _x('Add New', 'FAQ'),
	    'add_new_item' => __('Add New FAQ'),
	    'edit_item' => __('Edit FAQ'),
	    'new_item' => __('New FAQ'),
	    'view_item' => __('View FAQ'),
	    'search_items' => __('Search FAQs'),
	    'not_found' =>  __('No FAQs found'),
	    'not_found_in_trash' => __('No FAQs found in Trash'),
	    'parent_item_colon' => ''
	  );
After we've defined the labels, we next define the arguments array for the register_post_type method. These arguments contain all the important information which will define the components of our FAQ post. For example, will it have a tag box; an excerpt box? We pass the array of labels defined above as an argument, as well.
	$args = array(
	    'labels' => $labels,
	    'public' => true,
	    'publicly_queryable' => true,
	    'show_ui' => true,
	    'query_var' => true,
	    'rewrite' => true,
	    'capability_type' => 'post',
	    'hierarchical' => false,
	    'menu_position' => 5,
	    'supports' => array('title','editor','thumbnail','custom-fields')
	  );
Now that the arguments are defined, we can register the custom post type using the register_post_type method. You can learn more about this method by referring to its documentation in the WordPress Codex.
function my_custom_init()
{
  $labels = array(
    'name' => _x('FAQs', 'post type general name'),
    'singular_name' => _x('FAQ', 'post type singular name'),
    'add_new' => _x('Add New', 'FAQ'),
    'add_new_item' => __('Add New FAQ'),
    'edit_item' => __('Edit FAQ'),
    'new_item' => __('New FAQ'),
    'view_item' => __('View FAQ'),
    'search_items' => __('Search FAQs'),
    'not_found' =>  __('No FAQs found'),
    'not_found_in_trash' => __('No FAQs found in Trash'),
    'parent_item_colon' => ''
  );
  $args = array(
    'labels' => $labels,
    'public' => true,
    'publicly_queryable' => true,
    'show_ui' => true,
    'query_var' => true,
    'rewrite' => true,
    'capability_type' => 'post',
    'hierarchical' => false,
    'menu_position' => 5,
    'supports' => array('title','editor','thumbnail','custom-fields')
  );
  register_post_type('faq',$args);
}
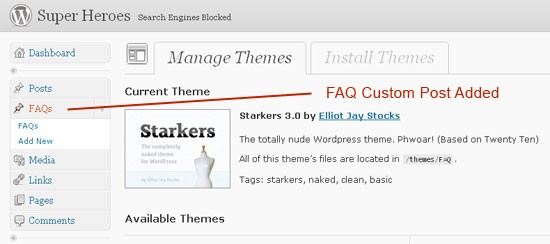
Check the administration panel to determine if the FAQ type post has, in fact, been added successfully. Hopefully, you'll see the FAQ tab in the sidebar.
Dummy FAQ Posts
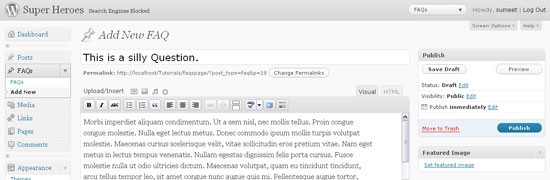
Now go ahead and add some demo FAQs, because we need some data for creating and testing the template. The title of each FAQ post should be the question, and the content will be the answer.
Step 3: Coding the Template
So far, we've created FAQ custom posts, as well as inserted a set of sample data. Now, we'll code the template to display the FAQs, accordingly. The main logic I have used for organizing the template is: use the FAQ's unique ID to link the question to the answers. Hence, we have two parts in the template: the questions section, listing all the FAQ titles; and the answer section, which displays the content of each of the FAQs.
Find the header.php file, open it, delete the div with an id of "access" at the bottom, and also the paragraph which contains the description of the blog. Now add the following code.
<body >
	<div id="page-wrap">
	<h1>
		<a href="" title="" rel="home">
	</h1>
	<?php
	/**
	 * The main template file.
	 *
	 * This is the most generic template file in a WordPress theme
	 * and one of the two required files for a theme (the other being style.css).
	 * It is used to display a page when nothing more specific matches a query.
	 * E.g., it puts together the home page when no home.php file exists.
	 * Learn more: http://codex.wordpress.org/Template_Hierarchy
	 *
	 * @package WordPress
	 * @subpackage Starkers
	 * @since Starkers 3.0
	 */
	 get_header(); ?>

	<?php
		query_posts('post_type=faq&order=ASC')
	?>
After we retrieve our FAQ post data, we must frame the architecture of how the questions will be displayed. We shall do it in the following manner. All the content is wrapped within a div with an id of "content."
<div id="content">
    <?php if (have_posts()) : ?>
        <h3>FAQs</h3>
        <div id="questions">
            <ul>
                <?php while (have_posts()) : the_post(); ?>
                <li><a href="#answer<?php the_id() ?>"><?php the_title(); ?></a></li>
                <?php endwhile; ?>
            </ul>
        </div>
    <?php else : ?>
        <h3>Not Found</h3>
        <p>Sorry, No FAQs created yet.</p>
    <?php endif; ?>
The most important part here is where we assign the hyperlink with a value of '#answer' and append the post's id to it. We can use this to jump to the answers, when clicked.
After we've displayed all of the questions, we "rewind" our posts to return to the beginning.
<?php rewind_posts(); ?>
Now we will structure how the answers are going to appear, just below the questions.
<?php if (have_posts()) : ?>
    <div id="answers">
        <ul>
            <?php while (have_posts()) : the_post(); ?>
                <li id="answer<?php the_id(); ?>">
                    <h4><?php the_title(); ?></h4>
                    <?php the_content(); ?>
                </li>
            <?php endwhile; ?>
        </ul>
    </div>
    <?php endif; ?>
    <?php wp_reset_query(); ?>
</div>
<?php get_footer(); ?>
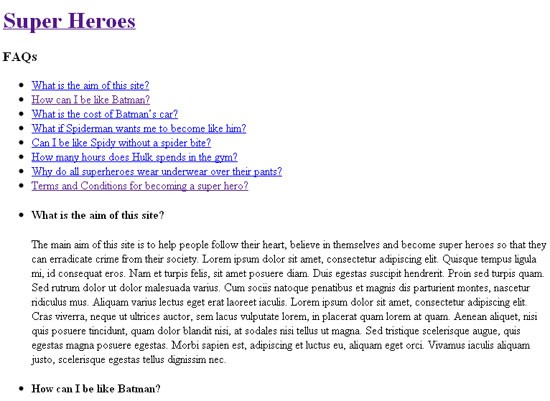
You can see that we are going to list the content of each post in a list element. Each list element will have an id of "answers" with the post ID appended to it. This is important: when the question is clicked, the view jumps to the content of the respective post. If you're working along, preview your site; you should see all the posts listed in the architecture described above.
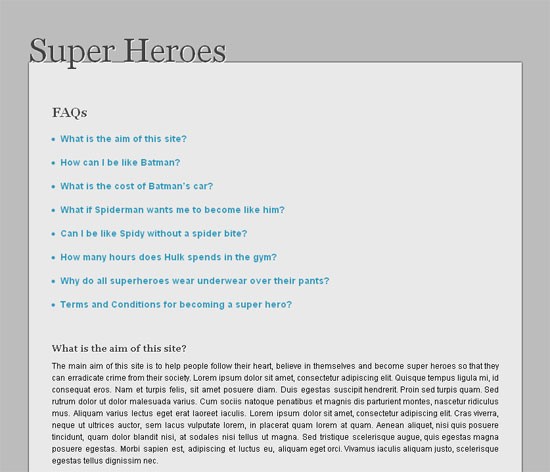
Step 4: Styling the Template
Styling of the FAQ page depends entirely on your tastes; you can proceed in any manner you wish. If you're a designer, feel free to skip Step 4. What I have personally implemented is a smooth and clean layout. When the user clicks on the question, the page smoothly scrolls down to the respective answer and highlights it by changing the colour and increasing the font size. To achieve this, we'll start by styling the template with CSS. We can make use of CSS3 to add some shadows and transition effects, too. Add the following CSS to styles.css.
body{
    background-color: #bcbcbc;
}
.clear {
    clear: both;
}
h1,h2,h3,h4,h5,h6{
    color:#424242;
    font-family:Georgia,Arial,Helvetica,sans-serif;
    text-shadow: #fff 1px 1px 0px;
}
h1 a{
    color:#424242;
    font-size:50px;
    position:relative;
    top:11px;
    font-weight: normal;
    z-index: 100;
}
h3{
    font-size: 20px;
    font-weight: bold;
    margin-bottom: 20px;
}
h4{
    font-size: 14px;
    font-weight: bold;
    margin-bottom: 10px;
}
a{
    color: #3299bb;
    text-decoration: none;
    -moz-transition: all 0.2s ease-in-out;
    -webkit-transition: all 0.2s ease-in-out;
    -o-transition: all 0.2s ease-in-out;
    transition: all 0.2s ease-in-out;
}
#page-wrap{
    width: 750px;
    position: relative;
    margin: 0px auto 20px auto;
    padding-top: 50px;
}
#content{
    background-color: #e9e9e9;
    padding: 64px 35px 22px;
    font-size: 14px;
    font-family: Arial, Helvetica, sans-serif;
    -webkit-box-shadow: rgba(0,0,0,1) 0px 0px 4px;
    -moz-box-shadow: rgba(0,0,0,1) 0px 0px 4px;
    box-shadow: rgba(0,0,0,1) 0px 0px 4px ;
}
#content p{
    text-align:justify;
    font-size: 12px;
    line-height: 18px;
    margin-bottom: 10px;
}
#questions{
    margin-bottom: 50px;
}
#questions li{
    margin-bottom: 20px;
    color: #3299bb;
    list-style-type: disc;
    list-style-position: inside;
}
#questions ul li a{
    font-weight: bold;
}
#questions ul li a:hover{
    color: #00befd;
}
#questions ul li a:active{
    color: #e78c03;
}
#answers ul li{
    margin-bottom: 30px;
    clear: both;
}
#footer{
    padding-top:5px;
    text-align:center;
}
#footer p{
    color: #424242;
}
#footer a{
    color: #424242;
    font-weight: bold;
}
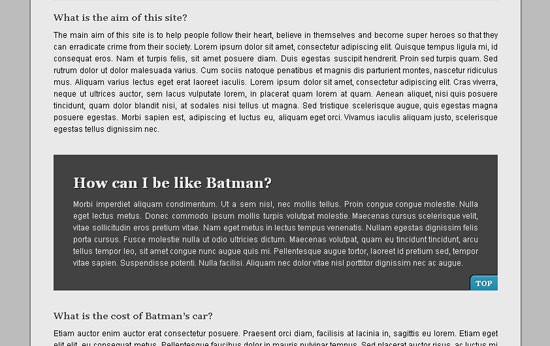
After styling the page, we should style the current FAQ. Note that we've also added a 'Top' button to the current FAQ. To create the button, we'll use a handful of CSS3 properties.
.current-faq{
    background-color: #424242;
    color: #e9e9e9;
    padding:30px 30px 23px;
}
.current-faq h4{
    color: #e9e9e9;
    font-weight: bold;
    font-size:22px;
    text-shadow: #000 1px 1px 0px;
}
.top-button {
    border-top: 1px solid #96d1f8;
    background: #2289a8;
    background: -webkit-gradient(linear, left top, left bottom, from(#3299bb), to(#2289a8));
    background: -moz-linear-gradient(top, #3299bb, #2289a8);
    padding: 4px 8px;
    -webkit-border-top-left-radius: 6px;
    -moz-border-radius-topleft: 6px;
    border-top-left-radius: 6px;
    -webkit-box-shadow: rgba(0,0,0,1) -1px -1px 0;
    -moz-box-shadow: rgba(0,0,0,1) -1px -1px 0;
    box-shadow: rgba(0,0,0,1) -1px -1px 0;
    text-shadow: rgba(0,0,0,.4) -1px -1px 0;
    color: #ffffff;
    font-size: 11px;
    font-family: Georgia, serif;
    text-decoration: none;
    vertical-align: middle;
    font-weight: bold;
    float: right;
    right:-30px;
    position: relative;
}
.top-button:hover {
    border-top-color: #0b93bd;
    background: #0b93bd;
    color: #ffffff;
}
.top-button:active {
    border-top-color: #e78c03;
    background: #e78c03;
}
Check if the 'current' class is working properly by assigning the class to any of the list elements. The current FAQ should look like the following:
Step 5: Adding a Pinch of jQuery UI
We'll use jQuery UI to add some effects to the page. You can download jQuery UI here. We only need limited use of the whole UI library, hence, downloading only the UI core components will suffice. We also need the jQuery scrollTo plug-in for achieving the smooth scrolling effect -- though you could also easily code this functionality on your own. Nonetheless, to save time, you can download the plug-in here.
First, we reference jQuery, the jQuery UI Core files, and the scrollTo plug-in within the header.php file. You can do this by adding the following code just before the wp_head() method.
<?php wp_enqueue_script("jquery"); ?><!--VERY IMPORTANT-->

<script src="http://ajax.googleapis.com/ajax/libs/jquery/1.4.2/jquery.js" type="text/javascript"></script>

<script src="<?php bloginfo('template_url') ?>/js/jquery-ui-1.8.4.custom.min.js" type="text/javascript"></script>

<script src="<?php bloginfo('template_url') ?>/js/jquery.scrollTo.js" type="text/javascript"></script>

<script src="<?php bloginfo('template_url') ?>/js/main.js" type="text/javascript"></script>
The
wp_enqueue_scriptstatement is needed in order to load jQuery safely.
To enable our desired functionality, we fetch the value of the href attribute from the clicked element (i.e. the question). This value is the id of the list element which contains the answer. Then, we scroll to the list element, and apply the 'current' class. jQuery UI will ensure that the class is implemented on the list element smoothly and dynamically.
$(document).ready(function(){
	$("div#questions ul a").click(function(){
		var selected = $(this).attr('href');
		selected += '"'+selected+'"';
		/*--Removing the Current class and the top button from previous current FAQs---*/
		$('.top-button').remove();
		$('.current-faq').removeClass();
		$.scrollTo(selected, 400 ,function(){
			$(selected).addClass('current-faq', 400, function(){
				$(this).append('<a href="#" class="top-button">TOP</a>');
			});
		});
		return false;
	});
As mentioned earlier, we also have a 'Top' button which scrolls the page back to the top.
$('.top-button').live('click',function(){
		$(this).remove();
		$('.current-faq').removeClass('current-faq',400,function(){
			$.scrollTo('0px', 800);
		});
		return false;
	})
});
Step 6: Conclusion
What you've learned today is merely one way of implementing a FAQ page. WordPress provides the power of custom fields, which can be used to further improve the functionality of the FAQ system. When it comes to adding other features to our FAQ page, your own creativity is the only limit! Feel free to share your ideas in the comments!

Comments