As a prudent developer, you might be wary of creating hybrid applications that depend on Android's native APIs. A few years ago, I was too, what with Android having so many version-specific and device-specific quirks. Today, however, we can trust hybrid application development frameworks to handle most of those quirks transparently. Ionic 2, which builds on Apache Cordova, is one such framework.
Ionic 2 has wrappers for several popular Cordova plugins that allow you to easily make use of Android's native resources, such as cameras, hardware sensors, and the file system. In this tutorial, I'll show you how to use those wrappers alongside Ionic 2 UI components to create a simple camera app.
Prerequisites
To follow along, you'll need:
- the latest version of the Android SDK
-
Node.js v6.7.0 or higher
- a device or emulator running Android 4.4 or higher
- a basic understanding of TypeScript and Angular 2
1. Install Cordova and Ionic
Both Ionic and Cordova are available as NPM modules, so the easiest way to install them is to use the npm command. Here's how you can install both of them globally:
npm install -g cordova ionic
Once the installation is complete, type in the following to make sure that the Ionic command-line interface, or CLI for short, is configured correctly.
ionic info | grep "Version"
The output of the above command should look like this:
Ionic CLI Version: 2.2.1
Ionic App Lib Version: 2.2.0
Node Version: v6.7.0
2. Create a New Project
Ionic's CLI makes it very easy for you to create new Ionic 2 projects with all the required configuration files and boilerplate code. It also offers several starter templates to choose from. For now, let us simply create a project using the blank starter template.
ionic start MyCameraApp blank --v2 --id com.tutsplus.mycameraapp
At this point, you'll have a new directory called MyCameraApp. For the rest of this tutorial, we'll be working inside this directory.
cd MyCameraApp
3. Configure the Project
By default, an Ionic 2 project isn't configured to target any mobile platform. Here's how you add support for Android:
ionic platform add android
You must also manually point Ionic 2 to the location where you installed the Android SDK. If you are using Mac or Linux, use the export command to do so.
export ANDROID_HOME=~/Android/Sdk/
4. Install Ionic Plugins
Our camera app needs access to the device's camera and file system, both of which are native resources. If you're familiar with Cordova, you might be aware that hybrid applications usually interact with such resources through plugins. Although you can use a Cordova plugin directly in an Ionic 2 project, it is much easier to use its Ionic Native wrapper instead.
To access the camera, we'll use the cordova-plugin-camera-preview plugin. It allows us to not only take pictures, but also apply several image filters to them. Here's how you can add it to your project:
ionic plugin add cordova-plugin-camera-preview
We'll, of course, have to save the pictures we take on external storage media, such as SD cards. To do so, we'll use the cordova-plugin-file plugin.
ionic plugin add cordova-plugin-file
Lastly, in order to support Android devices running API level 23 or higher, we'll need the cordova.plugins.diagnostic plugin.
ionic plugin add cordova.plugins.diagnostic
5. Define the Layout
Our app's user interface will be composed of the following components:
- a camera preview window
- a floating action button to take pictures
- a floating action button to apply image filters
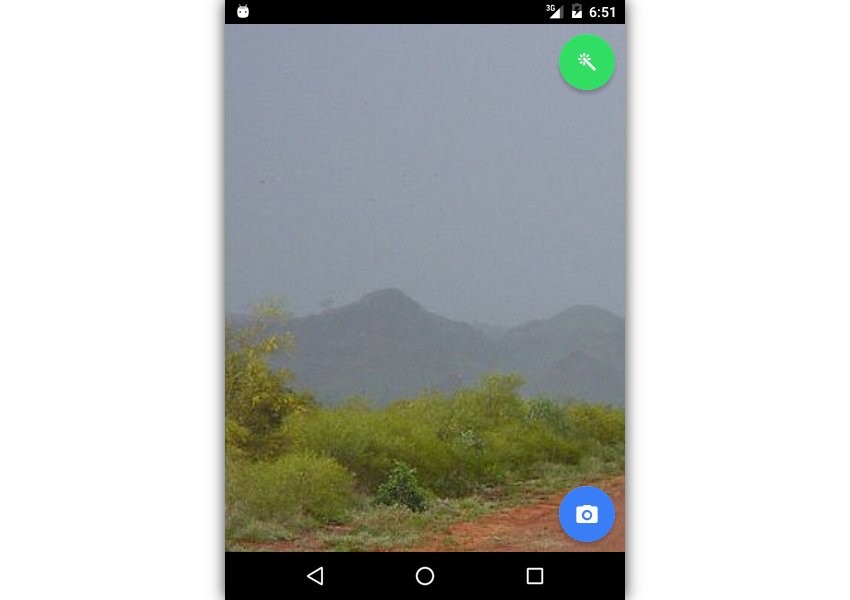
We'll be creating the camera preview window programmatically in a later step. For now, let's create an HTML layout containing just two floating action buttons.
Because our blank app already has a page, we'll be using it instead of creating a new one. To modify its layout, open src/pages/home/home.html. Empty its contents and add a new <ion-content> tag to it.
<ion-content padding>

</ion-content>
To create a floating action button, you can create an ordinary HTML button and add the ion-fab attribute to it. Additionally, by wrapping the <button> tag inside an <ion-fab> tag, you can position it.
A floating action button usually has an icon. By using the <ion-icon> tag, you can add any Ionicon to it.
Accordingly, add the following to your layout file:
<ion-fab right top>
    <button ion-fab color="secondary" (click)="changeEffect()">
        <ion-icon name="md-color-wand"></ion-icon>
    </button>
</ion-fab>

<ion-fab right bottom>
    <button ion-fab color="primary" (click)="takePicture()">
        <ion-icon name="md-camera"></ion-icon>
    </button>
</ion-fab>
As you can see in the above code, we've added click event handlers to both the buttons. We'll define them later.
6. Acquire Permissions
On devices running Android API level 23 or higher, you must explicitly ask the user for permissions to access the camera and file system during runtime. To do so in your hybrid app, you can use methods available in the Diagnostic Ionic Native wrapper.
Start by opening src/pages/home/home.ts and importing Diagnostic.
import { Diagnostic } from 'ionic-native';
Inside the constructor of the HomePage class, add a call to a new checkPermissions() method. Additionally, add a ToastController object to the class using dependency injection. We'll be using it to display Ionic 2 toasts, which are almost identical to native Android's snackbars.
After making the above changes, your code should look like this:
constructor(public navCtrl: NavController,
            public toastCtrl: ToastController) {
    this.checkPermissions();
}

checkPermissions() {
    // More code goes here
}
Inside the checkPermissions() method, use the isCameraAuthorized() method of the Diagnostic class to check if the app already has permissions to access both the camera and the file system. Because the method returns a Promise object, you must use a callback to handle its result.
If the app doesn't have the required permissions, you can use the requestCameraAuthorization() method to ask for them.
If the user does grant the permissions, or if our app already has them,
we can go ahead and initialize the camera preview inside initializePreview(), a method we'll be creating in the next step. Otherwise, let's simply display a toast containing an error message using the create() and present() methods of the ToastController class.
Accordingly, add the following code inside the checkPermissions() method:
Diagnostic.isCameraAuthorized().then((authorized) => {
    if(authorized)
        this.initializePreview();
    else {
        Diagnostic.requestCameraAuthorization().then((status) => {
            if(status == Diagnostic.permissionStatus.GRANTED)
                this.initializePreview();
            else {
                // Permissions not granted
                // Therefore, create and present toast
                this.toastCtrl.create(
                    {
                        message: "Cannot access camera",
                        position: "bottom",
                        duration: 5000
                    }
                ).present();
            }
        });
    }
});
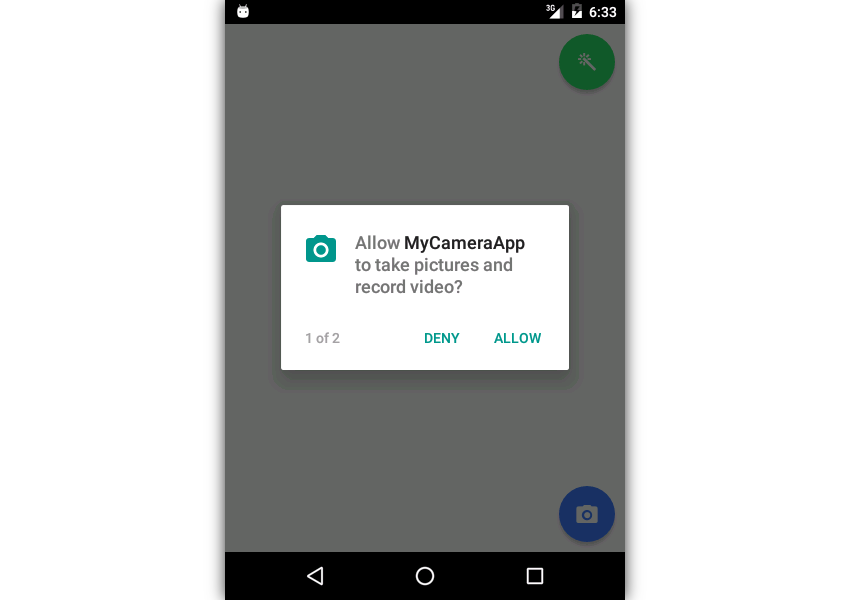
Here's what the camera authorization dialog looks like on a device running Android Marshmallow:
7. Create Camera Preview
The CameraPreview Ionic Native wrapper lets you display a live camera preview inside your hybrid app. However, because the preview uses an Android fragment instead of an HTML element, adding it to our page is slightly complicated.
Before you start, make sure you import both CameraPreview and CameraPreviewRect.
import { CameraPreview, CameraPreviewRect } from 'ionic-native';
Using a CameraPreviewRect object, you can specify the position and size of the camera preview. For now, let's make it fill the device's screen completely.
initializePreview() {
    // Make the width and height of the preview equal
    // to the width and height of the app's window
    let previewRect: CameraPreviewRect = {
      x: 0,
      y: 0,
      width: window.innerWidth,
      height: window.innerHeight
    };

    // More code goes here
}
At this point, we have everything we need to start the camera preview. Therefore, call the startCamera() method of the CameraPreview class and pass the CameraPreviewRect object to it. You must also, of course, specify the camera you want to use. In this tutorial, we'll use the rear camera only.
// Start preview
CameraPreview.startCamera(
    previewRect,
    'rear',
    false,
    false,
    true,
    1
);
The camera preview will be placed beneath our HTML page, and will not be visible unless we make the background of our app transparent. The easiest way to do so is to add a CSS rule inside the src/app/app.scss file.
ion-app, ion-content {
  background-color: transparent !important;
}
8. Take Pictures
While defining the layout of our page, we've already added a click handler to the button the user will press to take pictures. Let us now define the handler.
Taking a picture with the CameraPreview Ionic Native wrapper is as simple as calling the takePicture() method and specifying the desired resolution of the picture. For now, let's use 320 x 320 as the maximum dimensions of our picture.
takePicture() {
    CameraPreview.takePicture({maxWidth: 320, maxHeight: 320});
}
It is worth noting that specifying large resolutions can lead to out-of-memory errors.
9. Apply Image Effects
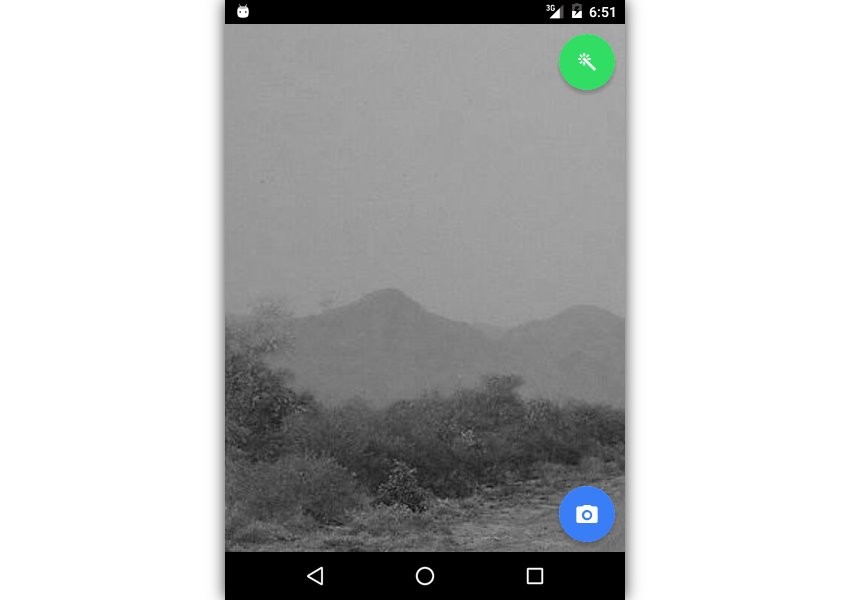
The CameraPreview wrapper allows you to easily apply several common image effects, also called image filters, to your pictures in real time. We've already added a click handler to the button the user will press to apply the image effects. Therefore, all we need to do now is define it.
To keep our code simple, every time the user presses the button, let us pick a random effect from an array of effects, and apply it. You can use the JavaScript Math.random() function to pick a random effect, and the setColorEffect() method of the CameraPreview class to apply it.
changeEffect() {
    // Create an array with 5 effects
    let effects: any = ['none', 'negative','mono', 'aqua', 'sepia'];

    let randomEffect: string = effects[Math.floor(
                                Math.random() * effects.length)];
    CameraPreview.setColorEffect(randomEffect);
}
You can run the app now and tap the FAB multiple times to see various image effects being applied to the camera preview window.
10. Move Pictures to External Storage
Our app places all the pictures it takes inside its application storage directory, which is a private data directory. If you prefer storing those pictures on external storage media, thus making them available to third-party photo gallery apps, you must manually move them. To do so, you can use the File Ionic Native wrapper.
As always, import the wrapper before using it. Additionally, declare cordova as an externally initialized global variable. It offers constants that let you easily refer to all the frequently used directories of the Android file system.
import { File } from 'ionic-native';
declare var cordova: any; // global variable for paths
We should be moving the pictures to the external storage directory as soon as they are taken. Therefore, subscribe to the setOnPictureTakenHandler() method of the CameraPreview class. The method returns an array containing the absolute paths of the picture and its thumbnail. For now, we'll be moving the picture only.
Accordingly, add the following code towards the end of the initializePreview() method:
CameraPreview.setOnPictureTakenHandler().subscribe((result) => {
    this.moveFileToExternalStorage(result[0]); // Move picture only
});
Inside the moveFileToExternalStorage() method, we can use the moveFile() method of the File class to actually move the picture. The moveFile() method expects source and destination directories and filenames as its arguments.
To determine the path of your application's external storage directory, use the cordova.file.externalApplicationStorageDirectory constant. Similarly, to determine the path of your application's private storage directory, use the cordova.file.applicationStorageDirectory constant.
Additionally, to extract the filename of the picture from its absolute path, you can simply use JavaScript's split() and pop() methods. I suggest you also display a toast after the move operation is complete.
moveFileToExternalStorage(fileName: string) {
    // Determine paths
    let externalStoragePath: string =
                cordova.file.externalApplicationStorageDirectory;
    let currentPath: string =
                cordova.file.applicationStorageDirectory + "files/";

    // Extract filename
    fileName = fileName.split("/").pop();

    // Move the file
    File.moveFile(currentPath, fileName,
                  externalStoragePath, fileName).then(_ => {
        this.toastCtrl.create(
            {
                message: "Saved one photo",
                position: "bottom",
                duration: 2000
            }
        ).present();
    });
}
Our camera app is now complete. You can view its pictures using any photo gallery app you have on your device.
Conclusion
In this tutorial, you learned how to use Ionic 2 and plugin wrappers available in Ionic Native to create a hybrid app that can take pictures, apply image effects to them, and store them on external storage media. Although we focused only on the Android platform today, you can be sure that our app will work, with minimal changes, on iOS devices too.
To learn more about Ionic 2, you can refer to its extensive documentation. Our check out our Ionic 2 course here on Envato Tuts+!


Comments