Introduction
In this tutorial, you learn how to create, Highway Dodge, a simple, yet addictive, game. Highway Dodge is easy to pick up and play, but it provides the addictive quality of other popular games in the App Store.
Highway Dodge starts out by placing the player in a race car
on the highway. During the game, the player must dodge oncoming traffic on the
highway by tapping on one of the three available lanes. For every dodged car,
the player receives one point and it’s game over for the player when an
oncoming car hits the race car. Over time, the oncoming cars come out faster and
faster in order to provide a real challenge to the player.
Requirements
This game is built using Lua and the Corona SDK. At a minimum,
you need to have an account with Corona Labs and the Corona SDK installed. You can grab the Corona SDK for free at the Corona Labs website. For this tutorial, I used build 2015.2731 of the Corona SDK.
1. Setting Up Highway Dodge
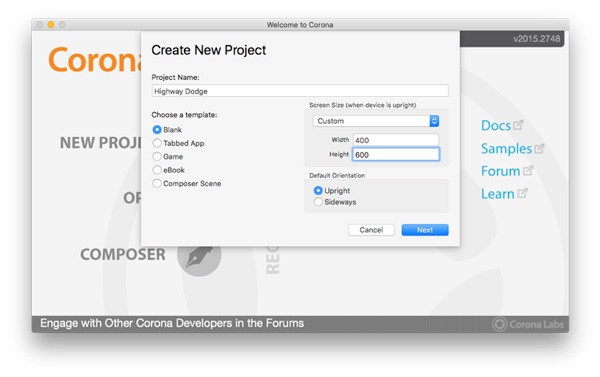
Let’s jump right in and start Highway Dodge by creating a blank template. Open the Corona Simulator and choose New Project from the File menu. Once you have the Create New Project window open, enter Highway Dodge as the project name, choose a blank template, and set the width to 400 and the height to 600. Leave the default orientation set to Upright.
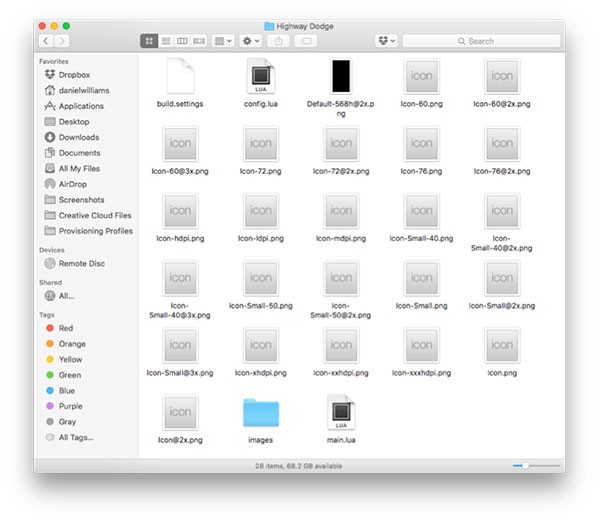
After setting up your project, download the images for Highway Dodge. Create a new folder in your new project, name it images, and add the images to this folder. Your project should now look like this:
2. Project Settings
With the project set up, let’s take a quick look at two important files, build.settings and config.lua.
build.settings
This file handles the build time properties of the
game. It stores information on the orientation of your app, icon
information, iOS settings, and Android settings. The default setup is adequate for our game.
config.lua
This configuration file controls the runtime properties of the game.
This includes width, height, scale, fps (frames per second), and
imageSuffix. The property we need to take a look at is imageSuffix. The imageSuffix property is used for dynamic
image selection. In a nutshell, it tells the app to use a higher resolution
image when on a higher resolution device.
I've provided high resolution images in the images folder so we need to update config.lua accordingly. Your project's config.lua file should look like the one below. I have omitted the push notification section, which is commented out.
application = {
    content = {
    	width = 400,
		height = 600,
		scale = "letterBox",
		fps = 30,

		imageSuffix = {
		    ["@2x"] = 2,
		},
	},
}
3. Launch Point
With the project and dynamic image selection set up, let’s move on to main.lua. This file is the launch point of every app built with the Corona SDK. In our game, it’s going to hold three lines of code.
Step 1
The first line hides the status bar on iOS devices. Open main.lua and add the following line after the comment -- Your code here.
display.setStatusBar( display.HiddenStatusBar )
Step 2
Next, we start using composer by requiring the library into our game. We do this by adding the following line:
local composer = require( "composer" )
Step 3
Next, we use composer to move to the menu scene. We move scenes by calling the function composer.gotoScene(), passing the value
"scene_menu" as the parameter. The value "scene_menu" is the name of the scene
and the name of the file that we create in the next section.
composer.gotoScene("scene_menu")
A Word About Composer
Composer is the official scene management library of Corona. Composer allows developers to easily create a scene and transition between scenes. In two lines, I was able to transition from the main scene to the menu scene. If you would like to read more about Composer, visit Corona’s Composer Library Guide available on the Corona Labs Docs website.
4. Menu
The menu scene of our game will consist of only a couple of elements. The scene will hold a background graphic, a title, and a start button. We’ll be using Corona's built-in widget library to create the start button. The widget library allows us to quickly and easily create common user interface elements. In our game, we’ll be using it for the button creation only.
Step 1
In the project folder of Highway Dodge, create a new file, scene_menu.lua, and open it in your text editor of choice. Instead of starting from scratch, we are going to use the scene template available on the Corona Labs Docs website. With their template, we’ll be able to move a lot faster. Head over to Corona Labs Docs and copy/paste the scene template to scene_menu.lua.
Step 2
Add the widget library to our game by adding the following line, just below the composer library.
local widget = require( "widget" )
Step 3
We add our background using the graphics
you downloaded earlier. The background should be positioned in the center of the screen. In the scene:create() function and
after the screenGroup variable is declared, add the following code:
local background = display.newImageRect(sceneGroup, "images/background.png", 475, 713)
background.x = display.contentCenterX
background.y = display.contentCenterY
Step 4
Next, we need to add the three lanes that represent the highway. We do this by using a table to hold the lanes and
creating a for loop that runs three times. Place this snippet after the
background graphic:
local lanes = {}
for i=1,3 do
    lanes[i] = display.newImageRect(sceneGroup, "images/lane.png", 79, 713)
    lanes[i].x = (display.contentCenterX - 79*2) + (i*80)
    lanes[i].y = display.contentCenterY
end
To make sure the lanes are always centered, I’ve placed the lanes on the x-axis using a bit of math. This ensures the lanes remain centered, regardless of the device the game runs on.
Step 5
We also add our logo for Highway Dodge by placing an image object near the top of the screen.
local logo = display.newImageRect(sceneGroup, "images/logo.png", 300, 150)
logo.x = display.contentCenterX
logo.y = 75
Step 6
Before we can add our button widget, we need to
create a function that responds when the button is touched. We’ll name the
function handleButtonEvent() and move
the player to the game scene using composer.gotoScene().
We will only respond when the player has lifted their finger off the button or at the ended phase of the event.
local function handleButtonEvent( event )
    if ( "ended" == event.phase ) then
        composer.gotoScene("scene_game", "slideLeft")
    end
end
Step 7
With the function added, we can add the button. We create the button by using widget.newButton
and passing some values to it. We specify the width and height of the
button, the image files for the button, the text to be displayed, the font
type, the font size, and the font color.
We also tell Corona what function to call when the button is pressed and position it in the middle of the screen. The source files of this tutorial include comments that explain each of the values used to set up the button.
local btn_startPlaying = widget.newButton {
    width = 220,
    height = 100,
    defaultFile = "images/btn-blank.png",
    overFile = "images/btn-blank-over.png",
    label = "Start Playing",
    font = system.defaultFontBold,
    fontSize = 32,
    labelColor = { default={ 0, 0, 0 }, over={ 0, 0, 0, 0.5 } },
    onEvent = handleButtonEvent
}
btn_startPlaying.x = display.contentCenterX
btn_startPlaying.y = display.contentCenterY
sceneGroup:insert(btn_startPlaying)
Step 8
To wrap up the menu scene, we need to remove the game scene when it exits. When Corona moves between scenes, it doesn’t always remove the previous scene. Without these lines, the game will always be in a game over scene after it’s been played once.
To remove the previous scene, we get the scene name
and call composer.removeScene() to remove it if it exists. Add the following code to the scene:show() function.
local prevScene = composer.getSceneName( "previous" )
if(prevScene) then
    composer.removeScene(prevScene)
end
5. Creating the Game Scene
We can now start working on the game scene. We’ll use the same workflow we used for creating the menu scene. Create a new file, scene_game.lua, and copy/paste the scene template available on Corona Labs Docs. Once you have the code in place, open scene_game.lua in your favorite text editor.
Step 1
To make coding the game scene easier for us, we are going to use the widget library and the physics library. The latter is used for collision detection. Add the following code to scene_game.lua:
local widget = require( "widget" )
local physics = require("physics")
physics.start()
physics.setGravity(0,0)
On the first and second lines, we require the widget library and the physics library respectively. We then start physics and disable gravity. We don’t need gravity for our highway game, instead we’ll be using
transition.to() to move the cars.
Step 2
In the scene:create() function, we declare a number of variables that we
will use in the game. These variables will be responsible for the player
car, lanes, enemy cars, and player score. To make things easier to read, I’ve
added some comments.
-- "scene:create()"
function scene:create( event )
    local lanes = {} -- create a table called lanes
    local playerCar -- a variable for the player car
    local laneID = 1 -- a variable for the land id
    local enemyCars = {} -- a table to hold the enemy cars
    local enemyCounter = 1 -- start the enemy counter at 1 to keep track of the enemy cars
    local sendEnemyFrequency = 2500 -- defines how often to send enemy cars in milliseconds
    local tmrToSendCars -- a variable to hold a reference to the timer of sending cars
    local playerScore = 0 -- start the player score at 0
    local playerScoreText -- an object to hold the score text object
end
Step 3
Below the variable declarations, we set up
the functions for the game. We will implement each function in a later step. Add the following code after the variable declarations in the scene:create() function.
local function incrementScore()
end

local function moveCar(event)
end

local function sendEnemyCar()
end

local function onPlayAgainTouch()
end

local function onGlobalCollision(event)
end
Step 4
After the functions, we add the background and
lanes. For the lanes, we attach an event listener to each lane to make them respond to touch events. When touched, the listener calls the moveCar() function.
local background = display.newImageRect(sceneGroup, "images/background.png", 475, 713)
    background.x = display.contentCenterX
    background.y = display.contentCenterY

for i=1,3 do
    lanes[i] = display.newImageRect(sceneGroup, "images/lane.png", 79, 713)
        lanes[i].x = (display.contentCenterX - 79*2) + (i*80)
        lanes[i].y = display.contentCenterY
        lanes[i].id = i
        lanes[i]:addEventListener("touch", moveCar)
end
Step 5
With the background and lanes set up, it's time to create a
text object to hold the player score and create the player car. The score will
be at the top of the screen and the player car will be positioned on the leftmost lane. Additionally,
we’ll make the player car a dynamic physics object.
playerScoreText = display.newText(sceneGroup, "Score: "..playerScore, 0, 0, native.systemFont, 36)
    playerScoreText.x = display.contentCenterX
    playerScoreText.y = 25

playerCar = display.newImageRect(sceneGroup, "images/playerCar.png", 50, 100)
    playerCar.anchorY = 1
    playerCar.x = lanes[1].x
    playerCar.y = display.contentHeight
    physics.addBody(playerCar)
    playerCar.bodyType = "dynamic"
Step 6
Next, we set a timer to send out a car based on the value of the sendEnemyFrequency variable and
create a runtime event listener for global collisions.
tmrToSendCars = timer.performWithDelay(sendEnemyFrequency, sendEnemyCar, 0)
Runtime:addEventListener( "collision", onGlobalCollision)
6. Adding Game Functionality
We can finally add functionality to our game. This section
will add additional code to each function we declared in the previous section.
We’ll get started with incrementScore() and end with onGlobalCollision().
incrementScore()
This function is
called when an enemy car passes by the player and the transition is complete.
When called, the player score is increased by 1. Add the following implementation to the incrementScore() function.
-- This function will increment the player score by 1. This function is called when the transition for the enemy car is complete and is off screen.
local function incrementScore()
    playerScore = playerScore + 1
    playerScoreText.text = "Score: "..playerScore
end
moveCar()
The moveCar() function is called when a lane is
touched. On the ended phase of the event, we grab the lane identifier and move the
car to the correct lane. We return true at the end to indicate a successful
touch event. Add the following implementation to the moveCar() function.
-- moveCar will respond to the touch event on the lanes
local function moveCar(event)
    if(event.phase == "ended") then
		laneID = event.target.id -- grab the lane id which will be 1, 2, or 3
		transition.to(playerCar, {x=lanes[laneID].x,time=50}) -- move the player car to the appropriate lane
        return true -- to indicate a successful touch event, return true
	end
end
sendEnemyCar()
The sendEnemyCar() function creates an enemy car,
assigns the car to a lane, attaches a physics body to the car, and uses transition.to() to send the car towards the bottom of the screen. To get started, let’s create the
enemy car object.
enemyCars[enemyCounter] = display.newImageRect(sceneGroup, "images/enemyCar"..math.random(1,3)..".png", 50, 100)
Next, we set the x and y location of the enemy car. We also create an if-then statement to assign the enemy car to the same lane the player car is in 50% of the time. This will force the player to move more often and makes
the game more fun.
enemyCars[enemyCounter].x = lanes[math.random(1,#lanes)].x -- place the car on a random lane
  if(math.random(1,2) == 1) then enemyCars[enemyCounter].x = lanes[laneID].x; end -- 50% of the time, place the enemy car on the player car lane.
enemyCars[enemyCounter].y = -125 -- place the enemy off screen at the top
We also need to rotate the enemy car so it’s facing down
and add a kinematic physics body type to the enemy car.
enemyCars[enemyCounter]:scale(1,-1) -- rotate the cars so they are facing down
physics.addBody(enemyCars[enemyCounter]) -- add a physics body to enemy cars
enemyCars[enemyCounter].bodyType = "kinematic" -- make the bodies kinematic
With the enemy car set up, we use the transition.to() function to send
the enemy car down one of the lanes. When the transition is complete, the game calls a
function to remove the object. I also increment the variable enemyCounter by 1 to keep track
of the number of enemy cars in the game.
transition.to(enemyCars[enemyCounter], {y=display.contentHeight+enemyCars[enemyCounter].height+20, time=math.random(2250,3000), onComplete=function(self) display.remove(self); incrementScore(); end}) -- a transition that moves the enemy car towards the bottom of the screen. On completion, the enemy car object is removed from the game.

enemyCounter = enemyCounter + 1 -- increase enemy counter by one for tracking
Finally, we want the game to get faster over time. For
every other car that is sent, the game will recreate the timer and sets it to be 200ms faster.
if(enemyCounter%2 == 0) then
    sendEnemyFrequency = sendEnemyFrequency - 200
    if(sendEnemyFrequency < 800) then sendEnemyFrequency = 800; end
    timer.cancel(tmrToSendCars)
    tmrToSendCars = timer.performWithDelay(sendEnemyFrequency, sendEnemyCar, 0)
end
onPlayAgainTouch()
The shortest function, onPlayAgainTouch(), returns the
player to the main menu. This is what the implementation of the onPlayAgainTouch() function looks like.
-- Allow the player to return to the menu
local function onPlayAgainTouch()
    composer.gotoScene("scene_menu", "fade") -- move player to menu
end
onGlobalCollision()
The onGlobalCollision() function is used
to detect collisions between any two physics objects on the screen. In our game,
we only have two types of physics objects:
- the player car
- the enemy car
When these two objects collide, the game stops all timers, transitions, and event listeners. Additionally, the game displays a game over scene that allows the player to play again.
Step 1
First, we create an if-then statement
that listens for the began phase.
if(event.phase == "began") then

end
Step 2
In the if-then statement, we stop
the game. We pause all transitions, cancel the timer, pause physics (even
if it’s not needed, it’s a good clean up call), and remove the event listener
from all three lanes. Add the following code inside of the if-then statement:
transition.pause()
timer.cancel(tmrToSendCars)
physics.pause()

for i=1,3 do
    lanes[i]:removeEventListener("touch", moveCar)
end
Step 3
After the game mechanics have stopped, we add an opaque rectangle and a text object that says "Game Over!". This gives a good visual indication that the game has ended.
local gameOverBackground = display.newRect(sceneGroup, 0, 0, display.actualContentWidth, display.actualContentHeight)
    gameOverBackground.x = display.contentCenterX
    gameOverBackground.y = display.contentCenterY
    gameOverBackground:setFillColor(0)
    gameOverBackground.alpha = 0.5

local gameOverText = display.newText( sceneGroup, "Game Over!", 100, 200, native.systemFontBold, 36 )
    gameOverText.x = display.contentCenterX
    gameOverText.y = 150
    gameOverText:setFillColor( 1, 1, 1 )
Step 4
To wrap up the global collision function, we add
the play again button that sends the player back to the menu.
local playAgain = widget.newButton {
    width = 220,
    height = 100,
    defaultFile = "images/btn-blank.png",
    overFile = "images/btn-blank.png",
    label = "Menu",
    font = system.defaultFontBold,
    fontSize = 32,
    labelColor = { default={ 0, 0, 0 }, over={ 0, 0, 0, 0.5 } },
    onEvent = onPlayAgainTouch
}
playAgain.x = display.contentCenterX
playAgain.y = gameOverText.y + 100
sceneGroup:insert(playAgain)
Test Drive
Run the application to see if everything is working as expected. You should be able to play the game, enemy cars should pop up from the top of the screen, and your score should increment for every enemy car you successfully dodge.
Conclusion
Thank you for reading my tutorial on creating Highway Dodge with the Corona SDK. You can download the source files for this game from GitHub. Take a moment to think how you can further improve the game. If you’re looking for some suggestions, I would recommend adding another lane, adding more enemy types, and even adding some cool power ups.

Comments