In the first part of this tutorial we looked at the kind of things that you need to consider before you set to work and build your ticketing website template. Now, we're going to add all the functionality you would want from a ticketing website.
We'll dive straight into the template crafted from the default WordPress install of Twenty Eleven and build ourselves a snazzy query which uses custom field data. Then we're going to sign up to TicketTailor and learn how we can create calls to action to make sure that our users can buy easily.
Step 1 Questions About Queries
One of the things that I'm constantly surprised by when writing code for use with WordPress is the amount of advanced tasks that can be accomplished with a relatively simple snippet of code and a bit of lateral thinking. I've lost count of the number of times I've used an overly complicated solution to a problem only to find that changing one line of code at a later date eliminates the need for 100 lines that I wrote when I delivered the project to my client.
The ticketing website is one of those examples. My client wanted a site that made a separation between future and past events. I solved the problem with a plugin which automatically changed the category of an event from 'future' to 'past' at a certain time on a certain day. This wasn't at all necessary.
WordPress post queries allow us to query by custom field. That means that we can set a custom field on our posts called 'Date', for example, and then arrange our posts by that. As you can probably see, that means that we can also make posts disappear or do anything else we want just by writing a good query and then using our custom fields carefully.
Let's go ahead and write a query for our index page. We want to do the following things:
- Show the next 4 concerts
- Hide any which have already passed
- Arrange them by the date that they're going to happen on rather than the date we created the post on
Here's the query we're going to use to do that:
query_posts(
	array (
		'post_type' => 'post',
		'posts_per_page' => 4,
		'meta_key' => 'Date',
		'meta_value' => date("Y/m/d"),
		'meta_compare' => '>=',
		'orderby' => 'meta_value',
		'order' => 'ASC',
		'paged' => get_query_var('paged')
	)
);
That's got a lot of symbols and letters in it, so let's break it down:
- post_type – This just tells WordPress that we want to use posts rather than pages or another post type
- posts_per_page – Set the number of posts you want to display. We've used 4 for the example but you can set any number that is 1 or higher
- meta_key – Remember that we can query posts by a custom field? This tells WordPress what the field we're using is called
- meta_value – As we're using a date as our query, this tells WordPress what date format to expect
- meta_compare – This does exactly what it says: compares the meta values of all the posts in the loop. Here, it compares them to the date as set on your web server and makes sure it only displays posts which have a date that is today or in the future
- order_by – Tells WordPress that we want our posts displayed in order of meta_value rather than the standard post date
- order – This lets WordPress know that we're going to be showing the posts in ascending date order: closest show first, furthest date further down the page
- paged – if pagination is enabled on your theme, you'll need this. If it's not, it won't affect your template
Wow! Deep breath. We've just written the code that's going to power the majority of our work from now on - good work! Now let's drop it into our index.php file. Here's what the index.php file should look like after that:
<?php
/**
 * The main template file.
 *
 * This is the most generic template file in a WordPress theme
 * and one of the two required files for a theme (the other being style.css).
 * It is used to display a page when nothing more specific matches a query.
 * E.g., it puts together the home page when no home.php file exists.
 * Learn more: http://codex.wordpress.org/Template_Hierarchy
 *
 * @package WordPress
 * @subpackage Twenty_Eleven
 */

get_header(); ?>

		<div id="primary">
			<div id="content" role="main">


				<?php twentyeleven_content_nav( 'nav-above' ); ?>

				<?php if (have_posts()) : ?>

 <?php
            query_posts( array (
                'post_type' => 'post',
                'posts_per_page' => 4,
                'meta_key' => 'Date',
                'meta_value' => date("Y/m/d"),
                'meta_compare' => '>=',
                'orderby' => 'meta_value',
                'order' => 'ASC',
                'paged' => get_query_var('paged')
                ) );

               ?>
 <?php while (have_posts()) : the_post(); ?>

					<?php get_template_part( 'content', get_post_format() ); ?>

				<?php endwhile; ?>

				<?php twentyeleven_content_nav( 'nav-below' ); ?>

			<?php else : ?>

				<article id="post-0" class="post no-results not-found">
					<header class="entry-header">
						<h1 class="entry-title"><?php _e( 'Nothing Found', 'twentyeleven' ); ?></h1>
					</header><!-- .entry-header -->

					<div class="entry-content">
						<p><?php _e( 'Apologies, but no results were found for the requested archive. Perhaps searching will help find a related post.', 'twentyeleven' ); ?></p>
						<?php get_search_form(); ?>
					</div><!-- .entry-content -->
				</article><!-- #post-0 -->

			<?php endif; ?>

			</div><!-- #content -->
		</div><!-- #primary -->

<?php get_footer(); ?>
Click save and then load your site. Something looks wrong here right? All your posts have disappeared:
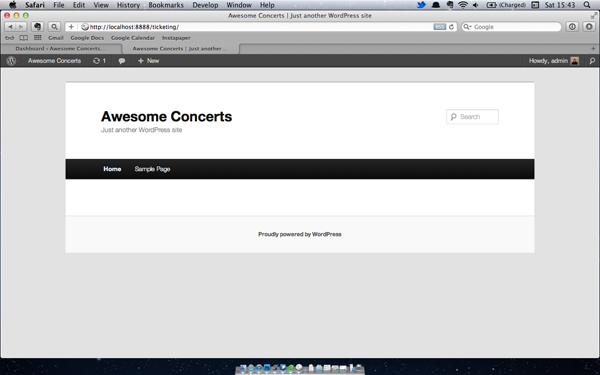
Where Have My Posts Gone?!
Not to worry! That means our query has worked. Remember that you told WordPress to use the 'Date' custom field to display your posts? Well, as clever as WordPress is, if you don't set a 'Date' custom field on your posts, it won't display your posts! Now we have to remedy our problem.
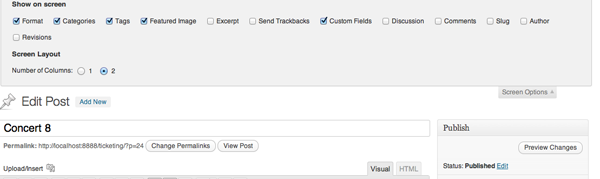
Step 2 Adding the Custom 'Date' Field
Load up your WordPress dashboard and navigate to one of your posts. Click 'edit'. If you've never used custom fields in your site before, chances are that the fields will be hidden on your post editing panel. To enable them, click 'Screen Options' in the top right hand corner of your window and then check the box next to 'Custom Fields.' That should give you the option to add custom fields by scrolling to the bottom of the window from now on. Add a new custom field with the name 'Date'
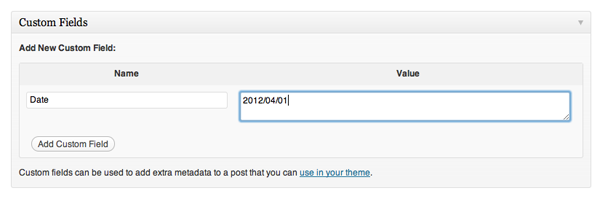
The custom field is case sensitive. It doesn't matter what you type as long as it matches the name of the custom field in your query.
Now you also need to add a date in the correct format. Earlier on we specified in our query that we were going to use the date format: YYYY/MM/DD - You need to stick to this format for this tutorial. If you don't, your code won't work. That's because WordPress is incredibly efficient at comparing dates and starting with the year first makes sure that only posts this year and in the future will show. Then it does the same for months. Then for days.
While this date format probably doesn't feel natural for you, it will save you a lot of hassle. You should have something that looks like this:
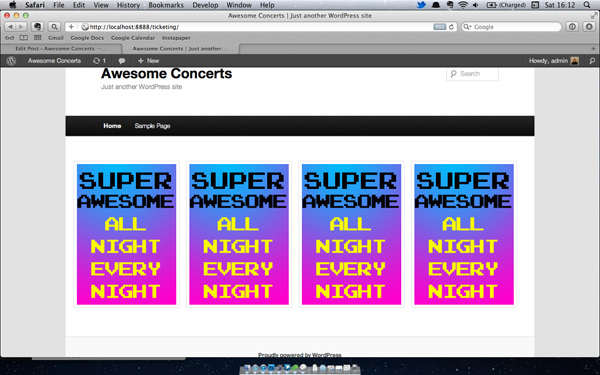
Add dates to all of your posts using the 'Date' custom field now. Then reload your index.php file and you'll see that you've got the four concerts (posts) with the nearest 'Date' displayed. Four will have disappeared too (assuming you used the XML file I gave you in the first part). There's a reason for that and we'll look at that in a moment.
Step 3 Sign Up to TicketTailor
TicketTailor is a great site which provides a ticketing and checkout service for promoters of concerts. Aside from having incredible customer service, they've also got an extensive back end platform which gives ticket sale stats, affiliate link capabilities, advanced ticketing abilities such as different pricing tiers, and also the ability to print out user friendly guestlists for concerts.
While you might be able to get those capabilities elsewhere, what you can't get anywhere else is the customisation help from the TicketTailor staff. With the top three plans in their pricing plan, the team behind TicketTailor customise your sales page on their server to look exactly like your WordPress site - regardless of what you've done to it. That's pretty smart.
This isn't included with the Basic or Promoter packages but if you don't want to pay, you can use those services too.
Sign up for TicketTailor and set up an event so that you've got a ticketing URL to send people to and use in this tutorial.
Step 4 Adding a Ticket Link
If you skipped Step 3, you won't have signed up for TicketTailor and now you'll be lost. You should go back and do it now.
So you've got your test event set up on TicketTailor and you can access your 'store' using the link on the TicketTailor admin panel. Now let's connect our WordPress site and our TicketTailor site. We'll do this using call to action buttons which are powered dynamically.
A Custom Field for Ticket Links
Remember how we added a custom field for 'Date' in Step 2? Now we're going to do the same for our ticket link. Except that this time we don't need to write a query.
Open the post editor and add the custom field 'Ticket' and then enter the URL of the test event that you set up on TicketTailor so that your post panel looks like this:
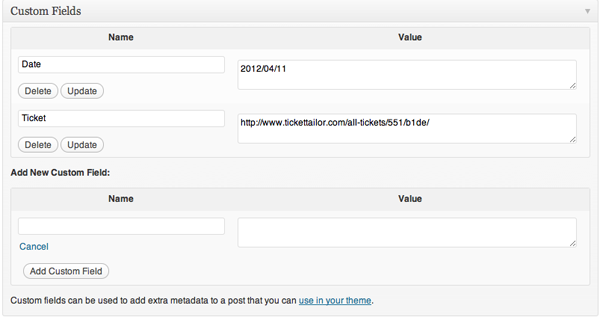
We need to use the 'Ticket' custom field to generate a button underneath the poster for the concert - but we only want it to display the button if there is a 'Ticket' custom field for the post. Open up the content.php file and drop the following code in just below line 14 (which calls the post content)
<!-- Display a ticket link only if it exists -->

<?php $Ticket = get_post_meta($post->ID, 'Ticket', true);

	if($Ticket) : ?>

		<a href="<?php echo $Ticket; ?>">Get Tickets</a>

	<?php endif; ?>
Now refresh your index page and as long as your event is:
- Not in the past,
- One of the next four events,
You should see something like this:
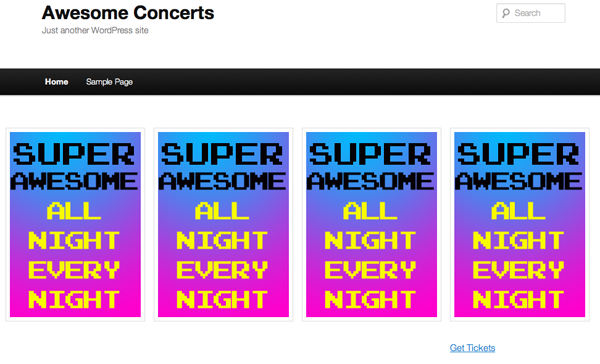
Step 5 Turning That Into a Call to Action
The internet is full of buzz words - no field is more full of buzz words than the web design world. One of the big trends in design is the idea of using a button to get someone to do something. This is called a 'call to action' and they really do work - so we're going to turn that simple ticket link into a call to action using a couple of lines of CSS and a class tag on our HTML. I used the following CSS as an example but you could use anything you like. Just add the following to your style.css file:
a.btn {
  width: 100px;
  padding: 10px 10px 10px 10px;
  margin-bottom: 10px;
  font-size: 16px;
  text-decoration: none;
  color: white;
  text-shadow: -1px -1px 2px #fff;
  background: #ff00cc;
  border: 1px solid #ccc;
  border-radius: 3px;
  -moz-border-radius: 3px;
  -webkit-border-radius: 3px;
}

a.btn:hover {
  text-shadow: -1px -1px 2px #fff;
  background: #00bafb;
  border: 1px solid #ccc;
}
And then update your content.php file to accommodate those new styles by changing your link to this:
<a class="btn" href="<?php echo $Ticket; ?>">Get Tickets</a>
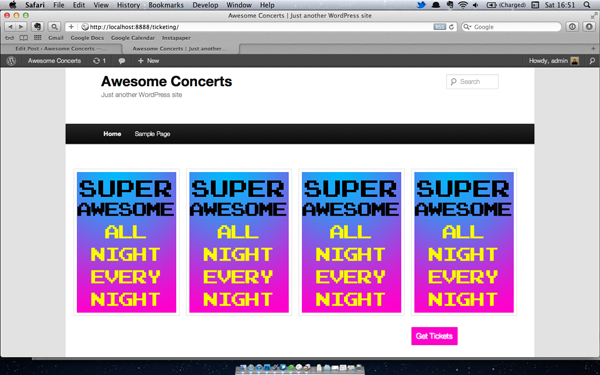
Refresh that and you've got a nice looking template file that links to a TicketTailor page which uses a lovely looking call to action button, a clever loop and a bit of lateral thinking to get you a really nice ticketing website that looks like this:
Additional Steps Adding Some Flourishes
While we could just stop there and have a really functional website, there are a few more things we can do.
There's a few things that everyone who goes to live music concerts like and those are:
- Reliving the memories of their favourite concerts
- Buying merchandise
Seeing as you've already got most of the tools at your finger tips to make your customers even happier, why not go two steps further - they're more likely to like coming to your shows if you make them a bit happier than other promoters.
Help Them Relive Their Memories
Remember we cut half of our concert posters out of our query by setting the number of gigs to show as '4' way back in Step 1? Now we've come to the reason for that. Wouldn't it be a nice touch to allow your customers to see all of the shows that you've ever put on next to all the shows you've got coming up? Sure it would!
To do that, open up your index.php file and alter it to the following:
<?php
/**
 * The main template file.
 *
 * This is the most generic template file in a WordPress theme
 * and one of the two required files for a theme (the other being style.css).
 * It is used to display a page when nothing more specific matches a query.
 * E.g., it puts together the home page when no home.php file exists.
 * Learn more: http://codex.wordpress.org/Template_Hierarchy
 *
 * @package WordPress
 * @subpackage Twenty_Eleven
 */

get_header(); ?>

		<div id="primary">
			<div id="content" role="main">


				<?php twentyeleven_content_nav( 'nav-above' ); ?>

				<?php if (have_posts()) : ?>

 <?php
            query_posts( array (
                'post_type' => 'post',
                'posts_per_page' => -1,
                'meta_key' => 'Date',
                'meta_value' => date("Y/m/d"),
                'meta_compare' => '>=',
                'orderby' => 'meta_value',
                'order' => 'ASC',
                ) );

               ?>
 <?php while (have_posts()) : the_post(); ?>

					<?php get_template_part( 'content', get_post_format() ); ?>

				<?php endwhile; ?>

				<?php twentyeleven_content_nav( 'nav-below' ); ?>

			<?php else : ?>

				<article id="post-0" class="post no-results not-found">
					<header class="entry-header">
						<h1 class="entry-title"><?php _e( 'Nothing Found', 'twentyeleven' ); ?></h1>
					</header><!-- .entry-header -->

					<div class="entry-content">
						<p><?php _e( 'Apologies, but no results were found for the requested archive. Perhaps searching will help find a related post.', 'twentyeleven' ); ?></p>
						<?php get_search_form(); ?>
					</div><!-- .entry-content -->
				</article><!-- #post-0 -->

			<?php endif; ?>

			<h2>Past Events</h2>
<div id="container_division">
<?php if (have_posts()) : ?>

     <?php
            query_posts( array (
                'post_type' => 'post',
                'posts_per_page' => -1,
                'meta_key' => 'Date',
                'meta_value' => date("Y/m/d"),
                'meta_compare' => '<',
                'orderby' => 'meta_value',
                'order' => 'DESC',
                'paged' => get_query_var('paged')
                ) );
                ?>

    <?php while (have_posts()) : the_post(); ?>

<?--Use a new template for the content-->
<?php get_template_part( 'content-past', get_post_format() ); ?>


<?php endwhile; else: ?>
<?php endif; ?>

			</div><!-- #content -->
		</div><!-- #primary -->

<?php get_footer(); ?>
That's a big section of code so let's break it up into manageable chunks.
The first part you will already recognise because it is the query we used earlier. The only difference is that I've set the posts_per_page argument to -1 which means that the front page will never paginate.
The second query, the latter half of the code, should also look very familiar to you as it is almost exactly the same as the code we wrote earlier with two exceptions:
- 'meta_compare' is set to '<' so that WordPress knows we want to display posts which are in the past.
- 'order' is set to descending to make the most recent past events display first. If you wanted to display the oldest events first, you could set this to ASC rather than DESC.
The other difference in the code is that we've called a new template part for the past events because tickets for past events aren't on sale anymore. We could write some conditional statements and just use the standard content.php but that's unnecessarily difficult so just duplicate the content.php file and remove the lines which display the 'Get Tickets' button:
<!-- Display a ticket link only if it exists -->

<?php $Ticket = get_post_meta($post->ID, 'Ticket', true);

	if($Ticket) : ?>

	<a class="btn" href="<?php echo $Ticket; ?>">Get Tickets</a>

	<?php endif; ?>
And How About Selling Some Merchandise?
You already know how to do this because you've set up ticket links and the custom fields for them before. Selling posters or t-shirts through BigCartel or an equivalent service is exactly the same. Just set up a custom field called 'Merch' for example, enter the URL of your product and press update. Then add a line of code just below your 'Get Tickets' code which looks like this:
<!-- Display a merch link only if it exists -->

<?php $Merch = get_post_meta($post->ID, 'Merch', true);

	if($Merch) : ?>

	<a class="btn" href="<?php echo $Merch; ?>">Get Merch</a>

	<?php endif; ?>
You can also add this snippet to your past events file (content-past.php) so that customers can always buy merchandise from you.
Conclusion
That's that! Now you've got a ticketing website that integrates WordPress with a fantastic ticketing provider, displays call to action buttons and organises your content without you ever using a category, custom post type or taxonomy.
There are so many things you could use this idea for. Leave a comment to let us know what you make with the code in this tutorial. Have fun!

Comments