In this tutorial, you will learn how to use Twitter API 1.1 and OAuth 2.0 to authenticate users of your application and publish a test tweet.
Why Do We Need an Authentication Framework?
To create services which act on behalf of users' accounts and make it really secure and easy to develop, we need three things:
- Twitter application
- REST API
- access to the user account
To put the pieces together into a working mechanism, we need an authentication framework. As a Twitter standard, the REST API identifies Twitter applications and users using OAuth.
What Is OAuth?
According to oauth.net, OAuth is:
An open protocol to allow secure authorization in a simple and standard method from web, mobile and desktop applications.
OAuth is the most common authorization framework today, and it is used on most common web applications and services, like GitHub, Google, Facebook, and, of course, Twitter.
This framework allows users to grant you permission to act on their behalf without sharing the account password. After the user has given permission, OAuth will return you a token. This token itself grants access to make requests on behalf of the user.
Tokens from Twitter do not have an expiration time, but they can become invalid after the user has rejected your application. Also, the Twitter crew can suspend your application if you are exceeding limits or performing other actions that violate the API Terms. You can review these terms to find out more about specific violations.
Create Your Application
As a first step, we need to set up a new Twitter application. Let's create a new application on the application management page.
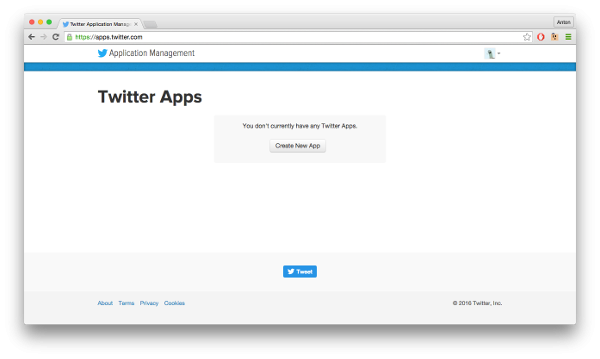
After logging in, you need to click the Create New App button and fill in the form with your application details: name, description, website and callback URL.
What is the callback URL? When users accept our application to use their account, the browser will deliver them to this URL with the OAuth verifier in GET. And we will use this verifier to get the user access token.

Notice: Don't forget to replace the website
and callback URL with your public domain when you share your
application with real users.
After filling in the form, you can sign the Developer Agreement and click the Submit button to create your application.

Congratulations! Now you have access to a page where you can look at the details and edit settings of your new application, change permissions and manage keys and access tokens. Navigate to the Keys and Access Tokens tab and find the Consumer Key and Consumer Secret. We will be using them shortly.
Start Coding
Choosing a Library
Before starting to code, we need to choose a library to work with Twitter API and Oauth 2.0. You can get an overview of the existing libraries on the Twitter developers page. In this tutorial I will use TwitterOAuth as the most popular and easy to use. We can install it from the command line with Composer:
composer require abraham/twitteroauth
The Config File
Let's create a new file named config.php to store all static data. Specify the following details in your application.
<?php

return [
    //
    'consumer_key'      => 'EPKXCv3tUsq9DoxwZy616Cy1o',
    'consumer_secret'   => 'UXnAeXkCZFIOnLVQCS4LFR7GsCTrOiU77OGSFL3dUoYZiTxU8x',

    //
    'url_login'         => 'http://localhost/twitter_login.php',
    'url_callback'      => 'http://localhost/twitter_callback.php',
];
Start the Login Script
Now create a new file named twitter_login.php and include Composer autoload, TwitterOAuth library, start session, and import the settings of our application from the config file.
<?php

require_once 'vendor/autoload.php';
use Abraham\TwitterOAuth\TwitterOAuth;

session_start();

$config = require_once 'config.php';
Request Auth
In this part we need to request the user to authorize our application. To reach this goal we will create an object of the TwitterOAuth class, request a token of the application from the Twitter API, get the URL of the authorize page using this token, and redirect the user to this page.
// create TwitterOAuth object
$twitteroauth = new TwitterOAuth($config['consumer_key'], $config['consumer_secret']);

// request token of application
$request_token = $twitteroauth->oauth(
    'oauth/request_token', [
        'oauth_callback' => $config['url_callback']
    ]
);

// throw exception if something gone wrong
if($twitteroauth->getLastHttpCode() != 200) {
    throw new \Exception('There was a problem performing this request');
}

// save token of application to session
$_SESSION['oauth_token'] = $request_token['oauth_token'];
$_SESSION['oauth_token_secret'] = $request_token['oauth_token_secret'];

// generate the URL to make request to authorize our application
$url = $twitteroauth->url(
    'oauth/authorize', [
        'oauth_token' => $request_token['oauth_token']
    ]
);

// and redirect
header('Location: '. $url);
Make a note that we are saving application tokens to the session, because we will need them in the next step.
Now you can run this script in the browser, and if everything goes well, you will be redirected to the Twitter API page with something like this:

You will be redirected to the callback URL by clicking the Authorize app button. But not so fast—first we need to create a callback script.
Get the User Token
Our next step is to create a callback script. Let's create a new file named twitter_callback.php and include the TwitterOAuth library, config file, and start session as we did in the previous part.
Then we will check if we received an auth verifier parameter from the Twitter API. If something is missing, we will redirect the user to log in again.
$oauth_verifier = filter_input(INPUT_GET, 'oauth_verifier');

if (empty($oauth_verifier) ||
    empty($_SESSION['oauth_token']) ||
    empty($_SESSION['oauth_token_secret'])
) {
    // something's missing, go and login again
    header('Location: ' . $config['url_login']);
}
The next step is to connect to the Twitter API with the application token and request a user token using the OAuth verifier:
// connect with application token
$connection = new TwitterOAuth(
    $config['consumer_key'],
    $config['consumer_secret'],
    $_SESSION['oauth_token'],
    $_SESSION['oauth_token_secret']
);

// request user token
$token = $connection->oauth(
    'oauth/access_token', [
        'oauth_verifier' => $oauth_verifier
    ]
);
And now you've got the user token stored in the $token variable.
How to Use This Token
We can use this token to act on behalf of the user's account. We can store it in the session or save in the database to manage the user account next time without requesting permission. To connect to the Twitter API with the user token, you just need to do this:
$twitter = new TwitterOAuth(
    $config['consumer_key'],
    $config['consumer_secret'],
    $token['oauth_token'],
    $token['oauth_token_secret']
);
Create a Test Tweet
To create a new tweet from the user's account, we need to add just a little piece of code:
$status = $twitter->post(
    "statuses/update", [
        "status" => "Thank you @nedavayruby, now I know how to authenticate users with Twitter because of this tutorial https://goo.gl/N2Znbb"
    ]
);

echo ('Created new status with #' . $status->id . PHP_EOL);
Also you can get details of the status from the answer of the API stored in the $status variable.
Finally, we are ready to test our script.

Conclusion
As you can see, creating a Twitter application is not so hard. Now you have all the API features to use: you can create new tweets, upload media, manage friendships and so on.
Keep in mind that now you can collect OAuth tokens and you have great power to act on behalf of your users. But with great power comes great responsibility—that's why you need to handle this situation gracefully and serve a quality user experience.
If you have questions or feedback, feel
free to post them in the comments section. I'll be looking forward
to it and will try to answer each of your comments.
Further Reading and Related Links
Note that I've prepared a full project for this tutorial on GitHub, and you can take a look at it with a link on the right side of the site or using this link.

Comments