Although a relatively new technology, Bluetooth Low Energy (LE) has already proven itself to be a versatile and useful communication medium. While it can be used for connecting devices to each other wirelessly, it also enables devices to act as beacons and broadcast data.
In this tutorial, you will learn about the BluetoothLeAdvertiser class, which enables developers to turn a supported phone into a Bluetooth LE beacon without the need for additional hardware. You will also learn how to scan for Bluetooth LE advertisement data so that you can react appropriately within your own applications. You can download the source files for this tutorial on GitHub.
1. Project Setup
For this tutorial, you can start by creating a basic empty project in Android Studio. You need to set the minimum SDK version to 21 in your build.gradle file, as Bluetooth LE advertising was not introduced on Android until the release of Lollipop. Although there are ways to wrap the APIs that are not supported before SDK 21, they will not be covered in this tutorial. We're only going to focus on the new technology at hand.
defaultConfig {
    applicationId "com.tutsplus.bleadvertising"
    minSdkVersion 21
    targetSdkVersion 23
    versionCode 1
    versionName "1.0"
}
Next, you need to add three permissions to the project's AndroidManifest.xml. The first two allow for Bluetooth communication and the third permission, ACCESS_COARSE_LOCATION, is a new requirement for using Bluetooth on Android 6.0 devices and above.
<uses-permission android:name="android.permission.BLUETOOTH" />
<uses-permission android:name="android.permission.BLUETOOTH_ADMIN" />
<uses-permission android:name="android.permission.ACCESS_COARSE_LOCATION" />
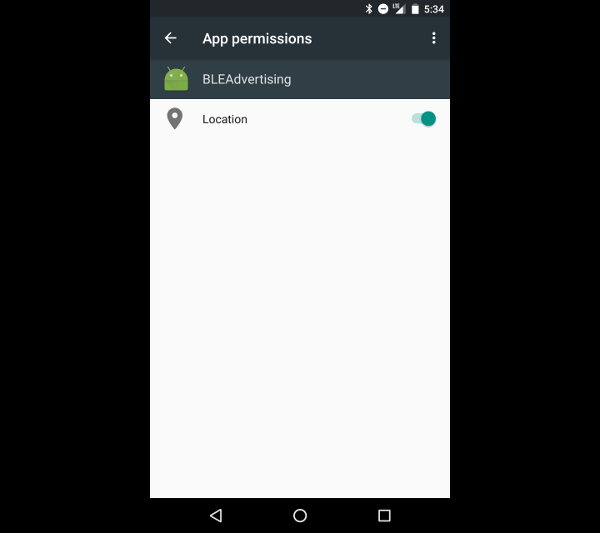
If you are developing on a device that runs Android 6.0 or above, your app needs the location permission granted by the user. Instructions for doing that can be found in Understanding Permissions in Android M, which I wrote earlier this year. For the sake of simplicity, this tutorial will simply grant the permission from the Android App Info screen.
Now that you have permission to access everything your application will need, it's time to create the layout file. Open activity_main.xml and create a simple layout with two buttons and a text view.
<?xml version="1.0" encoding="utf-8"?>
<LinearLayout xmlns:android="http://schemas.android.com/apk/res/android"
    android:layout_width="match_parent"
    android:layout_height="match_parent"
    android:orientation="vertical">

    <Button
        android:id="@+id/advertise_btn"
        android:layout_width="match_parent"
        android:layout_height="wrap_content"
        android:text="Advertise"/>

    <Button
        android:id="@+id/discover_btn"
        android:layout_width="match_parent"
        android:layout_height="wrap_content"
        android:text="Discover" />

    <TextView
        android:id="@+id/text"
        android:layout_width="wrap_content"
        android:layout_height="wrap_content"
        android:text="test"/>
</LinearLayout>
The two Button objects are used to start advertisement or discovery. The TextView is used to display data found on discovery. When you are done filling in the layout file, you can close it and open MainActivity.java. The first thing you do in this file is add the implementation for View.OnClickListener that is used by the buttons.
public class MainActivity extends AppCompatActivity implements View.OnClickListener {
    @Override
    protected void onCreate(Bundle savedInstanceState) {
        super.onCreate(savedInstanceState);
        setContentView(R.layout.activity_main);
    }

    @Override
    public void onClick(View v) {
        if( v.getId() == R.id.discover_btn ) {
            discover();
        } else if( v.getId() == R.id.advertise_btn ) {
            advertise();
        }
    }
}
In the above onClick(View v) method, advertise() and discover() are defined later in this tutorial. You can add stubs for those methods now in order for your app to compile. Next, you need to create member variables at the top of the class to keep track of the buttons and the text view.
private TextView mText;
private Button mAdvertiseButton;
private Button mDiscoverButton;
Once you have your views defined, you need to initialize them in onCreate(Bundle savedInstanceState) and wire each Button up to the OnClickListener you defined earlier.
@Override
protected void onCreate(Bundle savedInstanceState) {
    super.onCreate(savedInstanceState);
    setContentView(R.layout.activity_main);

    mText = (TextView) findViewById( R.id.text );
    mDiscoverButton = (Button) findViewById( R.id.discover_btn );
    mAdvertiseButton = (Button) findViewById( R.id.advertise_btn );

    mDiscoverButton.setOnClickListener( this );
    mAdvertiseButton.setOnClickListener( this );
}
Finally, make sure that the device you or your users are using supports multiple advertisements. While the software features necessary for advertising as a peripheral are available from Lollipop on, manufacturers must also use a Bluetooth chipset that can support advertisement.
If Bluetooth LE advertising is not supported, you should disable the two buttons in your application. While this feature is known to work on the Nexus 6, 5X, 6P, and 9, there are other phones that also support Bluetooth LE advertisement and additional devices will continue to be made as manufacturers create newer phones and tablets.
if( !BluetoothAdapter.getDefaultAdapter().isMultipleAdvertisementSupported() ) {
    Toast.makeText( this, "Multiple advertisement not supported", Toast.LENGTH_SHORT ).show();
    mAdvertiseButton.setEnabled( false );
    mDiscoverButton.setEnabled( false );
}
2. Advertising Over Bluetooth LE
To start advertising over Bluetooth LE, you need to retrieve the BluetoothLeAdvertiser from the Android BluetoothAdapter. You can do this in the advertise() method that is called when the advertising button is tapped.
BluetoothLeAdvertiser advertiser = BluetoothAdapter.getDefaultAdapter().getBluetoothLeAdvertiser();
Once you have your BluetoothLeAdvertiser, you define the settings that are used when advertising, such as the amount of power the antenna should use when broadcasting and how often the device should advertise. The AdvertiseSettings.Builder class also allows you to define whether the mobile device should be connectable, which allows you to stream much more data across devices.
AdvertiseSettings settings = new AdvertiseSettings.Builder()
        .setAdvertiseMode( AdvertiseSettings.ADVERTISE_MODE_LOW_LATENCY )
        .setTxPowerLevel( AdvertiseSettings.ADVERTISE_TX_POWER_HIGH )
        .setConnectable( false )
        .build();
You'll notice that this example is advertising with high signal strength (TX power) and low latency. While this makes your device discoverable quickly, it can also take up a lot of the battery, which is a precious commodity when you are developing in the mobile space.
There are other options for the advertising mode. The ADVERTISE_MODE_LOW_POWER option is the default setting for advertising and transmits the least frequently in order to conserve the most power. The ADVERTISE_MODE_BALANCED option attempts to conserve power without waiting too long between advertisements.
TX power can be set to ultra low, low, medium, or high. Each level corresponds to how far a Bluetooth LE advertising packet will be visible, though exact ranges depend on the device hardware.
Next, you define a UUID that is used for identifying your packets when they are advertised. You can create a new UUID by using the uuidgen utility from the command line.
➜  ~  uuidgen
CDB7950D-73F1-4D4D-8E47-C090502DBD63
While this utility creates a 128-bit UUID, the Android system only uses 16-bit UUIDs for advertisement and will automatically adjust a 128-bit UUID to conform. In the example above, the 16-bit UUID would be 950D. Next, save the 128-bit UUID as a string in strings.xml.
<string name="ble_uuid">CDB7950D-73F1-4D4D-8E47-C090502DBD63</string>
Once you have your UUID created, it's time to create the ParcelUuid, AdvertiseData object, and broadcast some additional data as an additional service. For this example, you just broadcast the name of the device and the string "Data" (which must be converted to a byte array) as the size of your advertising packets are fairly limited.
ParcelUuid pUuid = new ParcelUuid( UUID.fromString( getString( R.string.ble_uuid ) ) );

AdvertiseData data = new AdvertiseData.Builder()
        .setIncludeDeviceName( true )
        .addServiceUuid( pUuid )
        .addServiceData( pUuid, "Data".getBytes( Charset.forName( "UTF-8" ) ) )
        .build();
The last thing you do to advertise over Bluetooth LE with your device is create a callback that listens for success or failure when advertising, and then start advertising over the BluetoothLeAdvertiser.
AdvertiseCallback advertisingCallback = new AdvertiseCallback() {
    @Override
    public void onStartSuccess(AdvertiseSettings settingsInEffect) {
        super.onStartSuccess(settingsInEffect);
    }

    @Override
    public void onStartFailure(int errorCode) {
        Log.e( "BLE", "Advertising onStartFailure: " + errorCode );
        super.onStartFailure(errorCode);
    }
};

advertiser.startAdvertising( settings, data, advertisingCallback );
At this point, you should be able to run your app and start advertising over Bluetooth LE. However, the next step in this tutorial will go over discovering advertisements so that you can display that information.
3. Discovering Bluetooth LE Advertisements
Before you begin discovering Bluetooth LE services, you need to add a few more member variables at the top of your class.
private BluetoothLeScanner mBluetoothLeScanner;
private Handler mHandler = new Handler();
mBluetoothLeScanner is used for scanning for Bluetooth LE packets and mHandler controls a small timer that stops discovery after a set period of time.
In addition to these member variables, you need to create a new ScanCallback at the top of your class so that it can be accessed later in your application by an inner class. This callback receives the result of a discovered acceptable advertisement and displays the advertising device name and associated data in a text view.
private ScanCallback mScanCallback = new ScanCallback() {
    @Override
    public void onScanResult(int callbackType, ScanResult result) {
        super.onScanResult(callbackType, result);
        if( result == null
                || result.getDevice() == null
                || TextUtils.isEmpty(result.getDevice().getName()) )
            return;

        StringBuilder builder = new StringBuilder( result.getDevice().getName() );

        builder.append("\n").append(new String(result.getScanRecord().getServiceData(result.getScanRecord().getServiceUuids().get(0)), Charset.forName("UTF-8")));

        mText.setText(builder.toString());
    }

    @Override
    public void onBatchScanResults(List<ScanResult> results) {
        super.onBatchScanResults(results);
    }

    @Override
    public void onScanFailed(int errorCode) {
        Log.e( "BLE", "Discovery onScanFailed: " + errorCode );
        super.onScanFailed(errorCode);
    }
};
Next, initialize mBluetoothLeScanner in onCreate(Bundle savedInstanceState) as shown below.
mBluetoothLeScanner = BluetoothAdapter.getDefaultAdapter().getBluetoothLeScanner();
After you have initialized the Bluetooth scanner, you can start to flesh out the discover() method. For this sample application, you create a ScanFilter object and place it into a List so that your application only responds to the advertising packets that you are interested in.
ScanFilter filter = new ScanFilter.Builder()
        .setServiceUuid( new ParcelUuid(UUID.fromString( getString(R.string.ble_uuid ) ) ) )
        .build();
filters.add( filter );
You also need to create a ScanSettings object, which works similarly to the AdvertiseSettings object that you created earlier in this tutorial.
ScanSettings settings = new ScanSettings.Builder()
        .setScanMode( ScanSettings.SCAN_MODE_LOW_LATENCY )
        .build();
Once you have your filters, settings, and callbacks in place, you can begin discovering Bluetooth LE advertisements.
mBluetoothLeScanner.startScan(filters, settings, mScanCallback);
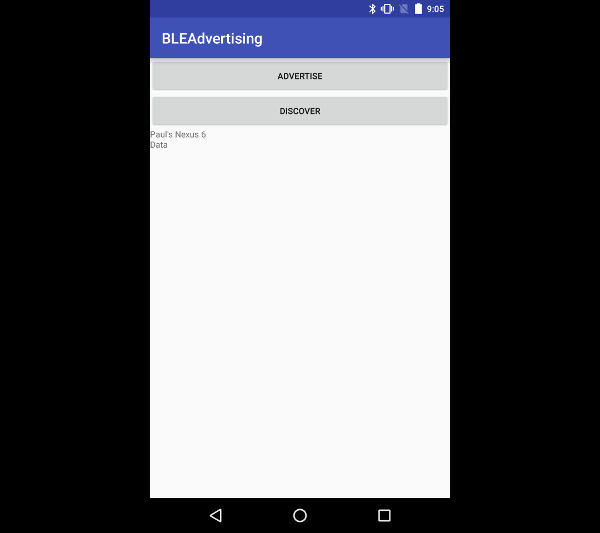
If you run your application now on two devices that both support Bluetooth LE advertisements and set one to advertise and the other to discover, the discovering device should find the advertiser and display the advertised data. The following screenshot shows a Nexus 5X discovering an advertising Nexus 6.
The last thing you need to do is create a new Runnable object and associate it with mHandler. The handler waits for ten seconds and then start the Runnable that stops discovery. The reason for this is that discovery can quickly drain the battery of the device. You only want to attempt to discover advertisement packets for short periods of time or when you expect to find an advertising device.
mHandler.postDelayed(new Runnable() {
    @Override
    public void run() {
        mBluetoothLeScanner.stopScan(mScanCallback);
    }
}, 10000);
Conclusion
While this example may not be much to look at, you've just created a fully working app that advertises over Bluetooth LE so that other devices can discover it and transfer data. Although this tutorial went over advertising and discovering with Android, you can just as easily make a similar app for iOS in order to share data across the two platforms or build your own Bluetooth LE enabled device that can interact with mobile phones and tablets.
As this technology continues to grow and be integrated into everyone's pockets, there will be endless possibilities for developers to make really interesting things. For more information on working with additional Bluetooth technology on Android, check out Create a Bluetooth Scanner With Android's Bluetooth API by Matthew Kim.

Comments