In this final installment in the Getting Started with Ionic series, you'll learn how to leverage Cordova to add device hardware capabilities to your app. We'll look at how to use features like geolocation and I'll show you how integrate with the ngCordova library to finish up our app. You'll want to be sure you've set up your machine for Ionic before we begin, and make sure you have your platform-specific tooling set up as well.
Project Files
The tutorial project files are available on GitHub. The general premise of the app is that it shows some information about facilities near you. In this tutorial, we add the ability to look up the current location and show results near you. You can see the working example here.
If you clone the project, you can also code along by using Git and running git checkout –b start. This coding for this lesson starts where the last post, Getting Started With Ionic: Navigation left off. You can also preview the starting point live.
Setting up Cordova
Before we write any code, we need to set up our project. Ionic will already set up a basic Cordova project, but we need to initialize a few additional things ourselves.
First, we need to install the ngCordova library. This is an Angular module that makes using some of the most popular Cordova plugins much easier. (Though not all plugins are supported by ngCordova.) Bower is used to install this dependency.
Second, we need to add a platform to our project. This will be ios or android (or both!), depending on the platform you choose to support. I've used ios in my examples, but you can replace that with android to achieve the same for that platform.
Third, we will install the geolocation plugin for Cordova. This enhances your app with the ability to get a user's current location (which requires permission). You can see a list of all plugins at https://cordova.apache.org/plugins/ with details on how to setup each one.
The following commands should be run from the root of the project to do these three setup steps.
node_modules/.bin/bower install ngCordova
ionic platform add ios # or android
ionic plugin add cordova-plugin-geolocation
Once that has completed, we need to add ngCordova to the application so it is recognized by Ionic. Open up the www/index.html file and add the following line after the ionic.bundle.js file.
<script src="lib/ngCordova/dist/ng-cordova.js"></script>
Then we need to update the www/js/app.js file to include the ngCordova module. The first line should be updated to appear as follows.
angular.module('App', ['ionic', 'ngCordova'])
Now that we've gotten our dependencies updated, our project is ready to use the geolocation plugin. The next step is to set up a new view to start using it!
Adding the Location View
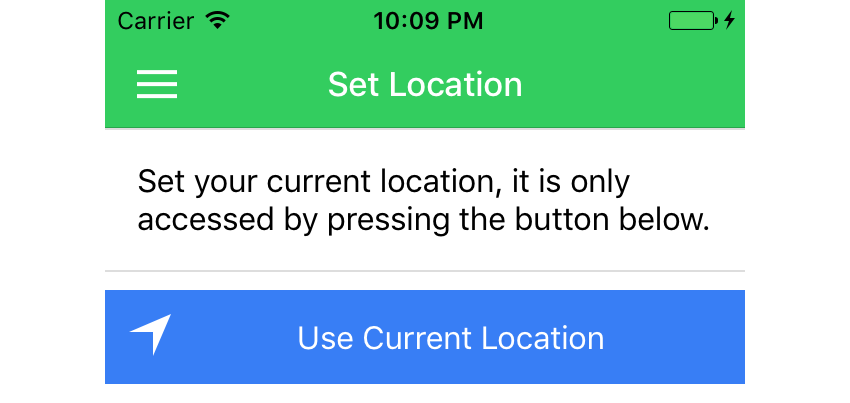
We'll create a new landing screen for the app. This screen shows a message about using the user's current location to find nearby places. They will tap a button to confirm they wish the app to access their location, and then see the list of places that reflects their current location.
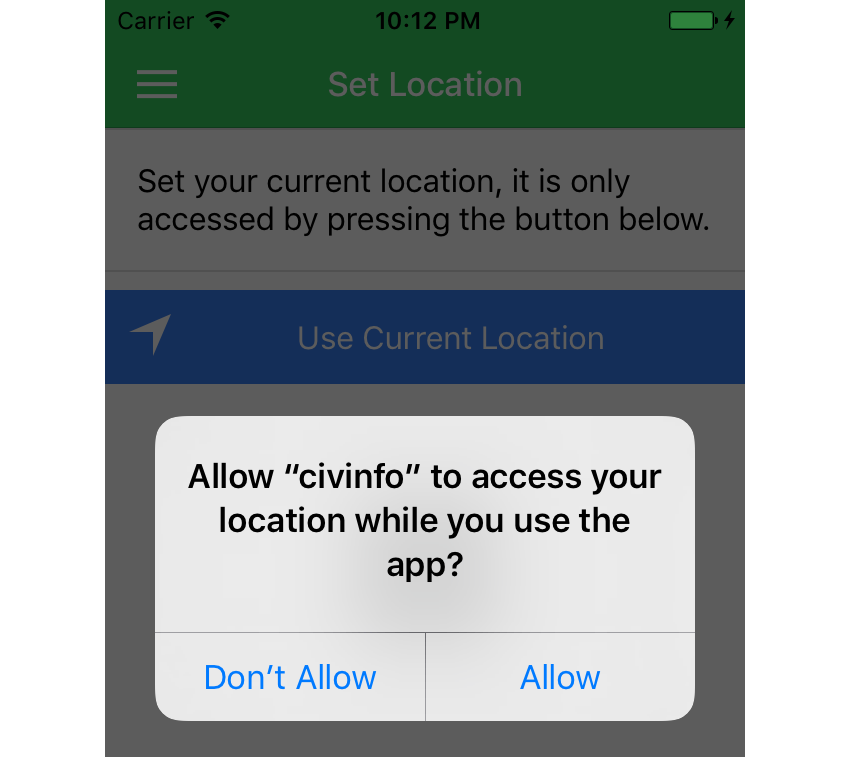
User location data is a privacy concern that apps should be careful when collecting, so mobile devices don't allow apps to automatically have access to geolocation data. Apps have to request permission (which can be declined or revoked at any time) so you need to keep that in mind when using certain plugins that require permissions. (Use that data carefully and avoid violating the privacy of your users!)
First, we will create the template for our location view. Create a new file at www/views/location/location.html and include the following. (This should all be familiar from the previous tutorials, but it essentially creates a new view with a button that will call a method in our controller, which we'll define next.)
<ion-view view-title="Set Location" hide-back-button="true">
  <ion-content>
    <div class="list">
      <div class="item item-text-wrap">
        <h2>Set your current location, it is only accessed by pressing the button below.</h2>
      </div>
      <button class="button icon-left ion-navigate button-full button-positive" ng-click="vm.useGeolocation()">
        Use Current Location
      </button>
    </div>
  </ion-content>
</ion-view>
We'll now create the controller shell, and then add a method to handle getting a user's location. Create another new file at www/views/location/location.js and include the following code. Make sure to also link to this file in the www/index.html file.
angular.module('App')
.config(function($stateProvider) {
  $stateProvider.state('location', {
    url: '/location',
    controller: 'LocationController as vm',
    templateUrl: 'views/location/location.html'
  });
})
.controller('LocationController', function($ionicLoading, $http, $state, Geolocation, $cordovaGeolocation, $ionicPopup) {
  var vm = this;
});
At this point we have a new location view, but the button won't work just yet. You can preview the app in your browser with ionic serve. You should be able to see the view if you go to http://localhost:8100/#/location.
$cordovaGeolocation in the controller constructor, which is going to provide us the access to user location data. The rest of the services injected are needed just to handle the business logic of what to do with the location data.There are actually two steps involved in getting the user's location in this app, first is getting the geolocation data from the Cordova plugin (which just returns a latitude and longitude value), and then doing a reverse lookup in the Google Geocode API to find the current location place (which works well with our other API calls).
Add the following method to the controller, and we'll go through it in detail below.
vm.useGeolocation = function() {
  $ionicLoading.show();

  $cordovaGeolocation.getCurrentPosition({timeout: 10000, enableHighAccuracy: false}).then(function (position) {
    var lat  = position.coords.latitude;
    var lng = position.coords.longitude;

    var url = 'https://civinfo-apis.herokuapp.com/civic/geolocation?latlng=' + lat + ',' + lng;
    $http.get(url).then(function(response) {
      $ionicLoading.hide();
      if (response.data.results.length) {
        Geolocation.data = response.data.results[0];
        $state.go('places');
      } else {
        $ionicPopup.alert({
          title: 'Unknown location',
          template: 'Please try again or move to another location.'
        });
      }
    })
    .catch(function(error) {
      $ionicLoading.hide();
      $ionicPopup.alert({
        title: 'Unable to get location',
        template: 'Please try again or move to another location.'
      });
    });
  });
};
First thing is to use the $ionicLoading service to display a loader while the current location is detected.
Then we use the $cordovaGeoposition service, which has a method called getPosition to get the current position. We specify the options, which are reasonable default values. You can read about other getPosition options in the documentation.
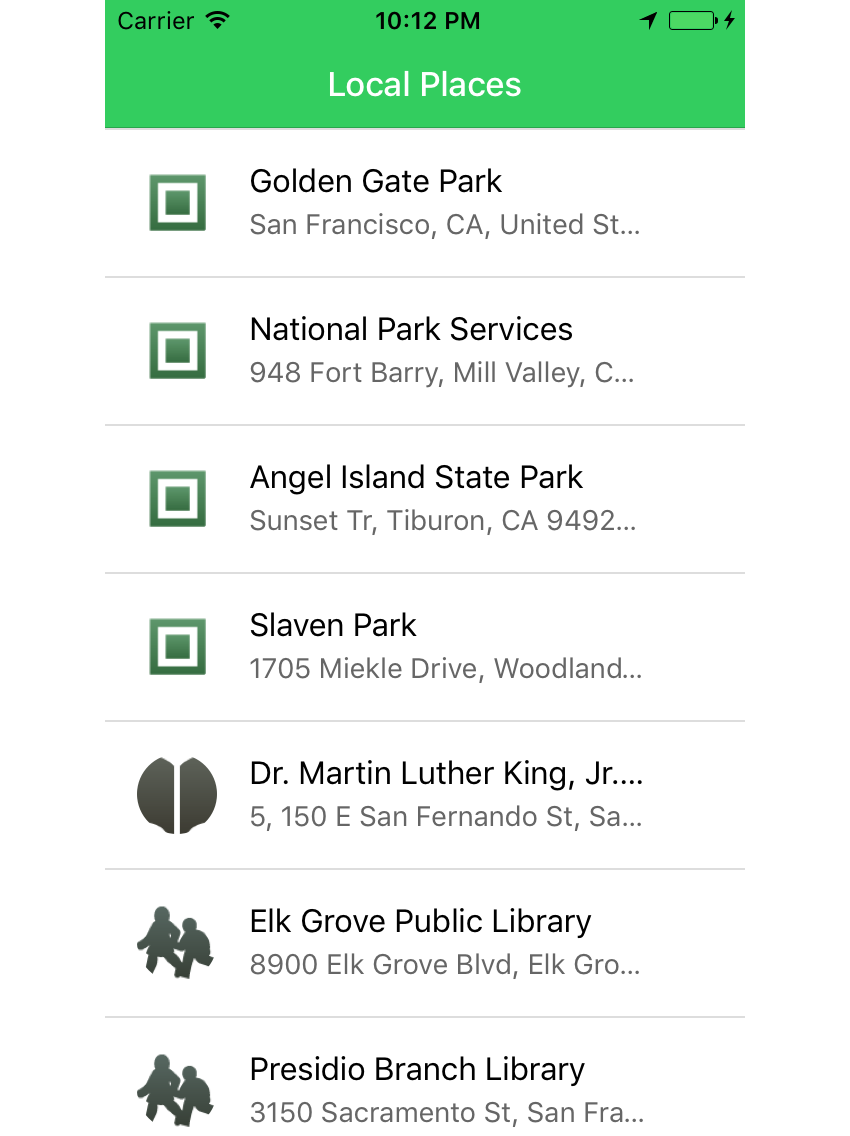
The getPosition method returns a promise, so we use then to handle the response. Assuming the user agrees to share their location, it gives us an object that contains the coordinates for latitude and longitude. We will then use those values to call the API to do a reverse geocode to lookup the closest place. If it fails, the catch handler will use $ionicPopup to show an alert that it failed.
The $http service is used to look up the reverse geocode, and if it is successful we need to check if any results were returned. If one was found, the Geolocation service value is updated and the user is redirected to the places list using $state.go. Otherwise, it uses $ionicPopup to show an alert saying that no places were found.
That's all we had to do to enable the geolocation feature of the device in our app. However, we still have to make a couple minor tweaks to the places view and to the app.js file.
First open up the www/js/app.js file and update the Geolocation service to the following. This is necessary to clear the default value of the geolocation service which we had previously hard coded to Chicago, and enable the digest cycle to properly sync changes.
.factory('Geolocation', function() {
  return {
    data: {}
  };
})
Then modify the default view for the app app by updating the last config line to the following. This will make the app start on the location view instead.
.config(function($urlRouterProvider) {
  $urlRouterProvider.otherwise('/location');
})
Lastly, we want to tweak the places view to no longer cache (so the updated location is always reflected), and to redirect to the location view if no location is found. Open up the www/views/places/places.html and update the first line as follows.
<ion-view view-title="Local Places" hide-back-button="true" cache-view="false">
Then open the www/views/places/places.js and update the start of the controller to match the following.
.controller('PlacesController', function($http, $scope, $ionicLoading, $ionicHistory, $state, Geolocation, Types) {
  var vm = this;

  if (!Geolocation.data.geometry || !Geolocation.data.geometry.location) {
    $state.go('location');
    return;
  }

  var base = 'https://civinfo-apis.herokuapp.com/civic/places?location=' + Geolocation.data.geometry.location.lat + ',' + Geolocation.data.geometry.location.lng;
We do a quick check before the controller fires to detect if the geolocation has been found, if not we redirect to the location to reset it.
This will actually also work in your browser, as the browser has support for geolocation features. In the next section we'll briefly talk about how to preview the app in an emulator.
Previewing in an Emulator
The Ionic CLI has a command that lets you easily emulate the app in a software version of a device. Not all hardware features are available, but many are emulated, including geolocation.
Using ionic emulate ios, Ionic will start the emulator and load the app (similarly for Android). If you have errors, it is likely that your machine has not been fully setup for the platform you are trying to emulate.
This command will boot a real version of the platform OS, and simulate a very realistic device. For someone who doesn't have an actual device to test with, this is a great way to quickly verify different devices work with your app.
You may need to reset the emulator sometimes to ensure that changes you make don't persist. For example, if you deny the app permission for geolocation, you will likely have to find the settings to allow it later, or you can reset the emulator to remove any settings.
Conclusion
In this tutorial we looked at how to use Cordova to create an app that leverages the hardware capabilities and sensors. Using ngCordova, it is very easy to access this information in your Ionic apps. You now have access to device features like the camera, geolocation, finger print readers, and the calendar. When possible you should leverage the ngCordova library to make it easier to integrate, but there are other Cordova plugins not exposed by ngCordova.
This also concludes the Getting Started with Ionic series. You should now have a grasp of the basics and be able to move ahead with Ionic. If you're interested in more, check out some of our other courses and tutorials on the ionic framework.


Comments