Introduction
Without a doubt, maps are one of the most useful tools for users when included in an app. This tutorial is the first in a series going over Google Maps v2 for Android. It will cover setting up the Google Maps API through the Google Developer Console, including a map fragment in your applications, displaying the user's location, adding markers, drawing on the map, and some general methods that will add utility to your app. All code for this tutorial can be found on GitHub.
1. Setting Up the Developer Console
In order to use the Google Maps API, you must register your application on the Google Developer Console and enable the API. To do this, start by going to the Google Developer Console. If you already have a project created, you can skip the next section. If not, you can follow along and create a new project for your maps application.
Step 1: Creating a Project
To create a new project, click on the blue Create Project button in the top left corner of the screen. If you don't see a Create Project button, then look for a button labeled Create an empty project.

This presents you with a dialog that asks for a project name. For this tutorial, I have created a project called TutsPlusMaps. There are some restrictions on what you can name your project as only letters, numbers, quotes, hyphens, spaces, and exclamation points are allowed characters.

Once you hit Create, a dialog appears in the lower right corner of the page with a loading indicator while the project is being created.
Step 2: Enabling the Maps API
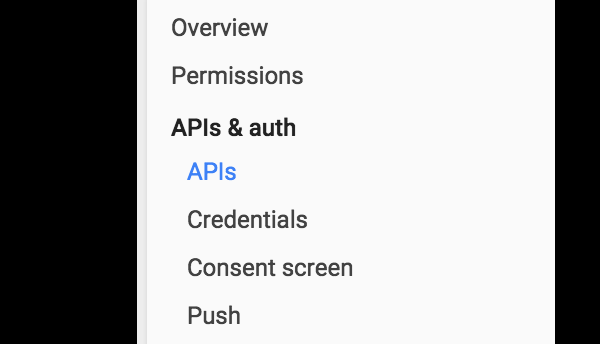
When the project has been created, or you have selected an existing project, you are taken to the project Overview screen. From here you will want to expand the APIs & auth item in the left navigation panel and click on APIs.
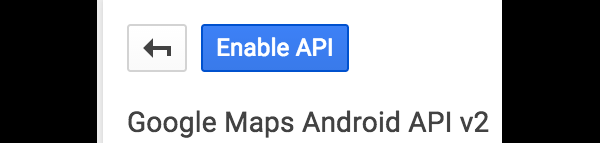
While there's a search box on this screen, you'll notice that Google placed the Maps API items at the top of the center column for developers to access. For this tutorial, click on the item titled Google Maps Android API under the Google Maps APIs heading.

This takes you to a screen where you can click on the blue Enable API button in order to enable the Maps API for your project.
Step 3: Creating an Android API Key
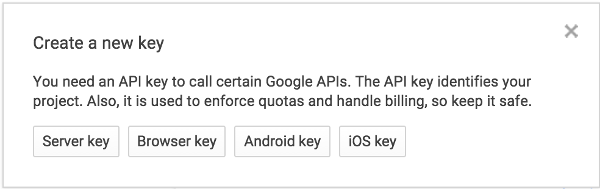
After you've enabled the Maps API, click on the Credentials item under APIs & auth in the side navigation to get a key to access the Maps API in your application. When you are presented with the Credentials dialog, press the blue Add Credentials button and select API Key.

Since this is an Android application, you need to select Android Key in the next dialog. If you were to create the same application using maps on different platforms, you could create a key for each platform.
On the next screen, click Add package name and fingerprint. This provides two fields, one for adding a package name and another for adding the SHA1 from your application signing key.
For this tutorial, I will use the package name com.tutsplus.mapsdemo. To get the SHA1 signature, you need to open a terminal or command prompt and navigate to the location of your application's signing key. This can be either your release key or debug.keystore. You can generate the SHA1 with the following command:
keytool -list -v -keystore debug.keystore
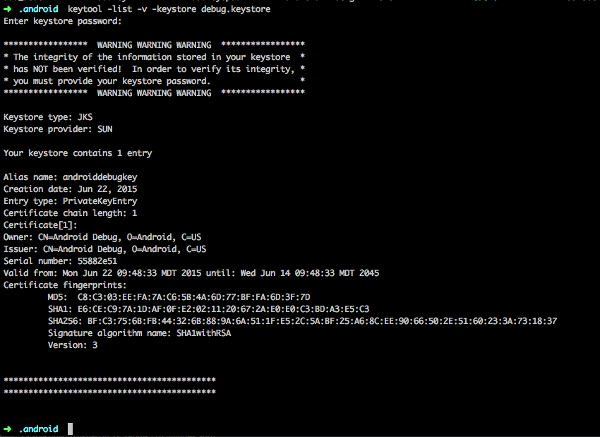
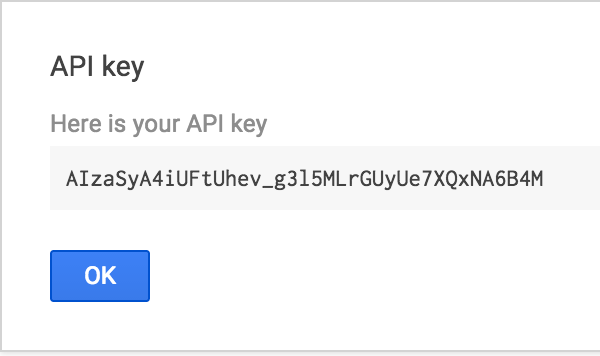
After you have created your SHA1 key and entered it into the text field, click on the blue Create button. You are then presented with a dialog containing the API key that you need to add to your Android app to access the Maps API.
2. Setting Up the Android Project
At this point, you can create the initial Android project with the same package name that you used for creating the API key. Once your project is created, open the build.gradle file. You need to import the Play Services library for maps. In this example, you also need to import the locations Play Services library in order to set an initial position for your map. Place the following lines into the dependencies node of the build.gradle file.
compile 'com.google.android.gms:play-services-maps:7.8.0'
compile 'com.google.android.gms:play-services-location:7.8.0'
Once you have your libraries imported, you can close build.gradle and open your AndroidManifest.xml file. Above the application node, you need to declare that the application uses OpenGL ES 2.0 and define the permissions needed by your application.
Note that the ACCESS_FINE_LOCATION permission is only required for this demo in order to get the user's location for defining where the map should initially display. If you have a known location in your own app, there's no need to use the user's location.
<uses-feature
    android:glEsVersion="0x00020000"
    android:required="true"/>

<uses-permission android:name="android.permission.INTERNET" />
<uses-permission android:name="android.permission.ACCESS_FINE_LOCATION" />
Within the application node, you need to add two pieces of metadata. The first informs the application that Play Services are used and the second binds the Maps API key with your application. In the following code snippet, @string/google_api_key is a string reference to the key from the Google Developer Console.
<meta-data
    android:name="com.google.android.gms.version"
    android:value="@integer/google_play_services_version" />

<meta-data
    android:name="com.google.android.geo.API_KEY"
    android:value="@string/google_api_key"/>
Once you've finished updating AndroidManifest.xml, go ahead and close the file. Next, you need to create a new Java class, called MapFragment, which extends SupportMapFragment. SupportMapFragment is used here rather than com.google.android.gms.maps.MapFragment in order to add backwards compatibility before API 12.
If your app does not need to support devices running older versions of Android, then it is fine to use com.google.android.gms.maps.MapFragment. Once you have the base fragment created, you need to implement the six interfaces that we will use for this demo.
public class MapFragment extends SupportMapFragment implements GoogleApiClient.ConnectionCallbacks,
        GoogleApiClient.OnConnectionFailedListener,
        GoogleMap.OnInfoWindowClickListener,
        GoogleMap.OnMapLongClickListener,
        GoogleMap.OnMapClickListener,
        GoogleMap.OnMarkerClickListener {
-
ConnectionCallbacksandOnConnectionFailedListenerare designed to monitor the state of theGoogleApiClient, which is used in this application for getting the user's current location. -
OnInfoWindowClickListeneris triggered when the user clicks on the info window that pops up over a marker on the map. -
OnMapLongClickListenerandOnMapClickListenerare triggered when the user either taps or holds down on a portion of the map. -
OnMarkerClickListeneris called when the user clicks on a marker on the map, which typically also displays the info window for that marker.
When prompted, click on the red lightbulb that appears next to the class name to add the methods required for these interfaces.
Once you have the initial fragment built, you need to let MainActivity know that it should use this fragment. Open activity_main.xml from your resources folder and change it so that it includes the fragment as a view.
<RelativeLayout xmlns:android="http://schemas.android.com/apk/res/android"
    xmlns:tools="http://schemas.android.com/tools" android:layout_width="match_parent"
    android:layout_height="match_parent"
    tools:context=".MainActivity">

    <fragment
        android:id="@+id/map"
        android:name="com.tutsplus.mapsdemo.MapFragment"
        android:layout_width="match_parent"
        android:layout_height="match_parent"/>

</RelativeLayout>
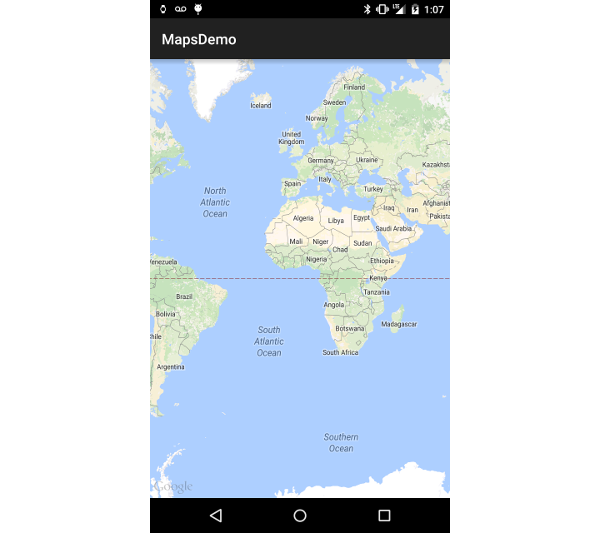
After updating your activity layout, you should be able to run your application and view a map of Earth that is fully zoomed out and focused on latitude 0, longitude 0.
3. Initializing the Map
Step 1: Declaring Map Types
Returning to our MapFragment class, you need to define some global values at the top of the class for use in your application.
private GoogleApiClient mGoogleApiClient;
private Location mCurrentLocation;
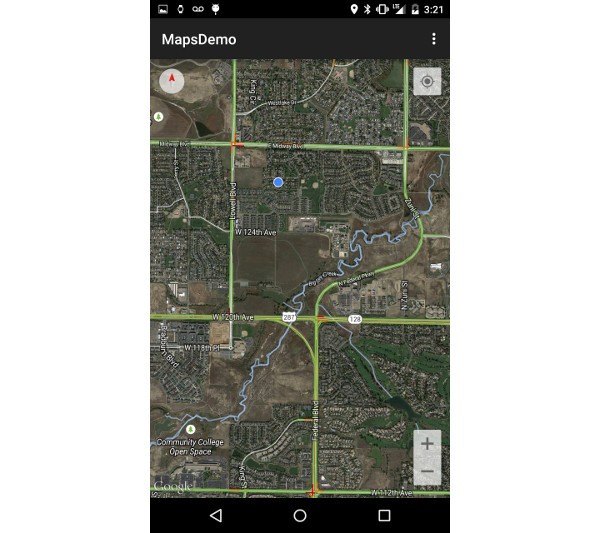
private final int[] MAP_TYPES = { GoogleMap.MAP_TYPE_SATELLITE,
GoogleMap.MAP_TYPE_NORMAL,
GoogleMap.MAP_TYPE_HYBRID,
GoogleMap.MAP_TYPE_TERRAIN,
GoogleMap.MAP_TYPE_NONE };
private int curMapTypeIndex = 0;
Here mGoogleApiClient and mCurrentLocation are used for getting the user's location for initializing the map camera. MAP_TYPES and curMapTypeIndex are used in the sample code for switching between different map display types. Each of the map types serves a different purpose, so one or more may be suitable for your own applications.
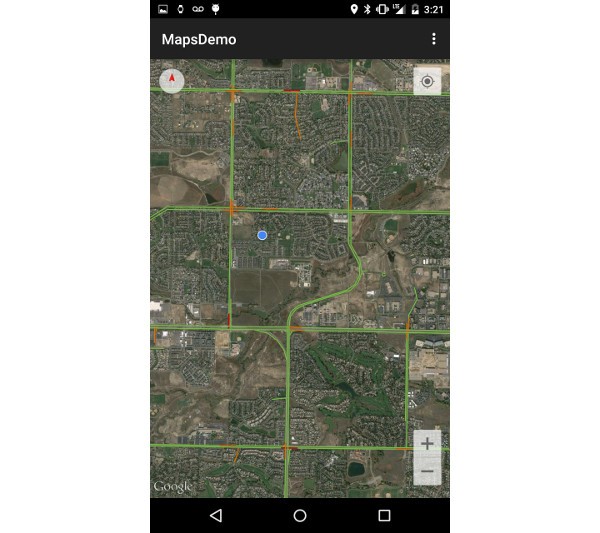
GoogleMap.MAP_TYPE_SATELLITE displays a satellite view of the area without street names or labels.
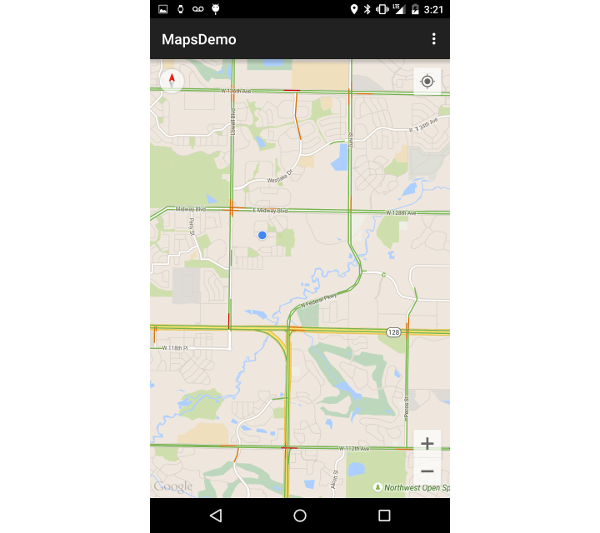
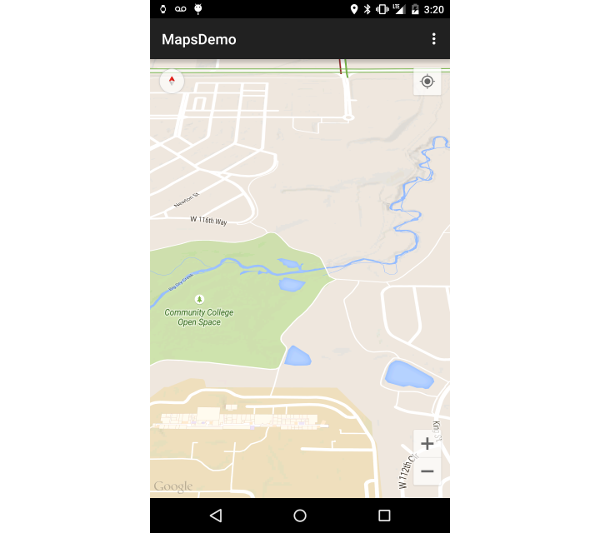
GoogleMap.MAP_TYPE_NORMAL shows a generic map with street names and labels.
GoogleMap.MAP_TYPE_HYBRID combines satellite and normal mode, displaying satellite images of an area with all labels.
GoogleMap.MAP_TYPE_TERRAIN is similar to a normal map, but textures are added to display changes in elevation in the environment. These textures are most visible when the map is angled with a two-finger drag.
GoogleMap.MAP_TYPE_NONE is similar to a normal map, but doesn't display any labels or coloration for the type of environment in an area. It does allow for displaying traffic and other overlays on the map.

Step 2: Creating the API Client
Next, you need to create your GoogleApiClient and initiate LocationServices in order to get your user's current location. As I mentioned before, if you have a set location that you want to display rather than focusing on the user, you can skip using LocationServices.
@Override
public void onViewCreated(View view, Bundle savedInstanceState) {
    super.onViewCreated(view, savedInstanceState);

    setHasOptionsMenu(true);

    mGoogleApiClient = new GoogleApiClient.Builder( getActivity() )
            .addConnectionCallbacks( this )
            .addOnConnectionFailedListener( this )
            .addApi( LocationServices.API )
            .build();

    initListeners();
}
The initListeners method binds the interfaces that you declared at the top of the class with the GoogleMap object associated with SupportMapFragment. This is what the implementation looks like:
private void initListeners() {
    getMap().setOnMarkerClickListener(this);
    getMap().setOnMapLongClickListener(this);
    getMap().setOnInfoWindowClickListener( this );
    getMap().setOnMapClickListener(this);
}
You may have noticed that the GoogleApiClient and listeners are created and bound from onViewCreated rather than the typical onCreate. This is because the GoogleMap object has not been initialized when onCreate is called, so we need to wait until the view is fully created before trying to call getMap in order to avoid a NullPointerException.
Step 3: Configuring the Map
Since you will set up the map camera after the user's location has been found through Play Services, we will use the Play Services lifecycle to drive initializing our map. You can connect the GoogleApiClient in onStart. When the client has connected, you can grab the user's most recently retrieved location and use that for aiming the map camera.
@Override
public void onStart() {
    super.onStart();
    mGoogleApiClient.connect();
}

@Override
public void onStop() {
    super.onStop();
    if( mGoogleApiClient != null && mGoogleApiClient.isConnected() ) {
        mGoogleApiClient.disconnect();
    }
}

@Override
public void onConnected(Bundle bundle) {
    mCurrentLocation = LocationServices
        .FusedLocationApi
        .getLastLocation( mGoogleApiClient );

    initCamera( mCurrentLocation );
}
In the initCamera method, you initialize the camera and some basic map properties. You start by creating a CameraPosition object through the CameraPosition.Builder, with a target set for the latitude and longitude of your user and a set zoom level.
Tilt and bearing are used here at their default values to illustrate that they are available options. Once you have a CameraPosition object, you can animate the map camera to that position using the CameraUpdateFactory.
private void initCamera( Location location ) {
    CameraPosition position = CameraPosition.builder()
            .target( new LatLng( location.getLatitude(),
                location.getLongitude() ) )
            .zoom( 16f )
            .bearing( 0.0f )
            .tilt( 0.0f )
            .build();

    getMap().animateCamera( CameraUpdateFactory
            .newCameraPosition( position ), null );

    getMap().setMapType( MAP_TYPES[curMapTypeIndex] );
    getMap().setTrafficEnabled( true );
    getMap().setMyLocationEnabled( true );
    getMap().getUiSettings().setZoomControlsEnabled( true );
}
At the end of this method, you'll notice the last four lines set some properties for the map. You set the map type, as described earlier in this tutorial, and enable live traffic flow overlays in the first two lines. setMyLocationEnabled adds a button to the top right corner of the MapFragment that automatically moves the camera to your user's location when pressed.
Finally calling setZoomControlsEnabled adds + and - buttons in the lower right corner, allowing the user to change the map zoom level without having to use gestures. There's a few more interesting things that you can set using UiSettings, such as adding a compass or disabling gestures, which you can find in the Android reference documentation.
4. Marking Locations
One of the most used map features involves indicating locations with markers. Since a latitude and longitude are needed for adding a marker, you need to use the OnMapClickListener to allow the user to pick a spot on the map to place a Marker object.
@Override
public void onMapClick(LatLng latLng) {

    MarkerOptions options = new MarkerOptions().position( latLng );
    options.title( getAddressFromLatLng( latLng ) );

    options.icon( BitmapDescriptorFactory.defaultMarker() );
    getMap().addMarker( options );
}
This method creates a generic red marker where the user has tapped. Additional options, such as setting a marker as draggable, can be set through the MarkerOptions object. You can find additional attributes in the official Android reference documentation. If you want to change the color of the marker, you can call BitmapDescriptorFactory.defaultMarker when adding an icon to the MarkerOptions. The defaultMarker method accepts a float value that defines the hue. The hue can either be set manually or as a predefined static value from BitmapDescriptorFactory. It should be noted that addMarker returns a Marker object, which can be stored for manually removing specific markers if needed.

If you want to avoid using the generic colored pins for your location markers, you can set a bitmap as the icon on the MarkerOptions object. To demonstrate this, you override the onMapLongClick method so that it uses the app icon from the resources folder as a Marker when your user long-presses the map.
@Override
public void onMapLongClick(LatLng latLng) {
    MarkerOptions options = new MarkerOptions().position( latLng );
    options.title( getAddressFromLatLng( latLng ) );

    options.icon( BitmapDescriptorFactory.fromBitmap(
            BitmapFactory.decodeResource( getResources(),
                    R.mipmap.ic_launcher ) ) );

    getMap().addMarker( options );
}
You've probably noticed that the getAddressFromLatLng method is being used in both click methods. This is a helper method that takes a LatLng and runs it through a Geocoder to get a street address. In the last two examples, we are using this method to display a street address when a marker is tapped.
private String getAddressFromLatLng( LatLng latLng ) {
    Geocoder geocoder = new Geocoder( getActivity() );

    String address = "";
    try {
        address = geocoder
          .getFromLocation( latLng.latitude, latLng.longitude, 1 )
          .get( 0 ).getAddressLine( 0 );
    } catch (IOException e ) {
    }

    return address;
}

@Override
public boolean onMarkerClick(Marker marker) {
    marker.showInfoWindow();
    return true;
}
5. Drawing on the Map
The GoogleMap object has a set of methods that make it easy to draw shapes and place images onto the map. To draw a simple circle, you only need to create a CircleOptions object, set a radius and center location, and define the stroke/fill colors and size.
Once you have a CircleOptions object, you can call addCircle to draw the defined circle on top of the map. Just like when placing markers, objects that are drawn on the map return an object of the drawn item type so it can be referenced later if needed.
private void drawCircle( LatLng location ) {
    CircleOptions options = new CircleOptions();
    options.center( location );
    //Radius in meters
    options.radius( 10 );
    options.fillColor( getResources()
        .getColor( R.color.fill_color ) );
    options.strokeColor( getResources()
        .getColor( R.color.stroke_color ) );
    options.strokeWidth( 10 );
    getMap().addCircle(options);
}

To draw a different closed-off shape, you can take multiple LatLng points and create a PolygonOptions object. As you can see below, PolygonOptions are created in a similar fashion to CircleOptions. Instead of using a center and radius method, you use add with a list of points. You can then call addPolygon to draw the shape. For this example, you simply draw a triangle onto the map.
private void drawPolygon( LatLng startingLocation ) {
    LatLng point2 = new LatLng( startingLocation.latitude + .001,
        startingLocation.longitude );
    LatLng point3 = new LatLng( startingLocation.latitude,
        startingLocation.longitude + .001 );

    PolygonOptions options = new PolygonOptions();
    options.add( startingLocation, point2, point3 );

    options.fillColor( getResources()
        .getColor( R.color.fill_color ) );
    options.strokeColor( getResources()
        .getColor( R.color.stroke_color ) );
    options.strokeWidth( 10 );

    getMap().addPolygon( options );
}

The final type of drawing you will learn about is adding an image as an overlay on the map. Overlays can be handy if you have a drawn map for an area that you want to display on top of a normal map type. This can be achieved by creating a GroundOverlayOptions with a set location, width and height, and the image that you want to use as a BitmapDescriptor.
In the following method, you draw the launcher icon for the app as an overlay on the map tiles.
private void drawOverlay( LatLng location, int width, int height ) {
    GroundOverlayOptions options = new GroundOverlayOptions();
    options.position( location, width, height );

    options.image( BitmapDescriptorFactory
            .fromBitmap( BitmapFactory
                .decodeResource( getResources(),
                    R.mipmap.ic_launcher ) ) );
    getMap().addGroundOverlay( options );
}
Conclusion
In this tutorial, you have learned how to create an API key and enable Google Maps for Android. You also learned about the MapFragment class and some of the basic features you can activate for a map.
You've learned how to place markers, listen for interactions with the map, and how to draw on the map to display additional information.
In the next tutorial of this series, you will learn how to overlay a View over the MapFragment, how to interact with indoor level maps, and how to show a street view to your users.

Comments