In this tutorial I am going to talk about Amazon’s Simple Email Service (SES) and go over a few ways you can utilise it. SES is an outbound email service, which means that it will allow you to send emails through it.
Why would you need an email service though? Well, with many hosting providers, sending a lot of emails (perhaps you have a great deal of customers using your web shop) can be an issue as hosts tend to have limitations. The standard alternative is to use Gmail to send emails, however, that has limitations as well. This is where SES comes in as it is designed for this exact purpose. SES makes sending emails more reliable, and, using a touch of magic, it also helps your emails avoid SPAM folders.
Pricing
When you sign up to Amazon, you can use their free tier for twelve months. The free tier will give you access to all of the Amazon services, but with fair limitations. For example, SES is limited to 2,000 messages per day if you opt for their EC2 hosting.
Otherwise the cost is $0.10 per thousand messages. They consider a single message as one message to a single recipient. So if you send one email to 1000 email addresses it would cost you 10 dollar cents.
Attaching files costs $0.12 per GB.
Options for Using SES
There are currently two ways to use SES:
- Simple Mail Transfer Protocol (commonly known as SMTP)
- The SDK API
They work differently; the SMTP allows you to link directly into the email server, whereas the API method allows you to send emails through the AWS SES Service. In this tutorial we'll cover use of the SMTP server via a WordPress plugin, then (for the more daring among you) we'll take a look at using the SDK API.
Quick SES Account Setup
Before we do anything, we'll need an account at SES. This will show you how to get your account ready and to send emails using the console.
Sign up for AWS
Before you can use SES you need to sign up for an Amazon Web Services account - a credit card is required, even for the free plan. To sign up you need to go to http://aws.amazon.com/ses, follow the on-screen instructions and complete a few identity confirmation steps.
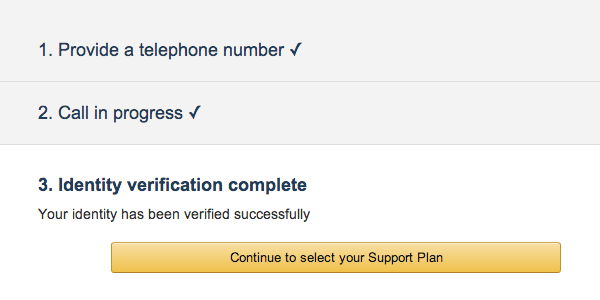
After signing up, you’ll have access to all of the Amazon services.
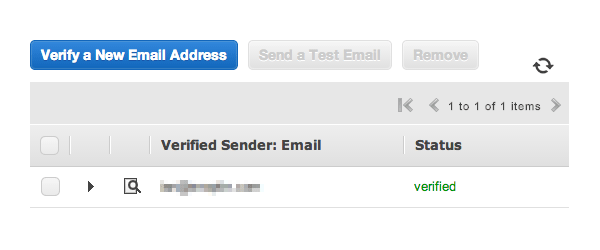
Verify Your Email Address
Regardless of whether you’re using the service in sandbox or production, you'll need to verify your “From” address. You can find more information about verifying email addresses in the help documentation.
Request Production Access
Once you have received an email you can then request production access. This will allow you to send emails to unverified email addresses. The number of emails you can send per day will be raised.
Note: It’s wise to play in sandbox mode before you send real emails.
Using the WordPress Plugin
Whilst Amazon do not currently have an official plugin, there are however third-party packages out there than can do the job. In this example we will use a plugin called Amazon SES DKIM Mailer. This is a brilliant plugin, compatible with different email services including Amazon SES. This means that if you decided not to stick with SES then you don’t have to change your site, just the connection details.
This plugin also comes with DomainKeys Identified Mail (DKIM) support. DKIM is about Reputation; by signing your emails with this you can prevent your emails from heading straight for the junk folder.
Installing
Taken from the plugin documentation on WordPress:
- Deactivate any existing mailer plugins to avoid conflicts.
- Unzip the plugin zip file inside the /wp-content/plugins/ directory (or install via the built-in WordPress plugin installer).
- Activate the plugin through the Plugins admin menu in WordPress.
- Click the plugin's Settings link next to its Deactivate link (still on the Plugins page), or click on the Settings > Mail Settings link, to go to the plugin's admin settings page. Customise the settings for your situation.
As we discussed before, to use Amazon SES in a real-world environment, you'll need to apply for Production Access. Without this, you will not be able to send emails to addresses that you do not control.
DKIM
To take advantage of DKIM you'll need to generate a public and private key and upload your private key to your server (we recommend naming it “.htkeyprivate” and placing it in the website root, and setting permissions to 400 or 440).
For Windows users there are many online key generators to help do this. On a linux server or Mac you can generate your own DKIM keys with a password of “change-me” using the following terminal command:
openssl genrsa -des3 -passout pass:change-me -out .htkeyprivate 1024 && openssl rsa -in .htkeyprivate -passin pass:change-me -pubout -out .htkeypublic
For DKIM, set a DNS TXT record something like:
HOST: your-selector._domainkey.example.com. TXT VALUE: v=DKIM1; k=rsa; g=*; s=email; h=sha1; t=s; p=your-public-key;
Use the built-in tests to check that your blog can properly send out (DKIM signed) e-mails.
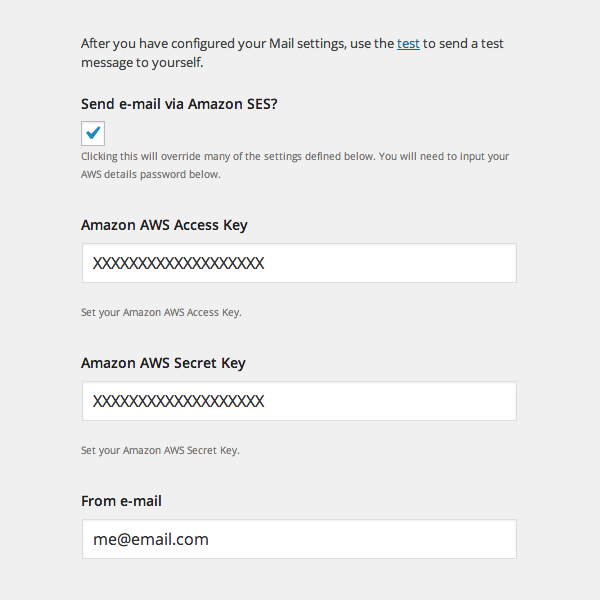
Configure
To ensure that the plugin is set to work with AWS SES there are a few settings that need be configured (see screenshot above).
- Tick the Send e-mail via Amazon SES?
- Add your AWS Access Key
- Add your AWS Secret Key
- Make sure that the “From” address is the one you validated earlier.
You can now use the plugin’s Send a Test Message. Once you have successfully received the email, you’re completely ready to use it.
AWS SDK PHP Tutorial
For more advanced users, in this section I am going to show you how to send an email using the SDK. This will be using PHP, however, there are SDK’s for other languages as well.
You will first have to install the SDK. For PHP there are a few ways to do this; Composer, Phar, Zip and PEAR. For this tutorial we are going to use Composer, which you will need to install first. Once you have Composer installed you should be able to access it from the Command Line Interface (CLI).
Create a file in the root of your project called “composer.json”, this is where you will put your configuration. Then add:
{
   "require": {
       "aws/aws-sdk-php": "2.*"
   }
}
If you have used the “composer.phar” then you can do php composer.phar install or on windows composer install. In your project you can then add require '/path/to/sdk/vendor/autoload.php';
Now that you have done this, you have access to all the product API’s that AWS provides. This means that you can now send emails. So what do you need?
Here is an example:
use Aws\Ses\SesClient;

require 'vendor/autoload.php';

$client = SesClient::factory(array(
    'key' => 'AWS_KEY',
	'secret' => 'AWS_SECRET_KEY',
	'region' => 'us-east-1'
));

$emailSentId = $client->sendEmail(array(
	// Source is required
	'Source' => '[email protected]',
	// Destination is required
	'Destination' => array(
		'ToAddresses' => array('[email protected]')
    ),
    // Message is required
    'Message' => array(
		// Subject is required
		'Subject' => array(
			// Data is required
			'Data' => 'SES Testing',
			'Charset' => 'UTF-8',
		),
		// Body is required
		'Body' => array(
			'Text' => array(
				// Data is required
				'Data' => 'My plain text email',
				'Charset' => 'UTF-8',
			),
			'Html' => array(
				// Data is required
				'Data' => '<b>My HTML Email</b>',
				'Charset' => 'UTF-8',
			),
		),
	),
    'ReplyToAddresses' => array( '[email protected]' ),
    'ReturnPath' => '[email protected]'
));
Let's run through that. First we added the use of the namespace so it makes the code look cleaner. Then we added the composer autoload.php file.
To be able to actually send a file we have to make a client. This is done by using the SES Client Factory. This can take many different settings but the bare minimum that we need is the key, secret and region. You can find the key and secret in IAM Management Console. The Region is the region that you have used for the SES.
With that you now have the client setup and ready to go. You can now use the client to call sendEmail. There are other methods that you can call and you can find more information about them in the help documentation.
The sendEmail method takes a single parameter which is an array. This array requires certain data within it; for example the source is required and must be an address that you have validated in your account to allow the sending of emails.
Once you have put in the emails that you want to use and added the content of your email you can now run the script and you shall have sent your first email!
Conclusion
Whichever implementation route you take, I hope this tutorial has piqued your interest and encouraged you to take a look at Amazon SES! If you come across any issues when using SES feel free to ask for advice in the comments.

Comments