Designing a React Native app from scratch is often a cumbersome process—especially the design part, because you have to plan for both Android and iOS devices. Not only that, but you also have to make sure your app looks nice on different screen sizes.
This is where templates come in handy. They handle the initial design for you so that your app looks nice with minimal design effort on your part. There are a handful of such templates at CodeCanyon, a marketplace for templates and plugins. There you can find different kinds of templates geared to the specific type of app that you want to create.
In this tutorial, we'll take a look at how to use the BeoStore template. As the name suggests, BeoStore is an e-commerce app template for React Native.
Getting the Template From the Marketplace
You can download the template by going to the BeoStore product page at CodeCanyon. It's a paid template, but it's worth the investment, because it has most of the features needed in an e-commerce app. All you need to do is configure the template and customize it to your liking. To get an idea what it offers out of the box, here are some of its highlight features:
- Full integration with WooCommerce: if you're running a WooCommerce website, the app can display the same products which you have on your existing website.
- Support for both iOS and Android: the app runs and looks good on both Android and iOS platforms.
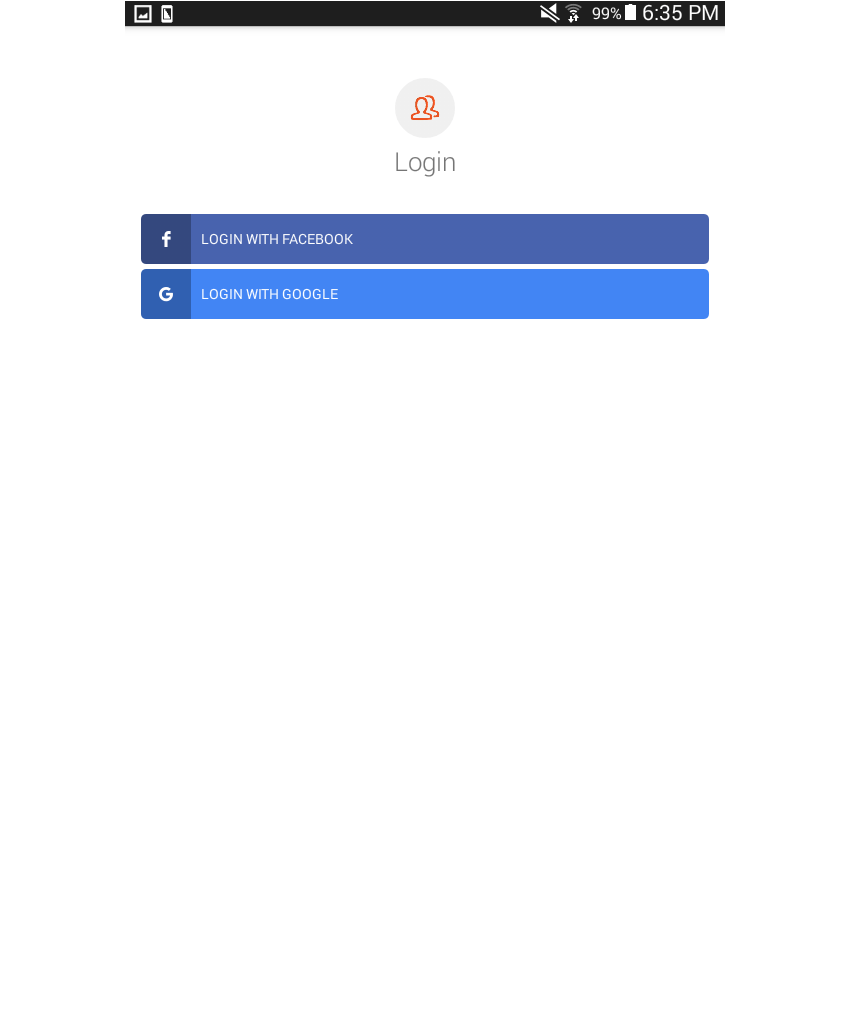
- Social logins: customers can log in using their Facebook or Google account.
- Easy customization: everything is broken down into components. This ensures that you can easily customize the template based on your brand.
- Push notifications: this automatically alerts your customers when there's an update to the status of their order. You can also send out push notifications for product promotions. Push notifications are implemented with Firebase.
- Multi-language support: out of the box you get English as the main language. Vietnamese exists as a second option, but you can also add your own language.
- Secure payment integration: payments are done with PayPal.
If you don't have an Envato account yet, you can sign up here. Once that's done, log in to your newly created account. Then you can go back to the BeoStore page and click on the Buy Now button.
Setting Up the Project
Once you've purchased the template, you'll get a download link to the template's archive file. Extract that and you'll get a CodeCanyon folder which contains MStore 2.2.
MStore 2.2 is the directory for the template project. Go ahead and open a new terminal window inside that directory and execute the following command:
npm install
This will install all the project dependencies. This may take a while depending on your download speed, because it has to download a lot of dependencies. Take a look at package.json if you want see the packages it needs to download.
Once that's done, there's an additional step if you want to build for iOS devices. Go to the iOS folder and execute the following:
pod install
Next, for Android, connect your mobile device to your computer and execute:
adb devices
This will list all the Android devices connected to your computer. If this is the first time you're connecting the device, you should get a prompt asking you if you want to allow the computer for USB debugging. Just tap on yes once you get that prompt.
Now you can run the app on your Android device:
react-native run-android
For iOS:
react-native run-ios
If you didn't encounter any errors, you should be greeted with the following page:
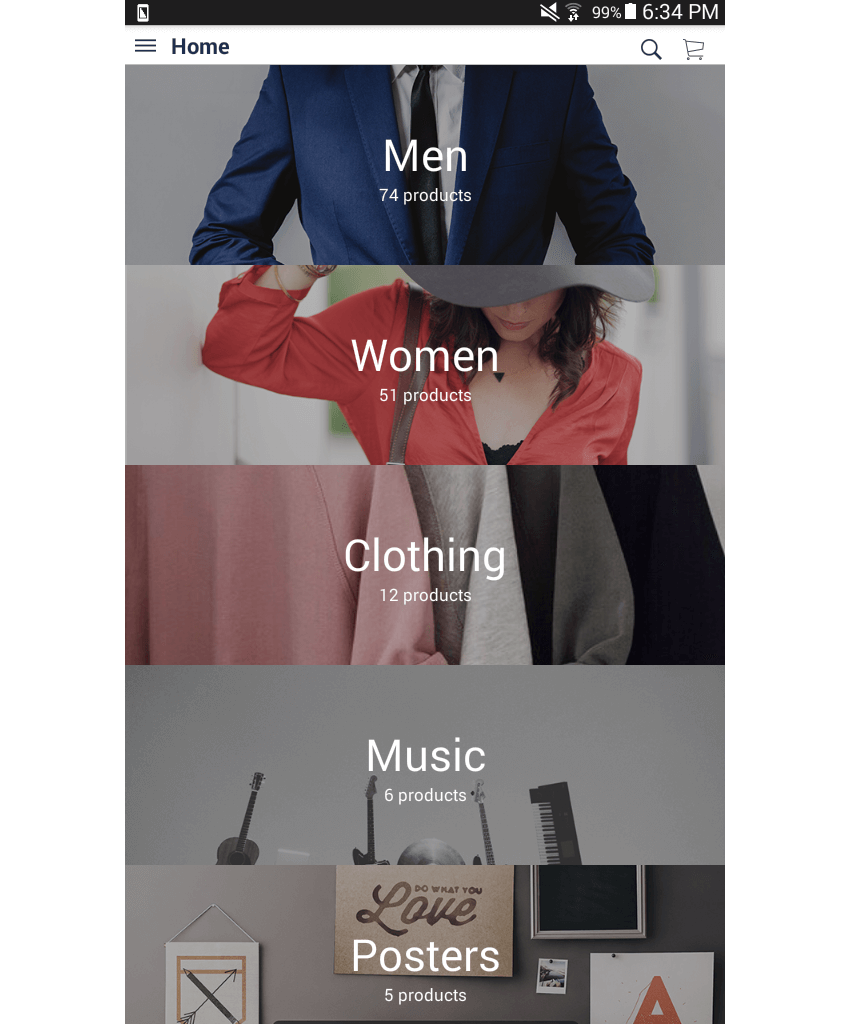
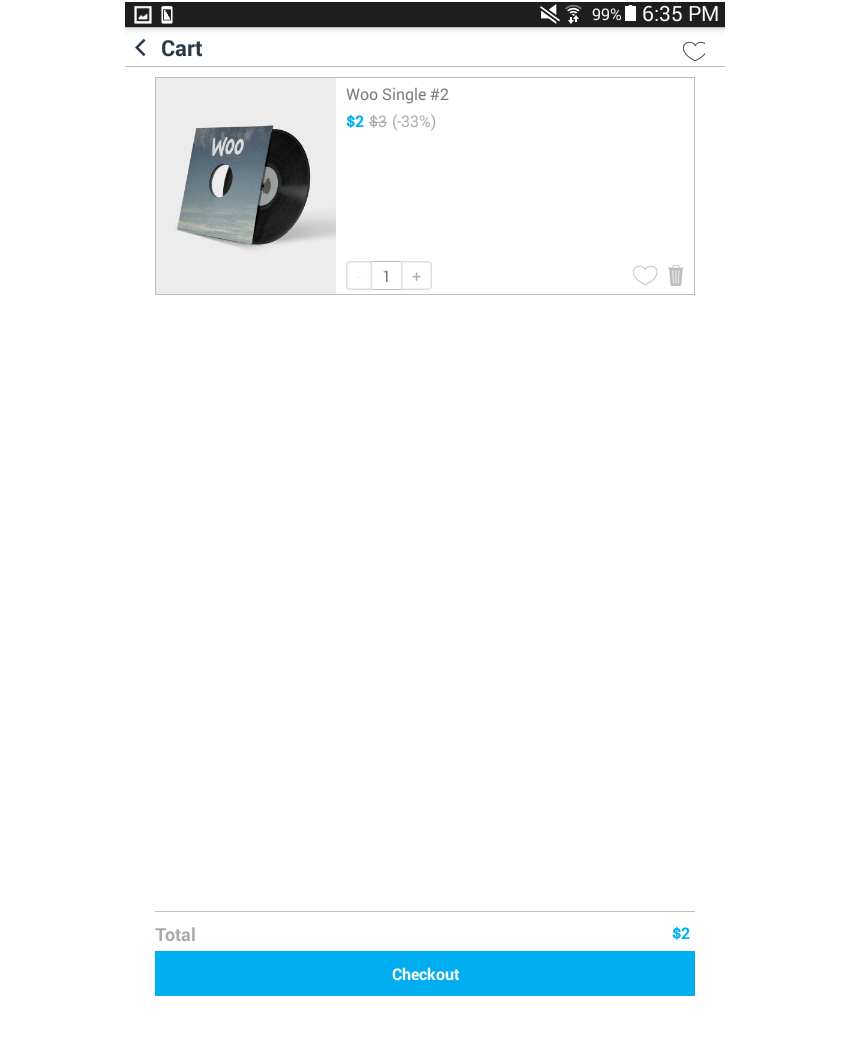
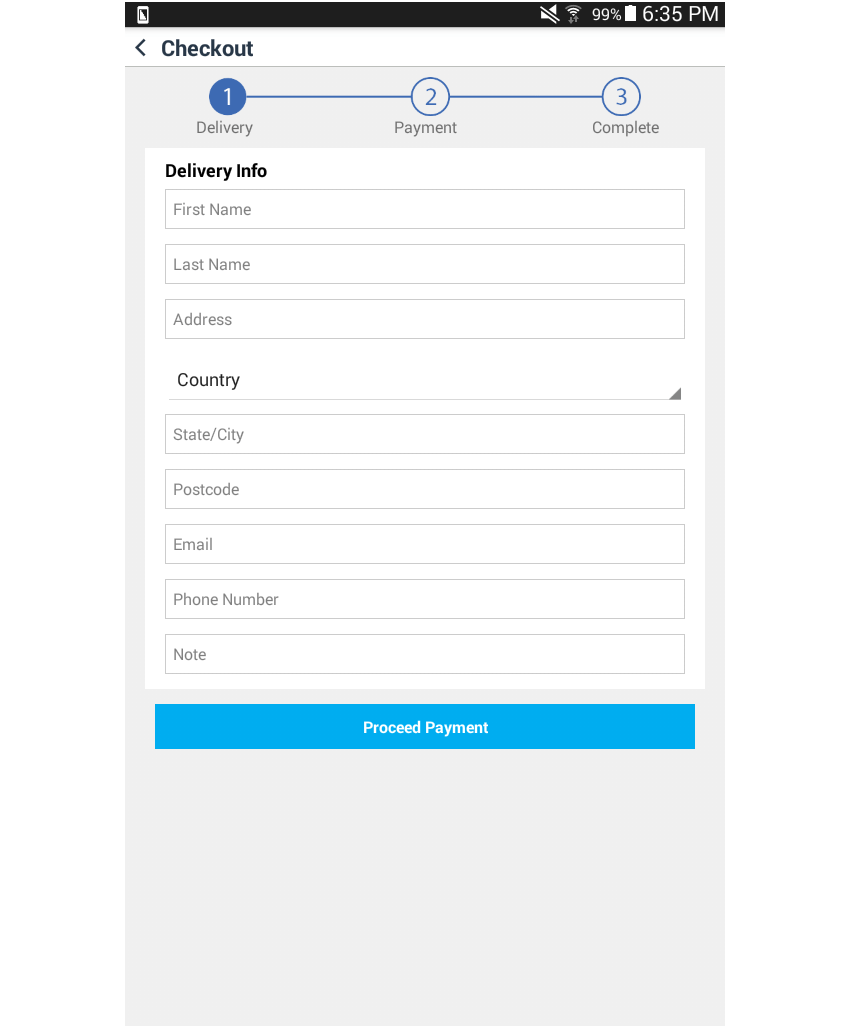
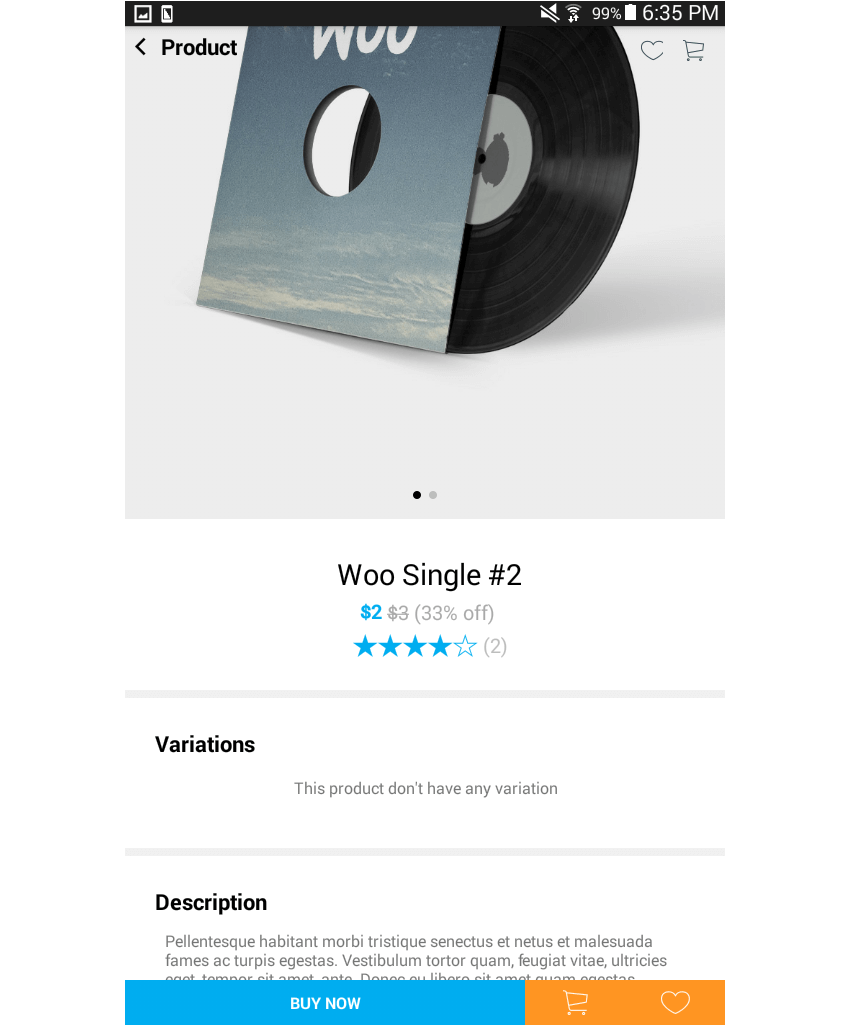
To give you an idea of the different pages available in the template, here are a few more screenshots:
Troubleshooting Project Setup
In this section, I've compiled a list of common project setup errors and their solutions.
Development Server Didn't Start
If the development server didn't automatically start when you executed react-native run-android or react-native run-ios, you can manually run it by executing:
react-native start
Watch Took Too Long to Load
If you get an error similar to the following:
Error building DependencyGraph:
 Error: Watcher took too long to load
Try running `watchman version` from your terminal
https://facebook.github.io/watchman/docs/troubleshooting.html
    at [object Object]._onTimeout (index.js:103:16)
    at Timer.listOnTimeout (timers.js:89:15)
This is because an existing Watchman instance is running. This is a component of the React Native development server. You can solve this error and shut down Watchman by executing the following commands:
sudo sysctl fs.inotify.max_user_instances=99999
sudo sysctl fs.inotify.max_user_watches=99999
sudo sysctl fs.inotify.max_queued_events=99999
watchman shutdown-server
Could Not Run ADB Reverse
If you're getting the following error:
error: closed Could not run adb reverse:
Command failed: /path/to/android-sdk-linux/sdk/platform-tools/adb -s
300494a80ea22200 reverse tcp:8081 tcp:8081
It means that your Android device is running on a version that's lower than 5.0 (Lollipop). This isn't actually an error. It simply means that your Android device doesn't support adb reverse, which is used to connect the development server to your device via USB debugging. If this isn't available, React Native falls back to debugging using Wi-Fi. You can find more information about it here: Running on Device.
Something else might be causing your build to fail. You can scroll up the terminal to see if there are any errors that happened before that.
Can't Find Variable _fbBatchedBridge
If you're getting the following error and the development server is running in Wi-Fi mode, this means that you haven't set up the IP of your computer in your Android device. (This usually only comes up with Android devices below version 5.0.)
ReferenceError: Can't find variable: _fbBatchedBridge (line 1 in the generated bundle)
You can execute the following to show the React Native developer options on your device:
adb shell input keyevent 82
Select Dev Settings from the menu that shows up. Under the Debugging section, tap on Debug server host & port for device. Enter the internal IP assigned by your home router along with the port in which the development server is running and press OK:
YOUR_INTERNAL_IP:8081
Go back to the home screen of the app and execute adb shell input keyevent 82 again. This time select Reload to reload the app.
Could Not Find Firebase, App Compat, or GMS Play Services
If you're getting "could not find" errors, this means you haven't installed the corresponding package using the Android SDK Manager.
Here are the packages that need to be installed:
- Android Support Repository
- Android Support Library
- Google Play Services
- Google Repository
Make sure to also update existing packages if there's an available update.
Other Problems
If your problem doesn't involve any of the above, you can try the following:
- Check out the documentation on troubleshooting.
- Check out the template product comments. You can search for the error you're getting. Try to generalize and shorten the error message though—don't just search for the entire error message. If you can't find the error, you can try asking your own question in the comments thread. The support team usually replies promptly.
- Try searching for the error on Google. Even if the results you find don't involve the use of the template, they will give you an idea on how to solve the problem.
- Search on StackOverflow or ask a new question. Make sure to include all the necessary details (e.g. error message, steps that you've taken). There's a good article about how to ask questions on StackOverflow.
Customizing the Template
A good place to start learning how to do things in the template is its documentation:
- Project Layout: shows where to find the different files in the template and what they're used for.
- Migrate WooCommerce: shows how you can hook up your existing WooCommerce website to the app. Hooking up the app to your WooCommerce means that it will be able to fetch all the product categories and products in your WooCommerce store.
- Migrate Services: shows how to configure the app's name, Firebase (for push notifications), and social login.
- Customize: shows how to customize the language and themes.
Be sure to check those out! I'm not going to repeat what was mentioned in the documentation. Instead, what we're going to do in this section is to actually customize the template so it looks the way we want.
Most of the project configuration settings are stored inside the app/Constants.js file. Here are a few examples of things which you can change from this file:
WooCommerce Integration: The URL of the WooCommerce store being used by the app. By default, this uses mstore.io.
WordPress: {
    Address: 'http://mstore.io/api',
},
WooCommerce: {
    url: 'http://mstore.io',
    consumerKey: '',
    consumerSecret: '',
    wp_api: true,
    version: 'wc/v1',
    timeout: 10, //request timeout
    RootCategoryId: 0,
    Product: {
        Display: {
            ProductThumbnails: {width: 180, height: 216,},
            CatalogImages: {width: 300, height: 360,},
            SingleProductImage: {width: 600, height: 720,}
        }
    },
},
Social logins: This is implemented using Auth0, an authentication platform. By default, the template only supports Google and Facebook sign-ins. But you should be able to add any service which Auth0 supports.
Auth0: {
    clientId: '',
    domain: '',
},
Icons: You can use any icon from Fontawesome, but you should prefix the name with ios-.
Icon: { //App's icons. Checkout http://fontawesome.io/icons/ for more icons.
    Menu: 'ios-menu',
    Home: 'ios-home',
    Back: 'ios-arrow-back',
    Forward: 'ios-arrow-forward',
    Config: 'ios-settings',
    More: 'ios-more',
    SignIn: 'ios-log-in',
    SignOut: 'ios-log-out',
    ShoppingCart: 'ios-cart',
    ShoppingCartEmpty: 'ios-cart-outline',
    Sort: 'ios-funnel',
    Filter: 'ios-funnel-outline',
    ShowItem: 'ios-arrow-dropright',
    HideItem: 'ios-arrow-dropup',
    ListMode: 'ios-list-box',
    GridMode: 'ios-grid',
    RatingFull: 'ios-star',
    RatingEmpty: 'ios-star-outline',
    Wishlist: 'ios-heart',
    WishlistEmpty: 'ios-heart-outline',
    Delete: 'ios-trash',
    AddToCart: 'ios-cart',
    MyOrder: 'ios-cube',
    News: 'ios-paper',
    Mail: 'ios-mail',
    RatioOff: 'ios-radio-button-off',
    RatioOn: 'ios-radio-button-on',
    Search: 'ios-search',
    Close: 'ios-close',
    HappyFace:'ios-happy-outline',
    SadFace: 'ios-sad-outline',
},
Theme: Colors for the different components that make up each page can also be updated. For example, if you want to change the header background color, you can update the value for TopBar:
Color: {
    TopBar: 'white',
    TopBarIcon: '#283747',
}
Images: The splash screen and other images can also be updated by specifying a new path to each of the following:
Image: {
    Logo: require('./images/logo.png'),
    SplashScreen: require('./images/splash_screen.png'),
    CategoryPlaceholder: require('./images/category_placehodler.png'),
    DefaultAvatar: require('./images/default_avatar.jpg'),
    AvatarBackground: require('./images/avatar_background.jpg'),
    CheckoutStep1: require('./images/line-1.png'),
    CheckoutStep2: require('./images/line-2.png'),
    CheckoutStep3: require('./images/line-3.png'),
    Stripe: require('./images/stripe.png'),
    PayPal: require('./images/PayPal.png'),
    CashOnDelivery: require('./images/cash_on_delivery.png'),
    PlaceHolder: require('./images/placeholderImage.png'),
},
These images are stored in the app/images directory, you can simply replace them if you don't want to keep the old images.
- You can also change the PayPal options from this file. Be sure to create your own PayPal Developer Account to obtain the
clientIDandsecretKey. Don't forget to updatesandBoxModetofalsewhen you deploy your app to production, because by default it uses sandbox mode so that no actual money will be spent on transactions.
PayPal: {
    clientID: '',
    secretKey: '',
    sandBoxMode: true, //change to false on production
},
- To customize individual pages, you need to go to the app/containers directory. This is where you will find the files for each page. For example, if you want to customize the home page, navigate to the home folder and open the index.js file. Once opened, you'll see that the page uses the
<ImageCard>component to render each product category. So if you want to add a general styling for the<ImageCard>component, you have to update the app/Components/ImageCard/index.js file. Otherwise, you can simply update the styles within the page itself:
this.styles = {
    container: {flex: 1},
    imageCard: {
        width: Constants.Dimension.ScreenWidth(1),
        height: 200,
    },
    mainCategoryText: {
        color: 'white', //change the color of the category text
        fontSize: 40 //make the category text bigger
    },
    numberOfProductsText: {
        color: 'white',
        fontSize: 15
    }
}
Conclusion
This tutorial is by no means a comprehensive guide on how to use the BeoStore template. But we have covered quite a lot of ground, especially on setup troubleshooting, which the official documentation lacks.
The next step is to hook this template up with your WooCommerce website or even repurpose it so it can be used for other types of apps.
Download the template now, or If you want to learn more about it, you can check out the documentation here. You can also find many more React Native app templates on CodeCanyon.

Comments