Since 1999, I've worked through my company, TheGameCreators, to make it easier for everyone to make games. Last year, I started developing with the Intel RealSense SDK and camera, which lets you capture 3D images in real time. (I actually won Intel's RealSense App Challenge with my Virtual 3D Video Maker!) It should come as no surprise that I've been looking at how RealSense can be used for game development, and in this tutorial I'll share one example: how to scan your (or your player's) head into your game.
Why Use RealSense?
Many 3D game characters will include a 2D texture image that is used as a "skin" for the 3D model, as with Kila, below:
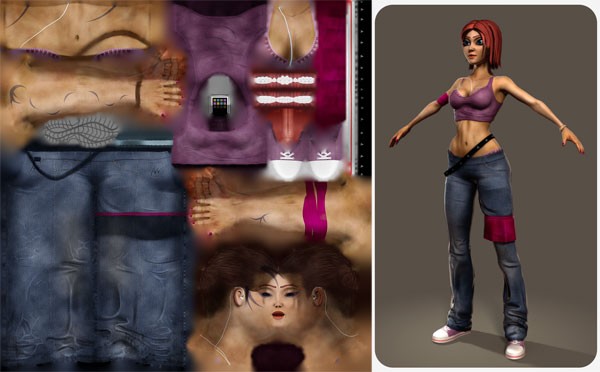
You can see a distinct face in the texture. If you want to change the character's face to match your own, it's tempting to try pasting a flat 2D photo onto the texture. However, this tends not to give great results, as demonstrated below:

That's fairly horrifying. The problem is, the face texture does not map onto the underlying "bone structure" of the model.
RealSense devices include an infra-red projector and camera, so they can capture a 3D projection map as well as a 2D photo of whatever they're pointed at. This means that you can adjust the 2D texture and the 3D model of a character to fit the new face.
In-Game Character Creator Workflow
Let's suppose we want to allow our players to take a few selfies with a RealSense camera, and then use them to create a 3D avatar for them.
Rather than attempting to scan in their entire body—and then creating a 3D model, texture, and set of animations from that—we'd be better off buying a 3D full-body model from a site like 3DOcean...

...then cutting off the head:
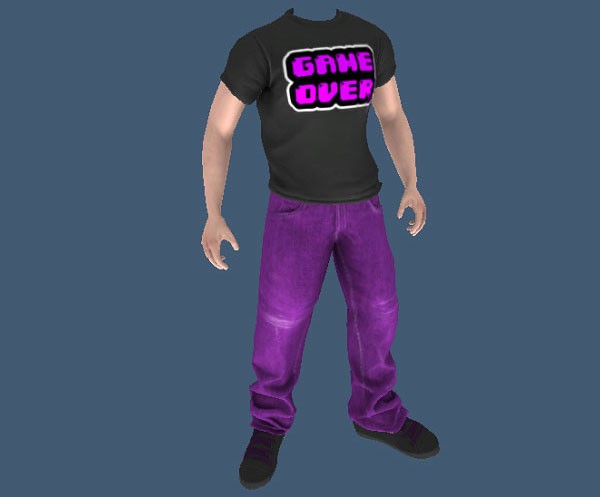
This makes it much easier to develop and test the game; the only thing that will vary between player avatars is the head.
Capturing the Player's Likeness
To capture the player's likeness, the in-game character creator must make several scans of their head, all precisely controlled so that the software can stitch it all back together again. (The Intel RealSense SDK has provided a sample that does just that; it can be run immediately from the pre-compiled binaries folder.)
Naturally you will want to create your own 3D scanner to suit your project, so what follows is just a breakdown of how the technique could work for you.
Method 1
You could take the mesh shots separately and then attempt to manually connect them in a make-shift art tool or small program. However, the problem with live 3D scanning is that there is a human at the other end of it, which means they fidget, shift in their seats, lean back, and move forward in subtle ways—and that’s not accounting for the subtle pitch, yaw and roll of the head itself. Given this tendency for the head to shift position and distance from the camera during the scanning session, this will only lead to frustration when trying to reassemble the shots.
Method 2
If your scans are accurate, you could blend the meshes against the first mesh you scanned and make adjustments if a vertex exists in the world space model data, or create a new world space vertex point if none previously existed. This will allow your head mesh to get more refined with the more samples the player provides. The downside to this technique is that getting your player's head to remain in a central position during scanning, and converting that 3D data to world coordinates, creates some challenges.
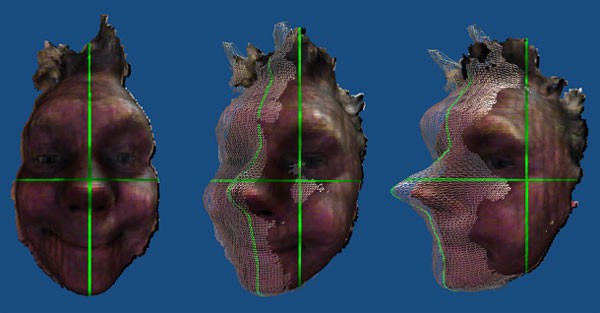
Method 3
The perfect technique is to detect signature markers within the scanned mesh, in order to get a "vertex fix". Think of this as charting your position on the ocean by looking at the stars; by using constellations, you can work out both your relative orientation and position. This is particularly useful when you produce a second mesh: you can apply the same marker detection algorithm, find the same pattern and return the relative orientation, position and scale shift from the first mesh. Once you have this offset, adding the second mesh to the first is a simple world transform calculation and then adding the extra vertex data to the original mesh. This process is repeated until there are no more meshes you wish to submit, and then you proceed to the final step.
Key Points
- I would not recommend implementing the techniques here until you have a good practical grasp of 3D geometry coding, as manipulating variable oriented vertex data can be tricky.
- If the technique you chose involved layering vertex data onto a single object, you will likely have a lot of surplus and overlapping vertices. These need to be removed and a new triangle list produced to seal the object.
- Storing the color data of your face scan in the diffuse component of the vertex data is a handy way to avoid the need for a texture, and offers other advantages when it comes to optimizing the final mesh
- Don’t forget to process the raw depth data to remove interference such as stray depth values that are not consistent with the surrounding depth pixel data. Fail to do this and all your work to create a good 3D head mesh will be in vain.
This is definitely The Hard Part, but it is not impossible; remember, there is a working demo in the SDK files you can use as a basis to get this running in your game's engine.
Using the Likeness in the Game
Let's suppose you have a decent 3D model (and corresponding texture) of the player's face:
We can now stick this on the character's body model:
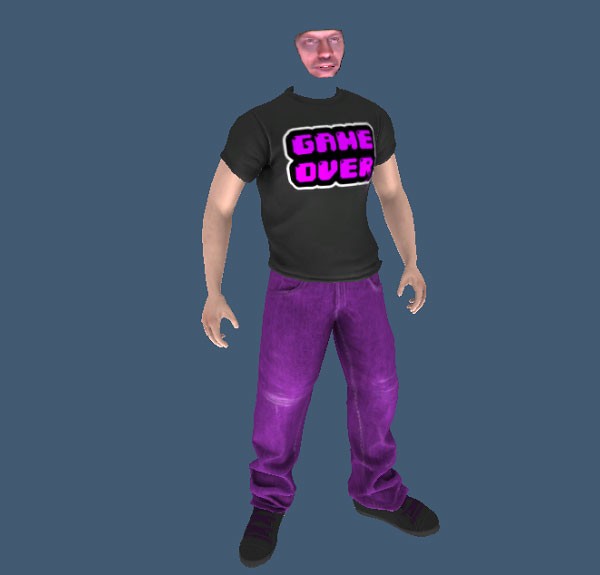
Granted, the result is still fairly horrifying—but we're not done yet. We can take a solution from one of the many pages of the game developers' bible, one we can convince ourselves is a rather nice feature as opposed to a rather sinister hack.
All we do is cover up the gaps with a wig and a hat:
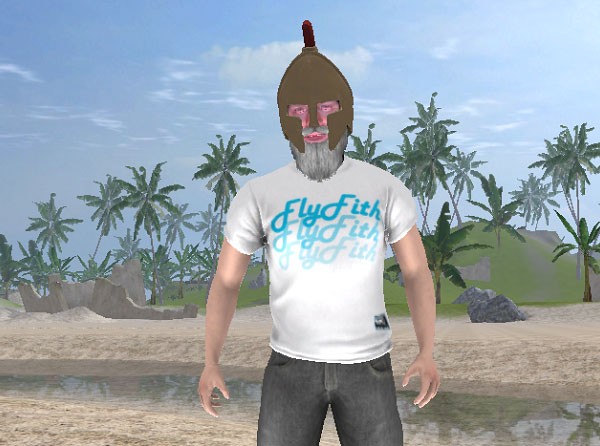
OK, granted, we could just stick the 3D face on the front of an already-modeled 3D head, but this is more fun. If Team Fortress 2 is anything to go by, players will enjoy having the option to customize their avatar's head and face with various accessories; we're killing two birds with one stone!
If you really want to avoid adding hats and wigs to the game character, you'll need to get the player to tie or gel back their hair before making the scans. The flatter their hair is, the better the scan will be. Loose hair interferes with the depth camera, and produces scatter reflections which do not scan well.
It's Easier to Do This at Dev Time
Although getting a player's likeness into the game at runtime is possible, it's a difficult place to start. If you've not attempted this before, I recommend first trying something technically simpler: getting your own likeness (or that of an actor) into the game.
This is easier for three reasons:
- There's much more margin for error and room for correction; if you control the whole process yourself, manually adjust any colors or meshes that don't come out right, and tweak the end result until it's just right. You aren't reliant on your code working perfectly, first time, for every face.
- You can use existing software (like Blender), rather than having to incorporate the whole process into your game's UI and code.
- Since it's your game, you're likely to have more patience than your players, so you can take (and retake) more pictures and wait longer for results than it's reasonable to ask a player to.
And based on this latter point, you can take the time to do a scan of your entire head, not just your face. In fact, we've already done this in a previous tutorial. Let's pick up where that left off and walk through how to get this model into Unity 5.
Getting Your Head Into Unity
After following the previous tutorial, you should have an FBX model of your head and a corresponding UV texture map.
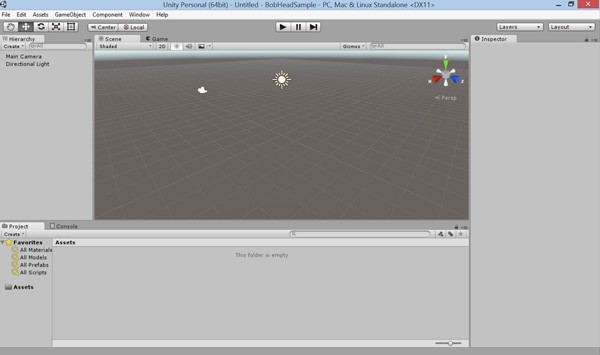
Open Unity, then create a new project and scene.
Click Assets > Import new asset. Select the FBX model you exported from Blender.
When Unity imports the object, it is possible (and even likely) that it won't import its texture, in which case you will see a gray-white version of your mesh:
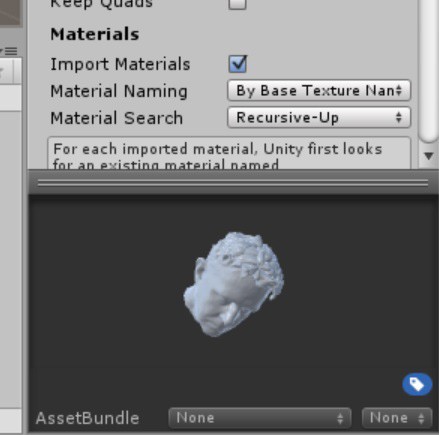
That's OK—we will add the texture map next.
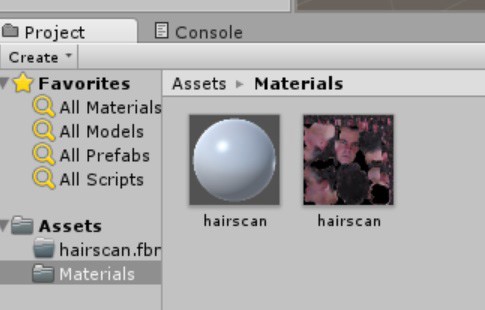
Select the Materials folder, then right-click and select Import Asset. Select the PNG file you saved in Blender, then import it.
You will now see the texture map alongside a gray-white material with the same name as your mesh. Right-click on the gray-white material (shaped like a ball) and delete it.
Go back to your Assets folder and right-click on the mesh you imported. Select Reimport:
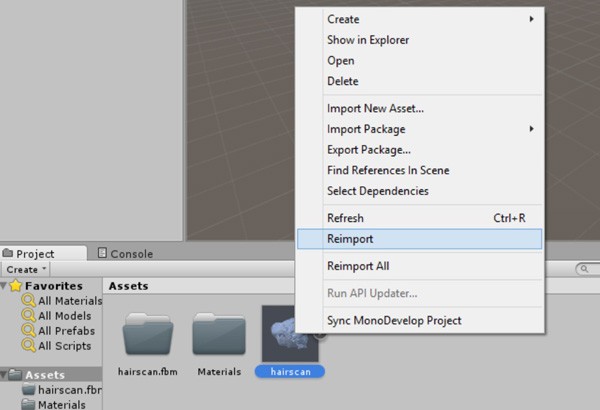
After it reimports, it will create the material properly and texture your mesh:
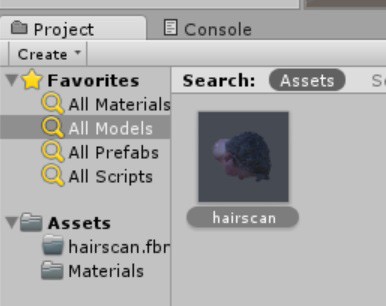
If the model looks pink in the object preview, simply select another object (like the camera), then select your mesh again to make it refresh.

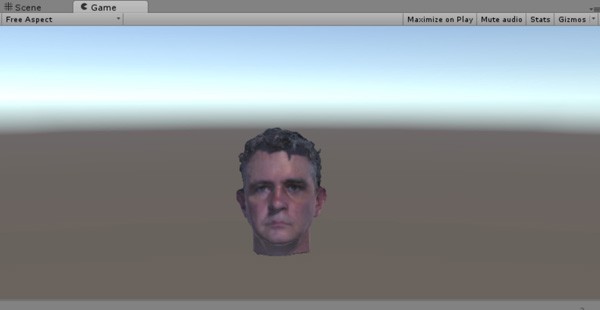
Now you are ready to get your head in the game. Drag your object to the scene. (You can make it bigger and mess around with the camera perspective to get it in view.)
When you hit Play, you should see your object rendered properly:
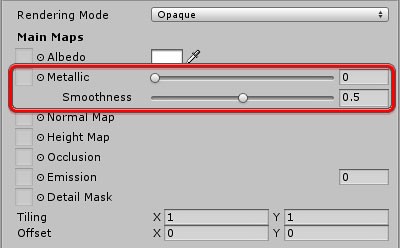
If you want to adjust the texture to make it more or less shiny or metallic, first go to the Materials folder and select the round shaped version of your texture. In the Inspector panel, you can adjust the Metallic and Smoothness sliders to get the right look:
Conclusion
It might seem an inordinate amount of work just to get the front parts of a head into a virtual scene, but the techniques you have learned in this article can be applied to scanning and stitching anything you want.
The ability to scan your very essence into the computer and continue your journey in a virtual landscape begins right here with the scanning of a single face. How will games and attitudes change as the in-game protagonists start to resemble real people you might meet in your own life? When you put a face to someone, they become real, and it will be interesting to see how games and players change as a result.
The Intel® Software Innovator program supports innovative independent developers who display an ability to create and demonstrate forward looking projects. Innovators take advantage of speakership and demo opportunities at industry events and developer gatherings.
Intel® Developer Zone offers tools and how-to information for cross-platform app development, platform and technology information, code samples, and peer expertise to help developers innovate and succeed. Join our communities for the Internet of Things, Android*, Intel® RealSense™ Technology, Modern Code, Game Dev and Windows* to download tools, access dev kits, share ideas with like-minded developers, and participate in hackathons, contests, roadshows, and local events.

Comments