In a previous tutorial, I demonstrated how to Read & Display PDF documents with the help of the VFR Reader open source library. In this followup lesson, I'll teach you how to generate your own custom PDF documents in-app as well.
Project Background
In iOS, there are a few different ways to draw content to the screen, or even off-screen. While it won't be necessary to have a deep understanding of these different methods for following this tutorial, it would be well worth your time to become familiar with Core Graphics, UIKit, and maybe even OpenGL ES. You can read more about these subjects from the Apple documentation.
We'll be using the UIKit framework in our tutorial today, which will give us some good flexibility without inferring too much overhead and complex development. Before reading further, it would be a VERY good idea to read at least the introductory section on "Generating PDF Content" from the official Apple documentation.
Basically, there are five steps to generating a PDF on iOS. The details may vary, but this process will be the same for all PDFs.
- Make a New PDF File in The Documents Directory - Here we'll set the name and location for our new PDF.
- Create a Graphics Context - This is the "environment" that we'll create our content within. It's kind of like the "book" where we'll put our PDF pages.
- Begin a New Page - This creates a blank page to draw on.
- Draw Our Content - Here, we'll put text, images, and other content onto our new page.
- Finish Our Document - We basically close and save our new PDF.
Project Setup
Adding Our Asset
We'll be drawing an image onto our PDF, so go ahead and add the "tree.jpg" image to our project. Since this tutorial is of intermediate difficulty, I'll skip the steps involved in adding images to an Xcode project, but if you're not sure what to do, there are plenty of good tutorials that you can find on Mobiletuts+ that will help you out.
Setting Up Our View
Before getting started on those easy steps, go ahead and open the PDFViewer project from part one.
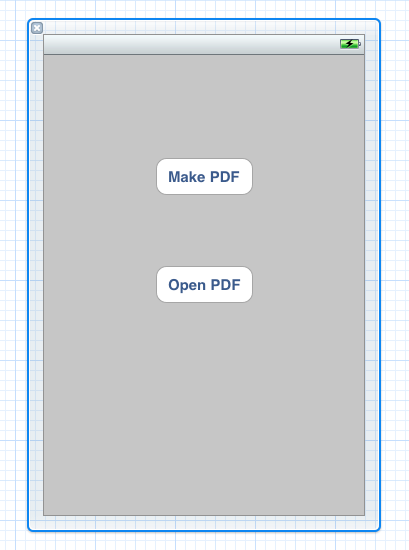
We'll add a new button on the "MTViewController.xib" page, and we'll label it "Make PDF".
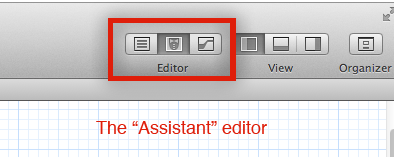
Next, we'll switch to our "Assistant" editor.
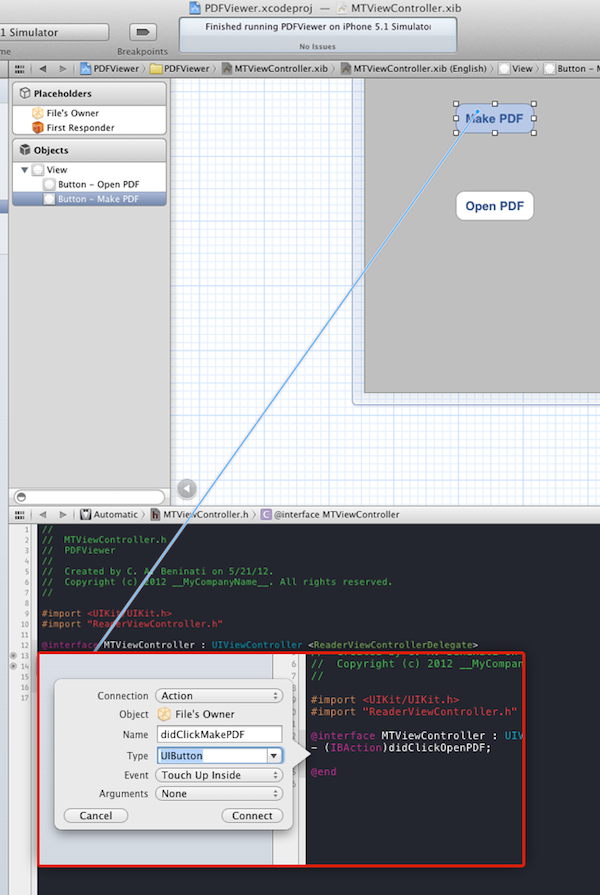
Now we can right-click (control-click) and drag an IBAction into our "MTViewController.h", and we'll name it "didClickMakePDF".
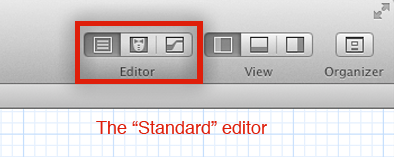
Now we can switch back to the the "Standard" editor, and open the "MTViewController.m" file, where we'll implement the rest of our PDF-creating methods.
Setting Our Attributes
In order to keep the content that we draw on our PDF page from drawing right on the edges, we'll set a 20 point padding. At the top of our "MTViewController.m" file, just underneath the "#import" statement, add the following:
#define kPadding 20
And finally, for setup, we'll create an ivar that we can use to set the size of our PDF pages. We'll add this to @interface MTViewController(), which we can find right below our new #define statement.
@interface MTViewController ()
{
    CGSize _pageSize;
}
And that's it for the set up. Now, on to the actual PDF methods.
Step 1: Make a New PDF File
Our first method will set up our PDF document and our PDF context.
Just beneath the empty "didClickMadePDF" method, which was created for us when we linked up our "Make PDF" button earlier, we'll make a new method called "setupPDFDocumentNamed:Width:Height". As the name suggests, we'll take three parameters- an NSString for our PDF name, and two floats. One float will be for the width and the other for the height of our PDF document.
- (void)setupPDFDocumentNamed:(NSString*)name Width:(float)width Height:(float)height {}
Inside this method, we'll set the document's page size with the ivar that we created in our interface.
_pageSize = CGSizeMake(width, height);
Next, we'll get the path to our App's documents directory, and append our filename to it to get the new PDF's full path name.
NSString *newPDFName = [NSString stringWithFormat:@"%@.pdf", name];

NSArray *paths = NSSearchPathForDirectoriesInDomains(NSLibraryDirectory, NSUserDomainMask, YES);
NSString *documentsDirectory = [paths objectAtIndex:0];

NSString *pdfPath = [documentsDirectory stringByAppendingPathComponent:newPDFName];
Step 2: Create a Graphics Context
To create our PDF graphics context, we'll add a single line to the end of the "setupPDF:" method that we just created.
UIGraphicsBeginPDFContextToFile(pdfPath, CGRectZero, nil);
Now, in the "didClickMakePDF" method, we can call "setupPDF:" to begin the PDF creation. I'm calling my document "NewPDF", and we'll be using that same name later. If you change your document name, be sure to remember to use the same name in step 6.
[self setupPDFDocumentNamed:@"NewPDF" Width:850 Height:1100];
Step 3: Begin a New Page
We're going to make a simple method called "beginPDFPage", using the document's page size that we set in our "setupPDF" method.
Just beneath the "setupPDF:" method, add the following:
- (void)beginPDFPage {
    UIGraphicsBeginPDFPageWithInfo(CGRectMake(0, 0, _pageSize.width, _pageSize.height), nil);
}
And just like that, we can create a new PDF page by calling [self beginPDFPage]; from our "didClickMakePDF" method, which will now look like this:
- (IBAction)didClickMakePDF {
    [self setupPDFDocumentNamed:@"NewPDF" Width:850 Height:1100];

    [self beginPDFPage];
}
Step 4: Draw Our Content
So far, our methods have been very simple. Now though, we're going to get into some larger and slightly more complex code.
Creating Our Drawing Methods
What we want to do now is draw our desired content to our new PDF page. The three elements that we'll be adding to our page are:
- text
- lines (or solid boxes)
- images
As you might imagine, we'll be creating new methods for each of these elements. Beneath our "beginPDFPage" method, add the following three methods:
- (CGRect)addText:(NSString*)text withFrame:(CGRect)frame fontSize:(float)fontSize { }

	-	(CGRect)addLineWithFrame:(CGRect)frame withColor:(UIColor*)color { }

- (CGRect)addImage:(UIImage*)image atPoint:(CGPoint)point { }
You'll notice that each of these methods is returning a CGRect- this is so that we know where the element's frame is in our document, so that we don't accidentally draw over something.
Let's start with text.
First, we want to set our font. We are accepting a float for our font size in our "addText:withFrame:fontSize:" call, so we can easily create our font with this line:
UIFont *font = [UIFont systemFontOfSize:fontSize];
Next, we'll calculate the size of our string to ensure that we don't spill text off the page. We'll also set our line to wrap after words (as opposed to wrapping between characters, etc.).
	CGSize stringSize = [text sizeWithFont:font constrainedToSize:CGSizeMake(_pageSize.width - 2*20-2*20, _pageSize.height - 2*20 - 2*20) lineBreakMode:UILineBreakModeWordWrap];

	float textWidth = frame.size.width;

    if (textWidth < stringSize.width)
        textWidth = stringSize.width;
    if (textWidth > _pageSize.width)
        textWidth = _pageSize.width - frame.origin.x;
Then, we'll build a frame for our text, and actually draw it to our page.
	CGRect renderingRect = CGRectMake(frame.origin.x, frame.origin.y, textWidth, stringSize.height);

    [text drawInRect:renderingRect
                  withFont:font
             lineBreakMode:UILineBreakModeWordWrap
                 alignment:UITextAlignmentLeft];

    frame = CGRectMake(frame.origin.x, frame.origin.y, textWidth, stringSize.height);
And finally, we'll return the CGRect "frame" variable to our calling method.
return frame;
And that's it for text. Now for lines...
In our "addLineWithFrame:withColor" method, we will pass a UIColor to set the color of our line. In our "addLine" method, we start by getting our current context, and then we'll set the color for drawing.
    CGContextRef currentContext = UIGraphicsGetCurrentContext();

    CGContextSetStrokeColorWithColor(currentContext, color.CGColor);
With our "addLine:" method, we are also accepting a CGRect with the coordinates for where to start our line (x,y), how long it will go (width), and how thick it will be (height). With these coordinates, we can set the line in place:
    // this is the thickness of the line
    CGContextSetLineWidth(currentContext, frame.size.height);

    CGPoint startPoint = frame.origin;
    CGPoint endPoint = CGPointMake(frame.origin.x + frame.size.width, frame.origin.y);
And now, we'll do the actual drawing to our context:
    CGContextBeginPath(currentContext);
    CGContextMoveToPoint(currentContext, startPoint.x, startPoint.y);
    CGContextAddLineToPoint(currentContext, endPoint.x, endPoint.y);

    CGContextClosePath(currentContext);
    CGContextDrawPath(currentContext, kCGPathFillStroke);
And, of course, we finish by returning our line's frame to the calling method:
return frame;
Let's add an image.
Our "addImage:" method is really simple- we just take our UIImage and draw it at the appropriate place on the page:
    CGRect imageFrame = CGRectMake(point.x, point.y, image.size.width, image.size.height);
    [image drawInRect:imageFrame];
And then we return our frame:
return imageFrame;
Notice that in each of these methods, we're just drawing to the PDF by either calling "drawInRect:", or by drawing directly to our context, as in "CGContextDrawPath". At that point, we're taking the elements that we created and we're actually putting them on the page.
Calling Our Drawing Methods
We'll call all of our drawing methods from the "didClickMakePDF" method, just beneath the call to "beginPDFPage". Remember that we're returning the CGRect frames for each of our elements, so we'll be saving those into variables as we call them, and then using them to position our next element.
Starting with the text:
    CGRect textRect = [self addText:@"This is some nice text here, don't you agree?"
                              withFrame:CGRectMake(kPadding, kPadding, 400, 200) fontSize:48.0f];
This will appear 20 points from the top and 20 points from the left, as indicated by the "kPadding" constant that we set in step 1. So far, so good.
Now, we'll take the frame "textRect" from our text element, and use it to position a blue line.
    CGRect blueLineRect = [self addLineWithFrame:CGRectMake(kPadding, textRect.origin.y + textRect.size.height + kPadding, _pageSize.width - kPadding*2, 4)
                                           withColor:[UIColor blueColor]];
Next, we'll create a UIImage using the "tree.jpg" image that we added back during set-up. Then, we'll draw that image to our PDF by calling our "addImage:" method. Notice that we are now using the "blueLineRect" frame to position our UIImage.
    UIImage *anImage = [UIImage imageNamed:@"tree.jpg"];
    CGRect imageRect = [self addImage:anImage
                               atPoint:CGPointMake((_pageSize.width/2)-(anImage.size.width/2), blueLineRect.origin.y + blueLineRect.size.height + kPadding)];
And finally, we can add another line to help set apart the image on our page. We'll make this line red and, since we aren't positioning any elements after it, we don't need to store its frame.
    [self addLineWithFrame:CGRectMake(kPadding, imageRect.origin.y + imageRect.size.height + kPadding, _pageSize.width - kPadding*2, 4)
                                          withColor:[UIColor redColor]];
Step 5: Finish Our Document
Now that our elements have been drawn to our PDF context, we need to end that context, which will close our PDF file. We'll create another method to do this called "finishPDF".
- (void)finishPDF {
    UIGraphicsEndPDFContext();
}
We will then call "[self finishPDF]" at the bottom of our "didClickMakePDF" method.
[self finishPDF];
Step 6: View Our Document
All we have to do to view our PDF document now, is go back to the "didClickOpenPDF" method that we created in the last tutorial, and modify it to open our new PDF- "NewPDF.pdf" in my case. To do this, we'll have to change most of the method, since we are now working with the documents directory to find the file and load it, so go ahead and replace the current "didClickOpenPDF" with the following:
- (IBAction)didClickOpenPDF {

    NSArray *paths = NSSearchPathForDirectoriesInDomains(NSLibraryDirectory, NSUserDomainMask, YES);
    NSString *documentsDirectory = [paths objectAtIndex:0];
    NSString *pdfPath = [documentsDirectory stringByAppendingPathComponent:@"NewPDF.pdf"];

    if([[NSFileManager defaultManager] fileExistsAtPath:pdfPath]) {

        ReaderDocument *document = [ReaderDocument withDocumentFilePath:pdfPath password:nil];

        if (document != nil)
        {
            ReaderViewController *readerViewController = [[ReaderViewController alloc] initWithReaderDocument:document];
            readerViewController.delegate = self;

            readerViewController.modalTransitionStyle = UIModalTransitionStyleCrossDissolve;
            readerViewController.modalPresentationStyle = UIModalPresentationFullScreen;

            [self presentModalViewController:readerViewController animated:YES];
        }
    }
}
Now, when you run your App, tap once on the "Make PDF" button, and then tap on the "Open PDF" button, and you should see your new PDF. Then, you can email it, print it, or close it.
Conclusion
There are many more things that can be drawn into the graphics context, but with a little bit of tinkering and the Apple docs ready-at-hand, it's short work to make fantastic PDFs for your specific needs.

Comments