Welcome back to the OpenCart developer series. In our previous article on module development, we built our first "Hello World Module" by using MVC (Model-View-Controller) with respect to the dashboard.
In this article, we're going to build a module for the front-end. I'd recommend that you review my previous article if you haven't read it yet. Many developers are afraid of developing modules for OpenCart, as they first search for available modules in the market, but it's actually very easy to develop functionality on your own.
As you know, we have built a simple module that takes one input from the back-end and saves it to the database.
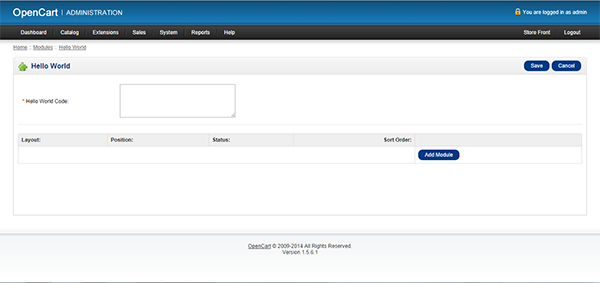
Module Configuration
- Put some dummy content in the "Hello World Code" field.
- Set the layout, position, status and its sorting order as per the following screenshot.

To understand what the layouts are, you can read my article on OpenCart configuration.
Creating a Store Controller
- Navigate to
catalog/controller/moduleand create a new PHP file. - Name the file
helloworld.php. - Open the file in your favorite IDE and use the OpenCart Class Naming Convention, i.e.
class ControllerModuleHelloworld extends Controller {}. - Make an OpenCart default function inside the class, i.e.
public function index() {}. (For reference, please read this article.) - Inside the default
index()function, write the code given below:
$this->language->load('module/helloworld'); // loads the language file of helloworld

$this->data['heading_title'] = $this->language->get('heading_title'); // set the heading_title of the module

$this->data['helloworld_value'] = html_entity_decode($this->config->get('helloworld_text_field')); // gets the saved value of helloworld text field and parses it to a variable to use this inside our module view

$this->template = $this->config->get('config_template') . '/template/module/helloworld.tpl'; // Template path of store helloworld module


$this->render(); // renders the output
And we are done creating our controller.
Note that it's important to read the comments after every line of code above to understand what work is being done.
Creating a Store View
- Navigate to your store default template folder; in my case it is:
catalog/view/theme/default/template/module. - Create a new template file.
- Name it
helloworld.tpl. - You can write your own HTML to display the content of your module. The way I wrote the HTML is as follows:
<div class="box">
  <div class="box-heading"><?php echo $heading_title; ?></div>
  <div class="box-content" style="text-align: center;"><?php echo $helloworld_value; ?></div>
</div>
Creating a Language File
- Create a
helloworld.phplanguage file inside yourcatalog/language/(language)/module. - Add some language data inside your language file, in my case:
<?php
// Heading
$_['heading_title']  = 'Hello World Title';
?>
If your site is multilingual, place the language file in all of your languages.
What Did We Just Do?
Basically, our module works simply because it takes a single input from the dashboard and displays it on the store's front-end. In this regard, we've added some dummy data from the back-end Hello World Module and set the layouts and positioning where the module should be displayed. In our case, those layouts are Contact and Account and their positions are at Column Left and Column Right, respectively.
Testing Our Work
The work for writing a module for our store front-end is done. But never assume that it works without actually testing the code.
- You can either go to the Contact Us page from the bottom of the store's front-end or by hitting the
http://localhost/OpencartStore/index.php?route=information/contactURL. - There our module should be in its defined position as per the following screenshot.
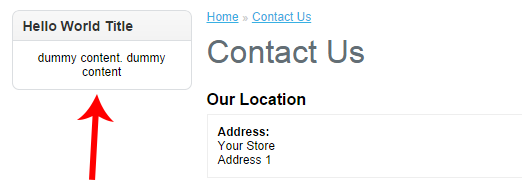
Wonderful! The module appears in the right position and in the right layout. This means that all of your work is fine. You can also check whether your module appears in the Accounts Layout or not. If you've followed the right steps, then it should also appear there.
Conclusion
At this point, you've done the most significant work in the OpenCart development series. As I mentioned in the introduction of this article, developing modules for OpenCart is easy enough for beginners to pick it up and get started.
In upcoming tutorials, we'll be focusing on API Integration with OpenCart and some theme development. I hope that you are enjoying our articles—a lot of fun stuff is coming on the way!
If you like my articles, do provide your feedback using the feed below

Comments