Introduction
Notifications are a very useful way to interact with your application's users and, with Android Wear, we now also have wearable devices running Android. It's therefore a good idea to learn how to take advantage of these new features by adding appropriate actions to notifications or by creating actions that are only visible on wearable devices.
In this tutorial, I'm going to show you the modern implementation of notifications, as shown during this year's Google I/O. We'll use the new support package and extend its capabilities by adding actions that are only visible on smartwatches, the only wearable devices available with Android Wear at the time of writing.
1. Prerequisites
For this project, you can use either Android Studio or the Android Developer Tools. If you're using Android Studio, then make sure to add the following line to your build.gradle file.
compile "com.android.support:support-v4:20.0.+"
2. Setting Up the Project
Launch your IDE and create a new Android project, or open a project you've created previously. For this tutorial, I'm going to create a new project and name it ImprovedNotifications. Don't forget to use a unique package name.
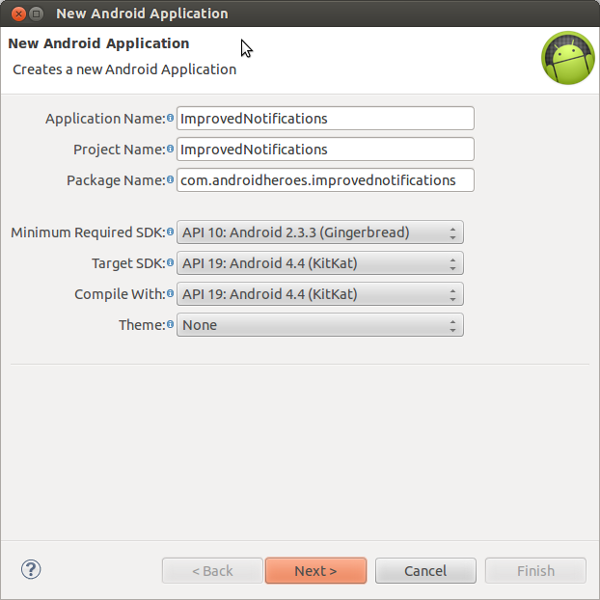
While setting up the project, make sure that you select the Empty Activity option in the Create Activity step.
Once the project
is created, create a new Activity, ActivatedActivity. This Activity is going to be called from a notification on your
mobile or wearable device.
Before we move on, we need to update the strings.xml file by adding the strings that we're going to be using a bit later in this tutorial.
<?xml version="1.0" encoding="utf-8"?>
<resources>
    <string name="app_name">ImprovedNotifications</string>
    <string name="title_activity_activated">ActivatedActivity</string>

    <string name="message">Hi"!" I"'"m the activated activity</string>
    <string name="button_text">Try me for a new notification</string>

    <string name="notification_title">Hey Mom"!" I"'""m a title</string>
    <string name="notification_text">Look at me"!" I"'"m a sexy notification content</string>
    <string name="first_action">Let"'"s see the author"'"s twitter profile</string>

    <string name="wearable_action">I only appear here</string>
</resources>
3. Creating the Layout
The next step is to create a layout for the MainActivity and the ActivatedActivity classes. The layout for the MainActivity class is shown below.
<RelativeLayout xmlns:android="http://schemas.android.com/apk/res/android"
    xmlns:tools="http://schemas.android.com/tools"
    android:layout_width="match_parent"
    android:layout_height="match_parent"
    tools:context="${relativePackage}.${activityClass}" >
    <Button
        android:id="@+id/notification_button"
        android:layout_height="wrap_content"
        android:layout_width="wrap_content"
        android:layout_centerInParent="true"
        android:padding="10dp"
        android:text="@string/button_text"/>
</RelativeLayout>
And this is the layout for the ActivatedActivity class.
<RelativeLayout xmlns:android="http://schemas.android.com/apk/res/android"
    xmlns:tools="http://schemas.android.com/tools"
    android:layout_width="match_parent"
    android:layout_height="match_parent"
    tools:context="${relativePackage}.${activityClass}" >
    <TextView
        android:layout_width="wrap_content"
        android:layout_height="wrap_content"
        android:padding="10dp"
        android:layout_centerInParent="true"
        android:text="@string/message"/>
</RelativeLayout>
4. Creating a Notification
We create a notification in the MainActivity class. In the code snippet below, you can see what steps are involved in creating a notification. I've commented the code block to help you understand the various steps, but let's walk through the snippet step by step.
package com.androiheroes.improvednotifications;

import android.app.Activity;
import android.app.Notification;
import android.app.PendingIntent;
import android.content.Intent;
import android.net.Uri;
import android.os.Bundle;
import android.support.v4.app.NotificationCompat;
import android.support.v4.app.NotificationManagerCompat;
import android.view.View;
import android.widget.Button;

public class MainActivity extends Activity {

    /* Widgets you are going to use */
  private Button button;

  /*
   * This is the notification id
   * You can use it to dismiss the notification calling the .cancel() method on the notification_manager object
   */
  private int notification_id = 1;
  private final String NOTIFICATION_ID = "notification_id";

  /* These are the classes you use to start the notification */
  private NotificationCompat.Builder notification_builder;
  private NotificationManagerCompat notification_manager;

  @Override
  protected void onCreate(Bundle savedInstanceState) {
    super.onCreate(savedInstanceState);
    setContentView(R.layout.activity_main);

    /*
     * Step 1
     * Instantiation of the button you use to start the notification
     */
    button = (Button) findViewById(R.id.notification_button);

    /*
     * Step 2
     * Create the intent you are going to launch when your notification is pressed
     * and let the PendingIntent handle it
     */
    Intent open_activity_intent = new Intent(this, ActivatedActivity.class);
    open_activity_intent.putExtra(NOTIFICATION_ID, notification_id);
    PendingIntent pending_intent = PendingIntent.getActivity(this, 0, open_activity_intent, PendingIntent.FLAG_CANCEL_CURRENT);

    /*
     * Step 3
     * Here you create the notification and start adding all the attributes you are going to use
     */
    notification_builder = new NotificationCompat.Builder(this)
      .setSmallIcon(R.drawable.ic_launcher)
      .setContentTitle(getString(R.string.notification_title))
      .setContentText(getString(R.string.notification_text))
      /*
       * This method specifies that our notification must have all the default characteristics of a notification
       * like sound and vibration
       */
      .setDefaults(Notification.DEFAULT_ALL)
      /* This method is going to dismiss the notification once it is pressed */
      .setAutoCancel(true)
      .setContentIntent(pending_intent);

    /*
     * Step 4
     * Here we instantiate the Notification Manager object to start/stop the notifications
     */
    notification_manager = NotificationManagerCompat.from(this);
  }

  @Override
  protected void onStart() {
    super.onStart();

    /*
     * Step 5
     * The notification is going to appear when you press the button on the screen
     */
    button.setOnClickListener(new View.OnClickListener() {
      @Override
      public void onClick(View v) {
        notification_manager.notify(notification_id, notification_builder.build());
      }
    });
  }
}
Step 1
We first instantiate the button that we'll use to launch the notification. You could also create the notification directly in the onCreate method, but by using a button you have more control over the exact timing of the notification.
Step 2
In the second step, we instantiate an Intent object with the task to perform when the notification is tapped. We pass the object to a PendingIntent instance to handle it later when it's called.
Step 3
Using the Android Support Library, we create the notification using the Builder class of the NotificationCompat object and set its attributes.
Step 4
In this step, we instantiate a NotificationManagerCompat instance to start and/or stop the notification anytime we want. This will make testing much easier.
Step 5
When the button is tapped, the notification is fired using the notify method.
Don't forget to use the classes from the Android Support Library. This way you can be sure your notification is going to look fine on older versions of Android.
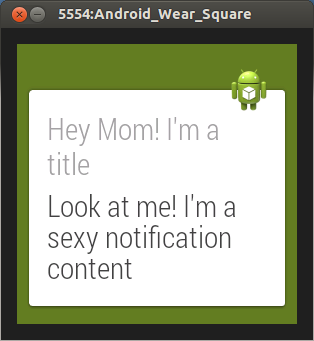
You can now run the app, tap the button, and see the notification appear at the top of the screen. If you tap the notification, it should take you to the ActivatedActivity activity. With the notification set up and working, it's time to start adding actions to it.
5. Adding Actions to the Notification
You can add extra actions to the notification by invoking the addAction method on the notification_builder object. For this to work, you need to pass a PendingIntent instance with the task you like to perform.
In the following code snippet, I show you the steps you have to implement to create an action with a custom task. In this example, I'm going to take you to my Twitter profile in the Twitter app. This means I need a URI instance pointing to my Twitter profile, add this to the Intent, and let the PendingIntent handle it when the action is tapped. Insert this code block before the
instantiation of the notification_builder object.
 /* The action in the handheld notification must perform some task
  * In this case the author's twitter profile is going to be opened, in the twitter app, when it is clicked
  * but you can change it with your profile if you want ;)
  */
  Intent open_twitter_profile = new Intent(Intent.ACTION_VIEW);
  Uri twitter_profile_location = Uri.parse("twitter://user?screen_name=@kerpie");
  open_twitter_profile.setData(twitter_profile_location);
  PendingIntent twitter_intent = PendingIntent.getActivity(this, 0, open_twitter_profile, 0);
To add the action, invoke the addAction method on the notification_builder object and pass in the open_twitter_profile object we just created.
/*
 * Here you create the notification and start adding all the attributes
 * you are going to use
 */

notification_builder = new NotificationCompat.Builder(this)
	.setSmallIcon(R.drawable.ic_launcher)
	.setContentTitle(getString(R.string.notification_title))
	.setContentText(getString(R.string.notification_text))
	/*
	 * This method specifies that your notification must have all the default characteristics of a notification
	 * like sound and vibration
	 */
	.setDefaults(Notification.DEFAULT_ALL)
	/* This method is going to dismiss the notification once it is pressed */
	.setAutoCancel(true)
	.setContentIntent(pending_intent)
	/*
	 * Here you can add actions to your handheld device
	 * just take care of the quantity of actions you add
	 * in this case, like in many others, less is more
	 */
	.addAction(android.R.drawable.ic_dialog_info, getString(R.string.first_action), twitter_intent);
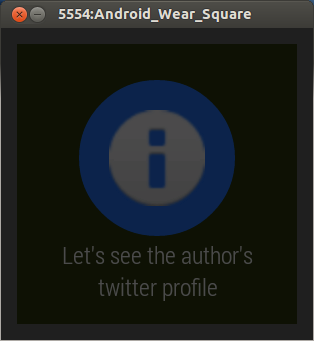
Run the
application, tap the button to trigger the notification, and you should see the notification
appear along with the action we just created.
While you can add more actions to a notification using the addAction method, make sure the user isn't overwhelmed by the number of actions they can choose from.
6. Supporting Android Wear
So far, we have used the classes from the Android Support Library to make sure the notifications are also shown on smartwatches running Android Wear. You can run the application on a physical smartwatch or you can try it on the emulator from the Android Virtual Device Manager. Either way, you need to sync your device with the smartwatch.
Before syncing your device with the smartwatch emulator, you need to install the Android Wear app, which is available on Google Play. After you've unplugged every other Android device connected to your computer, execute the following command from the command line.
adb devices
This command lists the devices connected to your development machine. You should see two of them, the smartwatch emulator and your device. Then run the following command from the command line to enable port forwarding.
adb -d forward
tcp:5601 tcp:5601
You can now connect your device with the emulator and turn on the notifications using the Android Wear app. Run the app again and trigger the notification. The notification should look similar to the one shown below.
7. Adding Wearable-Only Actions
It is possible to add actions that are only visible on wearables. This is accomplished by invoking the addAction method of the WearableExtender class. The result is that any actions added through the NotificationCompat.Builder class are ignored.
As we did before, to trigger the action, we make use of an Intent and a PendingIntent instance, but we'll create the action displayed on the wearable device using the Builder class of a special Action class, which is part of the NotificationCompat class as shown below.
/* Here we instantiate the Intent we want to use when the action in the smartwatch is pressed */
Intent wearable_intent = new Intent(this, ActivatedActivity.class);
PendingIntent wearable_pending_intent = PendingIntent.getActivity(this, 0, wearable_intent, PendingIntent.FLAG_UPDATE_CURRENT);

/* Now we have an intent for the wearable created we have to create a wearable action using it*/
NotificationCompat.Action wearable_action = new NotificationCompat.Action.Builder(
		android.R.drawable.ic_dialog_email,
		getString(R.string.wearable_action),
		wearable_pending_intent).build();
We then add
this action to the notification_builder object using the extend method as shown below.
/*
 * Here you create the notification and start adding all the attributes
 * you are going to use
 */

notification_builder = new NotificationCompat.Builder(this)
    .setSmallIcon(R.drawable.ic_launcher)
    .setContentTitle(getString(R.string.notification_title))
	.setContentText(getString(R.string.notification_text))
	/*
	 * This method specifies that your notification must have all the default characteristics of a notification
	 * like sound and vibration
	 */
	.setDefaults(Notification.DEFAULT_ALL)
	/* This method is going to dismiss the notification once it is pressed */
	.setAutoCancel(true)
	.setContentIntent(pending_intent)
	/*
	 * Here you can add actions to your handheld device
	 * just take care of the quantity of actions you add
	 * in this case, like in many others, less is more
	 */
	.addAction(android.R.drawable.ic_dialog_info, getString(R.string.first_action), twitter_intent)
    /*
     * Here you add a wearable-only action
     * This action won't be visible in the handheld device
     */
	.extend(new WearableExtender().addAction(wearable_action));
Run the app and tap the button to display the notification on your device. It should be different than the notification that pops up on the wearable emulator.
Conclusion
Smartwatches are here to stay, for a while at least, and it's therefore important to take advantage of this new way of communicating with your application's users. I hope you've found the tutorial helpful and don't forget to share it if you liked it.

Comments