This article will walk you through cloud hosting for your PHP application with Pagoda Box. It'll detail how to handle PHP dependencies, get your MySQL databases up and running (and debug locally), and customise various aspects of PHP with ease.
Introduction
As a developer who has been playing around with PHP since the age of 11, it's hard to remember many things that have absolutely changed the way I develop. In 2007, I picked up CodeIgniter, which made me rethink how I structure my code and use OOP to get things done. In 2010, I began working with Git and Git Flow for teamwork and branching, but, recently, the biggest thing to change my development workflow has been one "Platform as a Service," called Pagoda Box.
You might be a rockstar developer who knows how to set up a LAMP stack, but how much of your potential development time do you waste setting it up, optimizing it, securing things, locking it down, scaling resources and monitoring traffic.
Every day, I spot a developer battling to defend his server from some group of hackers or script kiddies, getting port flooded, having trouble getting some random security patch working, struggling to migrate to larger more powerful servers, getting mad trying to set up Capistrano, the list goes on. Services like Pagoda Box can help you skip all of that; so let's see how.
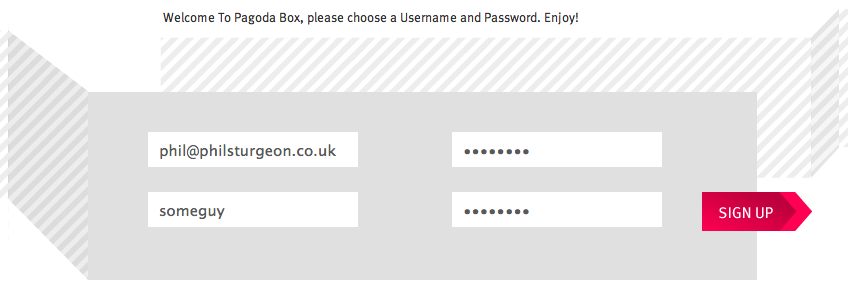
Step 1 - Register With Pagoda Box
The first step is to grab yourself an account. It's free, so go ahead.
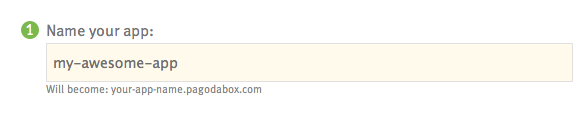
Step 2 - Create Your Application
Each application needs to have a unique name, as they are also used for preview URLs. You can call this application whatever you wish, as you will be hiding it behind a domain shortly, but call it something obvious and memorable.
Step 3 - Set Up Git
Git is an extremely useful version management system. Right now, it is massively popular thanks to sites like GitHub who allow for free social code hosting, but it is also great for deploying your code.
If you are new to Git then try the crash course.
If you haven't already, set up Git. Their documentation will help you get started. Windows users will find it a little more difficult than OSX or Linux users, so if you have a Virtual Machine of Ubuntu lying around, now would be a great time to fire it up.
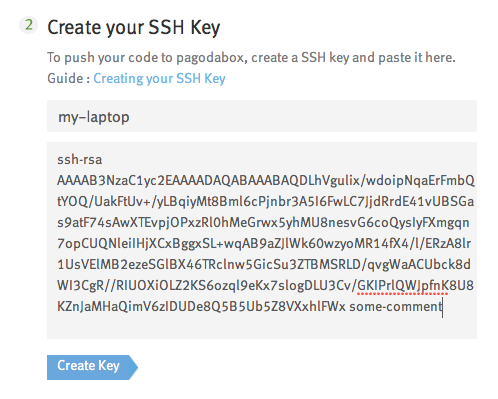
Step 4 - Create Your SSH Key
To push your code to Pagoda Box you need to authorize your computer to have push access to applications on your account. Create an SSH key and paste it here.
Step 5 - Deploy Your Code
First, set up a folder for your application and set the Git remotes. Remotes are essentially nicknames for a repository URL. By setting up this remote, we're letting our local Git repo know how to push code to Pagoda Box.
	$ mkdir my-awesome-app && cd my-awesome-app
	$ git init
	Initialized empty Git repository in /Users/phil/Sites/my-awesome-app/.git/
	$ git remote add pagoda [email protected]:my-awesome-app.git
Now with all of this account and environment setup done, we can start deploying code. For now, we'll deploy a simple Hello World app:
$ echo '<?php echo "Hello World!";?>' > index.php
This is a little command line trick to put some text into a file. You could alternatively create this file with your favorite text editor or IDE.
	$ git add index.php
	$ git commit -m "OH HAI"
	[master (root-commit) 6aa23f4] OH HAI
	 1 files changed, 1 insertions(+), 0 deletions(-)
	 create mode 100644 index.php
So far, we have made a new folder for our website, initialized Git, added a remote which tells Git where the Pagoda Box app lives, and added a new index.php file, which will simply say Hello World!. Next:
	$ git push pagoda master
	Counting objects: 3, done.
	Writing objects: 100% (3/3), 244 bytes, done.
	Total 3 (delta 0), reused 0 (delta 0)

	:: Auto deploy enabled for 'master'
	 +> to change, visit https://dashboard.pagodabox.com/apps/my-awesome-app/admin
	:: Deploying to 6aa23f4 on master
	:: Parsing Boxfile
	:: Executing deploy
	 +> Init submodules
	 +> Booting web1.1
	  - [22-Feb-2012 20:38:41] NOTICE: fpm is running, pid 54
	  - [22-Feb-2012 20:38:41] NOTICE: ready to handle connections
	 +> Propagating network updates
	:: Cleaning up

	To [email protected]:my-awesome-app.git
	 * [new branch]  master -> master
This is where the magic happens. You will push to a Git remote like any other repository, but then you will see the output of Pagoda Box taking over and creating a deployment. This will fire up a new instance each time and switch over from the live instance to this new instance instantaneously, meaning immediate updates - unlike slow FTP-based file deployment systems. Also unlike some similar services, all of your temporary files (cache, logs, image uploads, etc) will be there after any resize or re-deployment. Awesome!
Now if you refresh the Pagoda Box page, you will see a Dashboard with all sorts of options.
Step 6 - Creating a Boxfile
Pagoda Box has a special config file: Boxfile. This goes in the root of your application. An advanced example may look something like this:
web1:

  ################################################
  ## GENERAL SETTINGS
  ################################################
  shared_writable_dirs: [/system/cms/cache, /system/cms/logs, /uploads, /addons]

  ################################################
  ## WEB SPECIFIC SETTINGS
  ################################################
  index_list: [index.php]

  ################################################
  ## PHP SPECIFIC SETTINGS
  ################################################
  php_version: 5.3.8
  php_extensions: [mysqli, curl, gd, mbstring]
  php_date_timezone: Europe/London
  php_max_execution_time: 30
  php_max_input_time: 60
  php_post_max_size: 25M
  php_file_uploads: On
  php_upload_max_filesize: 20M
  php_max_file_uploads: 20
This example gives you the chance to create writable folders, set your index_list (which is index.php by default) and change all sorts of PHP settings that would normally be in a php.ini file.
The most important line here is:
php_extensions: [mysqli, curl, gd, mbstring]
Pagoda Box allows you to list your applications dependencies. The "mysqli" driver is "MySQL Improved" which you should start using, as "mysql" is going to be deprecated in PHP 5.4. "curl" and "gd" are fairly standard and "mbstring" helps you work with UTF-8 code.
It's good to know they are available - along with plenty of others - but for this tutorial we'll only need the following:
php_extensions: [pdo, pdo_mysql]
So let's make our new Boxfile and save it:
web1:
  php_extensions: [pdo, pdo_mysql]
We'll be using this later on.
Step 7 - Create a Database
At the time of this writing, Pagoda Box only supports MySQL databases, which is fine as that is what the majority of developers use.
We can fire up as many small database instances as we like for free; we only start paying when they get bigger, so you won't get surprised by a massive bill just for building a website. Just like the web instances, they can also be scaled to grow with your website.
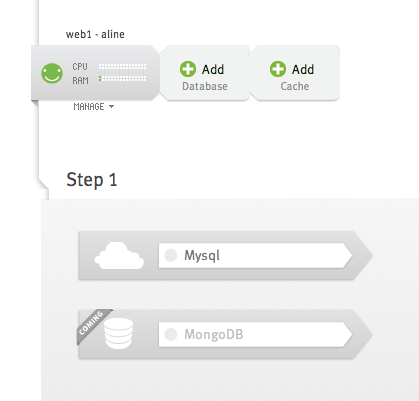
To make a new one, click the + icon and give it a name. You'll see a progress bar up top while it builds; then the page will refresh.
Step 8 - Connecting From Your App
Connecting via PHP is a cinch. You are given multiple $_SERVER variables, which contain credentials for each database you have. This means you can keep hard-coded passwords out of your application - which is very useful if you don't want all of your developers to see live passwords, or if you have your complete website on GitHub, like some people are beginning to do.
$db = new PDO(sprintf('mysql:host=%s;dbname=%s;port=%s', $_SERVER['DB1_HOST'], $_SERVER['DB1_NAME'], $_SERVER['DB1_PORT']), $_SERVER['DB1_USER'], $_SERVER['DB1_PASS']);
This is a basic example of the variables in use - connecting to your MySQL database via the PDO extension. If you're using a framework, such as CodeIgniter, you can shove those variables into your database.php config files.
Step 9 - Connecting Remotely
Some web servers - especially those run-of-the-mill cPanel set-ups - have phpMyAdmin installed and can be configured to allow remote access to the MySQL databases.
Instead of this approach, Pagoda Box uses Ruby Gem for - amongst other things - creating a temporary secure SSH tunnel. This means your MySQL databases are locked down behind a firewall and are only accessible via this secure SSH connection.
So, to install the gem run:
$ sudo gem install pagoda
Then to create the tunnel, simply run:
$ pagoda tunnel db1
The first time you run this (or any other pagoda gem command) you should be asked for a username and password. This is your Pagoda Box username and password, and is needed so that the gem can act on your behalf and is nothing to do with your database.
	$ pagoda tunnel db1
	it appears this is the first time you have used our client
	  Username: someguy
	  Password:

	Tunnel Established!  Accepting connections on :
	-----------------------------------------------

	HOST : 127.0.0.1 (or localhost)
	PORT : 3307
	USER : (found in pagodabox dashboard)
	PASS : (found in pagodabox dashboard)

	-----------------------------------------------
	(note : ctrl-c To close this tunnel)
Go to your dashboard and click on the database, then click "Show Credentials" to see a info window like this:
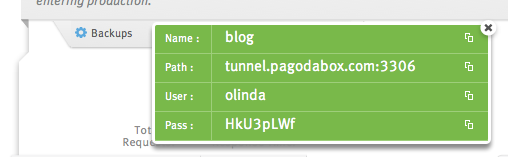
Use these credentials to connect. Don't forget to specify which port; it is listed in the output from the gem above - not the green box. Remember, you are connecting to the local tunnel, not directly to the database.
Step 10 - Making a Blog
What sort of tutorial would this be if it didn't involve making a blog in 20 minutes?
For all development you should really be building things locally using MAMP, XAMPP, WAMP, etc., then deploying code and database changes using some sort of "Migrations" or schema change tracking stuff, but we'll do this the old fashioned way.
First connect to your database remotely via the tunnel, then run this query to build a new table:
CREATE TABLE posts (
  'id' int(11) NOT NULL AUTO_INCREMENT,
  'title' varchar(255) NOT NULL,
  'slug' varchar(255) NOT NULL,
  'summary' text NOT NULL,
  'body' text NOT NULL,
  'created_at' int(11) NOT NULL,
  'updated_at' int(11) NOT NULL,
  PRIMARY KEY (id)
) ENGINE=InnoDB;

INSERT INTO posts VALUES
('1', 'Women love guys who use FuelPHP', 'women-love-guys-who-use-fuelphp', 'It is a well proven fact that girls love developers, but things have never been so good for PHP developers. Everyone who starts using FuelPHP gets 150% more women within the first month. Fact.', 'It is a well proven fact that girls love developers, but things have never been so good for PHP developers. Everyone who starts using FuelPHP gets 150% more women within the first month. Fact.', '1322825332', '1322934052'),
('2', 'People who echo HTML from apps die younger', 'bad-practises', 'Scientists have proven that PHP developers who echo HTML directly our of PHP files die younger. Often it happens while the developer is in the office. While sat at their chairs they suffer multiple wounds, but apparently there are no witnesses, even though their colleagues were in the office \"refactoring bad code\" all day.', 'Important body text', '1322826479', '1322826479');
With some test posts in place we can create this index.php:
<?php

	$db = new PDO(sprintf('mysql:host=%s;dbname=%s;port=%s', $_SERVER['DB1_HOST'], $_SERVER['DB1_NAME'], $_SERVER['DB1_PORT']), $_SERVER['DB1_USER'], $_SERVER['DB1_PASS']);

	$posts = array();
	foreach ($db->query('SELECT * from posts') as $row)
	{
		echo "<h2>{$row['title']}</h2>";
		echo "<p><em>Posted: ".date('l jS \of F Y', $row['created_at'])."</em><br />";  		echo $row['summary']."</p>";
	}
With that file saved, and our new Boxfile (from step 6) in place, we can deploy these new changes:
	$ git add Boxfile index.php
	$ git commit -m "Added Boxfile and deployed index.php changes"
	$ git push pagoda master
Go to "http://my-awesome-app.pagodabox.com" and see the output:
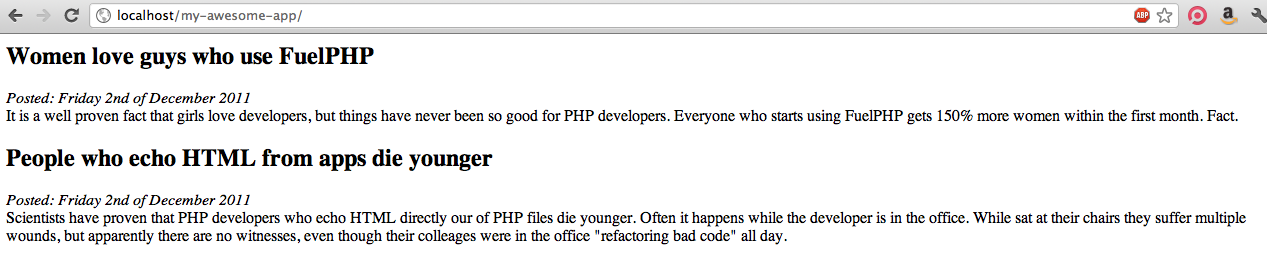
This is clearly not something that you'll want running on your website, but it does enough. You can see that your database content is being output to the browser, and your demo URL is working. You can replace this with your CMS of choice, or build something custom.
Step 11 - Use a Real Domain
There is no point having your wonderful new blog on a pagodabox.com subdomain; so let's park a domain on top of it.
First, in the DNS/SSL tab of your dashboard, add in some entries for your domain:
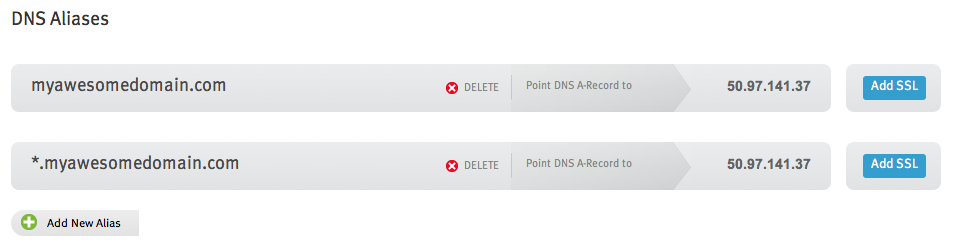
Now that your application is ready to accept a domain you should head over to whoever handles the DNS for your domain. Go to the DNS management area and set an A record for "myawesomedomain.com" to be "50.97.141.37" - which is the IP address listed on the interface for your app. These IP addresses are not unique per application, but will not always be the same. Set a CNAME record for "www.myawesomedomain.com" to alias "myawesomedomain.com" and you should be all set.
Summary
This may all seem rather different from how you work at the moment, but start to think about how much work you are saving yourself in the long run. Using PaaS is the same reason we use jQuery over native JavaScript, or PHP frameworks over writing native PHP. Why mess around with minor details when you can instead focus on building an awesome app?
Other alternatives you might consider are PHPFog and Orchestr.io, which both offer similar services. Have fun, and thanks for reading!

Comments