WooCommerce gives you a few options as to what you can display on your archive pages:
- products
- categories (on the main shop page) or subcategories (on category pages)
- both products and categories.
When I'm setting up a store, I normally select the third option: products and categories/subcategories. This means visitors to my store can either select products right from the home page or refine their search by clicking through to a product category archive.
However, there's one failing with this approach: It displays the categories/subcategories together, with no separation between the two. This means that if your product images have different dimensions from your product images, the layout can look a bit messy. Even if your images are the same size, if one of the lines in the archive page includes both categories and products, the absence of an 'Add to Cart' button for categories makes that row look untidy, as not all of its elements have the same dimensions.
In this tutorial I'll show you how to display categories in a separate list before displaying products.
To do this, we'll follow four steps:
- Identify the code WooCommerce uses to output categories and subcategories on archive pages.
- Create a plugin for our code.
- Write a function to put categories or subcategories before product listings.
- Style the output.
But before you start, you'll need a WooCommerce installation with some products added, and product categories and subcategories set up.
What You'll Need
To follow along, you'll need:
- A development installation of WordPress.
- A code editor.
- WooCommerce installed and activated.
- Products added—I've imported the dummy product data that comes with WooCommerce; for details of how to do this, see this guide.
- A WooCommerce-compatible theme activated—I'm using Storefront.
Before We Start: The Default Options
Let's take a look at what WooCommerce gives us by default.
I've started by adding some images to my product categories and subcategories, as the WooCommerce dummy data doesn't include those. I've simply used an image of one of the products from each category or subcategory, as you can see in the screenshot:

Now let's take a look at how WooCommerce displays the product categories and products in archive pages.
If you haven't already, go to WooCommerce > Settings, select the Products tab, and then choose the Display option. For each of the Shop Page Display and Default Category Display options, select Show both:
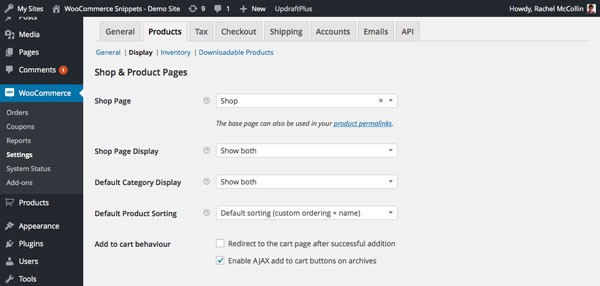
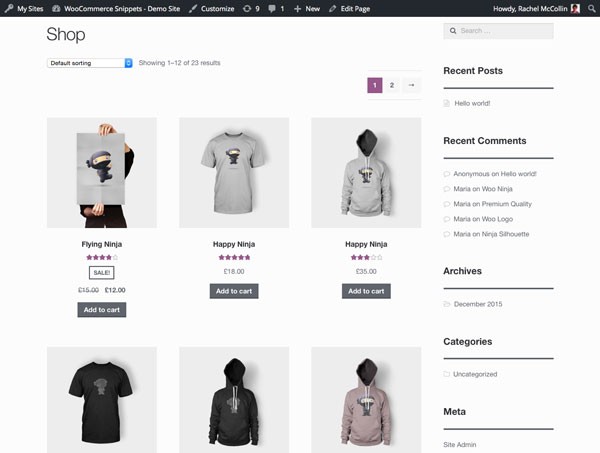
Click the Save changes button to save your settings and visit your site's shop page. Mine looks like this:
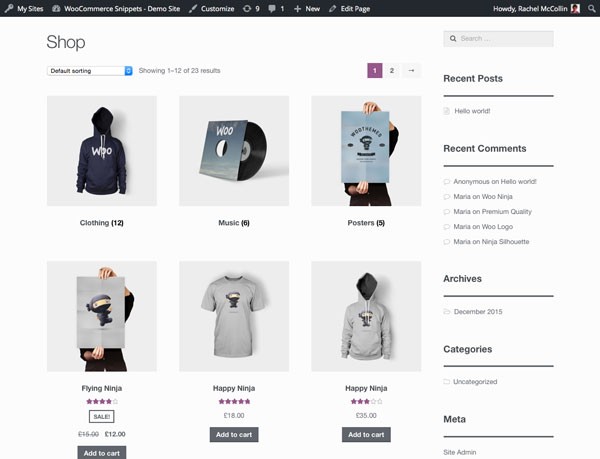
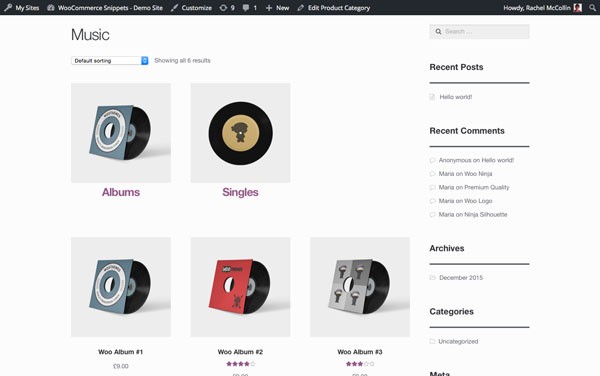
As it happens, because I have three product categories and my category images are the same size as my product images, it looks quite neat. But here's one of the product category archives:
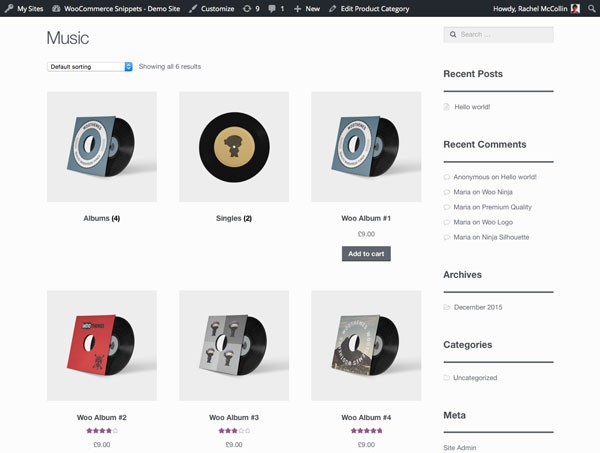
Because this category has two subcategories, the first product is displayed alongside them, in a grid three items wide. I want to make my categories and subcategories more prominent, and simply present them separately from the product listings. So let's do that.
Identifying the Code WooCommerce Uses to Output Categories and Products in Archives
The first step is to identify how WooCommerce outputs categories and subcategories. So let's delve into the WooCommerce source code to find the relevant function.
The file WooCommerce uses to display archive pages is archive-product.php, which is in the templates folder.
Inside that file, you can find this code, which outputs the categories and products:
<?php
    /**
	 * woocommerce_before_shop_loop hook
	 *
	 * @hooked woocommerce_result_count - 20
	 * @hooked woocommerce_catalog_ordering - 30
	*/
	do_action( 'woocommerce_before_shop_loop' );
?>

<?php woocommerce_product_loop_start(); ?>

    <?php woocommerce_product_subcategories(); ?>

	<?php while ( have_posts() ) : the_post(); ?>

		<?php wc_get_template_part( 'content', 'product' ); ?>

	<?php endwhile; // end of the loop. ?>

<?php woocommerce_product_loop_end(); ?>
So there's a woocommerce_product_subcategories() function which is outputting the categories or subcategories before running the loop which outputs the products.
The function is pluggable, which means we could override it in our theme. Unfortunately that doesn't quite work as WooCommerce has built-in styling for clearing items, which would appear at the beginning of a row with the default display.
So instead of that, we'll turn off display of categories and subcategories on our archive pages, so that just products are displayed. Then we'll create a new function that outputs the product categories or subcategories, and hook it to the woocommerce_before_shop_loop action, making sure we use a high priority so that it fires after the functions which are already hooked to that action.
Note: Because WooCommerce adds clears to each third product listing, we can't use the woocommerce_product_subcategories() function or an edited version of it to display the categories. This is because it will clear the third, sixth (and so on) category or product listed, even when we use this function to display categories separately. We could try to override that, but it's simpler just to write our own function.
So let's create a plugin which does that.
Creating the Plugin
In your wp-content/plugins directory, create a new folder and give it a unique name. I'm calling mine tutsplus-separate-products-categories-in-archives. Inside that, create a new file, again with a unique name. I'm using the same name: tutsplus-separate-products-categories-in-archives.php.
Open your file and add this code to it:
<?php
/**
 * Plugin Name: Tutsplus display WooCommerce products and categories/subcategories separately in archive pages
 * Plugin URI: http://code.tutsplus.com/tutorials/woocommerce-display-product-categories-subcategories-and-products-in-two-separate-lists--cms-25479
 * Description: Display products and catgeories / subcategories as two separate lists in product archive pages
 * Version: 1.0
 * Author: Rachel McCollin
 * Author URI: http://rachelmccollin.co.uk
 *
 *
 */
You might want to edit the author details as this is your plugin you're writing. Save your file and activate the plugin via the WordPress admin.
Writing Our Function
Now let's write the function. But before you start, turn off category listings in the admin screens. Go to WooCommerce > Settings, select the Products tab, and then choose the Display option. For each of the Shop Page Display and Default Category Display options, select Show products. Save your changes.
Your shop page will now look something like this:
In your plugin file, add this:
function tutsplus_product_subcategories( $args = array() ) {

	}
}
add_action( 'woocommerce_before_shop_loop', 'tutsplus_product_subcategories', 50 );
Now add this code inside the function:
$parentid = get_queried_object_id();

$args = array(
	'parent' => $parentid
);

$terms = get_terms( 'product_cat', $args );

if ( $terms ) {

	echo '<ul class="product-cats">';

		foreach ( $terms as $term ) {

			echo '<li class="category">';

				woocommerce_subcategory_thumbnail( $term );

				echo '<h2>';
					echo '<a href="' .  esc_url( get_term_link( $term ) ) . '" class="' . $term->slug . '">';
						echo $term->name;
					echo '</a>';
				echo '</h2>';

			echo '</li>';


	}

	echo '</ul>';

}
Let's take a look at what that function does:
- It identifies the current queried object and defines its id as
$parentid. - It uses
get_terms()to identify terms with the currently queried item as their parent. If this is the main shop page, it will return top-level categories; if this is a category archive, it will return subcategories. - Then it checks if there are any terms, before opening a
foreachloop and aulelement. - For each term, it creates a
lielement, and then outputs the category image usingwoocommerce_subcatgeory_thumbnail(), followed by the category name in a link to its archive.
Now save your file and refresh the main shop page. Mine looks like this:

The categories are displayed, but they need some styling. Let's do that next.
Styling the Category Listings
So that we can add styling, we need a stylesheet inside our plugin, which we'll need to enqueue.
In your plugin folder, create a folder called css, and inside that, create a file called style.css.
Now, in your plugin file, add this above the function you've already created:
function tutsplus_product_cats_css() {

    /* register the stylesheet */
    wp_register_style( 'tutsplus_product_cats_css', plugins_url( 'css/style.css', __FILE__ ) );

    /* enqueue the stylsheet */
    wp_enqueue_style( 'tutsplus_product_cats_css' );

}

add_action( 'wp_enqueue_scripts', 'tutsplus_product_cats_css' );
This correctly enqueues the stylesheet you've just created.
Now open your stylesheet and add the code below. WooCommerce uses mobile first styling, so that's what we'll be using too.
ul.product-cats li {
    list-style: none;
	margin-left: 0;
	margin-bottom: 4.236em;
	text-align: center;
	position: relative;
}
ul.product-cats li img {
	margin: 0 auto;
}

@media screen and (min-width:768px) {

	ul.product-cats {
		margin-left: 0;
		clear: both;
	}
	ul.product-cats li {
		width: 29.4117647059%;
		float: left;
		margin-right: 5.8823529412%;
	}
	ul.product-cats li:nth-of-type(3) {
		margin-right: 0;
	}

}
I've copied the exact widths and margins from the styling used by WooCommerce.
Now check your main shop page again. Here's mine:
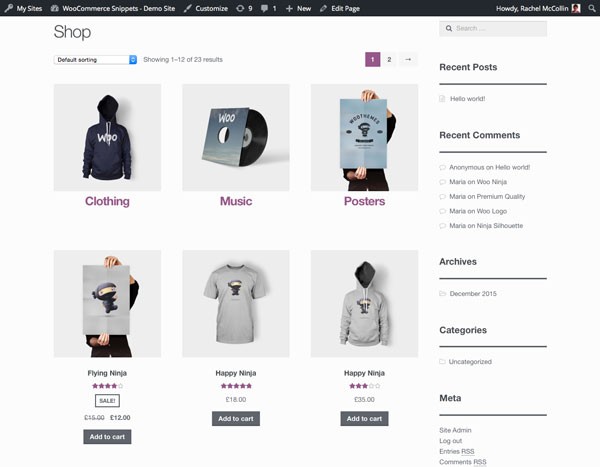
Here's the Music category archive:

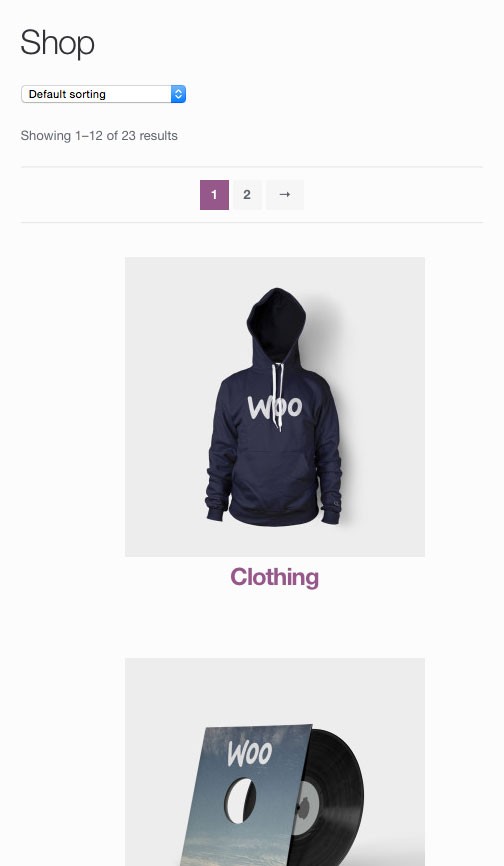
And here's how it looks on smaller screens:
Summary
Product categories are a great feature of WooCommerce, but the way they're displayed isn't always ideal. In this tutorial, you've learned how to create a plugin that outputs product categories or subcategories separately from the product listings, and then you've styled your category listings.
You could use this code to output a list of categories or subcategories elsewhere on the page (for example below the products), by hooking the function to a different action hook within the WooCommerce template file.
If you currently run a shop that you're looking to extend, or you're looking for some additional plugins to study as it relates to WooCommerce, don't hesitate to see what plugins are available in Envato Market.

Comments