This tutorial will teach you to combine UIGestureRecognizers to force users to make non-trivial gestures to perform an action. We will use the example of redeeming a digital ticket, using the real-world analogy of tearing it in half.
Project Overview
UIGestureRecognizer, and it’s various subclasses, make it easy to recognize different gestures on designated target objects and perform actions when those gestures are recognized. It’s possible to combine different UIGestureRecognizers to force people to make non-trivial gestures to perform an action. This can be used in cases where users are trying to initiate a non-reversible action, where a simple, accident-prone gesture, such as a tap or a swipe, is not suitable.
Tickets indicate a right of admission for various events or venues. They are usually perforated to indicate that the ticket has been used, and is no longer redeemable. Apple has introduced the Passbook app to allow people to use their phone as a ticket or other form of mobile payment. Passbook is limited to presenting tickets with a QR code as their sole method of redemption.
Airlines and large chains have invested in QR scanners so they can begin to accept digital tickets. Smaller venues, bars and nightclubs for example, may not be able or willing to invest in the new equipment. However, they have been forced to offer ticket purchasing online as more people demand it. Unfortunately, the default way these online tickets are redeemed is to compare an order number to a master list. Clearly this is not scalable, leaving both sellers and buyers of digital tickets in a less than ideal situation.
We don’t want the tickets to be accidentally redeemed by a simple gesture. Why don’t we recreate the real-world method of redeeming a ticket, tearing the stub from the main part of the ticket which is usually retained by the person checking the ticket? This can be implemented by using a long press gesture recognizer on the stub and a swipe gesture recognizer on the main part. Think of it as holding the stub and tearing the other part away.
1. Create the Project
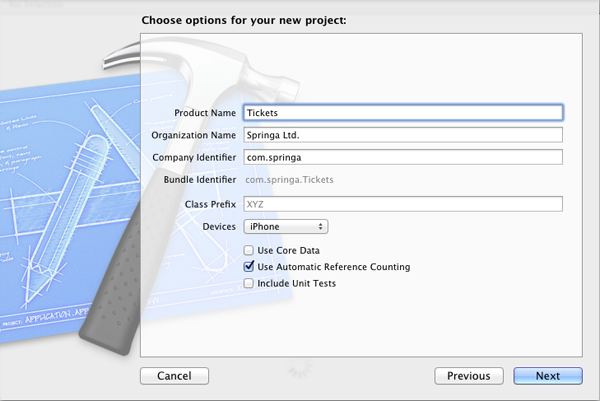
Open Xcode and select “Create a new Xcode project”. Choose “Empty Application” and click Next. Enter a name for your project, I’ve called mine “Tickets”. Enter your organization name, company identifier and class prefix. Choose iPhone from Devices and just choose “Use Automatic Reference Counting”. We don’t need unit tests or Core Data for this project.
2. Create the View Controllers
Step 1
This project will have two view controllers, one screen to present a list of all available tickets and one screen where the tickets are actually redeemed.
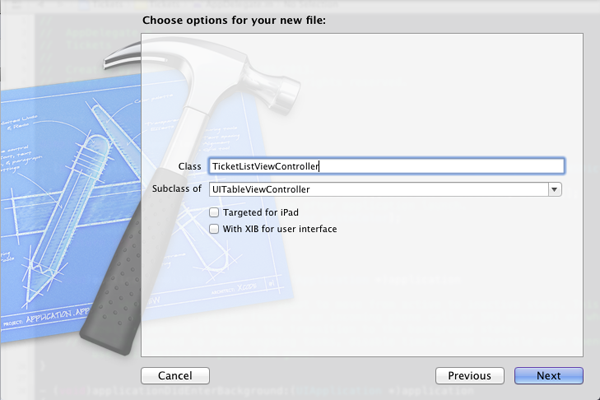
Create a UITableViewController subclass called “TicketListViewController”. This controller doesn’t require a XIB for user interface as it’s just a simple list.
Step 2
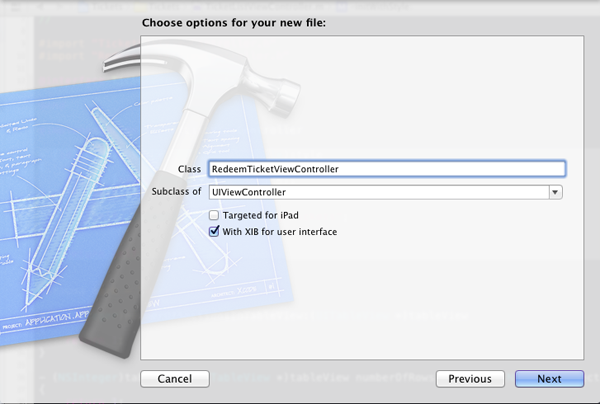
Create a UIViewController subclass called “RedeemTicketViewController”. Select “With XIB for user interface” as this screen will have a more complex design.
Step 3
Now create the navigation through the app. At the top of your app delegate import TicketListViewController.h.
#import “TicketListViewController.h”
In application:didFinishLaunchingWithOptions: create an instance of the ticket list view controller and an instance of UINavigationController with the ticket list view controller as its root view controller. Set the root view controller of the window to be the navigation controller.
- (BOOL)application:(UIApplication *)application didFinishLaunchingWithOptions:(NSDictionary *)launchOptions
{
    self.window = [[UIWindow alloc] initWithFrame:[[UIScreen mainScreen] bounds]];

    TicketListViewController* vc = [[TicketListViewController alloc] initWithStyle:UITableViewStylePlain];
    UINavigationController* navController = [[UINavigationController alloc] initWithRootViewController:vc];
    [self.window setRootViewController:navController];

    [self.window makeKeyAndVisible];
    return YES;
}
Build and run the application to check that everything is hooked up correctly. You should see an empty table view on the screen.
3. Create the List of Tickets
Step 1
For this example we will hard code the tickets into the app. You’ll need to change this section to by more dynamic when you have access to a database which stores the ticket sales.
Edit the init method of the TicketListViewController to set the title of the navigation bar for this screen. This will help guide users through the app.
- (id)initWithStyle:(UITableViewStyle)style
{
    self = [super initWithStyle:style];
    if (self) {

        self.navigationItem.title = @"Tickets";

    }
    return self;
}
Step 2
Change the table view data source to have one section and one row. Create a cell with style UITableViewCellStyleSubtitle. Set the text label to show the name of the event and venue, the detail text label to show the date of the event and the accessory type to be UITableViewCellAccessoryDisclosureIndicator.
#pragma mark - Table view data source

- (NSInteger)numberOfSectionsInTableView:(UITableView *)tableView
{
    return 1;
}

- (NSInteger)tableView:(UITableView *)tableView numberOfRowsInSection:(NSInteger)section
{
    return 1;
}

- (UITableViewCell *)tableView:(UITableView *)tableView cellForRowAtIndexPath:(NSIndexPath *)indexPath
{
    static NSString *CellIdentifier = @"Cell";
    UITableViewCell *cell = [tableView dequeueReusableCellWithIdentifier:CellIdentifier];
    if(!cell){
        cell = [[UITableViewCell alloc] initWithStyle:UITableViewCellStyleSubtitle reuseIdentifier:CellIdentifier];
    }

    cell.textLabel.text = @"Special Guests at Generic Venue";
    cell.detailTextLabel.text = @"19 Jun 2013";
    cell.accessoryType = UITableViewCellAccessoryDisclosureIndicator;

    return cell;
}
Step 3
At the top of the TicketListViewController.m import RedeemTickerViewController.h.
#import “RedeemTickerViewController.h”
Now change the table view delegate so that when a row is tapped the user is taken to the redeem ticket screen.
#pragma mark - Table view delegate

- (void)tableView:(UITableView *)tableView didSelectRowAtIndexPath:(NSIndexPath *)indexPath
{
    [tableView deselectRowAtIndexPath:indexPath animated:YES];

    RedeemTicketViewController* vc = [[RedeemTicketViewController alloc]initWithNibName:@"RedeemTicketViewController" bundle:nil];
    [self.navigationController pushViewController:vc animated:YES];
}
Step 4
Build and run the app to check that the navigation works correctly. Tapping the row will take you to an empty view with a back button.

4. Create the Redeem Tickets Screen
Step 1
This is the most interesting screen, with the most interactivity and functionality.
In RedeemTickerViewController.h create an outlet for the ticket stub UIImageView, the main part of the ticket UIImageView and a UIView which will allow us to animate the ticket as though it were tearing off. Declare a BOOL instance variable which we will use to track whether the ticket stub is being ‘held’ in place. Create a UILongPressGestureRecognizer and a UISwipeGestureRecognizer which we’ll use later.
The header file should now be like this:
#import <UIKit/UIKit.h>

@interface RedeemTicketViewController : UIViewController

@property (nonatomic, strong) IBOutlet UIView* containerView;
@property (nonatomic, strong) IBOutlet UIImageView* ticketStub;
@property (nonatomic, strong) IBOutlet UIImageView* ticketMain;

@property (nonatomic, strong) UILongPressGestureRecognizer* longPressGest;
@property (nonatomic, strong) UISwipeGestureRecognizer* swipeGest;

@property (nonatomic, assign) BOOL isHeld;

@end
Step 2
Open RedeemTicketViewController.xib and select the the view controller’s view object. Uncheck “Use Autolayout” in the File Inspector panel to enable pre-iOS6 compatibility. We’ll set the autoresizing mask on each view ourselves to ensure that we cater for the various screen sizes on the iPhone now.
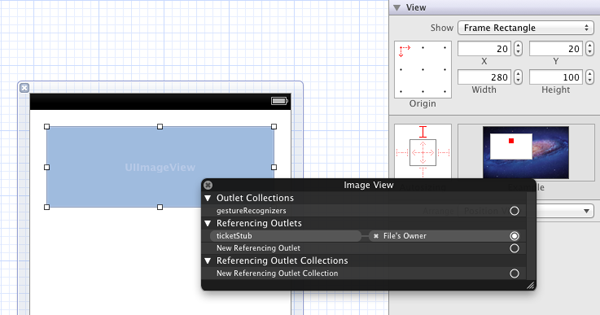
Now add an Image View from the Object Library. This will be for the ticket stub, so connect the File’s Owner ticketStub outlet to the image view. Set the size frame of the image view to be at origin (20, 20) and have size (280, 100). Set the autoresizing mask to have fixed top margin and no autoresizing on the width or height.
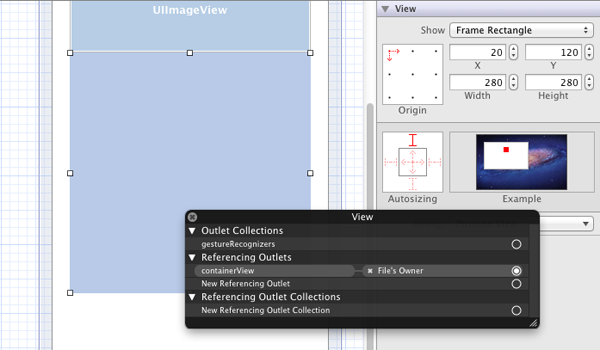
Now add a View from the Object Library. This will be the container view so connect the File’s Owner containerView outlet to the view. Set the frame of the view to be at (20, 120) and with size (280, 280). Set the autoresizing mask to have fixed top margin and no autoresizing on the width or height.
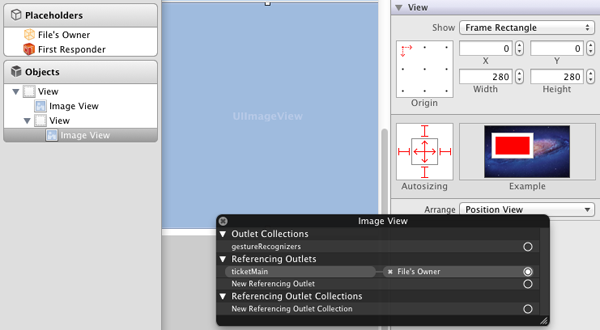
Next drag an Image View from the Object Library into the container view you just created. The image view should fill the container view and have its autoresizing mask set to have all margins fixed and to change the width and the height. Set the File’s Owner ticketMain outlet to the image view.
In the Attributes Inspector, choose the images for the stub and the main parts of the ticket using images you’ve imported into your project. Make sure you check “User Interaction Enabled” for both image views and the container view.
Step 3
Edit the init method of the RedeemTicketViewController to set the title of the navigation bar for this screen and initialize self.isHeld to NO.
- (id)initWithNibName:(NSString *)nibNameOrNil bundle:(NSBundle *)nibBundleOrNil
{
    self = [super initWithNibName:nibNameOrNil bundle:nibBundleOrNil];
    if (self) {
        self.navigationItem.title = @"Special Guests at Generic Venue";
        self.isHeld = NO;
    }
    return self;
}
Step 4
Build and run the app to check how it looks so far.

I’ve included a QR code in my images so that if the ticket systems at a venue were upgraded to handle Passbook, it would be seamless to continue using this app after the upgrade.
5. Add the UIGestureRecognizers
Step 1
In viewDidLoad (called after the view is loaded from the XIB), create a UILongPressGestureRecognizer and add it to the ticketStub image view. Create a UISwipeGestureRecognizer and add it to the ticketMain image view.
-(void)viewDidLoad
{
    [super viewDidLoad];

    self.longPressGest = [[UILongPressGestureRecognizer alloc]
                          initWithTarget:self action:@selector(handleLongPress:)];
    self.longPressGest.minimumPressDuration = 0.1;
    [self.ticketStub addGestureRecognizer:self.longPressGest];

    self.swipeGest = [[UISwipeGestureRecognizer alloc]
                      initWithTarget:self action:@selector(handleSwipe:)];
    self.swipeGest.direction = (UISwipeGestureRecognizerDirectionLeft | UISwipeGestureRecognizerDirectionRight);
    [self.ticketMain addGestureRecognizer:self.swipeGest];
}
Notice that I’ve set the direction mask on the swipe gesture recognizer to handle either left or right, not up or down. I’ve set the minimum press duration to be 0.1 seconds. These can be tweaked in your app to create the most realistic feeling action.
Step 2
Next write the methods to hand the long press and the swipe, called handleLongPress: and handleSwipe: respectively. The long press method will be used to determine if the swipe gesture actually has any effect. Imagine a physical piece of paper. You can try tearing it as much as you like, but if it’s not held in place then nothing will happen.
handleLongPress: is called whenever the state of the gesture recognizer changes, e.g. the gesture began or ended. We want to check if the gesture has ended, i.e. the finger is lifted, and ensure that self.isHeld is set back to NO. If if the gesture hasn’t ended then set self.isHeld to YES which we will use to allow the swipe to perform its action.
- (void)handleLongPress:(UIGestureRecognizer *)sender
{
	if (sender.state == UIGestureRecognizerStateEnded) {
		self.isHeld = NO;
	} else if(!self.isHeld){
        self.isHeld = YES;
    }
}
Step 3
Next let’s implement handleSwipe:. We check if self.isHeld is true and if so we animate the ticketMain view off the screen using the curl up transition, which looks like the ticket is being torn.
- (void)handleSwipe:(UIGestureRecognizer *)sender
{
    if(self.isHeld){
		[UIView transitionWithView:self.containerView duration:1
						   options:UIViewAnimationOptionTransitionCurlUp
						animations:^ { [sender.view removeFromSuperview]; }
						completion:nil];
	}
}
Step 4
Build and run the app to try out the new gestures. Press and hold the ticket stub and simultaneously swipe across the other part of the ticket. You should see the main part ‘tear off’ and disappear.

Conclusion
We’ve looked at creating a basic navigation structure to show a list of tickets and a ticket screen which can be redeemed by pressing one part of the screen and swiping across another part, creating an effect similar to tearing a ticket in real life.
This is by no means the end of the road. Tapping back and selecting a row from the table will take you right back to the screen with the ticket still intact. You need to write some logic to prevent a redeemed ticket from being able to be redeemed again.
I’ve also been using images throughout to represent tickets. This is to eliminate as much unnecessary code as possible for this tutorial, so we can really concentrate on the important parts. In a real life situation you’d want to use fields that you could dynamically include information about the event.
There are several ways you could improve security and eliminate accidental redemptions. You could record the location and time of the device when the ticket was swiped. Obviously if the ticket was redeemed several days before the event and at a location nowhere near the venue you could safely assume that it was an accident. A ticket redeemed 5 minutes ago right outside the venue is probably someone chancing their luck.

Comments