Themes are a huge part of what makes WordPress as popular as it is, and in this three-part series we'll take you through a step-by-step process that results in a completed, functioning WordPress theme. In part two, we delve into coding the bulk of our theme!
Part Two
Welcome to part two of this three-part series on developing a WordPress theme from scratch. Last time we looked at what makes a "good theme", as well as the general components required for a theme to work. This week we're going to dive straight in and start creating our very first theme.
- Developing Your First WordPress Theme: Day 1 of 3
- Developing Your First WordPress Theme: Day 2 of 3
- Developing Your First WordPress Theme: Day 3 of 3 (Coming Soon)
Our Theme
I'd like to stress that if you have your own layout to work with, use it - chances are you'll learn more by experimenting and you'll have a result that will be tailored to your tastes. If you don't have a layout to work with, we're providing a simple personal layout for you to work with.
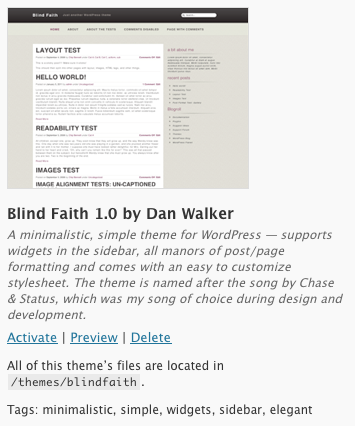
This layout is something I made a while back as one of many unused designs for a friends personal blog. In the downloadable zip that accompanies this tutorial, you will find two folders; bftheme and bffiles. In the bffiles folder is the layout in its pre-WordPress state, the other folder contains the completed theme.
Open up the theme in a browser to get an idea of what we're going for, it should look a little something like this:
Breaking It Up
While it would be possible to make a theme work with just one file, it's very bad practice and not something you'll see at all in the wild. It's good to stick to the standard file structure as it makes theme modification easier down the line and lets you use the built in WordPress functions to include files easily (such as get_header()).
First of all, let's prepare our workspace. In the themes directory of your WordPress installation, create a new folder called blindfaith. Inside that folder, create the following files:
- index.php
- single.php
- page.php
- comments.php
- functions.php
- header.php
- footer.php
- sidebar.php
Now we've got our stylesheets and images in place as well a theme skeleton, we're going to jump right in. First we need to make our theme appear in the WordPress dashboard - to do this we need to modify our style.css file.
WordPress will automatically look for a file called style.css in a theme directory to extract information about the theme. Paste the following code in to the top of style.css:
/*
Theme Name: Blind Faith
Theme URI: http://www.danwalker.com/
Description: A minimalistic, simple theme for WordPress -- supports widgets in the sidebar, all manors of post/page formatting and comes with an easy to customize stylesheet.

Author: Dan Walker
Version: 1.0
Tags: minimalistic, simple, widgets, sidebar, elegant
*/
If we check WordPress now, our theme should appear in the change themes part of the dashboard. Activate our new theme and load up the front page of WordPress. Seeing nothing? Good. Once WordPress has done its magic figuring out what page the user wants and has prepared the results, it calls index.php from our theme directory - except right now that file is blank.
First of all, we need to cut up our HTML in to its four respective parts; header, body, sidebar, footer. If you open up the index.html supplied with this tutorial, you should see this:
<!DOCTYPE HTML PUBLIC "-//W3C//DTD HTML 4.01 Transitional//EN" "http://www.w3.org/TR/html4/loose.dtd">
<html lang='en'>
	<head>
	<title>Blind Faith</title>
	<link rel="stylesheet" href="reset.css" type="text/css">
	<link rel="stylesheet" href="style.css" type="text/css">
	<!--[if IE]>
	<link rel="stylesheet" href="ie.css" type="text/css" />
	<![endif]-->
	</head>
	<body class="home blog">
	<div id="top-bar-tile">
		<div id="top-bar-content">
			<h1><a href="http://www.danwalker.com/themes/blindfaith">Blind Faith</a></h1>
			<span class="slogan">Just Another Theme by Dan Walker</span>
			<div id="search-box">
				<form method="get" id="searchform" action="" >
					<input type="text" value="Search..." onfocus="if(this.value == this.defaultValue) this.value = ''" name="s" id="s" />
				</form>
			</div><!-- search-box -->
		</div><!-- top-bar-content -->
	</div><!-- top-bar-tile -->
	<div id="nav-bar-tile">
			 <div class="nav-bar-content"><ul><li class="current_page_item"><a href="http://www.danwalker.com/themes/blindfaith/" title="Home">Home</a></li><li class="page_item page-item-2"><a href="http://www.danwalker.com/themes/blindfaith/?page_id=2" title="About">About</a></li><li class="page_item page-item-4"><a href="http://www.danwalker.com/themes/blindfaith/?page_id=4" title="Typography">Typography</a></li></ul></div>
	</div><!-- nav-bar-tile -->
	<div id="wrapper">
		<div id="content">

			<div class="post">
				<h1><a href="http://www.danwalker.com/themes/blindfaith/?p=1">Hello world!</a></h1>
				<div class="post-details">
					<div class="post-details-left">
						Posted on <strong>February 6, 2011</strong> by <span class="author">Dan</span> under <span class="author"><a href="http://www.danwalker.com/themes/blindfaith/?cat=1" title="View all posts in Uncategorized" rel="category">Uncategorized</a></span>
						</div>
						<div class="post-details-right">
						<span class="comment-count"><a href="http://www.danwalker.com/themes/blindfaith/?p=1#comments" title="Comment on Hello world!">1 Comment</a></span>
					</div>
				</div>

				<p>Lorem ipsum dolor sit amet, consectetur adipiscing elit. Etiam malesuada sem in orci ornare et porta nisi tristique. Integer sodales feugiat interdum. Nunc nec hendrerit velit. Praesent at dolor arcu. Nulla porttitor dui vel justo vehicula fringilla. Nunc condimentum justo ut nibh pharetra tempor. Morbi nulla nisl, blandit eu egestas vel, cursus eget justo. Nulla lectus ante, pellentesque tempor pretium eu, porttitor vitae mi. Nunc et dolor eget purus ultricies sollicitudin. Phasellus luctus tincidunt lobortis. Nunc ac aliquam leo. In tortor orci, auctor non condimentum ultricies, hendrerit et nunc. Nam neque est, laoreet at rhoncus vitae, porttitor at nulla. Maecenas dignissim sagittis massa non ultrices. Cras eros quam, ultrices eu iaculis eu, egestas eget justo. Vivamus diam sapien, volutpat eget luctus nec, lacinia non quam. Duis suscipit nunc eget neque congue pretium. Vestibulum non lectus ut quam tempus varius. Nunc a ligula non metus luctus molestie.</p>

				<p> <a href="#" class="more-link">Read More</a></p>

				<div class="dots"></div>
			</div><!-- post -->

			<div id="only-page">No newer/older posts</div>

			<div class="spacer"></div>
			<div class="dots"></div>

			<div id="footer">
				Copyright © 2011 <a href="http://www.danwalker.com">Dan Walker</a><br />
				Don't steal anything etc
			</div>

		</div><!-- content -->
		<div id="sidebar">
			<div class="sidebar-box">
				<span class="sidebar-title">a bit about me</span>
				<div class="dots"></div>
				<div class="textwidget">
					<p>Lorem ipsum dolor sit amet, consectetur adipiscing elit. Etiam malesuada sem in orci ornare et porta nisi tristique. Integer sodales feugiat interdum. Nunc nec hendrerit velit. Praesent at dolor arcu. Nulla porttitor dui vel justo vehicula fringilla. Nunc condimentum justo ut nibh pharetra tempor. Morbi nulla nisl, blandit eu egestas vel, cursus eget justo.</p>
				</div>
			</div>
			<div class="sidebar-box">
					<span class="sidebar-title">recent posts</span><div class="dots"></div>
				<ul>
				<li><a href="http://www.danwalker.com/themes/blindfaith/?p=1" title="Hello world!">Hello world!</a></li>
				</ul>
			</div>
		</div><!-- sidebar -->
		<div class="spacer"></div>
	</div><!-- wrapper -->
	</body>
</html>
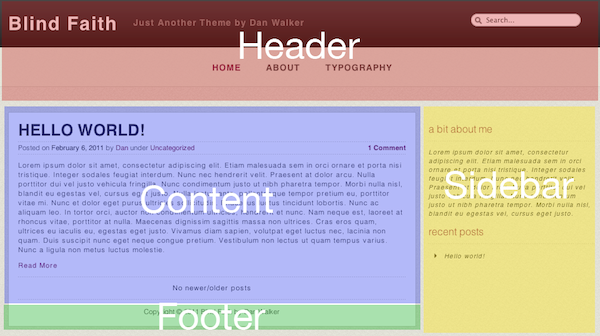
If we load up this HTML in a browser at the moment, we will see the basic layout. Looking at this layout, the first thing we need to do is decide what the header should include. Since we want the title, search box and navigation at the top of every page, that's what we will put in to our header file.
The main content area will be variable, meaning it could be index.php, page.php, etc. The sidebar is all the content outside of the content box to the right of the layout and the footer will simply be the copyright message. Our theme will be made up like this:
So, copy the code from index.html all the way from the doctype to the content division and paste it in to our header file, we should now have a header.php file that looks like this:
<!DOCTYPE HTML PUBLIC "-//W3C//DTD HTML 4.01 Transitional//EN" "http://www.w3.org/TR/html4/loose.dtd">
<html lang='en'>
	<head>
	<title>Blind Faith</title>
	<link rel="stylesheet" href="reset.css" type="text/css">
	<link rel="stylesheet" href="style.css" type="text/css">
	<!--[if IE]>
	<link rel="stylesheet" href="ie.css" type="text/css" />
	<![endif]-->
	</head>
	<body class="home blog">
	<div id="top-bar-tile">
		<div id="top-bar-content">
			<h1><a href="http://www.danwalker.com/themes/blindfaith">Blind Faith</a></h1>
			<span class="slogan">Just Another Theme by Dan Walker</span>
			<div id="search-box">
				<form method="get" id="searchform" action="" >
					<input type="text" value="Search..." onfocus="if(this.value == this.defaultValue) this.value = ''" name="s" id="s" />
				</form>
			</div><!-- search-box -->
		</div><!-- top-bar-content -->
	</div><!-- top-bar-tile -->
	<div id="nav-bar-tile">
			 <div class="nav-bar-content"><ul><li class="current_page_item"><a href="http://www.danwalker.com/themes/blindfaith/" title="Home">Home</a></li><li class="page_item page-item-2"><a href="http://www.danwalker.com/themes/blindfaith/?page_id=2" title="About">About</a></li><li class="page_item page-item-4"><a href="http://www.danwalker.com/themes/blindfaith/?page_id=4" title="Typography">Typography</a></li></ul></div>
	</div><!-- nav-bar-tile -->
	<div id="wrapper">
		<div id="content">
For now, we will skip the content section as that is the biggest and most complex part (made up of many different files) and move straight along to the footer. Usually a footer comes last in a layout, however since the sidebar comes after the footer in our code, we will simply call sidebar after footer. Therefore footer.php should contain the following code;
<div class="spacer"></div>

			<div id="footer">
				Copyright © 2011 Blind Faith by <a href="http://www.danwalker.com">Dan Walker</a><br />
			</div>

		</div><!-- content -->
<?php get_sidebar(); ?>
You'll notice that we're using our first WordPress function above; get_sidebar();. This function is roughly the same as require(“sidebar.php”); and since we're going to always require the sidebar after the footer, it makes sense to call the sidebar in the footer file at the end.
Finally we need to include the sidebar. Since the footer comes before the sidebar, the sidebar is the last file included and so should close the design too (by closing the remaining tags; wrapper, body and html).
		<div id="sidebar">
			<div class="sidebar-box">
				<span class="sidebar-title">a bit about me</span>
				<div class="dots"></div>
				<div class="textwidget">
					<p>Lorem ipsum dolor sit amet, consectetur adipiscing elit. Etiam malesuada sem in orci ornare et porta nisi tristique. Integer sodales feugiat interdum. Nunc nec hendrerit velit. Praesent at dolor arcu. Nulla porttitor dui vel justo vehicula fringilla. Nunc condimentum justo ut nibh pharetra tempor. Morbi nulla nisl, blandit eu egestas vel, cursus eget justo.</p>
				</div>
			</div>
			<div class="sidebar-box">
					<span class="sidebar-title">recent posts</span><div class="dots"></div>
				<ul>
				<li><a href="http://www.danwalker.com/themes/blindfaith/?p=1" title="Hello world!">Hello world!</a></li>
				</ul>
			</div>
		</div><!-- sidebar -->
		<div class="spacer"></div>
	</div><!-- wrapper -->
	</body>
</html>
For now, open up index.php and enter the following;
<?php get_header(); ?>

<?php get_footer(); ?>
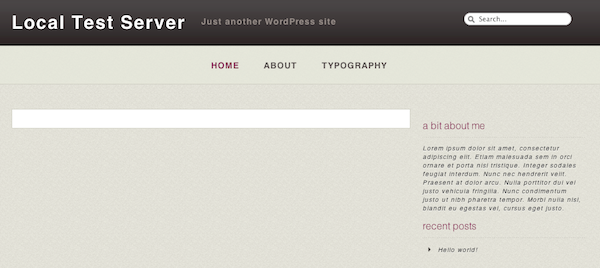
If we navigate to our installation of WordPress, we should get something like this

At the moment, the website content (or what we've done so far) seems to be loading but the stylesheets are not. This is because in our header file, the calls to the stylesheets now use a path that does not exist. They now reside in /wp-content/themes/blindfaith/, but there's an easier way of pasting that everywhere it's needed - a more dynamic way.
The bloginfo() Function
WordPress comes with a built in function called bloginfo() that's great for getting all sorts of useful local information such as; blog name, description, stylesheet URL, stylesheet directory and more. For more information on what we can get with bloginfo, read this page in the WordPress codex.
Let's open up our header file and change a few things to use the dynamic information provided by WordPress rather than the static information in the theme. Our current header.php file looks like this up until the nav-bar-tile tag:
<!DOCTYPE HTML PUBLIC "-//W3C//DTD HTML 4.01 Transitional//EN" "http://www.w3.org/TR/html4/loose.dtd">
<html lang='en'>
	<head>
	<title>Blind Faith</title>
	<link rel="stylesheet" href="reset.css" type="text/css">
	<link rel="stylesheet" href="style.css" type="text/css">
	<!--[if IE]>
	<link rel="stylesheet" href="ie.css" type="text/css" />
	<![endif]-->
	</head>
	<body class="home blog">
	<div id="top-bar-tile">
		<div id="top-bar-content">
			<h1><a href="http://www.danwalker.com/themes/blindfaith">Blind Faith</a></h1>
			<span class="slogan">Just Another Theme by Dan Walker</span>
			<div id="search-box">
				<form method="get" id="searchform" action="" >
					<input type="text" value="Search..." onfocus="if(this.value == this.defaultValue) this.value = ''" name="s" id="s" />
				</form>
			</div><!-- search-box -->
		</div><!-- top-bar-content -->
	</div><!-- top-bar-tile -->
First of all, let's fix the missing stylesheets. We'll use two values from bloginfo; stylesheet_directory and stylesheet_url. The URL value is a direct link to style.css, whereas directory lists the directory style.css resides in. It's important to remember that WordPress functions like this do not append a trailing slash to values.
Replace the stylesheet lines with the following;
<link rel="stylesheet" href="<?php bloginfo('stylesheet_directory'); ?>/reset.css" type="text/css">
	<link rel="stylesheet" href="<?php bloginfo('stylesheet_url'); ?>" type="text/css">
	<!--[if IE]>
	<link rel="stylesheet" href="<?php bloginfo('stylesheet_directory'); ?>/ie.css" type="text/css" />
	<![endif]-->
Our theme now has properly linked stylesheets. Next up, whilst we're in the header file, let's change the blog title, slogan and link.
The <title> tag doesn't simply have the bloginfo property that represents the name of the blog, we can also add another function; wp_title(). This function returns the title of the page or post currently being viewed, prepended with ». To turn off the » before the page name, simply change the parentheses of wp_title() to wp_title(“”, true);
<title><?php bloginfo('name'); ?> <?php wp_title(); ?></title>
This will produce something along the lines of;
Local Test Blog >> Hello World
Now we can simply change the logo/title text, slogan and URL using the following bloginfo() properties;
<h1><a href="<!--?php bloginfo('url'); ?-->"><?php bloginfo('name'); ?></a></h1>
<span class="slogan"><?php bloginfo('description'); ?></span>
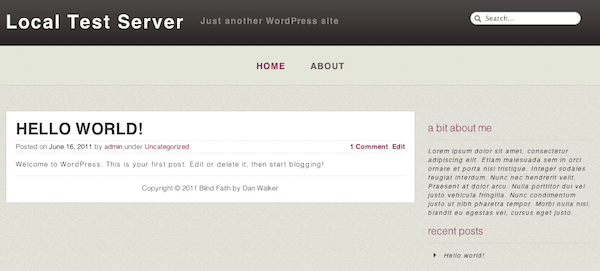
Our page should now look something like this;
Now we'll take a look at the index.php file. This is the file called by default and should be able to display lists of posts for the front page, categories, archives and search results - or an error message if none exist. Obviously each one of these different lists can contain variable amounts of posts, we can work with this by using something in WordPress known as "The Loop".
The Loop
WordPress figures out what posts to display before the index file is executed — after all we are making a theme, and the theme comes last as it's simply a way of displaying output. Using some in-built functions, we can avoid having to do complex PHP loops with constant checks for valid data - this aspect of WordPress theme development makes the process a lot easier and causes less headaches.
First of all, let's look at our post structure;
		<div class="post">
			<h1><a href="http://www.danwalker.com/themes/blindfaith/?p=1">Hello world!</a></h1>
			<div class="post-details">
				<div class="post-details-left">
					Posted on <strong>February 6, 2011</strong> by <span class="author">Dan</span> under <span class="author"><a href="http://www.danwalker.com/themes/blindfaith/?cat=1" title="View all posts in Uncategorized" rel="category">Uncategorized</a></span>
					</div>
					<div class="post-details-right">
					<span class="comment-count"><a href="http://www.danwalker.com/themes/blindfaith/?p=1#comments" title="Comment on Hello world!">1 Comment</a></span>
				</div>
			</div>

			<p>Lorem ipsum dolor sit amet, consectetur adipiscing elit. Etiam malesuada sem in orci ornare et porta nisi tristique. Integer sodales feugiat interdum. Nunc nec hendrerit velit. Praesent at dolor arcu. Nulla porttitor dui vel justo vehicula fringilla. Nunc condimentum justo ut nibh pharetra tempor. Morbi nulla nisl, blandit eu egestas vel, cursus eget justo. Nulla lectus ante, pellentesque tempor pretium eu, porttitor vitae mi. Nunc et dolor eget purus ultricies sollicitudin. Phasellus luctus tincidunt lobortis. Nunc ac aliquam leo. In tortor orci, auctor non condimentum ultricies, hendrerit et nunc. Nam neque est, laoreet at rhoncus vitae, porttitor at nulla. Maecenas dignissim sagittis massa non ultrices. Cras eros quam, ultrices eu iaculis eu, egestas eget justo. Vivamus diam sapien, volutpat eget luctus nec, lacinia non quam. Duis suscipit nunc eget neque congue pretium. Vestibulum non lectus ut quam tempus varius. Nunc a ligula non metus luctus molestie.</p>

			<p> <a href="#" class="more-link">Read More</a></p>

			<div class="dots"></div>
		</div><!-- post -->
Since we know what the structure of a post looks like and we have a copy with dummy information, we can replace the dummy information with some functions that will return actual post values. There are several pieces of information we can display with each post, such as;
- the_title
- the_tags
- the_ID
- the_category
- the_date
- the_content
- many more (which you can find at http://codex.wordpress.org/Template_Tags#Post_tags)
When any one of these functions is called within the loop, they display the correct information for the current post being looped through.
Using the link above (or just the functions supplied before the link), try to replace the dummy content on your own with the correct replacement functions before carrying on.
The correct code should look like this;
	<div class="post">
			<h1><a href="<?php the_permalink(); ?>"><?php the_title(); ?></a></h1>
			<div class="post-details">
				<div class="post-details-left">
					Posted on <strong><?php the_date(); ?></strong> by <span class="author"><?php the_author(); ?></span> under <span class="author"><?php the_category(', '); ?></span>
					</div>
					<div class="post-details-right">
	<?php edit_post_link('Edit', '<span class="comment-count">  ' , '</span>'); ?><span class="comment-count"><?php comments_popup_link('Leave a comment', '1 Comment', '% Comments'); ?></span>
	</div>
			</div>

			<?php if ( is_archive() || is_search() ) : // Only display excerpts for archives and search. ?>
					<?php the_excerpt(); ?>
			<?php else : ?>
					<?php the_content('Read More'); ?>
			<?php endif; ?>

			<div class="dots"></div>
		</div><!-- post -->
There are a few bits you may not have been able to do, let's look at them.
First of all, when displaying categories, WordPress likes to print a default style using a list. To override this, we can provide our own separator, which in our case is simply a comma and a space.
<?php the_category(', '); ?
Next up to display an edit link, followed by how many comments a post has, we can use a function that creates the link and can output three different states for; no comments, single comment and multiple comments (where the percentage sign is the placeholder for the comment count).
<?php comments_popup_link('Leave a comment', '1 Comment', '% Comments'); ?>
Finally we have a simple if statement to decide what type of content to show. If we use the_excerpt() then only an excerpt of the content is shown, if we use the_content() then all of the content is shown (or until a <--more--> appears in the content). On a search or archive page, it isn't important to show the full article - just enough to get the gist - so we use the_excerpt().
Now in order to make this code work, we have to supply it with posts, and to do that we need to put it inside the loop. Our index.php file should currently resemble this;
<?php get_header(); ?>

		<div class="post">
				<h1><a href="<?php the_permalink(); ?>"><?php the_title(); ?></a></h1>
				<div class="post-details">
					<div class="post-details-left">
						Posted on <strong><?php the_date(); ?></strong> by <span class="author"><?php the_author(); ?></span> under <span class="author"><?php the_category(', '); ?></span>
						</div>
						<div class="post-details-right">
		<?php edit_post_link('Edit', '<span class="comment-count">  ' , '</span>'); ?><span class="comment-count"><?php comments_popup_link('Leave a comment', '1 Comment', '% Comments'); ?></span>
		</div>
					</div>
				</div>

				<?php if ( is_archive() || is_search() ) : // Only display excerpts for archives and search. ?>
						<?php the_excerpt(); ?>
				<?php else : ?>
						<?php the_content('Read More'); ?>
				<?php endif; ?>

				<div class="dots"></div>
			</div><!-- post -->

<?php get_footer(); ?>
Put this code after the header function;
<?php if ( ! have_posts() ) : ?>
		<h1>Not Found</h1>
			<p>Apologies, but no results were found for the requested archive. Perhaps searching will help find a related post</p>
<?php endif; ?>

<?php while ( have_posts() ) : the_post(); ?>
and this one just before the footer function;
<?php endwhile; ?>
Loading up the WordPress blog should now look something like this;
Now our theme will show a list of WordPress posts according to how many should be displayed (changed under general settings in Dashboard). But what if there are more posts? What if the blog contains 6 posts but only displays 5? To combat this we need to add simple next/previous or new/old links.
Of course there's no point displaying these links if there are no newer or older posts to jump to as it's misleading, therefore we will use the following code after the loop;
<?php if ( $wp_query->max_num_pages > 1 ) : ?>
		<div id="older-posts"><?php next_posts_link('Older Posts'); ?></div>
		<div id="newer-posts"><?php previous_posts_link('Newer Posts'); ?></div>
<?php else: ?>
		<div id="only-page">No newer/older posts</div>
<?php endif; ?>
The next_posts_link() and previous_posts_link() will only display when they are needed, using the text provided in the first parameter. Of course it is possible to remove the if statement and only use the following two lines;
<div id="older-posts"><?php next_posts_link('Older Posts'); ?></div>
<div id="newer-posts"><?php previous_posts_link('Newer Posts'); ?></div>
But using the if statement above, we have the option of showing a message if there are no pages to skip to, which can make things less confusing for the user (which is always a good thing).
Our completed index.php file should look like this;
<?php get_header(); ?>

<?php /* If there are no posts to display, such as an empty archive page */ ?>
<?php if ( ! have_posts() ) : ?>
		<h1>Not Found</h1>
			<p>Apologies, but no results were found for the requested archive. Perhaps searching will help find a related post</p>
<?php endif; ?>

<?php while ( have_posts() ) : the_post(); ?>

<div class="post">
	<h1><a href="<?php the_permalink(); ?>"><?php the_title(); ?></a></h1>
	<div class="post-details">
		<div class="post-details-left">
		Posted on <strong><?php the_date(); ?></strong> by <span class="author"><?php the_author(); ?></span> under <span class="author"><?php the_category(', '); ?></span>
		</div>
		<div class="post-details-right">
		<?php edit_post_link('Edit', '<span class="comment-count">  ' , '</span>'); ?><span class="comment-count"><?php comments_popup_link('Leave a comment', '1 Comment', '% Comments'); ?></span>
		</div>
	</div>

	<?php if ( is_archive() || is_search() ) : // Only display excerpts for archives and search. ?>
			<?php the_excerpt(); ?>
	<?php else : ?>
			<?php the_content('Read More'); ?>
	<?php endif; ?>

	<div class="dots"></div>
</div><!-- post -->

<?php endwhile; ?>

<?php if ( $wp_query->max_num_pages > 1 ) : ?>
		<div id="older-posts"><?php next_posts_link('Older Posts'); ?></div>
		<div id="newer-posts"><?php previous_posts_link('Newer Posts'); ?></div>
<?php else: ?>
		<div id="only-page">No newer/older posts</div>
<?php endif; ?>

<div class="spacer"></div>
<?php get_footer(); ?>
Single Posts
We now have a working index, but now we need a way to display single posts. Due to the simplicity of our design, our single.php file and index.php are near identical, the difference being that we don't need next/previous links in single.php but we do need comments. The code for single.php is as follows;
<?php get_header(); ?>

<?php /* If there are no posts to display, such as an empty archive page */ ?>
<?php if ( ! have_posts() ) : ?>
		<h1>Not Found</h1>
			<p>Apologies, but no results were found for the requested archive. Perhaps searching will help find a related post</p>
<?php endif; ?>

<?php while ( have_posts() ) : the_post(); ?>

<div class="post">
	<h1><a href="<?php the_permalink(); ?>"><?php the_title(); ?></a></h1>
	<div class="post-details">
		<div class="post-details-left">
		Posted on <strong><?php the_date(); ?></strong> by <span class="author"><?php the_author(); ?></span> under <span class="author"><?php the_category(', '); ?></span>
		</div>
		<div class="post-details-right">
		<?php edit_post_link('Edit', '<span class="comment-count">  ' , '</span>'); ?><span class="comment-count"><?php comments_popup_link('Leave a comment', '1 Comment', '% Comments'); ?></span>
		</div>
	</div>

	<?php if ( is_archive() || is_search() ) : // Only display excerpts for archives and search. ?>
			<?php the_excerpt(); ?>
	<?php else : ?>
			<?php the_content('Read More'); ?>
	<?php endif; ?>

	<div class="dots"></div>
</div><!-- post -->

<div class="spacer"></div>

<?php comments_template( '', true ); ?>

<?php endwhile; ?>

<div class="spacer"></div>
<?php get_footer(); ?>
As you can see, not much has changed except around the bottom of the file. We've simply removed the code for the links and added a new function called comments_template(). The parameters for this function are simply the file to load (comments.php if left blank or by default) and whether or not to sort comments by type (default to false).
As you've probably guessed, the file that handles comments is comments.php - it is kept in a separate file so we can use it on both single.php and page.php alike.
Page
The file for displaying a page is almost identical to the single post file with the exception that information about time of post, author and so on is removed. This means the page file looks like this;
<?php get_header(); ?>

<?php /* If there are no posts to display, such as an empty archive page */ ?>
<?php if ( ! have_posts() ) : ?>
		<h1>Not Found</h1>
			<p>Apologies, but no results were found for the requested archive. Perhaps searching will help find a related post</p>
<?php endif; ?>

<?php while ( have_posts() ) : the_post(); ?>

<div class="post">
	<h1><a href="<?php the_permalink(); ?>"><?php the_title(); ?></a></h1>

	<?php if ( is_archive() || is_search() ) : // Only display excerpts for archives and search. ?>
			<?php the_excerpt(); ?>
	<?php else : ?>
			<?php the_content('Read More'); ?>
	<?php endif; ?>

	<div class="dots"></div>
</div><!-- post -->

<div class="spacer"></div>

<?php comments_template( '', true ); ?>

<?php endwhile; ?>

<div class="spacer"></div>
<?php get_footer(); ?>
Navigation
The final part we'll be adding today is the navigation up top (as it's so simple)! Open up header.php and replace the nav-bar-tile division with this;
<div id="nav-bar-tile">
		 <?php wp_nav_menu(array( 'menu' => 'mainnav', 'menu_class' => 'nav-bar-content', 'menu_id' => 'navigation', 'container' => false, 'theme_location' => 'primary-menu', 'show_home' => '1')); ?>
</div><!-- nav-bar-tile -->
The wp_nav_menu function spits out a list of pages, however it also takes arguments in the form of an array. The arguments we have supplied, in order, are;
- menu - The desired menu
- menu_class - The CSS class to be used
- menu_id - The UL element ID
- container - Whether or not to wrap the list
- theme_location - The location of the menu within the theme (for multiple menus)
- show_home - Whether or not to display a 'Home' link
The CSS we're using is coded to adapt to the way WordPress spits out a navigation list, it's important to consider how a list will be outputted in code by WordPress when coding a design.
Our WordPress installation should now look like this;
Next Time...
Next time we will look at adding a functional sidebar that's widget ready, dynamic post types, custom fields and wrapping up the final few elements in the theme!
If there is anything you were unsure of in this post, or if you just have questions, feel free to leave a comment below. For those with questions or just those wanting to know more, the WordPress Codex is goldmine of information for all the functions and so on that WordPress uses.

Comments