Introduction
In this tutorial, you'll learn how to create a mobile 3D game using C# and Unity. The objective of the game is to use the accelerometer to move the ball and reach the portal.
You will learn about the following aspects of Unity game development in this tutorial:
- 3D Primitives
- accelerometer controls
- camera movement
- physics
- GUI Textures
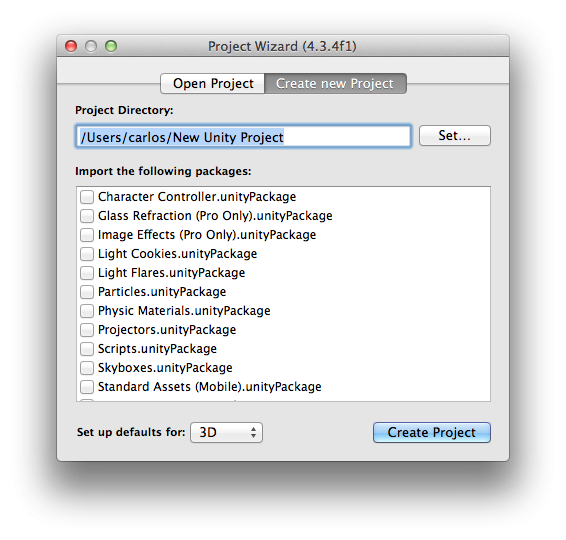
1. Create a New Unity Project
Open Unity and select New Project from the File menu to open the new project dialog. Tell Unity where you want to save the project and set the Set up defaults for: menu to 3D.
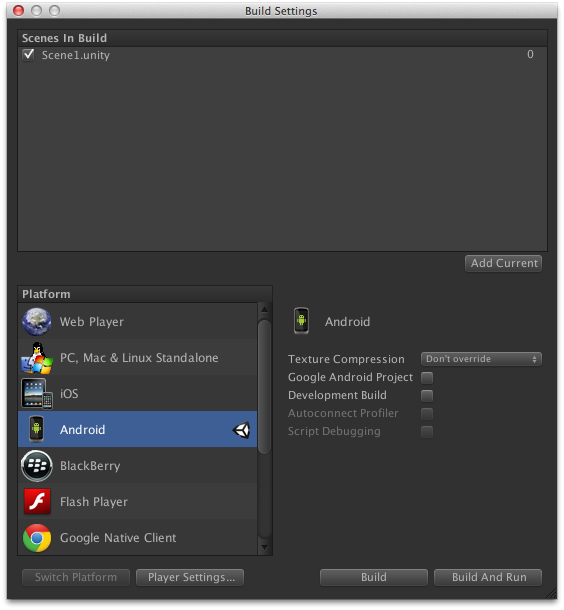
2. Build Settings
In the next step, you're presented with Unity's user interface. Set the project up for mobile development by choosing Build Settings from the File menu and selecting your platform of choice.
3. Devices
The first thing we need to do after selecting the target platform is choosing the size of the artwork we'll be using in the game. This will help us select a proper size for the 3D textures and 2D GUI without making the artwork blurry or use textures that are too large for the target device. For example, the artwork needs to have a higher resolution if you're targeting an iPad with a retina display than a Lumia 520.
iOS
- iPad without Retina: 1024px x 768px
- iPad with Retina: 2048px x 1536px
- 3.5" iPhone/iPod Touch without Retina: 320px x 480px
- 3.5" iPhone/iPod with Retina: 960px x 640px
- 4" iPhone/iPod Touch: 1136px x 640px
Android
Because Android is an open platform, there's a wide range of devices, screen resolutions, and pixel densities. A few of the more common ones are listed below.
- Asus Nexus 7 Tablet: 800px x 1280px, 216 ppi
- Motorola Droid X: 854px x 480px, 228 ppi
- Samsung Galaxy SIII: 720px x 1280px, 306 ppi
Windows Phone & BlackBerry
- Blackberry Z10: 720px x 1280px, 355 ppi
- Nokia Lumia 520: 400px x 800px, 233 ppi
- Nokia Lumia 1520: 1080px x 1920px, 367 ppi
Note that the code we'll write in this tutorial can be used to target any of the platforms.
4. Export Graphics
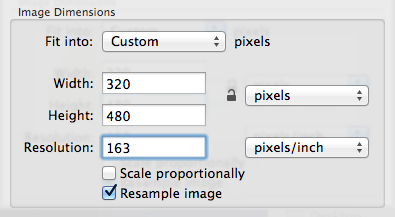
Depending on the devices you're targeting, you may need to convert the artwork to the recommended size and pixel density. You can do this in your favorite image editor. I've used the Adjust Size... function under the Tools menu in OS X's Preview application.
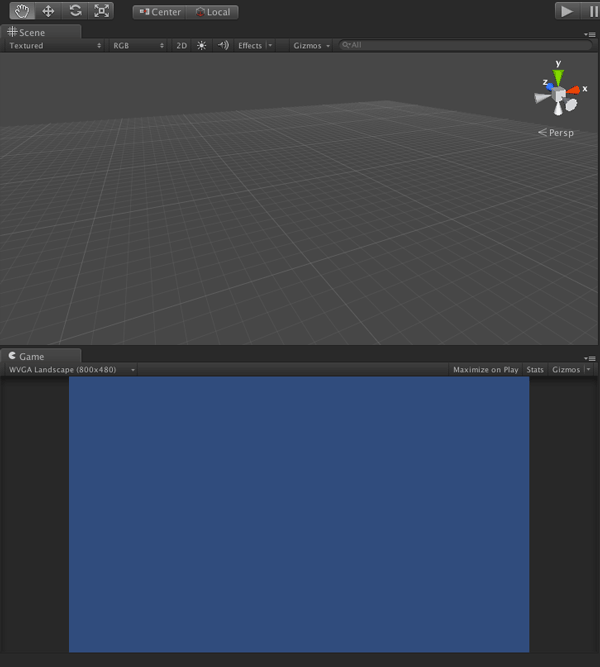
5. Unity User Interface
You can modify the resolution that's being displayed in the Game panel.
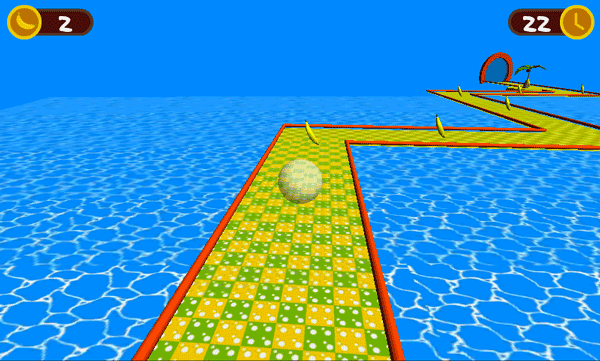
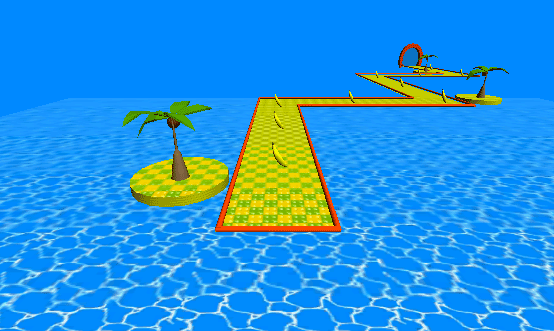
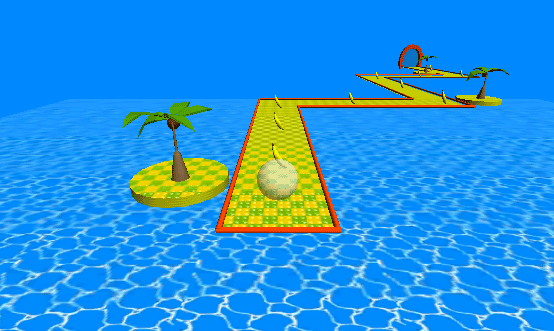
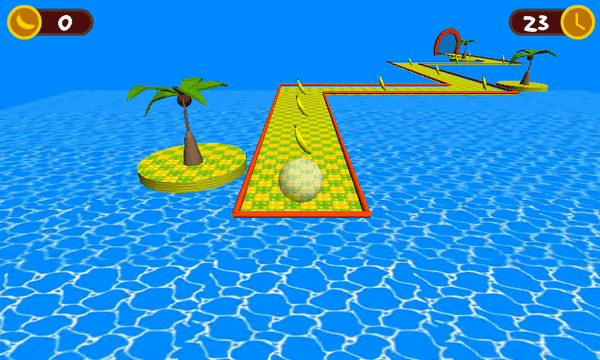
6. Game Interface

The interface of our game will be straightforward. The above screenshot gives you an idea of the artwork we'll be using and how the final game interface will end up looking. You can find the artwork and additional resources in the tutorial's source files on GitHub.
7. Programming Language
You can use one of three programming languages when using Unity, C#, UnityScript, a variation of JavaScript, and Boo. Each programming language has its pros and cons, and it's up to you to decide which one you prefer. My personal preference goes to the C# programming language so that's the language I'll be using in this tutorial.
If you decide to use another programming language, then make sure to take a look at Unity's Script Reference for examples.
8. Sound Effects
I'll use a number of sounds to improve the audial experience of the game. The sound effects used in this tutorial were obtained from playonloop.com and Freesound.
9. 3D Models
To create our game we first need to get our 3D models. I recommend 3docean for high quality models, textures, and more, but if you're testing or learning then a few free models are good as well. The models in this tutorial were downloaded from SketchUp 3D Warehouse where you can find a good variety of models of all kinds.
Now, as Unity doesn't recognize the SketchUp file format we need to convert it to something Unity can import. We first need to download the free version of SketchUp, which is called SketchUp Make.
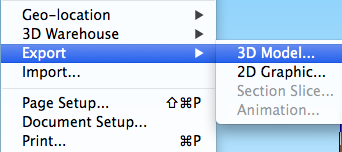
Open your 3D model in SketchUp Make, select Export > 3D Model from the File menu, and choose Collada (*.dae).
Choose a name and location, and click the save button. This will create a file and a folder for the 3D model. The file holds the data for the 3D object while the folder contains the model's textures. You can then import the model into Unity as explained in the next step.
10. Import Assets
Before we start coding, we need to add our assets to the Unity project. You can do this one of several ways:
- select Import New Asset from the Assets menu
- add the items to the assets folder in your project
- drag and drop the assets in the project window
After completing this step, you should see the assets in your project's Assets folder in the Project panel.
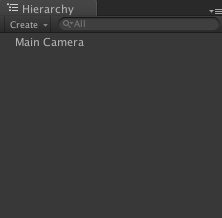
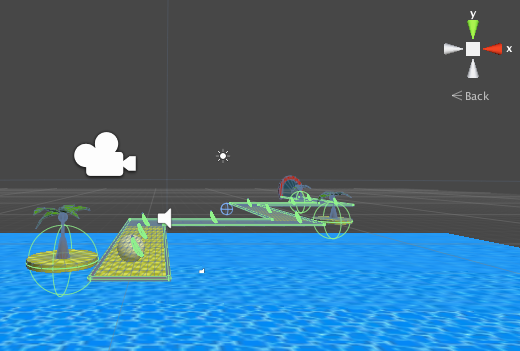
11. Create Scene
We're ready to create the scene of our game by dragging objects to the Hierarchy or Scene panel. We'll also use Unity native 3D primitive objects to create the level as shown in the next steps.
12. Setup Camera
Let's first position our Main Camera a little bit higher to achieve the view we want. Select it from the Hierarchy panel and adjust the Transform values in the Inspector to match the ones shown below.
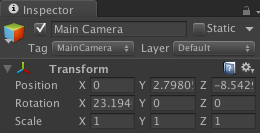
Don't worry if you don't see any changes. We haven't created anything for the camera to see yet. Next, use the Inspector to set the Background color to RGB: 0, 139, 252.

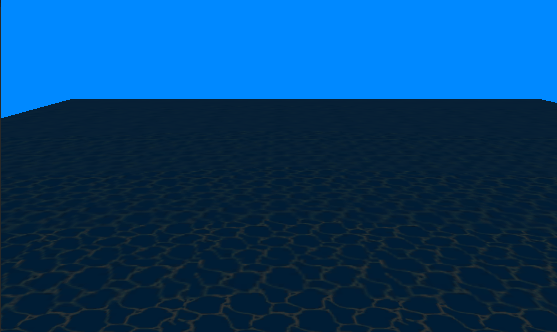
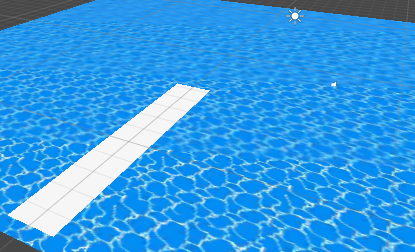
13. Background
Our platform level will be floating above a background, which will be a representation of a sea. It will be created using Unity primitives, a simple Plane with a texture applied to it.
While Unity can work with 3D objects of any type created by other programs, it is sometimes easier and/or more convenient to use primitives for prototypes.
To create the sea, for example, select Create Other > Plane from the GameObject menu and adjust the Transform values in the Inspector to match the ones shown below.
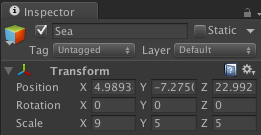
You should a square in the Scene panel. We'll use it to detect when the player falls from the platform, ending the game.

It's worth mentioning that these primitive objects already have a Mesh Collider attached to them, which means that they will automatically detect collisions or trigger events when they come in contact with a RigidBody.
14. Texture Material
To apply a texture to the sea plane, we need to create a Material. A Material is used to define how a GameObject looks and it is essential to add a texture to a GameObject.
Select Create > Material from the Assets menu to create one, find it in the Assets panel, and use the Inspector to select the texture you want to use as your sea. These are the settings I've used:
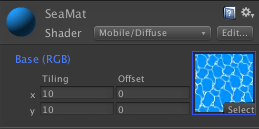
You'll notice a message in the material section stating that it's recommended to use Mobile/Diffuse as a shader, because the default white color doesn't do anything. Changing it to Mobile/Diffuse will also help with performance.
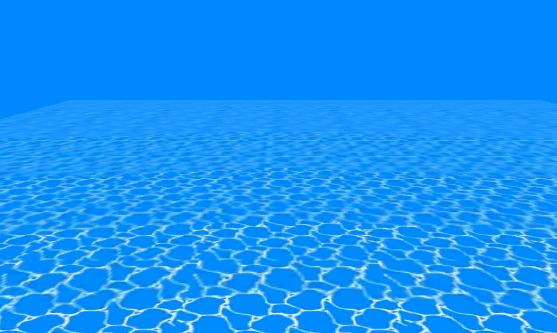
15. Adding Light
You may have noticed that the sea is a bit darker than it should be. To fix this, we need to add a Light to our scene. Select Create Other from the GameObject menu and select Directional Light. This will create an object that produces a beam of light. Change its Transform values as shown in the following screenshot to make it illuminate the sea.
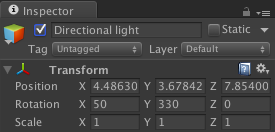
This looks much better.
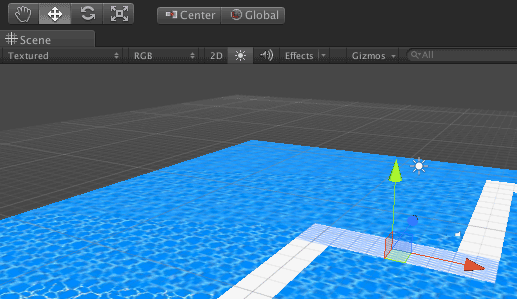
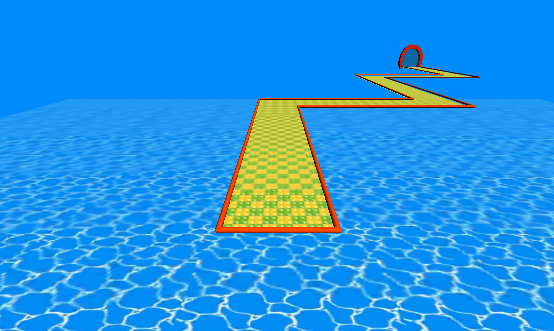
16. Creating Platforms
The platforms are parts of our level and are used by the player to move the ball to the portal on the other side of the sea.

Create a Plane as you did for the sea and adjust the Transform values in the Inspector as shown below. This will create and put the first platform in place.
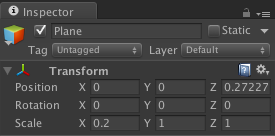
We can now use Unity's Move and Rotation tools to create the other platforms. They're all of the same size so we can use them vertically or horizontally by duplicating them using Command+D on OS X and Control+D on Windows.
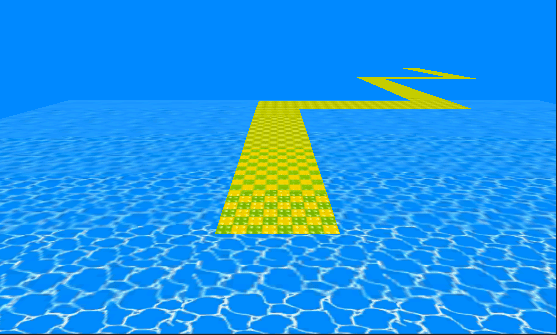
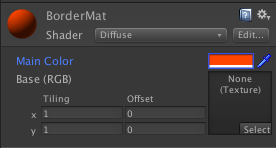
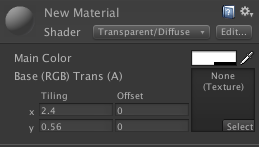
17. Platform Texture
Create a new Material like we did in Step 14 and apply the texture to it. Mine looks like this:
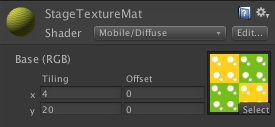
Adjust the x and y tiling until you're happy with the result.
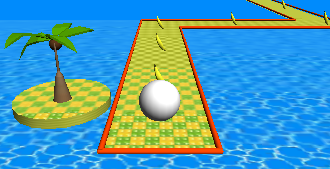
18. Border Cylinders
We need to create a border to prevent our player from falling off too easily. To do this, we'll use a new type of primitive, a Cylinder.
Select Create Other > Cylinder from the GameObject menu and adjust the Transform values in the Inspector as shown below.
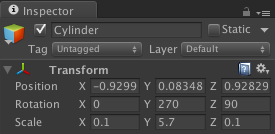
This will add a small border to the edge of the first platform. Create a new Material and change its color in the Inspector to RGB: 255, 69, 0.
The result should look like this:
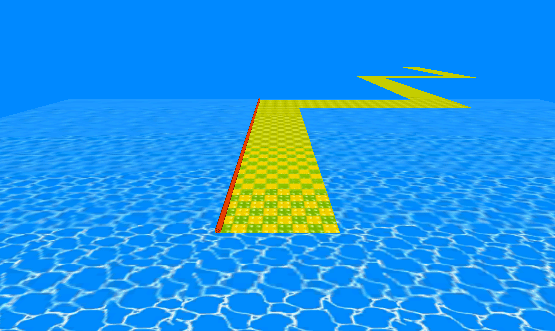
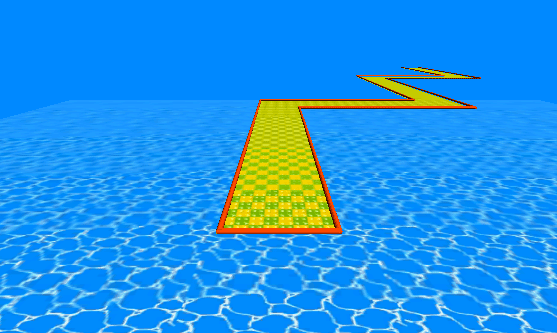
Use Command+D (Control+D on Windows) to duplicate the border and the Scale tool to change its size. Position the duplicates at the platforms' edges using Unity's tools.
19. Portal
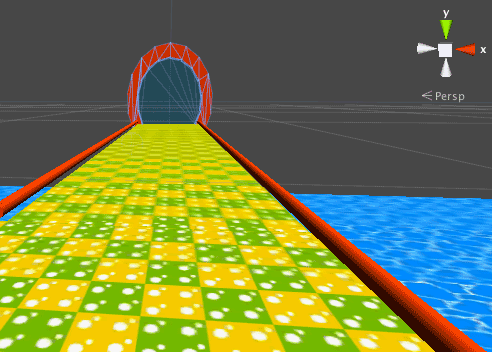
The portal is the goal line of the game. The player will use the accelerometer to control the ball and take it to this point while picking up items and avoiding falling off the platform. The portal is a 3D model, which we imported in Step 10.
Drag and drop it on the Scene or Hierarchy panel and change its Transform values to the following:
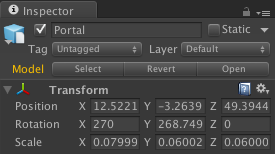
This will position it at the end of the platforms.
20. Portal Collider
Because imported 3D models don't have a collider by default, we need to attach one. Since we only need to test if the ball hits the blue area of the portal, we'll attach the collider to it.
Take a look at the portal model in the Hierarchy view and you'll notice a small triangle to the left of its name. Click the triangle to expand the portal's group and select the first item. I've added the -Collider suffix for clarification.
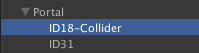
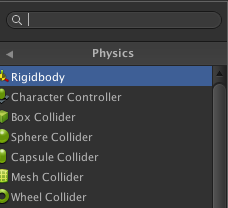
Click the Add Component button in the Inspector and choose Physics > Mesh Collider. This will add a collider using the shape of the model's selected area.
21. Portal Audio Source
To provide feedback to the player, we'll play a sound effect when the ball touches the portal's collider. Because we'll be triggering the event using the previously created collider, we need to add the audio source to that same object.
Select it from the Hierarchy panel, click the Add Component button in the Inspector panel, and select Audio Source from the Audio section.
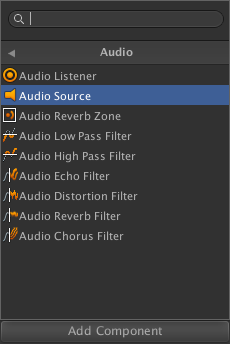
Uncheck Play on Awake and click the little dot on the right, below the gear icon, to select the sound you want to play.
22. Adding Islands
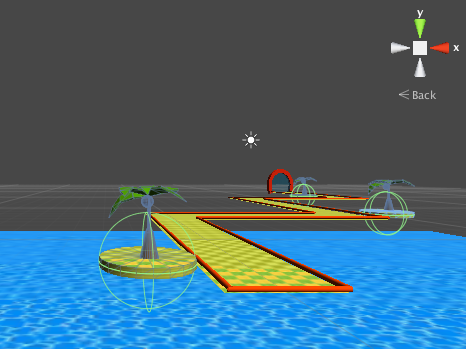
The islands are nothing more than decorative elements to make the level less empty. I've used an imported 3D model and a Cylinder to make them. I won't go into detail creating the islands since they're not essential to the game. With what you've learned so far, you should be able to create them yourself.
23. Adding Bananas
As in Monkey Ball, the player will be able to collect bananas during the game. Start by dragging the model from the Assets panel to the Scene. Don't worry about its location just yet, because we'll convert it to a Prefab later since we'll be reusing it multiple times.
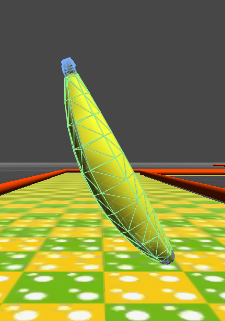
24. Banana Mesh Collider
As I mentioned earlier, imported models don't have a collider by default, so we need to attach one to the banana. Click the Add Component button in the Inspector and choose Physics > Mesh Collider. This will add a collider using the model's shape. Make sure to check the Trigger checkbox, because we want to detect collisions, but we don't want the ball to react with the banana.
24. Adding the Player
It's time to create our game character, which will be a simple Sphere primitive. Select Create Other > Sphere from the GameObject menu to create the primitive and modify the Transform values in the Inspector as shown below.
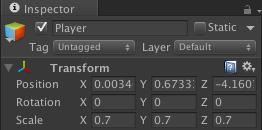
This will create the sphere and position it at the start of our level.
To make the sphere semi-transparent, we need to change its Shader options. Open the Inspector and change the shader to Transparent/Diffuse.
25. Player RigidBody
To detect a collision with the player, we need to attach a RigidBody to it. To add one, select Add Component from the Inspector panel, followed by Physics > RigidBody. You can leave the settings at their defaults.
26. GUI Textures
To display the game's user interface, we'll use Unity's GUI Textures. Unity's documentation provides a clear explanation of GUI Textures:
GUI Textures are displayed as flat images in 2D. They are made especially for user interface elements, buttons, or decorations. Their positioning and scaling is performed along the x and y axes only, and they are measured in Screen Coordinates, rather than World Coordinates.
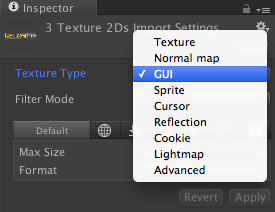
By default, images imported to the Assets folder are converted to Textures that can be applied to 3D objects. We need to change this to GUI Texture for the images we want to use in the game's user interface.
Select the images you want to convert in the Assets panel and open the Inspector, click on the Texture Type drop-down menu and select GUI.
You can now drag and drop the images to the Scene. The images will always appear in front of every object on the stage and will be treated as 2D elements.

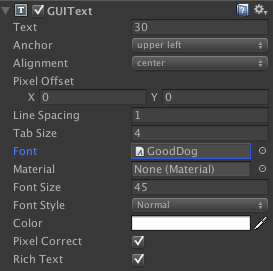
27. GUI Text
Inside each GUI element, we'll display a number indicating the number of bananas the player has collected and the time the player has left.
Select Create Other > GUI Text from the GameObject menu to create a text object, place it at the center of the GUI element, and change the text in the Hierarchy panel to 0. Do the same for the time on the right. I've set the default time to 30 seconds.
You can use a custom font for the text by adding the font to the Assets folder and then changing the Font property of the text in the Inspector.
28. Adding Scripts
It's time to write some code. With the user interface in place, we can start writing the necessary code to add functionality to our game. We do this by means of scripts. Scripts are attached to different game objects. Follow the next steps to learn how to add interaction to the level we've just created.
29. Move Scene
We'll start by making use of the device's accelerometer. Moving the player using the accelerometer is fairly simple in Unity. There's nothing to set up and it's easy to understand.
Select the stage, click the Add Component button in the Inspector panel, and choose New Script. Name the script MoveScene and don't forget to change the language to C#. Open the newly created file and add the following code snippet.
using UnityEngine;
using System.Collections;

public class MoveScene : MonoBehaviour
{
    void Update()
    {
        transform.rotation *= Quaternion.Euler(Input.acceleration.y/6, -Input.acceleration.x/3, 0);
    }
}
We use the Update method to request data from the accelerometer in every frame using the Input.acceleration property, which measures the device's movement in a three-dimensional space. This allows us to get the x, y, and z values, and use them to control the player's position.
We then apply the obtained values to the transform.rotation property of the level by invoking Quaternion.Euler, which returns the rotation values. Note that we divide the accelerometer's values to avoid that the player moves too fast, making the gameplay difficult.
We only modify the level's x and y values, because we only need it to tilt and not to move closer to or farther from the camera.
30. Camera Follow
The following script is attached to the Main Camera. It calculates the space between the camera and the player and maintains it while the ball moves.
using UnityEngine;
using System.Collections;

public class FollowPlayer : MonoBehaviour
{
    public GameObject player;
    private Vector3 playerOffset;

    // Use this for initialization
    void Start()
    {
        playerOffset = transform.position - player.transform.position;
    }

    // Update is called once per frame
    void Update()
    {
        transform.LookAt(player.transform);
        transform.position = player.transform.position + playerOffset;
    }
}
The script uses two variables that are worth explaining:
player: This is a reference to the player in the Scene. You can set this in the Inspector.-
playerOffset: This is the distance between the camera and the player. Because we maintain the same distance between camera and player, the camera follows the player as it moves. The offset is calculated in theStartmethod.
We direct the camera to the player and set its position to the player's position plus the value of playerOffset. Because we do this in the Update method, the camera position is calculated and updated in every frame. The result is that the camera follows the player. This is a simple yet effective strategy to create a camera that follows the player.
31. Picking Bananas
The following script is attached to the banana and handles any interactions with it. We start by getting references to the corresponding sound and the text displaying the number of collected bananas, which we'll need to play the sound and increase the counter in the top left when the player collides with a banana. Once you've declared the variables in the script, you need to set these references in the Inspector.
using UnityEngine;
using System.Collections;

public class PickBanana : MonoBehaviour
{
    public AudioClip bananaSound;
    public GUIText bananaText;

    void OnTriggerEnter(Collider other)
    {
        AudioSource.PlayClipAtPoint(bananaSound, transform.position);
		int score = int.Parse (bananaText.text) + 1;
		bananaText.text = score.ToString();
        Destroy(gameObject);
    }
}
Next, we call a method that detects when the ball collides with a banana. When this happens, we play the sound and increase the counter.
To modify the counter, we create a variable using the value of the GUI Text and use the int.Parse method to convert the string to a number and increment the number by 1. We then set the value to the GUI Text, first converting the number to a string by invoking the toString method. Finally, we invoke Destroy to remove the banana game object.
32. Falling Off the Platform
The following class is used to detect when the player falls off the platform into the sea. Attach the script to the sea game object.
using UnityEngine;
using System.Collections;

public class Lose : MonoBehaviour
{
    void OnCollisionEnter()
    {
        audio.Play();
        Invoke("Reload", 1.59f);
    }

    void Reload()
    {
        Application.LoadLevel(Application.loadedLevel);
    }
}
This simple class uses the OnCollisionEnter method to detect when the ball collides with the sea, which means the player has fallen off the platform. When this happens, we play the sound attached to the sea and use the Invoke method to call the Reload method, which restarts the game by reloading the current scene.
The second parameter of the Invoke method defines the delay with which the Reload method is invoked. This is necessary as we first want the sound to finish before we start a new game.
33. Monitoring Time
The next class, Timer, is attached to the time GUI in the top right. It reduces the time and ends the game when the counter reaches 0.
using UnityEngine;
using System.Collections;

public class Timer : MonoBehaviour
{
    public GUIText timeText;

    void Start()
    {
        InvokeRepeating("ReduceTime", 1, 1);
    }

    void ReduceTime()
    {
        int currentTime = int.Parse(timeText.text) - 1;
        timeText.text = currentTime.ToString();

        if (currentTime == 0)
        {
            audio.Play();
            Invoke("Reload", 1.59f);//waits until sound is played to reload
            Destroy(timeText);
        }
    }

    void Reload()
    {
        Application.LoadLevel(Application.loadedLevel);
    }
}
We keep a reference to the text in the timeText variable to make modifying the user interface easy. In the Start method, we call the InvokeRepeating method, which repeatedly invokes the ReduceTime method repeatedly.
To update the text in the user interface, we create a variable to convert the text to a number, just like we did earlier, and subtract one second and update the user interface with the result.
When the counter reaches 0, the appropriate sound is played and we destroy the counter text. We invoke the Reload method with a delay to restart the game when the sound has finished playing.
34. Level Complete
The last class, EndLevel, is used to detect when the player reaches the portal. When the player passes through the portal, we display a message on screen and destroy destroy the ball. We do this to prevent the ball from falling in the sea.
using UnityEngine;
using System.Collections;

public class EndLevel : MonoBehaviour
{
    public GameObject complete;
    public GameObject player;

    void OnTriggerEnter(Collider other)
    {
        audio.Play();
        Invoke("Restart", 2);
        GameObject alert = Instantiate(complete, new Vector3(0.5f, 0.5f, 0), transform.rotation) as GameObject;
        Destroy(player.rigidbody);
    }

    void Restart()
    {
        Application.LoadLevel(Application.loadedLevel);
    }
}
The Instantiate method is used to create an instance of the message that is displayed to the player. It lets us use the GUI element from the project's Assets instead of having it on the scene. Finally, we restart the game with a delay of two seconds.
35. Testing
It's time to test the game. Press Command+P to play the game in Unity. If everything works as expected, then you're ready for the final steps.
36. Player Settings
When you're happy with your game, it's time to select Build Settings from the File menu and click the Player Settings button. This should bring up the Player Settings in the Inspector panel where you can set the parameters for your application.
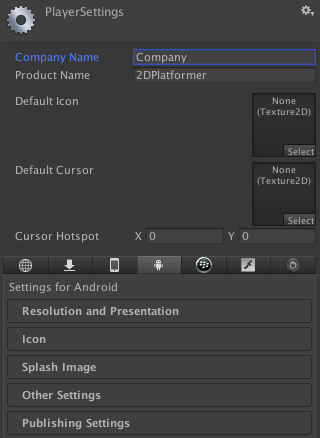
These settings are application specific data that includes the creator or company, app resolution and display mode, rendering mode (CPU, GPU), device OS compatibility, etc. Configure the settings according to the devices you're targeting and the store or market where you plan to publish the app.
37. Icons and Splash Images
Using the graphics you created earlier, you can now create a nice icon and a splash image for your game. Unity shows you the required sizes, which depend on the platform you're building for.
38. Build and Play
Once your project is properly configured, it's time to revisit the Build Settings and click the Build Button. That's all it takes to build your game for testing and/or distribution.
Conclusion
In this tutorial, we've learned how to use the accelerometer to control the movement of the player, GUI Textures, primitives, and other aspects of game development in Unity. I encourage you to experiment with the result and customize the game to make it your own. I hope you liked this tutorial and found it helpful.

Comments