Welcome to the second of three installments in our series on building a small business app from scratch. This tutorial will teach you how to implement an AQGridView within your project in order to achieve a stunning design. Read on!
Tutorial Overview
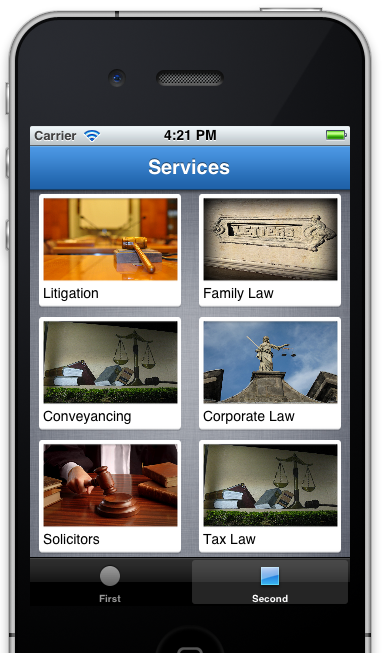
In this tutorial, I will go about designing the screen you see in the image below. The screen you see below has a grid of tabs that can be used to show a company's services. We are going to use an Open Source component called AQGridView to implement the Grid you see below.
AQGrid views behave similarly to the UITableViewController, so if you are familiar with using Table Views, you are in good company. If not, I will show you how. No worries!
Adding the Grid Cell
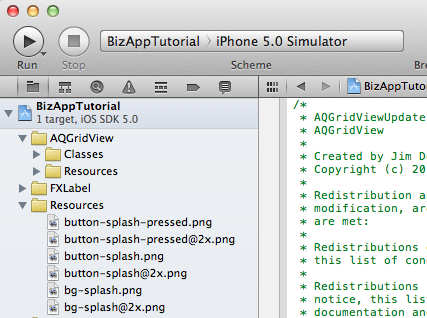
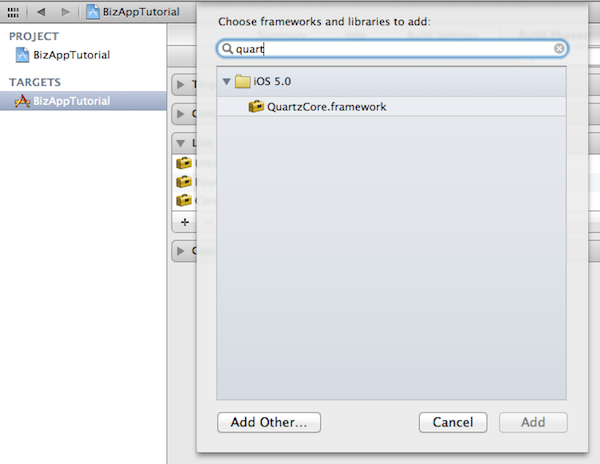
So, the first step is to download AQGrid view from GitHub and then add the AQGridView folder to your project. We also need to add the QuartzCore library to our project because the AQGrid view needs it. We don't need anything else for now.
Now we can add the class that will hold the details for each tab. Add a new file to the project. Choose the Cocoa Touch->Objective -C Class->NSObject template. Call it GridViewCell.
Change the inherited object to AQGridViewCell in the GridViewCell header file. This is the equivalent of a UITableViewCell for the Grid view component. Also, add an Image View and a Label to the the same header file.
#import <UIKit/UIKit.h>
#import "AQGridView.h"

@interface GridViewCell : AQGridViewCell

@property (nonatomic, retain) UIImageView * imageView;

@property (nonatomic, retain) UILabel * captionLabel;

@end
In the GridViewCell.m implementation file, we will write an initialization method that will create the Views, Image Views, and Label that will make up a single tab.
- (id) initWithFrame: (CGRect) frame reuseIdentifier: (NSString *) aReuseIdentifier
{
    self = [super initWithFrame: frame reuseIdentifier: aReuseIdentifier];
    if ( self)
    {

        UIView* mainView = [[UIView alloc] initWithFrame:CGRectMake(0, 0, 160, 123)];
        [mainView setBackgroundColor:[UIColor clearColor]];

        UIImageView *frameImageView = [[UIImageView alloc] initWithFrame:CGRectMake(9, 4, 142, 117)];
        [frameImageView setImage:[UIImage imageNamed:@"tab-mask.png"]];

        self.imageView = [[UIImageView alloc] initWithFrame:CGRectMake(13, 8, 135, 84)];

        self.captionLabel = [[UILabel alloc] initWithFrame:CGRectMake(13, 92, 127, 21)];
        [captionLabel setFont:[UIFont systemFontOfSize:14]];

        [mainView addSubview:imageView];
        [mainView addSubview:frameImageView];
        [mainView addSubview:captionLabel];

        [self.contentView addSubview:mainView];

    }

    return self;
}
This function looks similar to the init function of a standard UITableViewCell. The difference in this case is we are doing some basic layout for the views involved in the cell. There are two ImageViews, one for the white frame around the service image and another for the picture depicting the service itself. Please refer to the final image to understand what we are trying to achieve.
There is also a label which will be used as the caption of the tab.
After the views have been created, they are added to a UIView (just for organization) and then that UIView is added to the cell itself.
Creating the Grid Controller
The next step is to create the View controller that will act as the delegate and datasource of the Grid. Add a new file and use the Cocoa Touch->Objective -C Class->NSObject template. Call it GridViewController. Change the GridViewController.h file and make it a subclass of AQGidViewController. Also add a couple of fields that will hold the GridView itself and the list of services that will be in the Grid.
#import <UIKit/UIKit.h>
#import "AQGridView.h"

@interface GridViewController : UIViewController <AQGridViewDelegate, AQGridViewDataSource>

@property (nonatomic, retain) IBOutlet AQGridView * gridView;

@property (nonatomic, retain) NSArray * services;

@end
Add a viewDidLoad method. This is where we shall configure our Views and data. But first, let's configure the GridView.
@synthesize gridView, services;

- (void) viewDidLoad
{
    [super viewDidLoad];

    self.gridView = [[AQGridView alloc] initWithFrame:CGRectMake(0, 0, 320, 480)];
    self.gridView.autoresizingMask = UIViewAutoresizingFlexibleWidth|UIViewAutoresizingFlexibleHeight;
	self.gridView.autoresizesSubviews = YES;
	self.gridView.delegate = self;
	self.gridView.dataSource = self;

    [self.view addSubview:gridView];

    [self.gridView reloadData];
}
The mandatory synthesizer is added then the Grid is initialized and configured. We also make sure that the current class GridViewController is assigned as the delegate and datasource of the GridView. The Grid is added to the current view and the data is reloaded just to make sure we are starting from scratch.
Now we need to implements the methods that are expected to be in a class that inherits from AQGridViewDatasource and AQGridViewDelegate protocols.
The first one is the number of items in the Grid. We simply return a random number for now. Later, when we implement an array of services, this number will change.
- (NSUInteger) numberOfItemsInGridView: (AQGridView *) aGridView
{
    return 6;
}
The next method to implement is called cellForItemAtIndex. This method dequeues a cell using the CellIdentifier string if it can find one. If it doesn't, it will create a new version of our GridViewCell that we previously implemented.
- (AQGridViewCell *) gridView: (AQGridView *) aGridView cellForItemAtIndex: (NSUInteger) index
{
    static NSString * PlainCellIdentifier = @"PlainCellIdentifier";


    GridViewCell * cell = (GridViewCell *)[aGridView dequeueReusableCellWithIdentifier:@"PlainCellIdentifier"];

    if ( cell == nil )
    {
        cell = [[GridViewCell alloc] initWithFrame: CGRectMake(0.0, 0.0, 160, 123)
                                   reuseIdentifier: PlainCellIdentifier];
    }


    [cell.imageView setImage:[UIImage imageNamed:@"service-2.jpg"]];
    [cell.captionLabel setText:@"Sample service"];

    return cell;

}
You can also see that each cell is configured with some dummy data.
So far, we have been implementing a lot of code without seeing the result of the implementation. Let's do a quick run to see how things turn out.
To be able to see this view in the simulator, we will need to let our Storyboard know about this new ViewController.
Select the MainStoryboard_iPhone file and change the Class of the SecondViewController nib to GridViewController. Also delete both labels in the View.

Now we are ready to run our little app in the simulator. We should see the following screen.
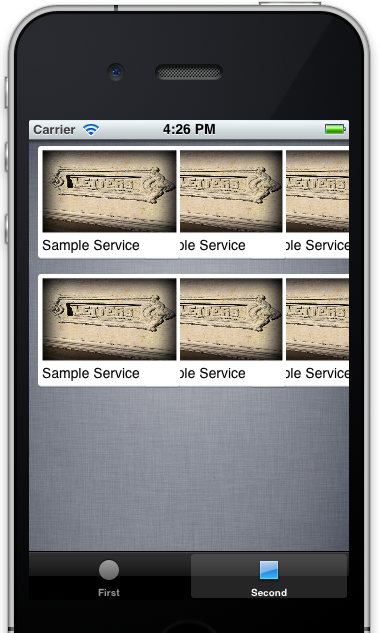
Disappointed? Doesn't look like what you expected, right? Okay let's fix that.
Implementing the Grid Layout
The first step is to change the background color. For that, we are going to use a fabric texture which is included in the sample project.
Open up the GridViewController.m file and add these two lines to the viewDidLoad method:
    UIImage * backgroundPattern = [UIImage imageNamed:@"bg-app.png"];

    [self.view setBackgroundColor:[UIColor colorWithPatternImage:backgroundPattern]];
Next, we need to implement the AQGridViewDataSource protocol method:
- (CGSize) portraitGridCellSizeForGridView: (AQGridView *) aGridView
{
    return ( CGSizeMake(160.0, 123) );
}
This method tells the Grid view how large each cell should be. The size is taken from the size of the GridViewCell we created previously.
If you now run the application in the simulator, you should see the screen below:
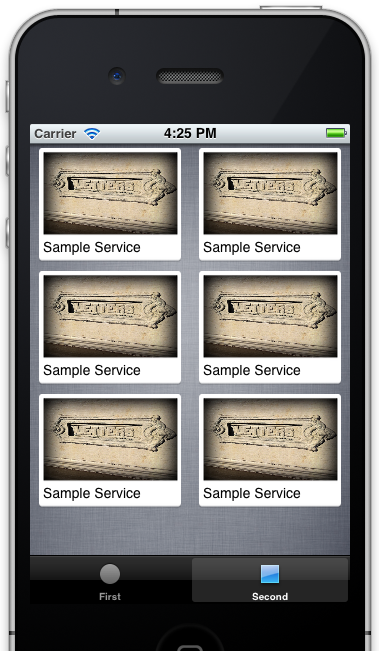
Now that's more like it!
Implementing a Data Model
Our cells could do with a bit more diversity. Let's add a data model to it so the services can come from some sample data. This will ideally be the list of services of the business that owns the app. You could connect to a website CMS and pull its categories as well. However, that is out of the scope of this tutorial series.
Add a new Cocoa Touch->NSObject file to the application and call it BusinessService. Open up the BusinessService.h file and add the following code:
#import <Foundation/Foundation.h>

@interface BusinessService : NSObject

@property (nonatomic, copy) NSString* caption;

@property (nonatomic, retain) UIImage* image;

-(id)initWithCaption:(NSString*)theCaption andImage:(UIImage*)theImage;

+(NSArray*)getSampleData;

@end
This is going to be a very simple class with just a caption and an image. It is also defined by two methods that I will explain shortly.
Open up the BusinessService.m file and add the following piece of code
@synthesize caption, image;

-(id)initWithCaption:(NSString*)theCaption andImage:(UIImage*)theImage
{
    self = [super init];

    if(self)
    {
        self.caption = theCaption;
        self.image = theImage;
    }

    return self;
}

+(NSArray*)getSampleData
{

    BusinessService* service1 = [[BusinessService alloc] initWithCaption:@"Litigation" andImage:[UIImage imageNamed:@"service-1.jpg"]];

    BusinessService* service2 = [[BusinessService alloc] initWithCaption:@"Family Law" andImage:[UIImage imageNamed:@"service-2.jpg"]];

    BusinessService* service3 = [[BusinessService alloc] initWithCaption:@"Conveyancing" andImage:[UIImage imageNamed:@"service-3.jpg"]];


    BusinessService* service4 = [[BusinessService alloc] initWithCaption:@"Corporate Law" andImage:[UIImage imageNamed:@"service-4.jpg"]];


    BusinessService* service5 = [[BusinessService alloc] initWithCaption:@"Solicitors" andImage:[UIImage imageNamed:@"service-5.jpg"]];


    BusinessService* service6 = [[BusinessService alloc] initWithCaption:@"Tax Law" andImage:[UIImage imageNamed:@"service-6.jpg"]];

    return [NSArray arrayWithObjects:service1, service2, service3, service4, service5, service6, nil];
}
The code above implements an init method where both the caption and the image are initialized using the parameters passed into the function. The getSampleData method just calls the init function 6 times with different captions and images.
We now need to hook up our model to the Grid View. Open up the GridViewController.m file and add this to the viewDidLoad method (don't forget to include the "BusinessService.h" file in the #import section).
self.services = [BusinessService getSampleData];
This will load the sample data into our array of services.
Also modify the numberOfItemsInGridView to return the actual number of services there are:
- (NSUInteger) numberOfItemsInGridView: (AQGridView *) aGridView
{
    return [services count];
}
And lastly, change the cellForItemAtIndex method to use the service at the specified index. This means the 6th cell will use the info (caption and image) for the 6th service.
- (AQGridViewCell *) gridView: (AQGridView *) aGridView cellForItemAtIndex: (NSUInteger) index
{
    static NSString * PlainCellIdentifier = @"PlainCellIdentifier";


    GridViewCell * cell = (GridViewCell *)[aGridView dequeueReusableCellWithIdentifier:@"PlainCellIdentifier"];

    if ( cell == nil )
    {
        cell = [[GridViewCell alloc] initWithFrame: CGRectMake(0.0, 0.0, 160, 123)
                                   reuseIdentifier: PlainCellIdentifier];

    }

    BusinessService* service = [services objectAtIndex:index];

    [cell.imageView setImage:service.image];
    [cell.captionLabel setText:service.caption];

    return cell;

}
Let's run the application to see what we get.
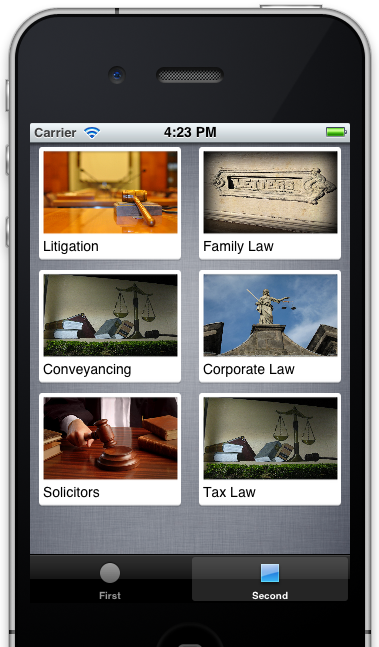
That is looking snazzy :-). The last bit left is to add the blue Navigation Bar at the top.
Customizing the Navigation Bar
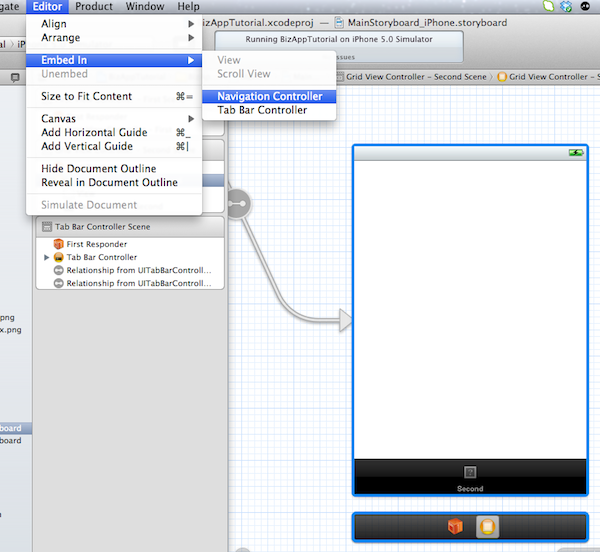
To show the Navigation Bar, we need to embed it in a Navigation controller. Open the MainStoryboard_iPhone file and select the GridViewController on the stage. Open the Editor Menu Option and Select Embed In>Navigation Controller.
If we run the app, we will get the basic default Navigation bar. We still need to customize it. To do so, we shall use the iOS 5 Appearance SDK. This allows you to set the global appearance of UI Elements in your app.
Open up the AppDelegate.m file and change the didFinishLaunchingWithOptions to the following.
- (BOOL)application:(UIApplication *)application didFinishLaunchingWithOptions:(NSDictionary *)launchOptions
{
    UIImage *navBarImage = [UIImage imageNamed:@"menubar.png"];

    [[UINavigationBar appearance] setBackgroundImage:navBarImage
                                       forBarMetrics:UIBarMetricsDefault];

    // Override point for customization after application launch.
    return YES;
}
What this does is to change the background image of all UINavigationBar's in the application to the specified UIImage (menubar.png).
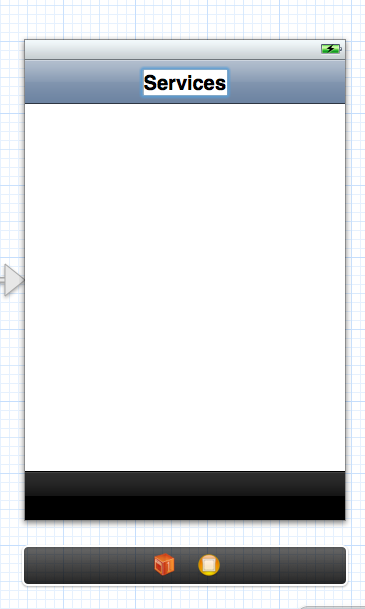
To add the "Services" title in the Navigation Bar, double click it in the Storyboard to edit it.
The last step is to add a gradient at the top of the Grid so that the Navigation Bar looks like it is hovering.
To do that, we will add a Gradient CALayer to the GridViewController.m file.
Include the QuartzCore header file:
#import <QuartzCore/QuartzCore.h>
And add this to the bottom of the viewDidLoad method:
    UIView* gradientView = [[UIView alloc] initWithFrame:CGRectMake(0, 0, 320, 4)];
    CAGradientLayer *gradient = [CAGradientLayer layer];
    gradient.frame = gradientView.bounds;

    UIColor* lightColor = [[UIColor blackColor] colorWithAlphaComponent:0.0];
    UIColor* darkColor = [[UIColor blackColor] colorWithAlphaComponent:0.5];

    gradient.colors = [NSArray arrayWithObjects:(id)darkColor.CGColor, (id)lightColor.CGColor, nil];
    [gradientView.layer insertSublayer:gradient atIndex:0];

    [self.view addSubview:gradientView];
Now for a final run of our application.
Wrap Up
We have come to the end of Part 2. Look out for Part 3 where I will show you how to design the detail view for each service. When a service tab is tapped on, it will push a new ViewController to the screen and we will start the process of designing that also. Be sure to check back soon!
If you have any questions, please let me know in the comments.

Comments