In the previous part of this series, I showed you how to register custom taxonomies for your knowledge base and deregister the ones you don't need.
The next step is to create the front end, by creating and/or editing any template files we need and adding functions for custom navigation.
What You'll Need
To follow this tutorial, you'll need
- a development installation of WordPress
- a text editor
- a starting theme
1. Creating Template Files
If you'll remember, in the first part of this series when we planned the knowledge base, we identified the following templates:
index.phppage.php-
archive.php
single.phpsidebar.php
The starter theme I'm using already includes all of these, which is great news. I will need to edit sidebar.php, to enable the context-sensitive navigation which was part of the original plan. I'll come to this shortly.
If you're using your own theme and it doesn't include all of those template files, you'll need to create them. Alternatively, if your index.php or loop.php file (if you have one) includes the code necessary for effectively displaying single posts and taxonomy archives, you might want to stick with that.
I'm not going to work through each of the template files, but let's have a quick look at archive.php to see how it works in my theme:
<?php
/* the archive file - for displaying archives
*/
 get_header(); ?>

    	<div id="content" class="two-thirds">

			<?php
			/* Queue the first post, that way we know if this is a date archive so we can display the correct title.
			 * We reset this later so we can run the loop properly with a call to rewind_posts().
			 */
			if ( have_posts() )
				the_post();
			?>

					<h2 class="page-title">
						<?php if ( is_day() ) { ?>
							Archive for <?php echo get_the_date();
						}
						elseif ( is_month() ) { ?>
							Archive for <?php echo get_the_date('F Y');
						}
						elseif ( is_year() ) { ?>
							Archive for <?php echo get_the_date('Y');
						}
						else {
							echo get_queried_object()->name;
						} ?>
					</h2>

			<?php rewind_posts(); ?>


			<?php // start the loop proper ?>
			<?php while ( have_posts() ) : the_post(); ?>

			<article id="post-<?php the_ID(); ?>" <?php post_class( 'clear' ); ?>>

				<section class="left image quarter">

					<?php if ( has_post_thumbnail() ) { ?>
						<a href="<?php the_permalink(); ?>">
							<?php the_post_thumbnail( 'medium', array(
								'class' => 'left',
								'alt'	=> trim(strip_tags( $wp_postmeta->_wp_attachment_image_alt ))
							) ); ?>
						</a>
					<?php } ?>

				</section><!-- .image -->

				<section class="left archive-content three-quarters">

					<h3 class="entry-title">
						<a href="<?php the_permalink(); ?>" title="<?php printf( esc_attr__( 'Permalink to %s', 'compass' ), the_title_attribute( 'echo=0' ) ); ?>" rel="bookmark">
							<?php the_title(); ?>
						</a>
					</h3>

					<section class="entry-content">
						<?php the_excerpt(); ?>
					</section><!-- .entry-content -->

				</section><!-- .archive-content -->


			</article><!-- #post-theID-->

			<?php endwhile; ?>
			<?php // ends the loop ?>


		</div><!-- #content-->

<?php get_sidebar(); ?>
<?php get_footer(); ?>
As you can see, the template uses object-oriented CSS to set the widths of elements and allows for the display of featured images if the post has one. In a knowledge base, you're less likely to use featured images but it's not impossible so I'll leave those in. If posts don't have featured images, the title and excerpt will still be displayed.
2. Creating the Sidebar Navigation
The next step is to create the context-sensitive navigation in the sidebar. I'm not going to add this to the sidebar.php file; instead, I'll add an action hook to that file and then create a function which I'll attach to that action hook.
Creating the Action Hook
Open your theme's sidebar.php file. Mine looks like this:
<!-- the sidebar - in WordPress this will be populated with widgets -->
<?php if ( is_active_sidebar( 'sidebar-widget-area' ) ) { ?>
    <aside class="sidebar widget-area one-third right" role="complementary">
		<?php dynamic_sidebar( 'sidebar-widget-area' ); ?>
	</aside>
<?php } ?>
At the moment this just includes the widget area. I want to keep this but add a hook above it.
Above the if ( is_active_sidebar() ) line, add the following:
do_action( 'tutsplus_sidebar' );
This creates an action hook using the do_action() function. Any functions you attach to that hook will be fired at that point in your template file, so anything displayed via the hook will show up before the widget area. If you'd rather have the hook below the widget area, just add the code after the widget area instead.
Creating Functions
When I was planning my knowledge base, I identified three lists I'd need in different sidebars:
- links to the archive pages for the user topic taxonomy terms
- links to the archive pages for the developer topic taxonomy terms
- links to the archives for the content type taxonomy terms
Each of these needs to include conditional tags so they're added to the sidebar on the right pages. They can all be included in one function but with a number of conditional tags.
So let's write them!
Note that as some of the conditional tags will be detecting static pages, you'll need to create three static pages before you start: for users, developers and content types.
The User Topics List
First up is a list of user topics. This includes a link to the main archive page for the taxonomy at the top.The first step is to create the function, and inside it add a conditional tag to check which part of the site we're in.
Open your functions.php file and add the following:
function tutsplus_sidebar_content() {

    // user topics list
	if ( is_tax( 'usertopic' )  || is_front_page() || is_page( 31 ) || is_single()) { ?>

	<?php }

}
add_action( 'tutsplus_sidebar', 'tutsplus_sidebar_content' );
This creates an empty function with our first conditional tag, and attaches it to the tutsplus_sidebar hook we added to the sidebar.php file.
Now add the content inside your conditional function so it reads as follows:
if ( is_tax( 'usertopic' )  || is_front_page() || is_page( 31 ) || is_single()) { ?>

    <aside class="user-topics one-third right">

		<h3>Users</h3>

		<ul>

			<?php
			// output list of terms in the usertopic taxonomy with links to their archive pages
			$args = array(
     					'orderby'  => 'slug',
						'order'  => 'ASC',
     		);
     		$terms = get_terms( 'usertopic', $args );
    	    foreach ( $terms as $term ) {

       			echo '<li><a href="'.get_term_link( $term->slug, 'usertopic' ).'">'.$term->name.'</a></li>';

	    	} ?>

		</ul>

		</aside>

<?php }
This outputs a list of terms in the User Topics taxonomy, with links to their archive pages, under a heading, using the following WordPress functions:
-
get_terms()to retrieve a list of taxonomy terms -
get_term_link()to output a link to the term's archive page
Note that the is_page( 31 ) check will need to have a different page ID depending on the ID of the Users page you've created.
The Developer Topics List
Now below the conditional tag for the user topics list, and still inside the tutsplus_sidebar_content() function, add the code for the developer topics, which is very similar:
// developer topics list
if ( is_tax( 'developertopic' )  || is_front_page() || is_page( 33 ) || is_single()) { ?>

    <aside class="developer-topics one-third right">

	<h3>Developers</h3>

		<ul>

			<?php
			// output list of terms in the usertopic taxonomy with links to their archive pages
			$args = array(
     					'orderby'  => 'slug',
						'order'  => 'ASC',
     		);
     		$terms = get_terms( 'developertopic', $args );
    	    foreach ( $terms as $term ) {

       			echo '<li><a href="'.get_term_link( $term->slug, 'developertopic' ).'">'.$term->name.'</a></li>';

	    	} ?>

		</ul>

</aside>

<?php }
The Content Types List
Finally, add the code for the content types, still inside the tutsplus_sidebar_content() function:
// content types list
if ( is_tax( 'contenttype' )  || is_front_page() || is_page( 37 ) || is_single()) { ?>

	<aside class="content-types one-third right">


		<h3>Content Types</h3>

		<ul>
			<?php
			// output list of terms in the usertopic taxonomy with links to their archive pages
			$args = array(
     					'orderby'  => 'slug',
						'order'  => 'ASC',
     		);
     		$terms = get_terms( 'contenttype', $args );
    	    foreach ( $terms as $term ) {

       			echo '<li><a href="'.get_term_link( $term->slug, 'contenttype' ).'">'.$term->name.'</a></li>';

	    	} ?>

		</ul>

	</aside>

<?php }
Your entire function will now look like this:
function tutsplus_sidebar_content() {

    // user topics list
	if ( is_tax( 'usertopic' )  || is_front_page() || is_page( 31 ) || is_single()) { ?>

		<aside class="user-topics one-third right">

			<h3>Users</h3>

			<ul>

				<?php
				// output list of terms in the usertopic taxonomy with links to their archive pages
				$args = array(
	     					'orderby'  => 'slug',
							'order'  => 'ASC',
	     		);
	     		$terms = get_terms( 'usertopic', $args );
	    	    foreach ( $terms as $term ) {

	       			echo '<li><a href="'.get_term_link( $term->slug, 'usertopic' ).'">'.$term->name.'</a></li>';

		    	} ?>

			</ul>

			</aside>

	<?php }

	// developer topics list
	if ( is_tax( 'developertopic' )  || is_front_page() || is_page( 33 ) || is_single()) { ?>

		<aside class="developer-topics one-third right">

		<h3>Developers</h3>

			<ul>

				<?php
				// output list of terms in the usertopic taxonomy with links to their archive pages
				$args = array(
	     					'orderby'  => 'slug',
							'order'  => 'ASC',
	     		);
	     		$terms = get_terms( 'developertopic', $args );
	    	    foreach ( $terms as $term ) {

	       			echo '<li><a href="'.get_term_link( $term->slug, 'developertopic' ).'">'.$term->name.'</a></li>';

		    	} ?>

			</ul>

	</aside>

	<?php }

	// content types list
	if ( is_tax( 'contenttype' )  || is_front_page() || is_page( 37 ) || is_single()) { ?>

		<aside class="content-types one-third right">


			<h3>Content Types</h3>

			<ul>
				<?php
				// output list of terms in the usertopic taxonomy with links to their archive pages
				$args = array(
	     					'orderby'  => 'slug',
							'order'  => 'ASC',
	     		);
	     		$terms = get_terms( 'contenttype', $args );
	    	    foreach ( $terms as $term ) {

	       			echo '<li><a href="'.get_term_link( $term->slug, 'contenttype' ).'">'.$term->name.'</a></li>';

		    	} ?>

			</ul>

		</aside>

	<?php }

}
add_action( 'tutsplus_sidebar', 'tutsplus_sidebar_content' );
You'll now find that as you create posts and assign taxonomy terms to them, the terms will show up in the relevant sidebar.
Note that any terms without posts assigned to them won't be output, so don't be surprised if your lists are empty at first.
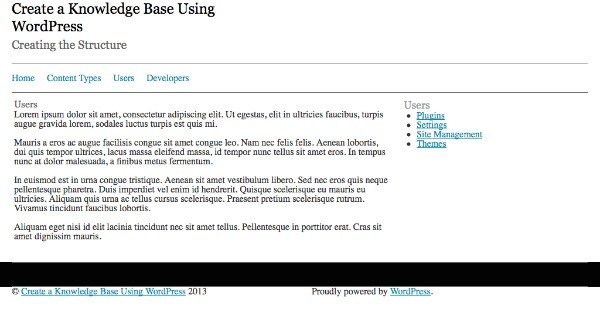
After you've done this and added some posts, your sidebars will display a list of taxonomy terms depending on where you are in the site. On the Users page (and user taxonomy term archives), you'll see the user topics list:
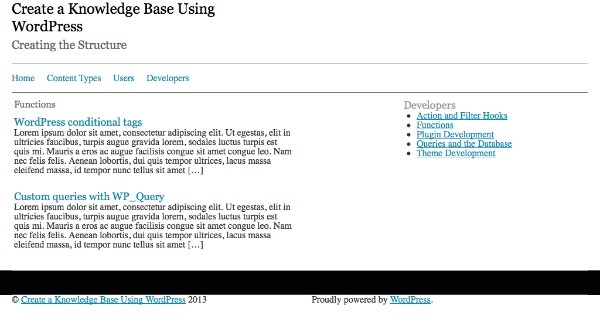
When in a term archive in the developer topics taxonomy, you'll see a list of all of the terms in that taxonomy with posts associated with them:
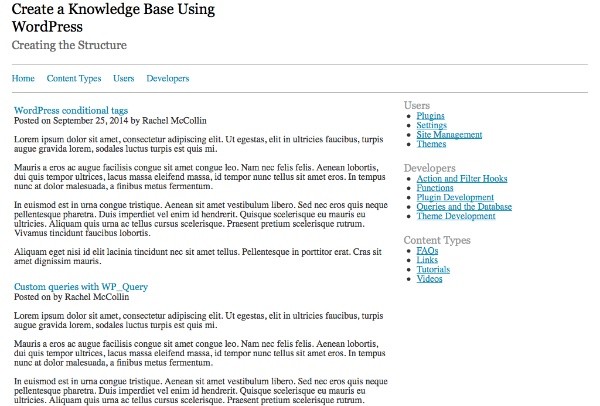
And on the home page and single pages you'll see a list of all of the terms:
Summary
Your knowledge base now has a front-end structure with the templates and functions in place to support it.
If you wanted to, you could take some of these techniques further to add additional navigation to your site. For example, you could:
- add a list of the latest posts to the sidebar on single post pages
- add a list of the terms which the current post has to the sidebar on single post pages
- create a page template for your users, developers and content types pages to display the latest posts in each of the terms for each taxonomy
You may be able to think of more that are relevant to your own knowledge base, but these should give you a taste of the possibilities.
In the final part of this series, I'll take you through the steps needed to make your knowledge base live and the considerations you'll need to take into account.

Comments