In the previous part of this series, we saw how to create a blog post and display all the blog posts in the welcome page. In this part, we'll implement the edit and delete post functionality.
Getting Started
Let's start by cloning the previous part of the tutorial from GitHub.
git clone https://github.com/jay3dec/AngularJS_Firebase_Part5.git
After cloning the source code, navigate to the project directory and install the required dependencies.
cd AngularJS_Firebase_Part5
npm install
Once the dependencies are installed, start the server.
npm start
Point your browser to http://localhost:8000/app/#/home and you should have the application running.
Editing the Blog Post
Step 1: Adding Edit and Delete buttons
We'll start by adding edit and delete buttons to our blog posts. In the last tutorial, we displayed the blog posts in the welcome page. Let's add an Edit and a Delete button to the blog posts.
Navigate to app/welcome/ and open up welcome.html. We used the bootstrap list-group component to display the blog posts. Add the following HTML code to the list-group component to display an Edit and a Delete button.
<div class="list-group" ng-repeat="article in articles">
    <a href="#" class="list-group-item active">
        <h4 class="list-group-item-heading">{{article.title}}</h4>
        <p class="list-group-item-text">{{article.post}}</p>

        <span class="pull-right">
      <button class="btn btn-xs btn-info">EDIT</button>
      <button class="btn btn-xs btn-warning">DELETE</button>
    </span>
    </a>
</div>
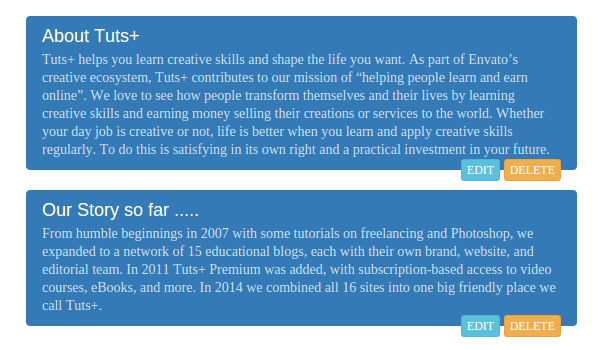
Save the changes and restart the server. Log in using a valid email address and password and you should be able to see the below screen:
Step 2: Show the Edit Popup on Click
We'll be using a Bootstrap JavaScript component called Modal popup. In order to use Bootstrap JavaScript components, include the jQuery and Bootstrap scripts in index.html.
<script src="https://code.jquery.com/jquery-2.0.1.min.js"></script>

<script src="https://maxcdn.bootstrapcdn.com/bootstrap/3.3.1/js/bootstrap.min.js"></script>
Once the scripts references are included, add the following popup HTML code to app/welcome/welcome.html.
<div class="modal fade" id="editModal" tabindex="-1" role="dialog" aria-labelledby="editModalLabel" aria-hidden="true">
<div class="modal-dialog">
<div class="modal-content">
<div class="modal-header">
<button type="button" class="close" data-dismiss="modal"><span aria-hidden="true">×</span><span class="sr-only">Close</span>
</button>
<h4 class="modal-title" id="editModalLabel">Update Post</h4>
</div>
<div class="modal-body">
<form role="form">
<div class="form-group">
<label for="recipient-name" class="control-label">Title:</label>
<input type="text" class="form-control" id="recipient-name">
</div>
<div class="form-group">
<label for="message-text" class="control-label">Post:</label>
<textarea class="form-control" id="message-text"></textarea>
</div>
</form>
</div>
<div class="modal-footer">
<button type="button" class="btn btn-default" data-dismiss="modal">Close</button>
<button type="button" class="btn btn-primary">Publish</button>
</div>
</div>
</div>
</div>
Next, modify the Edit button HTML code to include data-toggle and data-target to make the popup show on click.
<button class="btn btn-xs btn-info" data-toggle="modal" data-target="#editModal">EDIT</button>
The data-target attribute points to the ID of the HTML element which needs to be shown in the modal popup.
Also add an onclick event to the Edit button parent anchor tag as shown:
<a href="#" onclick="return false;" class="list-group-item active">
Save the changes, restart the server, and try to log in. When you're on the welcome page, click on the Edit button and you should have the popup displayed.

Step 3: Populate the Edit Popup
Each entry in Firebase has a unique ID, which we'll use to fetch the particular record details from Firebase. In order to query Firebase with the unique ID, we need to have that ID. In the previous tutorial, we queried Firebase and rendered the returned result in our welcome page. Here is how we rendered the result :
<div class="list-group" ng-repeat="article in articles">
    <a href="#" onclick="return false;" class="list-group-item active">
        <h4 class="list-group-item-heading">{{article.title}}</h4>
        <p class="list-group-item-text">{{article.post}}</p>

        <span class="pull-right">
      <button class="btn btn-xs btn-info" data-toggle="modal" data-target="#editModal">EDIT</button>
      <button class="btn btn-xs btn-warning" >DELETE</button>
    </span>
    </a>
</div>
Now remove data-toggle="modal" from the Edit button. We'll trigger the modal popup from our controller.
Inside app/welcome/welcome.js, add an editPost function which we'll call on Edit button click. Earlier, we used the Firebase URL https://blistering-heat-2473.firebaseio.com/Articles to fetch all articles from Firebase. In order to fetch a particular record from Firebase, we'll need to append the unique ID of the article, like https://blistering-heat-2473.firebaseio.com/Articles/-JdMk7taYJCLZg9DfMJg.
So we'll create the Firebase object using the unique ID specific URL, and then reference it to fetch the article details as an object. Here is how the editPost function looks:
$scope.editPost = function(id) {

    var firebaseObj = new Firebase("https://blistering-heat-2473.firebaseio.com/Articles/" + id);

    var syn = $firebase(firebaseObj);

    $scope.postToUpdate = syn.$asObject();

    $('#editModal').modal();      // triggers the modal pop up
}
Open up welcome.html and add an ngClick directive to the Edit button. While adding the ngClick function call to editPost, pass the unique ID of the article as shown below:
<button class="btn btn-xs btn-info" ng-click="editPost(article.$id)" data-target="#editModal">EDIT</button>
Next, we need to populate the details of the fetched articles in the modal popup. Since the details are in $scope.postToUpdate, we'll bind it to the modal using the ngModel directive. Add the ngModel directive to the post and title text area as shown below:
<input type="text" class="form-control" ng-model="postToUpdate.title" id="recipient-name">

<textarea class="form-control" id="message-text" ng-model="postToUpdate.post"></textarea>
Save all the changes and restart the server. Try to sign in using a valid email address and password. Once signed in, click the Edit button and you should have the modal popup populated with the article details.

Step 4: Implement the Update Functionality
Next we'll implement the update functionality. When the article has been populated in the edit modal popup, the user can modify the title or post and click Publish. Once Publish has been clicked, we need to update the details in Firebase.
First, add the ngClick directive to the Publish button.
<button type="button" class="btn btn-primary" ng-click="update()">Publish</button>
Open app/welcome/welcome.js and add an update function call which is called on Publish button click. Inside the update function, we need to create a Firebase object using the Firebase URL appended by the unique article ID.
var fb = new Firebase("https://blistering-heat-2473.firebaseio.com/Articles/"+$scope.postToUpdate.$id);
Using the fb object, create a $firebase object.
var article = $firebase(fb);
Using the article object, we'll call the update API to update the changes to Firebase.
article.$update({
    title: $scope.postToUpdate.title,
    post: $scope.postToUpdate.post,
    emailId: $scope.postToUpdate.emailId
}).then(function(ref) {
    // Update successful
}, function(error) {
    console.log("Error:", error);
});
Once the update is successful, close the modal popup. Add the following code to update success callback.
$('#editModal').modal('hide');
Here is the full update function:
$scope.update = function() {
    var fb = new Firebase("https://blistering-heat-2473.firebaseio.com/Articles/" + $scope.postToUpdate.$id);
    var article = $firebase(fb);
    article.$update({
        title: $scope.postToUpdate.title,
        post: $scope.postToUpdate.post,
        emailId: $scope.postToUpdate.emailId
    }).then(function(ref) {
        $('#editModal').modal('hide');
    }, function(error) {
        console.log("Error:", error);
    });
}
Save all the changes and restart the server. Try to sign in using a valid email address and password. Once signed in, try editing and updating a post.
Deleting the Blog Post
Next, let's implement the delete post functionality. Before deleting a post, it's apt to show a confirmation popup, so let's start with that.
Step 1: Show Delete Confirmation Popup
Here also we'll be using a Bootstrap modal to show a confirmation popup. Add the following HTML code to welcome.html:
<div class="modal fade" id="deleteModal" tabindex="-1" role="dialog" aria-labelledby="deleteModalLabel" aria-hidden="true">
    <div class="modal-dialog">
        <div class="modal-content">
            <div class="modal-header" style="text-align:center;">
                <h4 class="modal-title" style="color:red;" id="deleteModalLabel">You are going to Delete this post forever !!</h4>
            </div>

            <div class="modal-footer">
                <button type="button" class="btn btn-default" data-dismiss="modal">Cancel</button>
                <button type="button" class="btn btn-primary" ng-click="update()">Delete</button>
            </div>
        </div>
    </div>
</div>
Now, modify the Delete button to add a data-toggle and data-target attribute as shown below:
<button class="btn btn-xs btn-warning" data-toggle="modal" data-target="#deleteModal" >DELETE</button>
The data-toggle attribute triggers the modal popup, and the data-target attribute identifies which HTML block to show as the modal popup.
Save the changes and restart the server. Sign in and click the Delete button and you should see the delete confirmation popup.

Step 2: Delete the Post
Now, in order to delete the blog post we need to retrieve the article from Firebase. Once we have the ID, if the user clicks Delete from the modal popup, we'll remove the article from Firebase.
So, first remove the data-toggle attribute from the Delete button, since we'll trigger the modal popup from the controller once the article has been fetched. Also, add an ngClick directive to the Delete button.
<button class="btn btn-xs btn-warning" ng-click="confirmDelete(article.$id)" data-target="#deleteModal" >DELETE</button>
Inside app/welcome/welcome.js, create a new function called confirmDelete, which will trigger the modal popup and also fetch the article from Firebase. Here is what the confirmDelete function looks like:
$scope.confirmDelete = function(id) {
        var fb = new Firebase("https://blistering-heat-2473.firebaseio.com/Articles/" + id);
        var article = $firebase(fb);
        $scope.postToDelete = article.$asObject();
        $('#deleteModal').modal();
    }
As seen in the above code, we have created the Firebase object using the article ID. Using $firebase we have retrieved the article object. Using this article object we'll be able to remove the article from Firebase.
Next, add another function called deletePost, which we'll call once the user confirms the article deletion. In the confirmDelete function we have already assigned the article object to $scope.postToDelete. In the deletePost function we'll use the $scope.postToDelete object to refer to the article and remove it from Firebase. Here is how the deletePost function looks:
$scope.deletePost = function() {
        var fb = new Firebase("https://blistering-heat-2473.firebaseio.com/Articles/" + $scope.postToDelete.$id);
        var article = $firebase(fb);
        article.$remove().then(function(ref) {
            $('#deleteModal').modal('hide');
        }, function(error) {
            console.log("Error:", error);
        });
    }
We have used the $remove API method to remove the article from Firebase. On successful deletion, we have also toggled the visibility of the delete confirmation popup.
Add the ngClick directive on the Delete button in the delete modal popup.
<button type="button" class="btn btn-primary" ng-click="deletePost()">Delete</button>
Save all the changes and restart the server. Sign in using a valid email address and password. Once logged in, try to delete an article.
Wrapping Up
In this tutorial, we saw how to edit and delete the blog posts added in Firebase using API methods. In the next part of the tutorial, we'll try to integrate Ladda loading indicators into our application. We'll also fix some small issues existing in our application.
Do let us know your thoughts in the comments below!
Source code from this tutorial is available on GitHub.

Comments