In the previous part of this series, we created the sign-up page, set up the routes, and also did some form validations using AngularJS. In this tutorial, we'll implement the sign-up functionality by wiring up AngularJS and the latest release of Firebase. We'll also modify the sign-in code as per the newer Firebase API.
Getting Started
Let's start by cloning the second part of the tutorial from GitHub.
git clone https://github.com/jay3dec/AngularJS_Firebase_Part2.git
After cloning the source code, navigate to the project directory and install the required dependencies.
cd AngularJS_Firebase_Part2
npm install
Once the dependencies are installed, start the server.
npm start
Point your browser to http://localhost:8000/app/ and you should have the application running.
Firebase Script References
Firebase recently released a newer version, and the FirebaseSimpleLogin client that we used in our first tutorial to sign in the user has been deprecated and included in the main Firebase library. So open up app/index.html and remove the existing Firebase references and include the following script references:
<script src="https://cdn.firebase.com/js/client/2.0.4/firebase.js"></script>
<script src="https://cdn.firebase.com/libs/angularfire/0.9.0/angularfire.min.js"></script>
Modifying Sign-In Implementation
Navigate to app/home and open up home.js. Remove the injected $simplefirebaselogin from the controller and inject $firebaseAuth. Use it to create the loginObj as shown.
.controller('HomeCtrl', ['$scope', '$firebaseAuth', function($scope, $firebaseAuth) {
    var firebaseObj = new Firebase("https://blistering-heat-2473.firebaseio.com");
    var loginObj = $firebaseAuth(firebaseObj);
}));
The new Firebase provides an API method called $authWithPassword to authenticate using email address and password. Replace the login method with $authWithPassword in the SignIn function as shown:
$scope.SignIn = function(e) {
    e.preventDefault();
    var username = $scope.user.email;
    var password = $scope.user.password;
    loginObj.$authWithPassword({
            email: username,
            password: password
        })
        .then(function(user) {
            //Success callback
            console.log('Authentication successful');
        }, function(error) {
            //Failure callback
            console.log('Authentication failure');
        });
}
Save the changes, restart the server, and try to sign in using a valid email address and password. You should have a success message in the browser console.
Implementing Sign-Up Functionality
We'll be using the Firebase createUser method to create a new user using an email address and password. Since we have already validated the data in our previous tutorial, we'll bind a sign-up function call on the click of the register button. Add the ngClick directive to the register button as shown:
<button type="button" ng-click="signUp();" ng-disabled="!user.email || !user.password" class="btn btn-lg btn-primary btn-block">Register</button>
Open up register.js and inside the RegisterCtrl controller, create a new function called signUp.
.controller('RegisterCtrl', ['$scope', function($scope) {
    $scope.signUp = function() {

        // Sign up implementation would be here !!

    };
}]);
In the signUp function we'll just check if our form is valid:
$scope.signUp = function() {
    if (!$scope.regForm.$invalid) {
    	console.log('Valid form submission');
    }
};
Add the ngController directive to the body tag in register.html.
<body ng-controller="RegisterCtrl">
Restart the server and try browsing to the register page. Press the Register button after entering the email address and password. Now, if you check the browser console you should see the Valid form submission message.
So, before calling the Firebase API to create a new user, we'll need to inject firebase into our application. Open up register.js and add the firebase module.
angular.module('myApp.register', ['ngRoute','firebase'])
Next, we'll also need to inject the $firebaseAuth into our register controller.
.controller('RegisterCtrl', ['$scope','$firebaseAuth', function($scope,$firebaseAuth) {
Using our Firebase URL we'll create a Firebase instance and using that Firebase instance, we'll create a $firebaseAuth object. We'll be using this $firebaseAuth object to make our API call. Add the following code in register.js, inside the register controller.
var firebaseObj = new Firebase("https://blistering-heat-2473.firebaseio.com");
var auth = $firebaseAuth(firebaseObj);
Now, we'll get the email address and password from $scope and call the createUser Firebase method. Here is the modified signUp method.
$scope.signUp = function() {
        if (!$scope.regForm.$invalid) {
            var email = $scope.user.email;
            var password = $scope.user.password;
            if (email && password) {
                auth.$createUser(email, password)
                    .then(function() {
                        // do things if success
                        console.log('User creation success');
                    }, function(error) {
                        // do things if failure
                        console.log(error);
                    });
            }
        }
    };
As you can see in the above signUp function, we have called the $createUser method to create a new user. On successful user creation, we'll be logging the success message in the success callback of the createUser function.
Restart the server and point your browser to http://localhost:8000/app/#/register and try to register for a new user account using an email address and password. Check your browser console after the user registration button click. If successful, you should have the user creation success message in the browser console.
Next, point your browser to http://localhost:8000/app/#/home and try to sign in using the new user credentials.
Handling User Registration Callbacks
Create User Success Callback
When a user registration is successful, we need to redirect the user to the sign-in page. In order to redirect the user, we'll need to inject the $location AngularJS service into our controller. So, inject $location as shown:
.controller('RegisterCtrl', ['$scope','$location','$firebaseAuth', function($scope,$location,$firebaseAuth) {
Add the following code to the success callback of the auth.$createUser function to redirect the user to the sign-in page on successful user registration.
$location.path('/home');
Save the changes, restart the server, and try to register for another user account. On successful user registration, you should be redirected to the sign-in page.
Create User Failure Callback
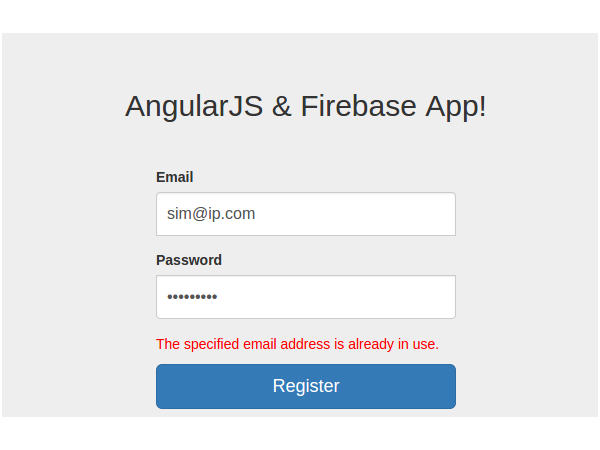
User registrations may fail due to some issues, for example if the user email address already exists. So when an error occurs during user registration, we need to show it to the user. We'll add another error message below the password field and set its display to show when an error occurs. Here is the error message:
<p style="color:red;" ng-show="regError">{{regErrorMessage}}</p>
As seen in the above code, we have used the ngShow directive to show the above error message when regError is true. The message is displayed using the $scope variable regErrorMessage. In the createUser failure callback, add the following code to display the error message.
$scope.regError = true;
$scope.regErrorMessage = error.message;
Here is the modified signUp function:
$scope.signUp = function() {
    if (!$scope.regForm.$invalid) {
        var email = $scope.user.email;
        var password = $scope.user.password;
        if (email && password) {
            auth.$createUser(email, password)
                .then(function() {
                    // do things if success
                    console.log('User creation success');
                    $location.path('/home');
                }, function(error) {
                    // do things if failure
                    console.log(error);
                    $scope.regError = true;
                    $scope.regErrorMessage = error.message;
                });
        }
    }
};
Save the changes, restart the server, and try to register using an email address and password you have already used. On doing this, you should have an error message displayed on screen as shown :
Creating the Home Screen
When a user successfully signs into the application, we'll redirect the user to the home page. The home page will display the posts created by the user and it will also have an option to create new posts. So let's create the home page.
Navigate to the app folder in the application directory and create a new folder called welcome. This folder will contain templates and files related to the home page. Inside the welcome folder, create pages called welcome.html and welcome.js. Add the following code to welcome.html.
<!DOCTYPE html>
<html lang="en">

<head>
    <meta http-equiv="Content-Type" content="text/html; charset=UTF-8">
    <link rel="icon" href="http://getbootstrap.com/favicon.ico">

    <title>AngularJS & Firebase Web App</title>

    <link href="http://getbootstrap.com/dist/css/bootstrap.min.css" rel="stylesheet">
    <link href="blog.css" rel="stylesheet">

</head>

<body ng-controller="WelcomeCtrl">

    <div class="blog-masthead">
        <div class="container">
            <nav class="blog-nav">
                <a class="blog-nav-item active" href="#">Home</a>
                <a class="blog-nav-item " href="addPost.html">Add Post</a>

            </nav>
        </div>
    </div>
    <div class="container">
        <div class="page-header">
            <h1>AngularJS & Firebase App</h1>
        </div>
        <p class="lead">Welcome home !!</p>

    </div>

    <footer class="footer">
        <div class="container">
            <p class="text-muted"></p>
        </div>
    </footer>

</body>

</html>
Inside welcome.js we'll define the routes for the application to the welcome page. We'll use $routeProvider to create a route for the welcome view. When defining a new route, we'll set a templateUrl which would be rendered in the index.html. Along with that, we'll also set a controller (a controller is a logic which controls a particular view) for the newly created $scope of the welcome view. Here's what welcome.js finally looks like:
'use strict';

angular.module('myApp.welcome', ['ngRoute'])

.config(['$routeProvider', function($routeProvider) {
    $routeProvider.when('/welcome', {
        templateUrl: 'welcome/welcome.html',
        controller: 'WelcomeCtrl'
    });
}])

.controller('WelcomeCtrl', ['$scope', function($scope) {

}]);
Now, open up app/app.js and include the newly added module.
angular.module('myApp', [
    'ngRoute',
    'myApp.home',
    'myApp.register',
    'myApp.welcome'   // Newly added module
])
Also, open up app/index.html and include the newly-added register.js script.
<script src="welcome/welcome.js"></script>
When a user successfully signs in, we'll redirect the user to the welcome page. Open up app/home/home.js and inject the $location into the HomeCtrl.
.controller('HomeCtrl', ['$scope','$location','$firebaseAuth',function($scope,$location,$firebaseAuth) {
We'll use $location to redirect the user to the welcome page. In home.js, inside the SignIn function, on success callback add the following code:
$location.path('/welcome');
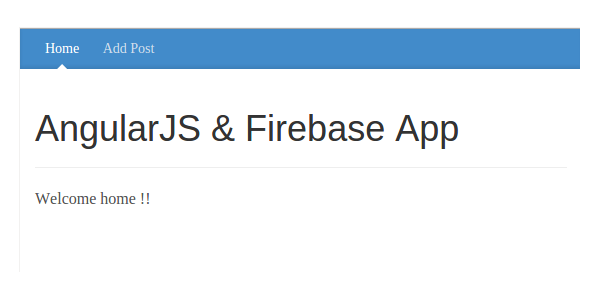
Save the changes, restart the server, and try to sign in to the app. On successful sign-in you should be able to see a screen as shown below:
Accessing $scope Between Controllers
Now let's display the email of the logged in user in the welcome page. But there is an issue. During sign-in, we have the user detail in the HomeCtrl, but when we redirect to welcome view, the $scope of HomeCtrl isn't accessible inside the WelcomeCtrl. So in order to make this possible we'll make use of AngularJS services.
Angular services are substitutable objects that are wired together using dependency injection (DI). You can use services to organize and share code across your app.
Using services we can share data across different controllers. So in home.js we'll create our service called CommonProp.
.service('CommonProp', function() {
    var user = '';

    return {
        getUser: function() {
            return user;
        },
        setUser: function(value) {
            user = value;
        }
    };
});
In the CommonProp service we have created a variable called user, where we'll set the email of the logged-in user. Since the service can be accessed from all controllers, it would be possible to share data between controllers using the service CommonProp.
Inject the service CommonProp in the HomeCtrl as shown:
.controller('HomeCtrl', ['$scope','$location','CommonProp','$firebaseAuth',function($scope,$location,CommonProp,$firebaseAuth) {
On successful user authentication set the user variable in CommonProp service as shown.
CommonProp.setUser(user.password.email);
Also, inject the CommonProp service in the WelcomeCtrl in welcome.js.
.controller('WelcomeCtrl', ['$scope','CommonProp', function($scope,CommonProp) {
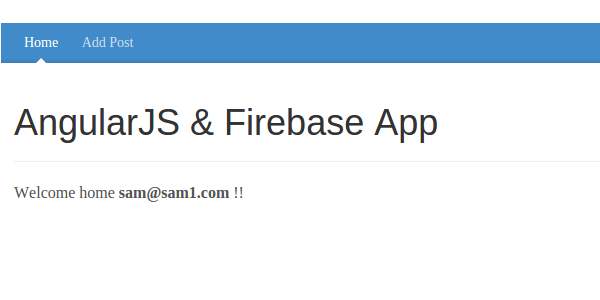
In welcome.html modify the welcome message to include a $scope variable as shown.
<p class="lead">Welcome home <b>{{username}}</b> !!</p>
Now in the WelcomeCtrl set the value of the $scope.username from CommonProp services getUser method.
$scope.username = CommonProp.getUser();
Save all the changes, restart your browser, and try to log in using any email address and password. On successful login you should see your email address on the welcome page.
Wrapping It Up
In this tutorial, we took our blog application development tutorial using AngularJS and Firebase to the next level. We implemented the sign-up functionality and also saw how to share data between two controllers.
In the next part of this series, we'll see how to get started with implementing the "Create Blog Post" page.
Source code from this tutorial is available in GitHub.
Do let us know your thoughts in the comments below!

Comments