Projects is a plugin by WooThemes that is designed to provide a simple way of creating portfolios within WordPress.
Out of the box, Projects allows you to have categories, galleries, client details, and project URL's - this feature-set can also be extended through its various hooks, filters and templates.
In this article, I will show you how to create a basic online portfolio using Projects. I am going to be making a portfolio for a fictitious web design company. Projects is quite simple in nature and can be used for many types of websites, a few examples include:
- Copywriters to tell people about your client projects
- Web designers to show off your latest clients
- Tutors/trainers/coaches to tell potential customers some case studies or success stories
- Artwork to showcase your online portfolio
Installing Projects
Projects can be installed from the WordPress.org repository. From your WordPress dashboard go "Plugins" and click the "Add New" link. From the plugin installation page, search for "projects by woothemes" - it should come up as the top result. Click the "Install Now" link and follow the on-screen instructions.
Configure Projects
There's just a few simple options to get Projects configured. After installation, you will see the following dialogue box:

Click the link to be taken to the Projects configuration page.
Projects Page
This is a dropdown menu that will list all of your WordPress pages, whichever page you select from here will be your projects base or archive page.
Here, the best idea is to first create a blank page. To do that, head over to "Pages" and add a new blank page. This page could be called anything, but for this tutorial we will use "projects". You can put content on this page if you want to - it will display above your projects.
Images
The rest of the settings on this page concern images. You have:
- Archive Images: These are the images displayed on the base/archive page.
- Single Images: The main image within your project item.
- Thumbnails: I'm only making a slight change to the defaults here - my "single image" is going to be 1024 x 860. If you change any of the image dimensions after you have added any projects then you will have to regenerate your thumbnails (or they will may be pixelated). WordPress doesn't have a thumbnail regeneration interface built in but luckily, there's a plugin for that. Go ahead and install the "Regenerate Thumbnails" plugin. Now if you change any image dimensions head over to the "Tools" menu in WordPress and choose "Regen. Thumbnails" and on the next screen click on the "Regenerate All Thumbnails" button. This may take a few minutes if you have a lot of images.
Once you are happy with your settings hit the "Save Changes" button.
Adding, Editing and Deleting
If you have added any posts or pages to WordPress before then this process should be pretty familiar to you. On this page you have the following details to fill in:
- Title: the title of your project. For example: "Tutsplus Website".
- Description: a WYSIWYG editor box for the bulk of your text about your project.
- Categories: these are explained in more detail below.
- Project Gallery: the project gallery allows you to upload or select images from your WordPress image library, to display in your project. By default, these images are placed to the left of your main projects text. Images are optional here as they may not be suitable for all projects. For example, if you are a copywriter then your portfolio may not be particularly image heavy. To add some gallery images, click on the "Add project gallery images" link and either select some images you already have or click on the "Upload" tab and drag and drop some new images in. More than one image may be uploaded or selected at a time for this field.
- Project Cover Image: this is similar to a "featured image" on a standard WordPress post or page. This image is displayed on your Projects archive page and at the top of your Projects pages. This is administered in much the same way as the gallery and uses the standard WordPress media uploader.
- Project Details - This section has two input fields - client and URL. These are both optional but very handy for many portfolios, especially if you are showing off client work. This is displayed on your Projects pages below your main description text.
- Project Short Description - The short description is the snippet of text that is displayed about a project on the archive page (much like the excerpt with posts). This is optional, and if you don't specify anything here then a snippet of your main body text will be shown. See the below image for an example of this.

All Projects pages have the standard WordPress status (draft, pending review or published), visibility (public, password protected or private) and publish options (immediately or by date) available. These options can be accessed from the "Publish" area when adding your Project and by clicking on the "Edit" link next to the relevant heading.

To edit or delete Projects, go to the "All Projects" link within the "Projects" menu. Click on the project name to edit the project. After that, you will be greeted with the same screen as when adding a project. Make any changes here and click the "Update" button to save changes.
You can also click the "Move to Trash" link (within the "publish" area) to delete the item. Alternatively, from the "All Projects" screen you can hover over the project name and click either the "Edit" or the "Trash" link.

Once you have moved items to the trash, they aren't actually permanently deleted. Near the top of your "All Projects" page within the "Projects" menu, there are some links:
- All: Show's all posts (published, drafts etc) excluding any trashed posts.
- Published: Filters to just published posts.
- Draft: Filters to just draft posts.
- Trash: Filters to just trash posts.
Note that the "Draft" and "Trash" links won't show up if you don't have any drafts or any posts in the trash.
If you click on the trash link, you will see all of the posts that you have marked for trash. If you hover over the name of the post you have the option to permanently delete or restore the post.

Categories
Categories are optional and you may not need them if you only have a few projects to show. For larger portfolios where the work may be more diverse, categories give you a good way of allowing users to filter what they see.
Categories can be added in two ways.
First, categories can be added within a Projects page. On a page, you will see "Project Categories" with a list of categories (if you have any) and a link called "+ Add New Category". If you click the link you can type the name of a new category and assign a parent category if you need to.
Alternatively, categories can be added by clicking the "Categories" link under the "Projects" menu. Here you can enter the category name, choose a parent category and set a custom slug if you need to. The slug is the URL version of the category name and is automatically filled in (it should be lowercase and only contain letters, numbers and hyphens), you can change this though if you want your URL to be different from your category name.
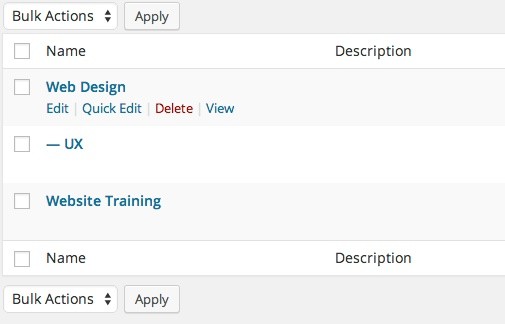
From this screen, you can also edit and delete categories. To do this, hover over the category name and click either "edit" or "delete". You can also bulk delete categories here if you need to - check the checkbox to the left of the category names that you want to delete and then select "Delete" form the bulk actions dropdown and click the "Apply" button.
Widget
There is one widget available for you to use with Projects: a simple list of your projects categories. You can add the widget by going to Appearance >> Widgets in the WordPress admin. The widget is called "Project Categories" and should be dragged and dropped to the widget area that you want it to appear. This widget has a few customisation options:
- Title: this is an optional field and has the default text of "Project Categories". This title will appear above the list of categories that the widget displays.
- Show Count: a checkbox that is checked by default. This shows the number of projects within a category next to the category link. If you don't want the counter to show then uncheck this box.
- Show Hierarchy: this is a checkbox (ticked by default). Having this ticked shows sub categories below their parent category (and slightly indented)- if it is not ticked then subcategories are shown just within the same list.
Remember to hit the "Save" button when you are finished here.

Shortcode
Projects ships with a handy shortcode for displaying your projects anywhere on your WordPress site.
Here's an example of the shortcode:
[projects limit="6" columns="3" orderby="date" order="asc" exclude_categories="4,6,8"]
Now, let's break this down a little:
-
limit: How many projects to display -
columns: How many columns you want to use to display your projects -
orderby: This defines what to order your projects by. It uses the standard WordPress 'orderby' parameters. Some handy ones include date, ID, title, order or rand (random). -
order: This defines how to order your posts. This can either be asc (ascending) or desc (descending). -
exclude_categories: A list of categories to exclude from the list. This needs to be in the form of a comma separated list of category ID's. An easy way to find the ID of a category is to go to the "Categories" section within the "Projects" menu and click on the link of the category that you want to find the ID for. In the URL bar of your web browser you should now see the following:edit-tags.php?action=edit&taxonomy=project-category&tag_ID=2&post_type=projectall you need to do here is look at thetag_ID=2section and take a note of that number.
This shortcode can be used in all of the normal places - pages, posts and widgets.
The Finished Article
We've now gone through how to set up Projects as well as how to add, edit and delete Projects pages. Next time, we will look at how to theme, customize and extend Projects using CSS and a little PHP.


Comments