In this article, we will learn how to create a flat file blog engine in PHP using the Slim framework. If you don't understand the jargon, don't worry. We're simply going to create a spartan blogging application, which utilizes text files instead of a database to store data.
If you're a beginner, fret not! We will start with the basics of using Slim. Let's get started after the jump!
Introduction
Slim is a light weight RESTful PHP framework for creating simple websites. It's inspired from Sinatra, a framework written in Ruby. Slim ships with some minimal components, like
Request, ResponseandViewwhich are the only required components in our flat-file blog engine.
Step 1: Getting Started
To get started, let's set up a hello world application. Before that, you need to download the Slim framework to your system. We are not going to discuss a lot about Slim since it's already been covered here at Nettuts+. You should ideally have the following files in you folder:
-
Slim/- Slim framework -
Index.php- The index file -
.htaccess- For URL rewriting
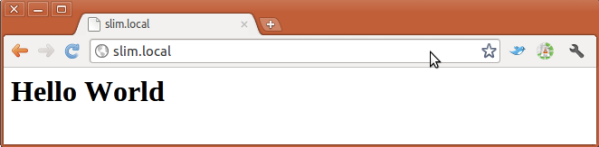
Now open up index.php, where you will see a bunch of HTML inside the following section. I have removed all of it and replaced it with "Hello world". You index.php should hopefully look like this now.
require 'Slim/Slim.php';
$app = new Slim();
$app->get('/', function () {
    echo "<h1>Hello world</h1>";
});
$app->run();
I've created a Virtualhost in my machine which is the URL shown in the screenshot. Adjust the URL based on the location of Slim in your machine.
Navigate to the URL and you'll see a home page with the text "Hello world" in it.
get() is a Slim method, which will take a route as the first argument and a corresponding callback function as the last. Other than get, we can have routes for the POST, PUT and DELETE verbs too. As Slim supports PHP 5.3, the callback function can be, and is, written as an anonymous function.
Step 2: Render a PHP Page
The next step is to render a PHP file. Before we continue, create a directory called templates to store all our template files. Any static HTML or template files we create will be placed in this folder. Slim allows us to specify the path to our template files in its configuration. We can add a configuration as shown below.
$app->config(array(
   'templates.path' => './templates'
));
Let's create an about page for our blog. Create a PHP file called about.php and place it in the templates folder. Add the following code to it:
<html>
<head>
	<title>A Slim Blog engine</title>
</head>
<body>
	<h1>About page</h1>
	<p>
		This page is an example of static route, rendering a php file.
	</p>
</body>
</html>
For Slim to process a request, we need to define a corresponding Route that can map to that URL. In our first step, we have added a route to the index or '/'' . Now let's add another route for our about page.
$app->get('/about', function () use ($app) {
    $app->render('about.php');
});
If you load up http://slim.local/about in your browser, it should hopefully display something like this:
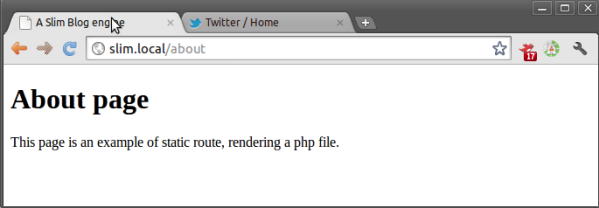
We have added a route to the about page, which will display about.php located at ./templates (remember the template.path config variable?). Did you notice that we used use ($app) inside the get method? Well, this is just a way to use a variable inside an anonymous function which is outside its scope.
Step 3: Assign Values to the Template
Now we can display a template page for a route. It's time to think about displaying some dynamic values in the template, as we may not be rendering and serving static files all the time. We can assign values to be rendered in a template from the render() method. It should be passed as the second parameter as an associative array. Let's change the above code to look like so:
$app->get('/about', function () use ($app) {
    $data = array(
	    'heading' => 'About page',
	    'message' => 'This page is an example of static route, rendering a php file.'
	);
    $app->render('about.php',$data);
});
And change the body of the template a little bit.
<body>
	<h1><?php echo $heading; ?></h1>
	<p>
		<?php echo $message; ?>
	</p>
</body>
You'll notice that you can see the same page if you reload the previous URL. Variables used in the template file are the corresponding keys in the associative array.
Step 4: Add a Dynamic Route
So far, we've been playing with some static routes, '/' and '/about'. Now we are going to create a dynamic route, i.e. a route that can respond to different URLs.
$app->get('/:param1/:param2', function ($param1,$param2) use ($app) {
    echo $param1 .' - ' . $param2;
});
Slim always invokes the first route that matches the current HTTP request. This means that all static routes must be defined before dynamic routes.
If you load up http://slim.local/first-param/second-param in your browser, it will display first-param - second-param.
A variable's route must start with a ':'. Slim will pass the value of this variable as an argument to our callback function, so that we can parse it and perform an appropriate operation. Slim expects exactly two parameters for the above route since the two route variables are mandatory. If it's not present, Slim will display a 404 error. We can make a URL parameter optional as shown in the next step.
Step 5: Optional Route Parameters
To make a route parameter optional, rewrite the above code as shown below:
$app->get('/:param1(/:param2(/:param3))', function () use ($app) {
	$args = func_get_args();
	foreach($args as $arg){
		echo $arg . ' -- ';
	}
});
With that, the second and third parameters are optional. We can use the func_get_args()method to obtain all arguments that are passed into the callback function.
Alright, it's time to get into about some serious business. Now we have all the required information to create a flat-file blog engine. Let's put the above discussed knowledge together to create it.
Step 6: Create a File System
We need to create a file-system before we put all these different components together. Here is a simple file-system for our application.
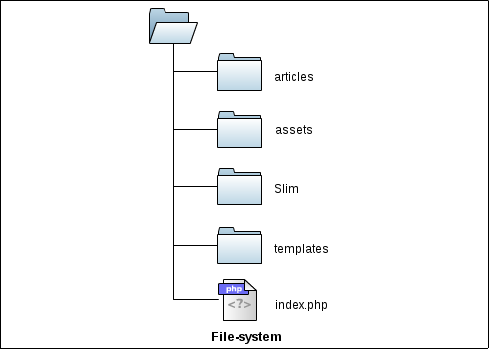
This is a minimalistic file-system with only the required files/folders. All articles will be kept in the articles folder. The assets folder will house our CSS and JavaScript files as well as images. Slim will contain the framework and template files.
Step 7: Add a Route for the Article View
If you're feeling a little lost, here is an quick bird's eye view of how our application is structured.
- The article will be written in a text file with the url as its file name.
- Our application will map URLs to corresponding articles.
- For our convenience, we will keep the meta information (like the author name, date etc.) of an article inside the text file in JSON. It will help us retrieve them using PHP's inbuilt
json_decode()function. Content and metadata will be separated with a blank line.
Let's add a route which will load an article from articles folder based on the url.
// add article location in configuration
$app->config(array(
   'templates.path' => 	'./templates',
   'article.path'	=>	'./articles'   // location of articles
));
// '/post-url' will load post-url.txt file.
$app->get('/:article',function($article) use($app){
	$path 	 = $app->config('article.path');
	//open text file and read it
	$handle  = fopen($path . '/' . $article . '.txt', 'r');
	$content = stream_get_contents($handle);
	// split the content to get metadata
	$content = explode("\n\n", $content);
	$rawMeta = array_shift($content);
	// metadata is json encoded. so decode it.
	$meta    = json_decode($rawMeta,true);
	$content = implode("\n\n", $content);
	$article = array('meta' => $meta , 'content' => $content);
	$app->render('article.php', $article);
});
We have added a dynamic route with a single route parameter. The callback function will receive the value for that parameter, which should be a file name without its extension. Next, we extract the value of the article.path configuration variable, where we keep our articles.
In the next two lines, we read that file and store its content in a variable, $content . As I mentioned in the previous paragraph, an article will have metadata and actual content which will be separated by a single line ("\n\n"). Often, there may be many other blank lines in an article's content, which will probably break the current method. To avoid that, we will use the first element to get metadata and will join the rest of the array using the same blank line. Since the metadata is in the JSON format, we need to decode that from here and store it in the $meta array.
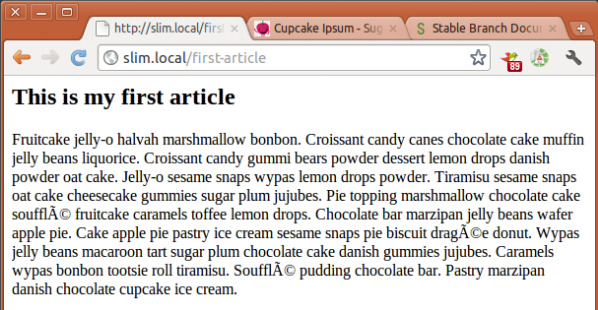
Create a template file to render an article and place it in the template folder.
//article.php
echo '<h2>' . $meta['title'] . '</h2>';
echo $content;
Let's create our first blog post now. Create a new file named first-article.txt, place it in the articles folder and add the content as shown below. Make sure that you have the metadata and content separated by a blank line.
//first-article.txt
{
	"title" : "This is my first article",
	"date"  : "02/15/2012",
	"slug"  : "first-article",
	"author": "Author name"
}

Fruitcake jelly-o halvah marshmallow bonbon. Croissant candy canes chocolate cake muffin jelly beans liquorice.... (copy paste some lipsum)
Excellent! You can start posting articles now. But wait! We don't have a listing page yet. We need to list all the articles available in our system, with its title and a small description. To get this done, we will need to parse the articles folder to find all articles and add them to an array reading them one after the other.
Step 8: Create a Listing Page
$app->get('/', function() use ($app){
	$path = $app->config('article.path');
	$dir = new DirectoryIterator($path);
	$articles = array();
	foreach($dir as $file){
		if($file->isFile()){
			$handle  = fopen($path . '/' . $file->getFilename(), 'r');
			$content = stream_get_contents($handle);
			$content = explode("\n\n", $content);
			$rawMeta = array_shift($content);
			$meta    = json_decode($rawMeta,true);
			$content = implode("\n\n", $content);
			$articles[$file->getFilename()] = array('meta' => $meta, 'content' => $content);
		}
	}
	$app->render('index.php',array('articles' => $articles));
});
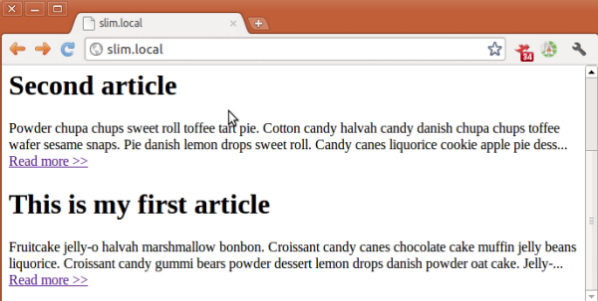
Here, we have added a route to the home page. We are using PHP's inbuilt Directoryiterator class to loop through each file in the directory. Each article is added to the $articles array. From the template file (index.php), we can loop through these articles as shown below.
foreach($articles as $article){
	echo "<h1> ". $article['meta']['title'] ." </h1> ";
	echo substr(strip_tags($article['content']), 0,200)
			. '... <a href="/' . $article['meta']['slug']
			. '">Read more >> </a>';
}
Our home page is ready now. It will list all the articles in our blog, with its corresponding title and a portion of the content.
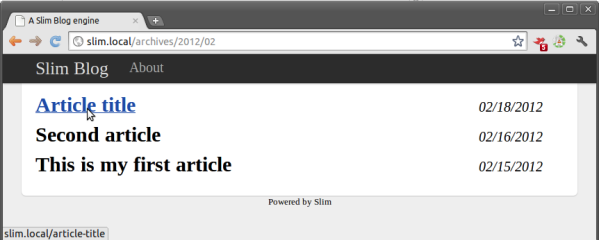
Step 9: Create an Archives Page
Next up, we will create an 'archives' page. Since we expect the archives page to have filters based on year, month and date, we will add a route with optional parameters. The archives page will the support following URLs.
- /archives
- /archives/yyyy
- /archives/yyyy/mm
- /archives/yyyy/mm/dd
To achieve this, we will load all the articles and filter them based on the arguments passed to the callback function. I have moved everything to a class so that we can start reusing our code. A route that will support the above URLs will look something like so:
	// assign $this to another variable as it is not supported inside closure
	$blog = new Blog();
	$slim->get('/archives(/:yyyy(/:mm(/:dd)))', function() use ($blog,$slim) {});
Note that in this route, the year, month and date are optional parameters. /archives is the only required part of URL. Next, we need to implement this route which will respond based on the optional parameters.
	$args  = func_get_args();
	//load all articles
	$articles = $blog->loadArticles();
	$archives = array();
	// check count($args) for optional route params
	if(count($args)>0) {
		switch(count($args)){
			case 1 :    //only year is present
				$format = 'Y';
				$date = $dateFormat($args,$format);
				break;
			case 2 :    //year and month are present
				$format = 'Y-m';
				$date = $dateFormat($args,$format);
				break;
			case 3 :	//year, month and date are present
				$format = 'Y-m-d';
				$date = $dateFormat($args,$format);
				break;
		}
		// filter articles
		foreach($articles as $article){
			if($dateFormat($article['meta']['date'], $format) == $date){
				$archives[] = $article;
			}
		}
	}
	else{
		$archives = $articles;
	}
	// render archives
	$slim->render('archives.php',array('archives' => $archives));
Inside the switch statement, we create the date to be filtered using the arguments passed. This date is compared against the date of each article and if they match, it is added to the $archives array. $dateFormat() is an anonymous function inside the route to format dates.
	$dateFormat = function($args,$format){
		$temp_date = is_array($args) ? implode('-', $args) : $args;
		$date   = new DateTime($temp_date);
		return $date->format($format);
	};
We can write conditions for a route that should be satisfied by the arguments, to validate the year, month and date passed to the route.
$slim->get('/archives(/:yyyy(/:mm(/:dd)))', function() use $blog {
})->conditions(
		array(
			 'yyyy' => '(19|20)\d\d'
			,'mm'=>'(0[1-9]|1[0-2])'
			,'dd'=>'(0[1-9]|[1-2][0-9]|3[0-1])'
		));
Here, the year should start with 19 or 20 followed by any two digits. The month should be between 1 and 12 and date should be in between 01 and 31.
Here is the archives page I have created with the above code. If you noticed that I've used Twitter Bootstrap for applying some basic styles, you get an extra cookie!
Step 9: Spice it Up
Well, we now possess a working model of a flat-file blog engine. The next thing we need to do is organize the application to avoid code duplication and add features like commenting and so on. Let's move this code from index.php to a separate class for better organization.
So far, we have used the View class of the Slim framework. We can create a custom view class which will extend Slim_View for adding some additional features like setting a base layout, global settings, etc. If you prefer to write articles in Markdown, you can include a Markdown parser as well.
We should also look into improving the aesthetics of the application. I prefer using Twitter bootstrap since it's really very easy to use and customize. I don't think it's a good idea to dig into these details here. I have compiled them into a simple application called TextPress which can be downloaded here.
Wrapping Up
Nearly all flat-file blog engines prefer living in the cloud. Further Git is most likely used for publishing articles. With our engine, you can create posts using a simple text file and publish it using the command line. As there is no admin panel to hack, it is much more secure than almost any other content management system. Above all, it's easy to host, since platform services, like PHP Fog allow us to host applications freely in the cloud.
So that's about it. Let me know if you have any questions in the comments below and thank you so much for reading!

Comments