Introduction
With iOS 10, Apple has opened up the Messages application to third-party developers through a new feature called iMessage apps. Developers can now create their own various types of apps, ranging from sticker packs to fully interactive interfaces, which create inline iMessage content.
In this tutorial I am going to introduce you to the new Messages framework and show you how to create your very own iMessage apps.
This tutorial requires that you are running Xcode 8 on OS X El Capitan or later and assumes that you are comfortable with creating a UIKit-based iOS application. If you're still getting started with iOS development, check out the iOS From Scratch With Swift tutorial series. Over the course of that series, you'll learn how to start developing for the iOS platform with in-depth articles and tutorials.
1. Ecosystem
The iMessage app ecosystem begins with a full App Store that is accessible to users through the Messages application. This store is completely separate from the regular iOS app store and will show only the iMessage-related apps.
iMessage apps exist as extensions to regular iOS applications, similar to things like Photos extensions and custom keyboards. The key difference is that, since the iMessage App Store exists on its own inside the Messages app, you can create an iMessage app without having to create an iOS app that goes on the user's home screen; the iMessage app is created as an extension of an effectively blank and invisible iOS app. It is important to note, however, that of course if you want to develop both an iOS and iMessage app, you can create an iMessage extension just like any other type of extension.
Lastly, while iMessage apps will only be available on iOS, their content will still be viewable on macOS and watchOS devices. In addition to this, users of watchOS 3 will be able to view their recently used stickers and send these to their contacts straight from an Apple Watch.
2. Basic Sticker Packs
For people who just want to create a quick and easy iMessage sticker pack, Xcode provides a template to do so without having to write any code at all! This will be a great tool to enable graphic artists with no programming knowledge at all to create a sticker pack.
Using the new Messages framework to create a sticker pack, you can create small, medium or large stickers. This size, however, applies for all stickers in your pack. You only need to provide the largest image size for each sticker in your pack, and the system will downscale your images when being displayed on other devices.
While not strictly enforced, here are the file sizes that Apple recommends for your sticker packs:
- Small: 100 x 100 pt @3x scale (300 x 300 pixel image)
- Medium: 136 x 136 pt @3x scale (378 x 378 pixel image)
- Large: 206 x 206 pt @3x scale (618 x 618 pixel image)
There are, however, some limitations to the images you can use in your sticker packs:
- Images can be no larger than 500 KB in file size.
- Images can be no smaller than 100 x 100 pt (300 x 300 pixels).
- Images can be no larger than 206 x 206 pt (618 x 618 pixels).
- Image files must be PNG, APNG, JPEG, or GIF format; PNG for static stickers and APNG for animated ones are recommended because they handle scaling and transparent backgrounds much better than JPEG and GIF respectively.
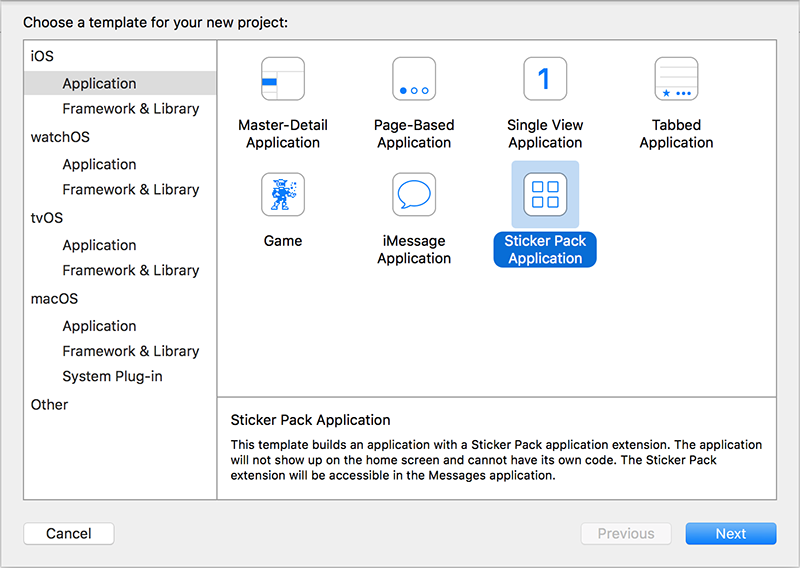
Open up Xcode and create a new project. Under the iOS > Application section, you will see that there are now options for iMessage Application and Sticker Pack Application projects. For this first example, select the Sticker Pack Application template:
If you are following along and want some sticker assets to use in your application, you can download them from the iMessage Application Stickers folder of the tutorial GitHub repo.
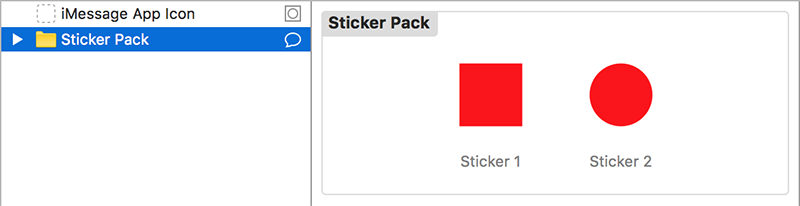
You will see in the left sidebar of Xcode that you now have a Stickers.xcstickers asset catalog in your project. This folder will contain your iMessage application icon and all of the stickers in your pack. Adding stickers to your application is as easy as dragging them into the Sticker Pack folder of your asset catalog.
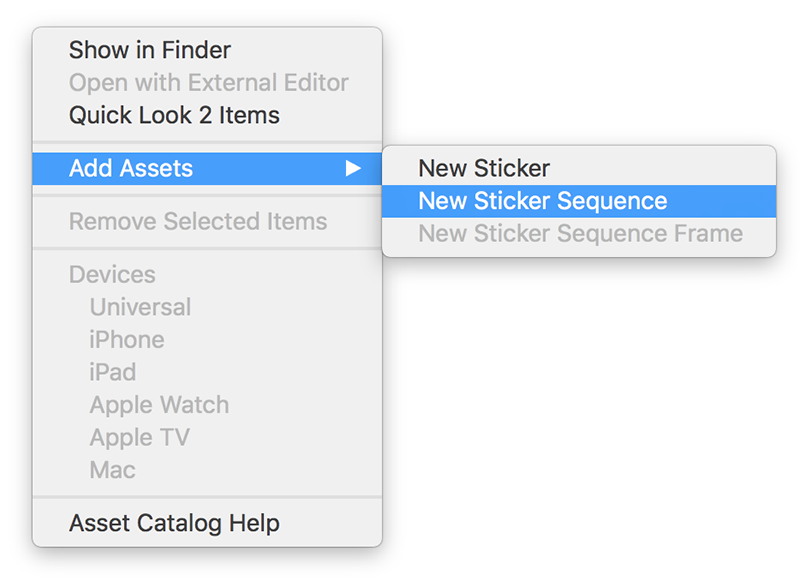
Please note that if you want to add in an animated sticker using a series of images, you can right click in your Sticker Pack folder and choose the Add Assets > New Sticker Sequence option. With this in your sticker pack, you can then drag to reorder individual frames.
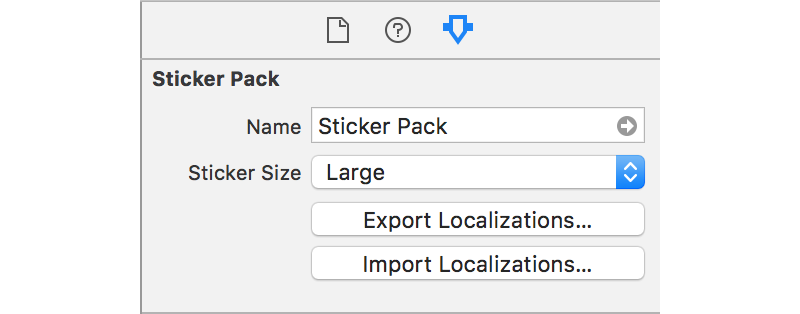
Lastly, with your asset catalog open, if you go to the Attributes inspector in the right sidebar of Xcode, you can change the name of your sticker pack and also the sticker size you are using.
Testing Your Sticker Pack
To test your sticker pack, simply press the play button in the top-left corner of Xcode or press Command-R on your keyboard. Once the simulator has booted up, Xcode should present you with the following menu.
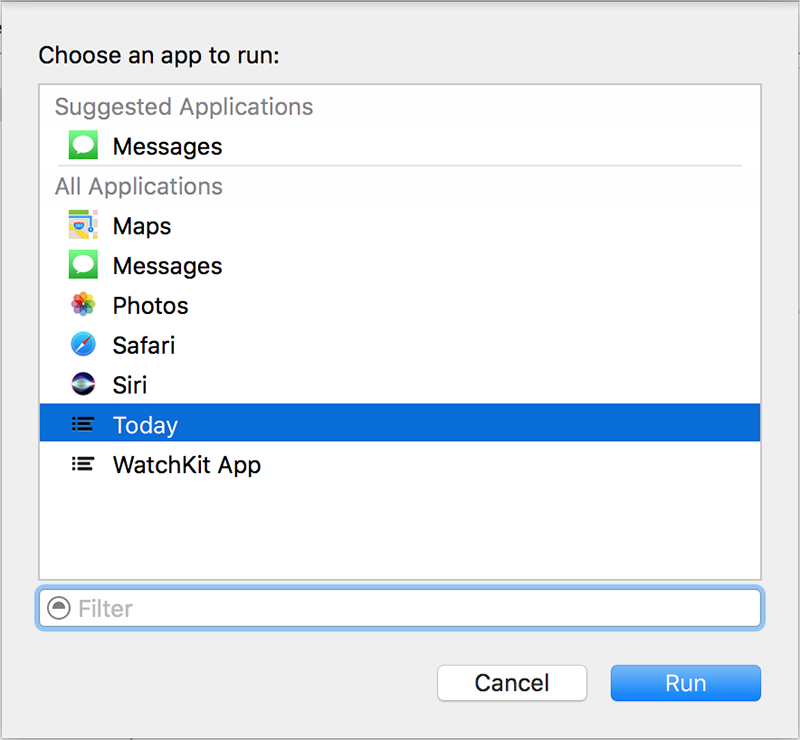
Choose Messages and then click the Run button. Once the simulator has launched the Messages app, press on the app store button at the bottom of the screen to access your iMessage applications.
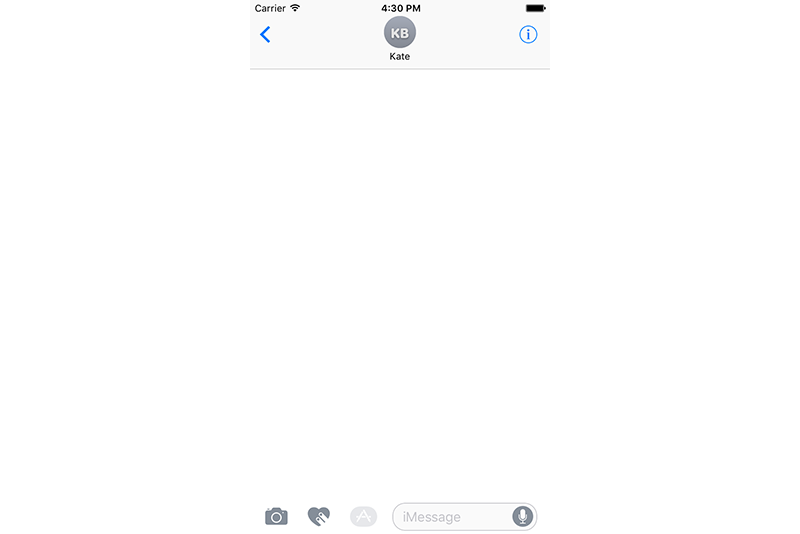
Your sticker pack should show up initially, but if it doesn't, swipe across until you reach it. Once your app has loaded you should see the two stickers that we added available to use and send.
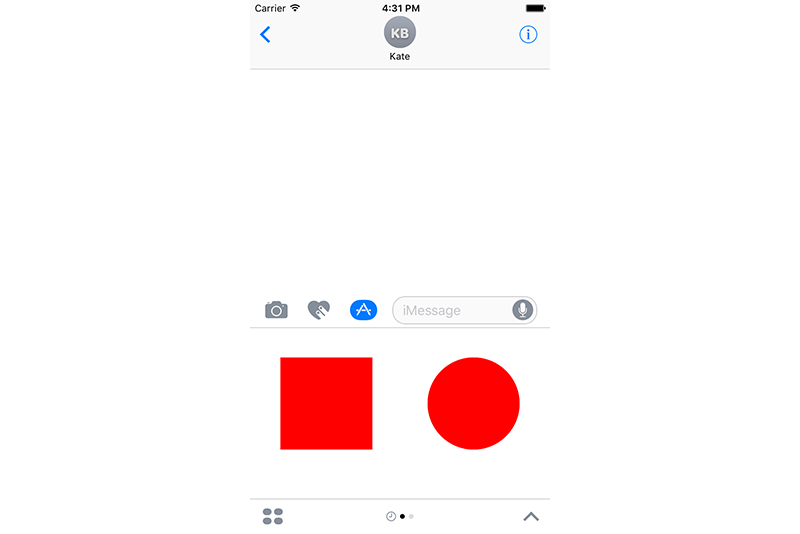
Tapping on either of these stickers will add it to the current message, and from here you can press send.
As you can see, it is very quick and easy to create sticker packs for iMessage in iOS 10 without needing to use any code at all.
3. Custom Sticker Applications
For some use cases, the very basic functionality provided by the basic sticker application template may not quite be enough. Because of this, Apple also provides a way for you to create a more customised sticker pack application. If you want to follow along, create a new project called CustomStickerPack as shown at the start of this tutorial, but this time choose the iMessage Application template.
Once Xcode has created your project, you will see that you now have folders similar to that of an iOS app with an additional MessagesExtension folder. The top CustomStickerPack folder simply contains an asset catalog and Info.plist file for your "blank" iOS application. It is important that you provide all of the correct sized app icons in this asset catalog because iOS will still use it for things such as the user's storage usage settings.
The folder we are going to focus on is the MessageExtension folder, which at the moment contains the following files:
- MessagesViewController.swift which is the root view controller for your iMessage app's UI
-
MainInterface.storyboard where you can design your app's interface easily
-
Assets.xcassets which contains your iMessage app's icon files as well as any other image assets you need to use in your interface
-
Info.plist for configuration values of your extension
For our example custom sticker application, we are just going to create our interface programmatically using the new MSStickerBrowserViewController class.
Open up your MessagesViewController.swift file, and you will firstly see that your MessagesViewController class is a subclass of MSMessagesAppViewController, which itself is a subclass of UIViewController. This means that all of UIKit is available for you to use in your iMessage applications.
The MSMessagesAppViewController class provides many callback methods which you can override to further customise the functionality of your application, but we don't need to worry about these in this tutorial. For now, just edit your class definition so that your class conforms to the MSStickerBrowserViewDataSource protocol:
class MessagesViewController: MSMessagesAppViewController, MSStickerBrowserViewDataSource {

    ...

}
Before we can display our stickers, we need to add the files to our project and load them. Drag the image files we used earlier in this tutorial into your project, and make sure that they are added to the MessagesExtension target. The files need to be added to the target rather than to an asset catalog because that way we can load them from a URL, which is much easier when working with custom stickers.
Once you have added these files, add the following code to your MessagesViewController class:
var stickers = [MSSticker]()

func loadStickers() {
    for i in 1...2 {
        if let url = Bundle.main.urlForResource("Sticker \(i)", withExtension: "png") {
            do {
                let sticker = try MSSticker(contentsOfFileURL: url, localizedDescription: "")
                stickers.append(sticker)
            } catch {
                print(error)
            }
        }
    }
}
With this code we simply create an MSSticker array to store our stickers and a function to load them from the local storage.
Next, add the following method to your class:
func createStickerBrowser() {
    let controller = MSStickerBrowserViewController(stickerSize: .large)

    addChildViewController(controller)
    view.addSubview(controller.view)

    controller.stickerBrowserView.backgroundColor = UIColor.blue()
    controller.stickerBrowserView.dataSource = self

    view.topAnchor.constraint(equalTo: controller.view.topAnchor).isActive = true
    view.bottomAnchor.constraint(equalTo: controller.view.bottomAnchor).isActive = true
    view.leftAnchor.constraint(equalTo: controller.view.leftAnchor).isActive = true
    view.rightAnchor.constraint(equalTo: controller.view.rightAnchor).isActive = true
}
With this code, we create an instance of the MSStickerBrowserViewController class and add this as a child of the root view controller in addition to constraining it to the full available height and width.
Next, we need to implement the required MSStickerBrowserViewDataSource methods to provide the necessary sticker information. To do so, add the following methods to your code:
func numberOfStickers(in stickerBrowserView: MSStickerBrowserView) -> Int {
    return stickers.count
}

func stickerBrowserView(_ stickerBrowserView: MSStickerBrowserView, stickerAt index: Int) -> MSSticker {
    return stickers[index]
}
Lastly, so that all of our code is actually executed, replace your viewDidLoad method with the following:
override func viewDidLoad() {
    super.viewDidLoad()

    loadStickers()
    createStickerBrowser()
}
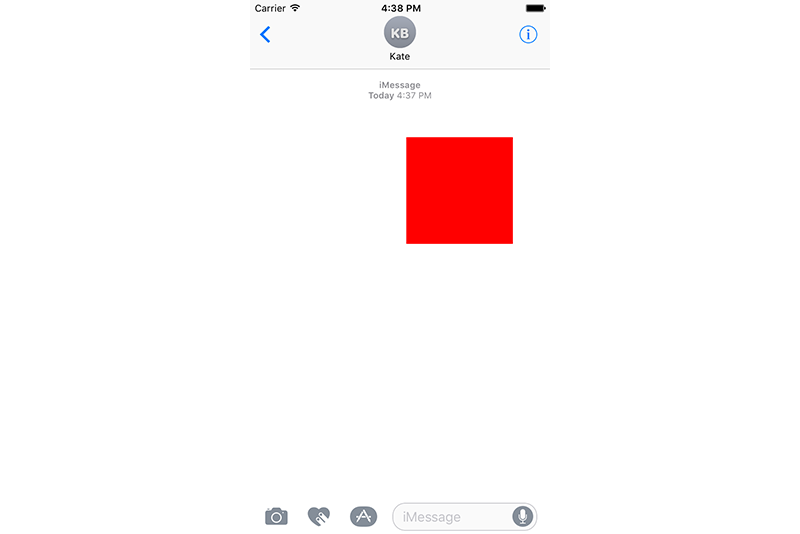
Run your app just as we did earlier (remembering that you may have to swipe across to get to the right app), and once everything has finished loading you should see an identical screen to earlier except now with a blue background:
In this tutorial, we only loaded local sticker images into our custom application for simplicity. One of the main advantages to using a custom sticker application, however, is that you can load sticker images from a remote server and even, through the use of other view controllers before showing your MSStickerBrowserViewController, let your users create their own stickers.
4. Custom Applications
In the last part of this tutorial, we are going to create a very basic iMessage application in order to create a unique message.
If you want to follow along, open up Xcode and create another iMessage Application called MessageApp. Open up your MainInterface.storyboard file and in the view controller shown, remove the default label and add a stepper and button as shown:
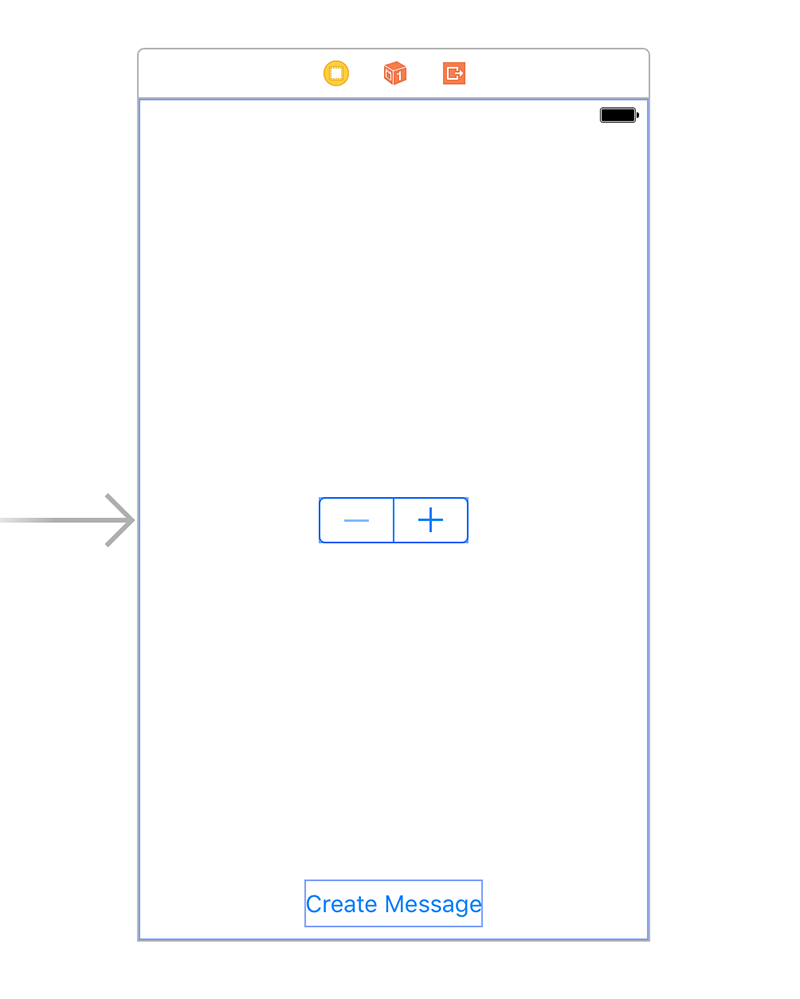
Please note that for your iMessage app to appear correctly on all device sizes, you will need to implement auto layout in your interfaces. In this example, I have constrained the stepper to the centre of the view controller and the button to the bottom.
Next, open up the Attributes inspector with your stepper selected and change its minimum and maximum values to 0 and 10 respectively:

Next, open up the Assistant editor with your MessagesViewController.swift file to create and connect an outlet for your stepper and a touch up inside action for your button:
@IBOutlet weak var stepper: UIStepper!

@IBAction func didPress(button sender: AnyObject) {

}
Now it's time for us to write some code. Firstly, I need to introduce you to a few classes that are crucial when creating an iMessage app:
-
MSConversation: represents the currently open conversation. You can use this class in order to manipulate the conversation transcript, for example by inserting messages or getting the currently selected message.
-
MSMessage: represents a single message, whether created by you to insert into the conversation or already existing in the conversation.
-
MSMessageTemplateLayout: creates a message bubble for you to display your custom message in. As shown in the below image, this template layout has many properties and places for you to put your own content in order to customise your messages.
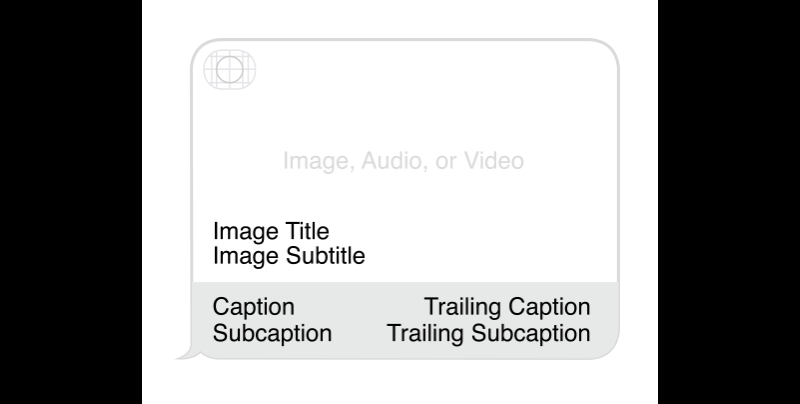
It is important to note that the space in the top left of this layout will be filled by your iMessage app's icon. Also, all of these properties are optional, and providing no caption strings at all will get rid of the bottom portion of the layout.
Still in your MessagesViewController.swift file, add the following method to your MessagesViewController class:
func createImageForMessage() -> UIImage? {
    let background = UIView(frame: CGRect(x: 0, y: 0, width: 300, height: 300))
    background.backgroundColor = UIColor.white()

    let label = UILabel(frame: CGRect(x: 75, y: 75, width: 150, height: 150))
    label.font = UIFont.systemFont(ofSize: 56.0)
    label.backgroundColor = UIColor.red()
    label.textColor = UIColor.white()
    label.text = "\(Int(stepper.value))"
    label.textAlignment = .center
    label.layer.cornerRadius = label.frame.size.width/2.0
    label.clipsToBounds = true

    background.addSubview(label)
    background.frame.origin = CGPoint(x: view.frame.size.width, y: view.frame.size.height)
    view.addSubview(background)

    UIGraphicsBeginImageContextWithOptions(background.frame.size, false, UIScreen.main().scale)
    background.drawHierarchy(in: background.bounds, afterScreenUpdates: true)
    let image = UIGraphicsGetImageFromCurrentImageContext()
    UIGraphicsEndImageContext()

    background.removeFromSuperview()

    return image
}
With this method, we take the current value of the slider and put this in a circular label. We then render this label (and its containing parent view) into a UIImage object which we can attach to our message.
Next, replace your didPress(button:) method with the following code:
@IBAction func didPress(button sender: AnyObject) {
    if let image = createImageForMessage(), let conversation = activeConversation {
        let layout = MSMessageTemplateLayout()
        layout.image = image
        layout.caption = "Stepper Value"

        let message = MSMessage()
        message.layout = layout
        message.url = URL(string: "emptyURL")

        conversation.insert(message, completionHandler: { (error: NSError?) in
            print(error)
        })
    }
}
You will see that with this code, we firstly create the message layout and set the image and caption properties. Next, we create our MSMessage object to insert into the conversation.
Please note that for iMessage to process your custom message correctly, you must set a layout and url for your message. This url is intended to link to a web page of some sort where macOS users can also view your custom iMessage content. For this simple example, however, we just created a basic url from a string.
Lastly, we insert the message into the current active conversation. Calling this method does not actually send the message, though—instead it puts your message in the user's entry field so that they can press send themselves.
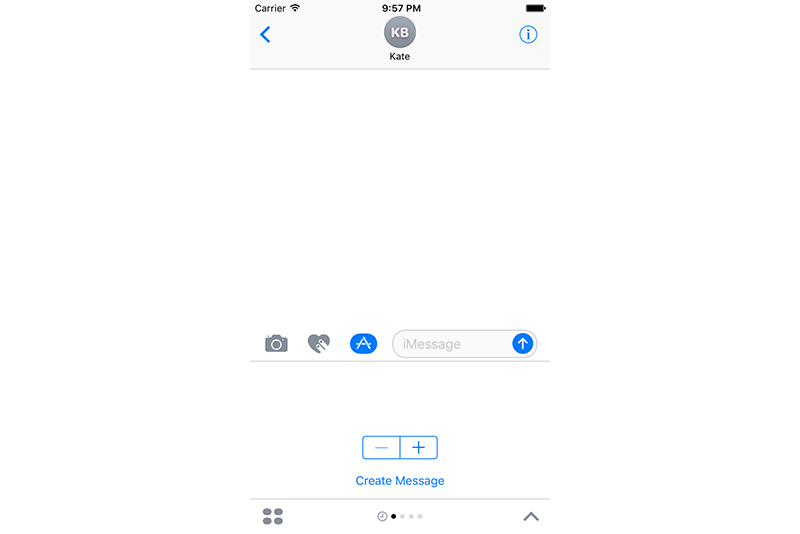
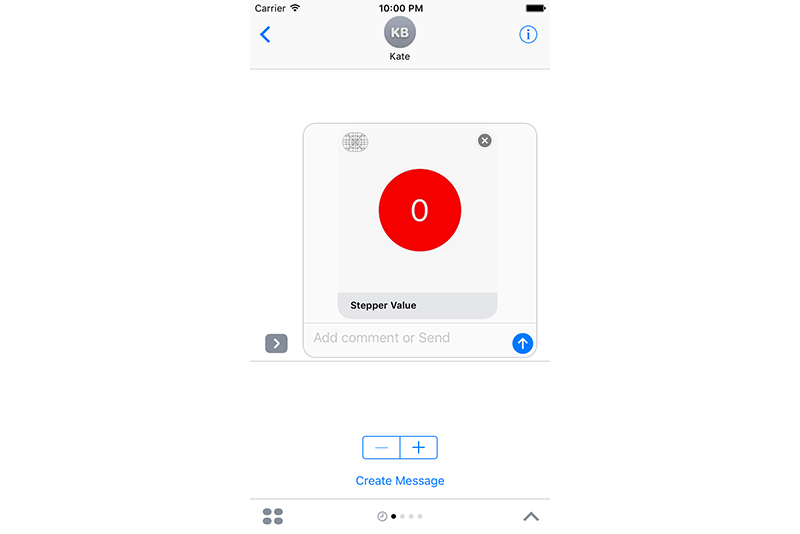
Build and run your new app once again, and you will see an interface similar to the following:
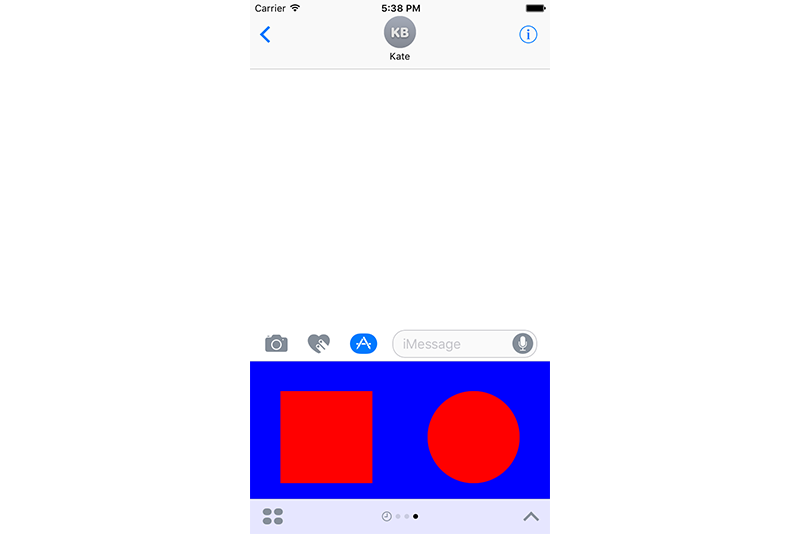
Once you press the Create Message button, you should then also see the message layout bubble shown in the entry field and available to send:
Conclusion
In this tutorial, I introduced you to the new Messages framework in iOS 10, which allows you to create sticker packs and applications to integrate with iMessage. We covered the basic classes you need to be aware of, including MSStickerBrowserViewController, MSConversation, MSMessage, and MSTemplateMessageLayout.
The Messages framework provides APIs to give you a large amount of control over your iMessage apps. For further reading, I would recommend checking out Apple's Messages Framework Reference.
As always, please be sure to leave your comments and feedback in the comments section below.

Comments