In this tutorial, I will show you how to use the Dolby Audio API to enhance the sound in your Android applications. To show you how to use the Dolby Audio API, we will create a simple yet fun puzzle game.
Introduction
In today's crowded mobile market, it's important to make your applications as compelling as they can possibly be. Enhancing an application's audial experience can be as appealing to the user as having a stunning user interface.
The sound created by an application is a form of interaction between the user and the application that is all too often overlooked. However, this means that offering a great audial experience can help your application stand out from the crowd.
Dolby Digital Plus is an advanced audio codec that can be used in mobile applications using Dolby's easy-to-use Audio API. Dolby has made its API available for several platforms, including Android and Kindle Fire. In this tutorial, we will look at the Android implementation of the API.
The Dolby Audio API for Android is compatible with a wide range of Android devices. This means that your Android applications and games can enjoy high-fidelity, immersive audio with only a few minutes of work integrating Dolby's Audio API. Let's explore what it takes to integrate the API by creating a puzzle game.
1. Overview
In the first part of this tutorial, I will show you how to create a fun puzzle game. Because the focus of this tutorial is on integrating the Dolby Audio API, I won't be going into too much detail and I expect you're already familiar with the basics of Android development. In the second part of this article, we'll zoom in on the integration of the Dolby Audio API in an Android application.
We're going to make a traditional puzzle game for Android. The goal of the game is to slide a puzzle piece into the empty slot of the puzzle board to move the puzzle pieces around. The player needs to repeat this process until every piece of the puzzle is in the correct order. As you can see in the screenshot below, I've added a number to each puzzle piece. This will make it easier to keep track of the pieces of the puzzle and the order they're in.

To make the game more appealing, I'll show you how to use custom images as well as how to take a photo to create your own unique puzzles. We'll also add a shuffle button to rearrange the pieces of the puzzle to start a new game.
2. Getting Started
Step 1
It's not important what IDE you use, but for this tutorial I'll be using JetBrains IntelliJ Idea. Open your IDE of choice and create a new project for your Android application. Make sure to create a main Activity class and an XML layout.
Step 2
Let's first configure the application's manifest file. In the application node of the manifest file, set hardwareAccelerated to true. This will increase your application's rendering performance even for 2D games like the one we're about to create.
android:hardwareAccelerated="true"
In the next step, we specify the screen sizes our application will support. For games, I usually focus on devices with larger screens, but this choice is entirely up to you.
<supports-screens
            android:largeScreens="true"
            android:anyDensity="true"
            android:normalScreens="true"
            android:smallScreens="false"
            android:xlargeScreens="true"/>
In the activity node of the manifest file, add a node named configChanges and set its value to orientation as shown below. You can find more information about this setting on the developer website.
android:configChanges="orientation"
Before we move on, add two uses-permission nodes to enable vibration and write access for our game. Insert the following snippet before the application node in the manifest file.
<uses-permission android:name="android.permission.VIBRATE" />
<uses-permission android:name="android.permission.WRITE_EXTERNAL_STORAGE" />
Step 3
Let's also add the resources that we'll be using later in this tutorial. Start by adding the image that you want to use for the puzzle. Add it to the drawable folder of your project. I've chosen to add the image to the drawable-hdpi folder of my project.
Last but not least, add the sound files that you want to use in your game. In your project's res folder, create a new directory named raw and add the sound files to this folder. For the purpose of this tutorial, I've added two audio files. The first sound is played when the player moves a puzzle piece while the second sound is played when the game is finished, that is, when the player completes the puzzle. Both sounds are available on SoundBible. The first sound is licensed under the Creative Commons Attribution 3.0 license and was recorded by Mike Koenig.
3. Creating the Brain of the Game
As I mentioned earlier, I won't explain the game creation process in detail since the focus of this tutorial is integrating the Dolby Audio API. In the next steps, I will walk you through the steps you need to take to create the puzzle game.
We start by creating a new class, SlidePuzzle, that will be the brain of the game. Every move made in the puzzle is processed and tracked by an instance of this class using simple math.
It's an important part of the game as it will determine which tiles can be moved and in what direction. The class will also notify us when the puzzle is completed.
package com.dolby.DolbyPuzzle;

public class SlidePuzzle {

}
We'll start by declaring a number of variables that we'll need a bit later. Take a look at the next code snippet in which I declare variables for the four possible directions the puzzle pieces can move in, two arrays of integers for the horizontal and vertical directions, and an array for the tiles of the puzzle. We also declare and create an instance of the Random class, which we'll use later in this tutorial.
public static final int DIRECTION_LEFT = 0;
public static final int DIRECTION_UP = 1;
public static final int DIRECTION_RIGHT = 2;
public static final int DIRECTION_DOWN = 3;

public static final int[] DIRECTION_X = {-1, 0, +1, 0};
public static final int[] DIRECTION_Y = {0, -1, 0, +1};

private int[] tiles;
private int handleLocation;

private Random random = new Random();
private int width;
private int height;
The next step is to create an init method for the SlidePuzzle class. The init method accepts two arguments that determine the width and height of the SlidePuzzle object. Using the width and height instance variables, we instantiate the tiles array and set handleLocation as shown below.
public void init(int width, int height) {
  this.width = width;
  this.height = height;
  tiles = new int[width * height];

  for(int i = 0; i < tiles.length; i++)
  {
    tiles[i] = i;
  }

  handleLocation = tiles.length - 1;
}
The SlidePuzzle class also needs a setter and getter method for the tiles property. Their implementations aren't that complicated as you can see below.
public void setTiles(int[] tiles) {
  this.tiles = tiles;

  for(int i = 0; i < tiles.length; i++)
  {
    if(tiles[i] == tiles.length - 1)
    {
      handleLocation = i;
      break;
    }
  }
}

public int[] getTiles() {
  return tiles;
}
In addition to the accessors for the tiles property, I've also created a handful of convenience methods that will come in handy later in this tutorial. The getColumnAt and getRowAt methods, for example, return the column and row of a particular location in the puzzle.
public int getColumnAt(int location) {
  return location % width;
}

public int getRowAt(int location) {
  return location / width;
}

public int getWidth() {
  return width;
}

public int getHeight() {
  return height;
}
The distance method, another helper method we'll use in a few moments, calculates the distance between tiles using simple math and the tiles array.
public int distance() {
  int dist = 0;

  for(int i = 0; i < tiles.length; i++)
  {
    dist += Math.abs(i - tiles[i]);
  }

  return dist;
}
The next method is getPossibleMoves, which we'll use to determine the possible positions the puzzle pieces can move to. In the following screenshot, there are four puzzle pieces that can be moved to the empty slot of the puzzle board. The pieces the player can move are 5, 2, 8 and 4. Didn't I tell you the numbers would come in handy?
The implementation of getPossibleMoves might seem daunting at first, but it's nothing more than basic math.
public int getPossibleMoves() {
  int x = getColumnAt(handleLocation);
  int y = getRowAt(handleLocation);

  boolean left = x > 0;
  boolean right = x < width - 1;
  boolean up = y > 0;
  boolean down = y < height - 1;

  return (left ? 1 << DIRECTION_LEFT : 0) |
      (right ? 1 << DIRECTION_RIGHT : 0) |
      (up ? 1 << DIRECTION_UP : 0) |
      (down ? 1 << DIRECTION_DOWN : 0);
}
In the pickRandomMove method, we use the Random object we created earlier. As its name indicates, the pickRandomMove method moves a random piece of the puzzle. The Random object is used to generate a random integer, which is returned by the pickRandomMove method. The method also accepts one argument, an integer, which is the location we ignore, that is, the empty slot of the puzzle board.
private int pickRandomMove(int exclude) {
  List<Integer> moves = new ArrayList<Integer>(4);
  int possibleMoves = getPossibleMoves() & ~exclude;

  if((possibleMoves & (1 << DIRECTION_LEFT)) > 0)
  {
    moves.add(DIRECTION_LEFT);
  }

  if((possibleMoves & (1 << DIRECTION_UP)) > 0)
  {
    moves.add(DIRECTION_UP);
  }

  if((possibleMoves & (1 << DIRECTION_RIGHT)) > 0)
  {
    moves.add(DIRECTION_RIGHT);
  }

  if((possibleMoves & (1 << DIRECTION_DOWN)) > 0)
  {
    moves.add(DIRECTION_DOWN);
  }

  return moves.get(random.nextInt(moves.size()));
}
The invertMove method, which is used a bit later in the shuffle method, inverts the integer used for a chosen direction.
private int invertMove(int move) {
  if(move == 0)
  {
    return 0;
  }

  if(move == 1 << DIRECTION_LEFT)
  {
    return 1 << DIRECTION_RIGHT;
  }

  if(move == 1 << DIRECTION_UP)
  {
    return 1 << DIRECTION_DOWN;
  }

  if(move == 1 << DIRECTION_RIGHT)
  {
    return 1 << DIRECTION_LEFT;
  }

  if(move == 1 << DIRECTION_DOWN)
  {
    return 1 << DIRECTION_UP;
  }

  return 0;
}
The moveTile method accepts two integers, which are used to calculate the moves needed using basic math. The method returns true or false.
public boolean moveTile(int direction, int count) {
  boolean match = false;

  for(int i = 0; i < count; i++)
  {
    int targetLocation = handleLocation + DIRECTION_X[direction] + DIRECTION_Y[direction] * width;
    tiles[handleLocation] = tiles[targetLocation];
    match |= tiles[handleLocation] == handleLocation;
    tiles[targetLocation] = tiles.length - 1; // handle tile
    handleLocation = targetLocation;
  }
  return match;
}
The shuffle method is used to shuffle the pieces of the puzzle when a new game begins. Take a moment to inspect its implementation as it's an important part of the game. In shuffle, we determine the limit based on the height and the width of the puzzle. As you can see, we use the distance method to determine the number of tiles that need to be moved.
public void shuffle() {
  if(width < 2 || height < 2)
  {
    return;
  }

  int limit = width * height * Math.max(width, height);
  int move = 0;

  while(distance() < limit)
  {
    move = pickRandomMove(invertMove(move));
    moveTile(move, 1);
  }
}
There are two more helper methods we need to implement, getDirection and getHandleLocation. The getDirection method returns the direction to which the puzzle piece at location is moved and getHandleLocation returns the empty slot of the puzzle board.
public int getDirection(int location) {
  int delta = location - handleLocation;

  if(delta % width == 0)
  {
    return delta < 0 ? DIRECTION_UP : DIRECTION_DOWN;
  }
  else if(handleLocation / width == (handleLocation + delta) / width)
  {
    return delta < 0 ? DIRECTION_LEFT : DIRECTION_RIGHT;
  }
  else
  {
    return -1;
  }
}

public int getHandleLocation() {
  return handleLocation;
}
4. Creating the Puzzle Board
Create a new class and call it SlidePuzzleView. This class is the view of the puzzle board, it extends the View class and will take up the entire screen of the device. The class is responsible for drawing the puzzle pieces as well as handling touch events.
In addition to a Context object, the constructor of SlidePuzzleView also accepts an instance of the SlidePuzzle class as you can see below.
package com.dolby.DolbyPuzzle;

import android.content.Context;
import android.view.View;

public class SlidePuzzleView extends View {
    public SlidePuzzleView(Context context, SlidePuzzle slidePuzzle) {
        super(context);
        ...
    }
}
public static enum ShowNumbers { NONE, SOME, ALL };

private static final int FRAME_SHRINK = 1;

private static final long VIBRATE_DRAG = 5;
private static final long VIBRATE_MATCH = 50;
private static final long VIBRATE_SOLVED = 250;

private static final int COLOR_SOLVED = 0xff000000;
private static final int COLOR_ACTIVE = 0xff303030;

private Bitmap bitmap;
private Rect sourceRect;
private RectF targetRect;
private SlidePuzzle slidePuzzle;
private int targetWidth;
private int targetHeight;
private int targetOffsetX;
private int targetOffsetY;
private int puzzleWidth;
private int puzzleHeight;
private int targetColumnWidth;
private int targetRowHeight;
private int sourceColumnWidth;
private int sourceRowHeight;
private int sourceWidth;
private int sourceHeight;
private Set<Integer> dragging = null;
private int dragStartX;
private int dragStartY;
private int dragOffsetX;
private int dragOffsetY;
private int dragDirection;
private ShowNumbers showNumbers = ShowNumbers.SOME;
private Paint textPaint;
private int canvasWidth;
private int canvasHeight;
private Paint framePaint;
private boolean dragInTarget = false;
private int[] tiles;
private Paint tilePaint;

public SlidePuzzleView(Context context, SlidePuzzle slidePuzzle) {
  super(context);

  sourceRect = new Rect();
  targetRect = new RectF();

  this.slidePuzzle = slidePuzzle;

  tilePaint = new Paint();
  tilePaint.setAntiAlias(true);
  tilePaint.setDither(true);
  tilePaint.setFilterBitmap(true);

  textPaint = new Paint();
  textPaint.setARGB(0xff, 0xff, 0xff, 0xff);
  textPaint.setAntiAlias(true);
  textPaint.setTextAlign(Paint.Align.CENTER);
  textPaint.setTextSize(20);
  textPaint.setTypeface(Typeface.DEFAULT_BOLD);
  textPaint.setShadowLayer(1, 2, 2, 0xff000000);

  framePaint = new Paint();
  framePaint.setARGB(0xff, 0x80, 0x80, 0x80);
  framePaint.setStyle(Style.STROKE);
}
We override the class's onSizeChanged method and in this method we set puzzleWidth and puzzleHeight to 0.
@Override
protected void onSizeChanged(int w, int h, int oldw, int oldh) {
  puzzleWidth = puzzleHeight = 0;
}
The refreshDimensions method is invoked when the dimensions of the view change and the puzzle needs to be rebuilt. This method is invoked in the class's onDraw method.
private void refreshDimensions() {
  targetWidth = canvasWidth;
  targetHeight = canvasHeight;

  sourceWidth = bitmap.getWidth();
  sourceHeight = bitmap.getHeight();

  double targetRatio = (double) targetWidth / (double) targetHeight;
  double sourceRatio = (double) sourceWidth / (double) sourceHeight;

  targetOffsetX = 0;
  targetOffsetY = 0;

  if(sourceRatio > targetRatio)
  {
    int newTargetHeight = (int) (targetWidth / sourceRatio);
    int delta = targetHeight - newTargetHeight;
    targetOffsetY = delta / 2;
    targetHeight = newTargetHeight;
  }
  else if(sourceRatio < targetRatio)
  {
    int newTargetWidth = (int) (targetHeight * sourceRatio);
    int delta = targetWidth - newTargetWidth;
    targetOffsetX = delta / 2;
    targetWidth = newTargetWidth;
  }

  puzzleWidth = slidePuzzle.getWidth();
  puzzleHeight = slidePuzzle.getHeight();

  targetColumnWidth = targetWidth / puzzleWidth;
  targetRowHeight = targetHeight / puzzleHeight;
  sourceColumnWidth = sourceWidth / puzzleWidth;
  sourceRowHeight = sourceHeight / puzzleHeight;
}
In the onDraw method of the SlidePuzzleView class, the actual drawing of the puzzle takes place, including drawing the lines of the puzzle board, but we also set the dimensions of the puzzle pieces to make sure they neatly fit the screen of the device. The view's SlidePuzzle instance helps us laying out the view as you can see in the implementation of onDraw below.
@Override
protected void onDraw(Canvas canvas) {
  if(slidePuzzle == null || bitmap == null)
  {
    return;
  }

  if(puzzleWidth != slidePuzzle.getWidth() || puzzleHeight != slidePuzzle.getHeight())
  {
    refreshDimensions();
  }

  boolean solved = slidePuzzle.isSolved();
  canvas.drawColor(solved ? COLOR_SOLVED : COLOR_ACTIVE);

  int[] originalTiles = slidePuzzle.getTiles();

  if(tiles == null || tiles.length != originalTiles.length)
  {
    tiles = new int[originalTiles.length];
  }

  for(int i = 0; i < tiles.length; i++)
  {
    if(originalTiles[i] == originalTiles.length - 1)
    {
      continue;
    }

    if(dragInTarget && dragging.contains(i))
    {
      tiles[i - SlidePuzzle.DIRECTION_X[dragDirection] - puzzleWidth *  SlidePuzzle.DIRECTION_Y[dragDirection]] = originalTiles[i];
    }
    else
    {
      tiles[i] = originalTiles[i];
    }
  }

  int delta = !dragInTarget ? 0 : (SlidePuzzle.DIRECTION_X[dragDirection] + puzzleWidth *  SlidePuzzle.DIRECTION_Y[dragDirection]) * dragging.size();
  int shownHandleLocation = slidePuzzle.getHandleLocation() + delta;
  tiles[shownHandleLocation] = tiles.length - 1;

  int emptyTile = tiles.length - 1;

  for(int i = 0; i < tiles.length; i++)
  {
    if(!solved && originalTiles[i] == emptyTile)
    {
      continue;
    }

    int targetColumn = slidePuzzle.getColumnAt(i);
    int targetRow = slidePuzzle.getRowAt(i);

    int sourceColumn = slidePuzzle.getColumnAt(originalTiles[i]);
    int sourceRow = slidePuzzle.getRowAt(originalTiles[i]);

    targetRect.left = targetOffsetX + targetColumnWidth * targetColumn;
    targetRect.top = targetOffsetY + targetRowHeight * targetRow;
    targetRect.right = targetColumn < puzzleWidth - 1 ? targetRect.left + targetColumnWidth : targetOffsetX + targetWidth;
    targetRect.bottom = targetRow < puzzleHeight - 1 ? targetRect.top + targetRowHeight : targetOffsetY + targetHeight;

    sourceRect.left = sourceColumnWidth * sourceColumn;
    sourceRect.top = sourceRowHeight * sourceRow;
    sourceRect.right = sourceColumn < puzzleWidth - 1 ? sourceRect.left + sourceColumnWidth : sourceWidth;
    sourceRect.bottom = sourceRow < puzzleHeight - 1 ? sourceRect.top + sourceRowHeight : sourceHeight;

    boolean isDragTile = dragging != null && dragging.contains(i);

    boolean matchLeft;
    boolean matchRight;
    boolean matchTop;
    boolean matchBottom;

    int di = i;

    if(dragInTarget && dragging.contains(i))
    {
      di = di - SlidePuzzle.DIRECTION_X[dragDirection] - puzzleWidth *  SlidePuzzle.DIRECTION_Y[dragDirection];
    }

    if(di == tiles[di])
    {
      matchLeft = matchRight = matchTop = matchBottom = true;
    }
    else
    {
      matchLeft = (di - 1) >= 0 && di % puzzleWidth > 0 && tiles[di] % puzzleWidth > 0 && tiles[di - 1] == tiles[di] - 1;
      matchRight = tiles[di] + 1 < tiles.length - 1 && (di + 1) % puzzleWidth > 0 && (tiles[di] + 1) % puzzleWidth > 0 && (di + 1) < tiles.length && (di + 1) % puzzleWidth > 0 && tiles[di + 1] == tiles[di] + 1;
      matchTop = (di - puzzleWidth) >= 0 && tiles[di - puzzleWidth] == tiles[di] - puzzleWidth;
      matchBottom = tiles[di] + puzzleWidth < tiles.length - 1 && (di + puzzleWidth) < tiles.length  && tiles[di + puzzleWidth] == tiles[di] + puzzleWidth;
    }

    if(!matchLeft)
    {
      sourceRect.left += FRAME_SHRINK;
      targetRect.left += FRAME_SHRINK;
    }

    if(!matchRight)
    {
      sourceRect.right -= FRAME_SHRINK;
      targetRect.right -= FRAME_SHRINK;
    }

    if(!matchTop)
    {
      sourceRect.top += FRAME_SHRINK;
      targetRect.top += FRAME_SHRINK;
    }

    if(!matchBottom)
    {
      sourceRect.bottom -= FRAME_SHRINK;
      targetRect.bottom -= FRAME_SHRINK;
    }

    if(isDragTile)
    {
      targetRect.left += dragOffsetX;
      targetRect.right += dragOffsetX;
      targetRect.top += dragOffsetY;
      targetRect.bottom += dragOffsetY;
    }

    canvas.drawBitmap(bitmap, sourceRect, targetRect, tilePaint);

    if(!matchLeft)
    {
      canvas.drawLine(targetRect.left, targetRect.top, targetRect.left, targetRect.bottom, framePaint);
    }

    if(!matchRight)
    {
      canvas.drawLine(targetRect.right - 1, targetRect.top, targetRect.right - 1, targetRect.bottom, framePaint);
    }

    if(!matchTop)
    {
      canvas.drawLine(targetRect.left, targetRect.top, targetRect.right, targetRect.top, framePaint);
    }

    if(!matchBottom)
    {
      canvas.drawLine(targetRect.left, targetRect.bottom - 1, targetRect.right, targetRect.bottom - 1, framePaint);
    }

    if(!solved && (showNumbers == ShowNumbers.ALL || (showNumbers == ShowNumbers.SOME && di != tiles[di])))
    {
      canvas.drawText(String.valueOf(originalTiles[i] + 1), (targetRect.left + targetRect.right) / 2, (targetRect.top + targetRect.bottom) / 2 - (textPaint.descent() + textPaint.ascent()) / 2, textPaint);
    }
  }
}
To handle touch events, we need to override the class's onTouchEvent method. To keep onTouchEvent concise and readable, I've also declared a few helper methods, finishDrag, doMove, startDrag, and updateDrag. These methods help implementing the dragging behavior.
@Override
public boolean onTouchEvent(MotionEvent event) {
  if(slidePuzzle == null || bitmap == null)
  {
    return false;
  }

  if(slidePuzzle.isSolved())
  {
    return false;
  }

  if(event.getAction() == MotionEvent.ACTION_DOWN)
  {
    return startDrag(event);
  }
  else if(event.getAction() == MotionEvent.ACTION_MOVE)
  {
    return updateDrag(event);
  }
  else if(event.getAction() == MotionEvent.ACTION_UP)
  {
    return finishDrag(event);
  }
  else
  {
    return false;
  }
}

private boolean finishDrag(MotionEvent event) {
  if(dragging == null)
  {
    return false;
  }

  updateDrag(event);

  if(dragInTarget)
  {
    doMove(dragDirection, dragging.size());
  }
  else
  {
    vibrate(VIBRATE_DRAG);
  }

  dragInTarget = false;
  dragging = null;
  invalidate();

  return true;
}

private void doMove(int dragDirection, int count) {
      playSlide();
  if(slidePuzzle.moveTile(dragDirection, count))
  {
    vibrate(slidePuzzle.isSolved() ? VIBRATE_SOLVED : VIBRATE_MATCH);
  }
  else
  {
    vibrate(VIBRATE_DRAG);
  }

  invalidate();

  if(slidePuzzle.isSolved())
  {
    onFinish();
  }
}

private boolean startDrag(MotionEvent event) {
  if(dragging != null)
  {
    return false;
  }

  int x = ((int) event.getX() - targetOffsetX) / targetColumnWidth;
  int y = ((int) event.getY() - targetOffsetY) / targetRowHeight;

  if(x < 0 || x >= puzzleWidth || y < 0 || y >= puzzleHeight)
  {
    return false;
  }

  int direction = slidePuzzle.getDirection(x + puzzleWidth * y);

  if(direction >= 0)
  {
    dragging = new HashSet<Integer>();

    while(x + puzzleWidth * y != slidePuzzle.getHandleLocation())
    {
      dragging.add(x + puzzleWidth * y);
      dragStartX = (int) event.getX();
      dragStartY = (int) event.getY();
      dragOffsetX = 0;
      dragOffsetY = 0;
      dragDirection = direction;

      x -= SlidePuzzle.DIRECTION_X[direction];
      y -= SlidePuzzle.DIRECTION_Y[direction];
    }
  }

  dragInTarget = false;
  vibrate(VIBRATE_DRAG);

  return true;
}

private boolean updateDrag(MotionEvent event) {
  if(dragging == null)
  {
    return false;
  }

  int directionX = SlidePuzzle.DIRECTION_X[dragDirection] * -1;
  int directionY = SlidePuzzle.DIRECTION_Y[dragDirection] * -1;

  if(directionX != 0)
  {
    dragOffsetX = (int) event.getX() - dragStartX;

    if(Math.signum(dragOffsetX) != directionX)
    {
      dragOffsetX = 0;
    }
    else if(Math.abs(dragOffsetX) > targetColumnWidth)
    {
      dragOffsetX = directionX * targetColumnWidth;
    }
  }

  if(directionY != 0)
  {
    dragOffsetY = (int) event.getY() - dragStartY;

    if(Math.signum(dragOffsetY) != directionY)
    {
      dragOffsetY = 0;
    }
    else if(Math.abs(dragOffsetY) > targetRowHeight)
    {
      dragOffsetY = directionY * targetRowHeight;
    }
  }

  dragInTarget = Math.abs(dragOffsetX) > targetColumnWidth / 2 ||
      Math.abs(dragOffsetY) > targetRowHeight / 2;

  invalidate();

  return true;
}
I've also declared getter methods for targetWidth and targetHeight and accessors for bitmap.
public int getTargetWidth() {
  return targetWidth;
}

public int getTargetHeight() {
  return targetHeight;
}

public void setBitmap(Bitmap bitmap) {
  this.bitmap = bitmap;
  puzzleWidth = 0;
  puzzleHeight = 0;
}

public Bitmap getBitmap() {
  return bitmap;
}
5. Creating the Activity Class
With the implementation of the SlidePuzzle and SlidePuzzleView classes finished, it is time to focus on the main Activity class that your IDE created for you. The main Activity class in this example is named SlidePuzzleMain, but yours may be named differently. The SlidePuzzleMain class will bring together everything that we've created so far.
package com.dolby.DolbyPuzzle;

import android.app.Activity;

public class SlidePuzzleMain extends Activity {
  @Override
  protected void onCreate(Bundle savedInstanceState) {
    super.onCreate(savedInstanceState);
    ...
  }
}
protected static final int MENU_SCRAMBLE = 0;
protected static final int MENU_SELECT_IMAGE = 1;
protected static final int MENU_TAKE_PHOTO = 2;

protected static final int RESULT_SELECT_IMAGE = 0;
protected static final int RESULT_TAKE_PHOTO = 1;

protected static final String KEY_SHOW_NUMBERS = "showNumbers";
protected static final String KEY_IMAGE_URI = "imageUri";
protected static final String KEY_PUZZLE = "slidePuzzle";
protected static final String KEY_PUZZLE_SIZE = "puzzleSize";

protected static final String FILENAME_DIR = "dolby.digital.plus";
protected static final String FILENAME_PHOTO_DIR = FILENAME_DIR + "/photo";
protected static final String FILENAME_PHOTO = "photo.jpg";

protected static final int DEFAULT_SIZE = 3;

private SlidePuzzleView view;
private SlidePuzzle slidePuzzle;
private Options bitmapOptions;
private int puzzleWidth = 1;
private int puzzleHeight = 1;
private Uri imageUri;
private boolean portrait;
private boolean expert;
In the activity's onCreate method, we instantiate the bitmapOptions object, setting its inScaled attribute to false. We also create an instance of the SlidePuzzle class and an instance of the SlidePuzzleView class, passing the activity as the view's context. We then set the activity's view by invoking setContentView and passing in the view object.
bitmapOptions = new BitmapFactory.Options();
bitmapOptions.inScaled = false;

slidePuzzle = new SlidePuzzle();

view = new SlidePuzzleView(this, slidePuzzle);
setContentView(view);
In loadBitmap, we load the image that you added to the project at the beginning of this tutorial and that we'll use for the puzzle. The method accepts the location of the image as its only argument, which it uses to fetch the image.
protected void loadBitmap(Uri uri) {
  try
  {
    Options o = new Options();
    o.inJustDecodeBounds = true;

    InputStream imageStream = getContentResolver().openInputStream(uri);
    BitmapFactory.decodeStream(imageStream, null, o);

    int targetWidth = view.getTargetWidth();
    int targetHeight = view.getTargetHeight();

    if(o.outWidth > o.outHeight && targetWidth < targetHeight)
    {
      int i = targetWidth;
      targetWidth = targetHeight;
      targetHeight = i;
    }

    if(targetWidth < o.outWidth || targetHeight < o.outHeight)
    {
      double widthRatio = (double) targetWidth / (double) o.outWidth;
      double heightRatio = (double) targetHeight / (double) o.outHeight;
      double ratio = Math.max(widthRatio, heightRatio);

      o.inSampleSize = (int) Math.pow(2, (int) Math.round(Math.log(ratio) / Math.log(0.5)));
    }
    else
    {
      o.inSampleSize = 1;
    }

    o.inScaled = false;
    o.inJustDecodeBounds = false;

    imageStream = getContentResolver().openInputStream(uri);
    Bitmap bitmap = BitmapFactory.decodeStream(imageStream, null, o);

    if(bitmap == null)
    {
      Toast.makeText(this, getString(R.string.error_could_not_load_image), Toast.LENGTH_LONG).show();
      return;
    }

    int rotate = 0;

    Cursor cursor = getContentResolver().query(uri, new String[] {MediaStore.Images.ImageColumns.ORIENTATION}, null, null, null);

    if(cursor != null)
    {
      try
      {
        if(cursor.moveToFirst())
        {
          rotate = cursor.getInt(0);

          if(rotate == -1)
          {
            rotate = 0;
          }
        }
      }
      finally
      {
        cursor.close();
      }
    }

    if(rotate != 0)
    {
      Matrix matrix = new Matrix();
      matrix.postRotate(rotate);

      bitmap = Bitmap.createBitmap(bitmap, 0, 0, bitmap.getWidth(), bitmap.getHeight(), matrix, true);
    }

    setBitmap(bitmap);
    imageUri = uri;
  }
  catch(FileNotFoundException ex)
  {
    Toast.makeText(this, MessageFormat.format(getString(R.string.error_could_not_load_image_error), ex.getMessage()), Toast.LENGTH_LONG).show();
    return;
  }
}
In loadBitmap , we also invoke setBitmap. The implementation of setBitmap is shown below.
private void setBitmap(Bitmap bitmap) {
  portrait = bitmap.getWidth() < bitmap.getHeight();

  view.setBitmap(bitmap);
  setPuzzleSize(Math.min(puzzleWidth, puzzleHeight), true);

  setRequestedOrientation(portrait ? ActivityInfo.SCREEN_ORIENTATION_PORTRAIT : ActivityInfo.SCREEN_ORIENTATION_LANDSCAPE);
}
To make the puzzle game more appealing to the player, we'll add an option to customize the game by allowing the player to select an image for the puzzle from the user's photo gallery or take one with the device's camera. We'll also create a menu option for each method.
To make all this work, we implement two new methods, selectImage and takePicture, in which we create an intent to fetch the image we need. The onActivityResult method handles the result of the user's selection. Take a look at the code snippet below to understand the complete picture.
private void selectImage() {
  Intent photoPickerIntent = new Intent(Intent.ACTION_PICK);
  photoPickerIntent.setType("image/*");
  startActivityForResult(photoPickerIntent, RESULT_SELECT_IMAGE);
}

private void takePicture()
{
  File dir = getSaveDirectory();

  if(dir == null)
  {
    Toast.makeText(this, getString(R.string.error_could_not_create_directory_to_store_photo), Toast.LENGTH_SHORT).show();
    return;
  }

  File file = new File(dir, FILENAME_PHOTO);
  Intent photoPickerIntent = new Intent(MediaStore.ACTION_IMAGE_CAPTURE);
  photoPickerIntent.putExtra(MediaStore.EXTRA_OUTPUT, Uri.fromFile(file));
  startActivityForResult(photoPickerIntent, RESULT_TAKE_PHOTO);
}

@Override
protected void onActivityResult(int requestCode, int resultCode, Intent imageReturnedIntent)
{
  super.onActivityResult(requestCode, resultCode, imageReturnedIntent);

  switch(requestCode)
  {
    case RESULT_SELECT_IMAGE:
    {
      if(resultCode == RESULT_OK)
      {
        Uri selectedImage = imageReturnedIntent.getData();
        loadBitmap(selectedImage);
      }

      break;
    }

    case RESULT_TAKE_PHOTO:
    {
      if(resultCode == RESULT_OK)
      {
        File file = new File(getSaveDirectory(), FILENAME_PHOTO);

        if(file.exists())
        {
          Uri uri = Uri.fromFile(file);

          if(uri != null)
          {
            loadBitmap(uri);
          }
        }
      }

      break;
    }
  }
}
All that's left for us to do is create a menu option for each method. The below implementation illustrates how you can create a menu with options, which is shown to the user when they tap the device's options button.
@Override
public void onCreateContextMenu(ContextMenu menu, View v, ContextMenuInfo menuInfo)
{
  super.onCreateContextMenu(menu, v, menuInfo);

  onCreateOptionsMenu(menu);
}

@Override
public boolean onCreateOptionsMenu(Menu menu)
{
  boolean hasCamera = getPackageManager().hasSystemFeature(PackageManager.FEATURE_CAMERA);

  menu.add(0, MENU_SELECT_IMAGE, 0, R.string.menu_select_image);

  if(hasCamera)
  {
    menu.add(0, MENU_TAKE_PHOTO, 0, R.string.menu_take_photo);
  }

  menu.add(0, MENU_SCRAMBLE, 0, R.string.menu_scramble);

  return true;
}

@Override
public boolean onContextItemSelected(MenuItem item)
{
  return onOptionsItemSelected(item);
}

@Override
public boolean onOptionsItemSelected(MenuItem item)
{
  switch(item.getItemId())
  {
    case MENU_SCRAMBLE:
      shuffle();
      return true;

    case MENU_SELECT_IMAGE:
      selectImage();
      return true;

    case MENU_TAKE_PHOTO:
      takePicture();
      return true;

    default:
      return super.onOptionsItemSelected(item);
  }
}
The options menu should look similar to the one shown below.
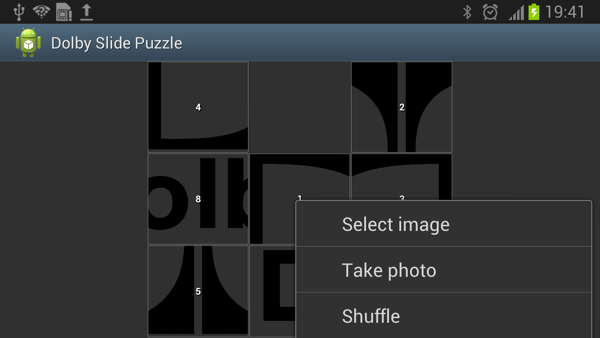
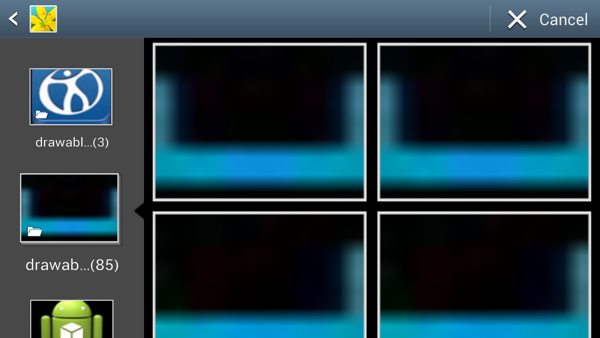
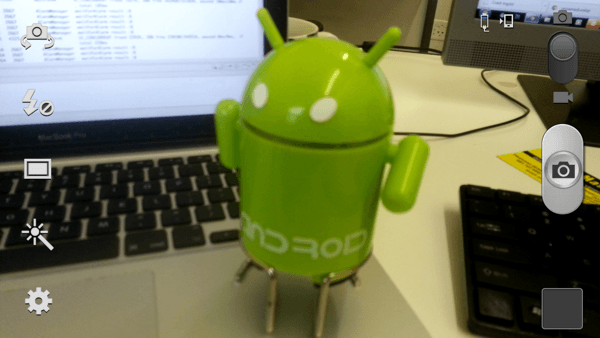
By tapping Select image or Take photo, you should be able to select an image from your device's photo gallery or take one with the camera, and use it in the puzzle game.
You may have noticed that I've also added a third menu option to shuffle the pieces of the puzzle board. This menu option invokes the shuffle method that we implemented in the SlidePuzzle class a bit earlier in this tutorial.
Before we implement the Dolby Audio API, let's create the two methods that will trigger the playback of the audio files we added earlier. You can leave the implementations of these methods blank for now. The onFinish method is invoked when the game is finished while playSound is called whenever a puzzle piece is moved.
public void onFinish() {

}

public void playSound() {

}
All that's left for us to do is invoke loadBitmap from the activity's onCreate method and pass it the location of the image you want to use for the puzzle.
Uri path = Uri.parse("android.resource://com.dolby.DolbyPuzzle/" + R.drawable.dolby);

loadBitmap(path);
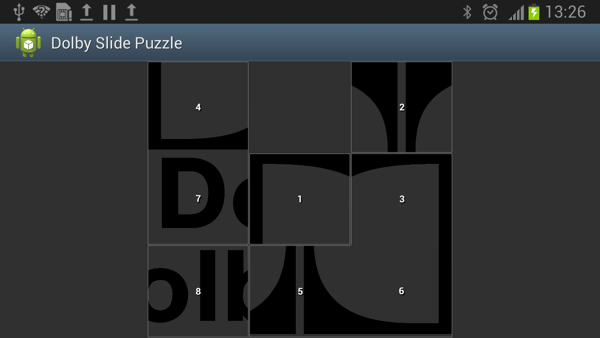
Take a look at the image below for an example of what your game should look like, depending on the image you've used for the puzzle.
6. Implementing the Dolby Audio API
Step 1
As I mentioned at the beginning of this tutorial, integrating the Dolby Audio API is easy and only takes a few minutes. Let's see how we can leverage the Dolby Audio API in our game.
Start by downloading the Dolby Audio API from Dolby's developer website. To do so, create a free developer account or sign in if you already have one. Once you've downloaded the API, add the library to your project.
Step 2
Before you integrate the Dolby Audio API, it's a good idea to add volume controls to your application. This is easy to do and takes only a single line of code. Add the following code snippet to your activity's onCreate method
setVolumeControlStream(AudioManager.STREAM_MUSIC);
Step 3
The next step is to declare two variables in your Activity class, an instance of the MediaPlayer class and an instance of the DolbyAudioProcessing class. Don't forget to add the required imports at the top.
import android.media.MediaPlayer;
import com.dolby.dap.*;

MediaPlayer mPlayer;
DolbyAudioProcessing mDolbyAudioProcessing;
Step 4
We'll now make the Activity class adopt the OnDolbyAudioProcessingEventListener and MediaPlayer.OnCompletionListener interfaces.
public class SlidePuzzleMain extends Activity implements MediaPlayer.OnCompletionListener,
        OnDolbyAudioProcessingEventListener {
    ...
}
To adopt these interfaces, we need to implement a few methods as shown in the code snippet below.
// MediaPlayer.OnCompletionListener
@Override
public void onCompletion(MediaPlayer mp) {}

// OnDolbyAudioProcessingEventListener
@Override
public void onDolbyAudioProcessingClientConnected() {}

@Override
public void onDolbyAudioProcessingClientDisconnected() {}

@Override
public void onDolbyAudioProcessingEnabled(boolean b) {}

@Override
public void onDolbyAudioProcessingProfileSelected(DolbyAudioProcessing.PROFILE profile) {}
We enable the DolbyAudioProcessing object when onDolbyAudioProcessingClientConnected is invoked and disable it again when onDolbyAudioProcessingClientDisconnected is called.
@Override
public void onCompletion(MediaPlayer mp) {
  if(mPlayer != null) {
    mPlayer.release();
    mPlayer = null;
  }
}

@Override
public void onDolbyAudioProcessingClientConnected() {

}

@Override
public void onDolbyAudioProcessingClientDisconnected() {

}

@Override
public void onDolbyAudioProcessingEnabled(boolean b) {}

@Override
public void onDolbyAudioProcessingProfileSelected(DolbyAudioProcessing.PROFILE profile) {}
As you can see in the previous code snippet, we release the MediaPlayer object when it has finished playing the audio file.
To play a sound when the player moves a puzzle piece, we need to implement the playSound method. Before we focus on playSound, we first create an instance of SlidePuzzleMain in the SlidePuzzleView class and in the view's playSlide method, we call playSound on the SlidePuzzleMain instance.
private void playSlide() {
  SlidePuzzleMain activity = (SlidePuzzleMain) getContext();
  activity.playSound();
}
In the playSound method, we create an instance of the MediaPlayer class and make use of the Dolby Audio API to initiate the processing of the audio. If the Dolby Audio API isn't supported by the user's device, the getDolbyAudioProcessing method will return null.
public void playSound()
{
  if(mPlayer == null) {
    mPlayer = MediaPlayer.create(
      SlidePuzzleMain.this,
      R.raw.slide);
    mPlayer.start();

  } else {
    mPlayer.release();
    mPlayer = null;
    mPlayer = MediaPlayer.create(
      SlidePuzzleMain.this,
      R.raw.slide);
    mPlayer.start();
  }

  mDolbyAudioProcessing = DolbyAudioProcessing.getDolbyAudioProcessing(this, DolbyAudioProcessing.PROFILE.GAME, this);
  if (mDolbyAudioProcessing == null) {
    return;
  }
}
As you can see below, the implementation of the onFinish method is very similar to that of playSound. The main difference is that we show a message to the user if the Dolby Audio API isn't available. As you may remember, the onFinish method is played when the game is finished and the player has completed the puzzle.
public void onFinish()
{
  if(mPlayer == null) {
    mPlayer = MediaPlayer.create(
      SlidePuzzleMain.this,
      R.raw.fireworks);
    mPlayer.start();

  } else {
    mPlayer.release();
    mPlayer = null;
    mPlayer = MediaPlayer.create(
      SlidePuzzleMain.this,
      R.raw.fireworks);
    mPlayer.start();
  }

  mDolbyAudioProcessing = DolbyAudioProcessing.getDolbyAudioProcessing(this, DolbyAudioProcessing.PROFILE.GAME, this);

  if (mDolbyAudioProcessing == null) {
    Toast.makeText(this, "Dolby Audio Processing not available on this device.", Toast.LENGTH_SHORT).show();
    shuffle();
  }
}
We also call shuffle at the end of onFinish to start a new game when the player has finished the puzzle.
Step 5
It's important that we release the DolbyAudioProcessing and MediaPlayer objects when they are no longer needed. Releasing these objects ensures we don't compromise the device's battery life and negatively impact the device's performance.
We start by declaring three methods. The first method, releaseDolbyAudioProcessing, releases the DolbyAudioProcessing object and sets it mDolbyAudioProcessing to null. The second method, restartSession, restarts the session managed by the DolbyAudioProcessing object and in the third method, suspendSession, the audio session is suspended and the current configuration is saved for later use.
public void releaseDolbyAudioProcessing() {
    if (mDolbyAudioProcessing != null) {
        try {
            mDolbyAudioProcessing.release();
            mDolbyAudioProcessing = null;
        } catch (IllegalStateException ex) {
            handleIllegalStateException(ex);
        } catch (RuntimeException ex) {
            handleRuntimeException(ex);
        }
    }

}

// Backup the system-wide audio effect configuration and restore the application configuration
public void restartSession() {
    if (mDolbyAudioProcessing != null) {
        try{
            mDolbyAudioProcessing.restartSession();
        } catch (IllegalStateException ex) {
            handleIllegalStateException(ex);
        } catch (RuntimeException ex) {
            handleRuntimeException(ex);
        }
    }
}

// Backup the application Dolby Audio Processing configuration and restore the system-wide configuration
public void suspendSession() {

    if (mDolbyAudioProcessing != null) {
        try{
            mDolbyAudioProcessing.suspendSession();
        } catch (IllegalStateException ex) {
            handleIllegalStateException(ex);
        } catch (RuntimeException ex) {
            handleRuntimeException(ex);
        }
    }
}

 /** Generic handler for IllegalStateException */
private void handleIllegalStateException(Exception ex)
{
    Log.e("Dolby processing", "Dolby Audio Processing has a wrong state");
    handleGenericException(ex);
}

/** Generic handler for IllegalArgumentException */
private void handleIllegalArgumentException(Exception ex)
{
    Log.e("Dolby processing","One of the passed arguments is invalid");
    handleGenericException(ex);
}

/** Generic handler for RuntimeException */
private void handleRuntimeException(Exception ex)
{
    Log.e("Dolby processing", "Internal error occurred in Dolby Audio Processing");
    handleGenericException(ex);
}

private void handleGenericException(Exception ex)
{
    Log.e("Dolby processing", Log.getStackTraceString(ex));
}
As you can see in the above code snippet, I've also created a handful of methods to handle any exceptions that may be thrown in releaseDolbyAudioProcessing, restartSession, and suspendSession.
The three methods we just created need to be invoked at several key moments of the application's lifecycle. We accomplish this by overriding the onStop, onStart, onDestroy, onResume, and onPause methods in our SlidePuzzleMain class.
In onStop, we tell the MediaPlayer object to pause and in onStart the MediaPlayer object continues playback if it isn't null. The onDestroy method is called when the application is closed. In this method, we release the MediaPlayer object, set mPlayer to null, and invoke releaseDolbyAudioProcessing, which we implemented earlier.
@Override
protected void onStop()
{
	super.onStop();

    if (mPlayer != null) {
        mPlayer.pause();
    }
}

@Override
protected void onStart() {
    super.onStart();

    if (mPlayer != null)
    {
        mPlayer.start();
    }
}

@Override
protected void onDestroy() {
    super.onDestroy();

    Log.d("Dolby processing", "onDestroy()");

    // Release Media Player instance
    if (mPlayer != null) {
        mPlayer.release();
        mPlayer = null;
    }

    this.releaseDolbyAudioProcessing();

}

@Override
protected void onResume() {
    super.onResume();
    restartSession();

}

@Override
protected void onPause() {
    super.onPause();
        Log.d("Dolby processing", "The application is in background, supsendSession");
        //
        // If audio playback is not required while your application is in the background, restore the Dolby audio processing system
        // configuration to its original state by suspendSession().
        // This ensures that the use of the system-wide audio processing is sandboxed to your application.
        suspendSession();
}
Finally, in onPause and onResume we suspend and restart the audio session by invoking suspendSession and restartSession respectively.
If you've followed the steps outlined in this tutorial, then your game should now be fully functional with the Dolby Audio API integrated. Build the project to play with the final result.
7. Summary
I'm sure you agree that integrating the Dolby Audio API is easy and doesn't take more than five minutes. Let's briefly summarize the steps we've taken to integrate the API.
- import the Dolby Audio API library
- create an instance of the
DolbyAudioProcessingclass
- implement the
OnDolbyAudioProcessingEventListenerinterface.
- enable the
DolbyAudioProcessinginstance inonDolbyAudioProcessingClientConnected
- disable the
DolbyAudioProcessinginstance inonDolbyAudioProcessingClientDisconnected - after starting the media player, initialize the
DolbyAudioProcessinginstance using theGAMEprofile - check if the
DolbyAudioProcessingobject isnullto verify if the Dolby Audio API is supported by the device - to conserve battery life and optimize performance, suspend and release the
DolbyAudioProcessinginstance when the application is destroyed or moved to the background
Conclusion
Even though the game we created is fairly simple, it is important to remember the focus of this tutorial, the Dolby Audio API. The mobile market is a crowded place and standing out from other games isn't easy. Adding superior sound to your game won't go unnoticed by your users and it will get your game noticed. Head over to Dolby's developer website to give it a try.

Comments