An online portfolio is of great importance for any modern artist, photographer or even musician. It represents their professionalism. Today we will look at making an original, stylish photo portfolio based on a Moto CMS; an advanced Flash Content Management System
We will use a standalone version of Moto CMS consisting of a set of utilities, components and a built-in sample designs carried out in a clean style. In fact, this ready-made template won't be needed, as we are going to create a portfolio website from scratch.
This tutorial covers the following aspects:
- Creating the content holders.
- Creating slots (the Close button, simple button slot).
- Modules (music player, image gallery).
- Editing the website preloader.
- Creating the website pages and content.
We'll also focus on what is different in Moto CMS presenting its features and functionality.
We will need:
- Adobe Photoshop;
- Adobe Flash CS3;
- A standalone version of Moto CMSs (Free Trial);
- Website design in .PSD format.
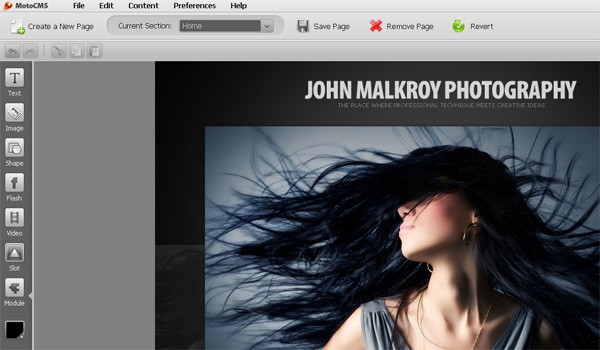
Final Result Preview
Website Home Page:
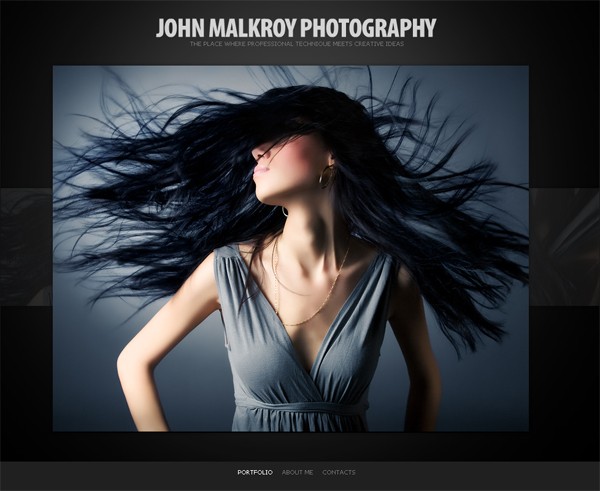
Click on the demo link at the top of the page and check out the final result we will be working towards, kindly hosted by the Moto CMS team (login/password: admin).
Step 1: Download Moto CMS files
From the very beginning we have to download a standalone version of Moto Flash CMS. To replicate the steps of this tutorial and get a feel for Moto CMS features, the Trial version will be enough for you.
So, to download the trial version, please follow this link.
Step 2: Moto CMS Files Overview
Here is a short walkthrough of the Moto CMS files and folders:
- Components. This folder contains MXP component run by Adobe Extension Manager.
- Control panel. All control panel files are here.
- Docs. This folder contains API documentation.
- Examples. This folder contains 4 examples of ready-made Flash websites, starting from a simple website to a complex one with a gallery module, news component, MP3 and video player, contact from, etc.
- Templates. There are 5 website templates that are used for creating Moto CMS based websites. Each template has a necessary set of files and differs by its structure. In this tutorial we are going to use one of these templates, in particular template #1, as a basis for creating our portfolio website.
- Readme file where the first steps for working with the CMS are described.
Step 3: Launch on Localhost
Our next step is to launch the website template # 1, on the basis of which we are going to create our portfolio website. For this we will need a local web server. I'll be using WampServer, a Windows web development environment. It allows you to create web applications with Apache, PHP and a MySQL database.
To launch the website template # 1 simply upload the following folders from the \templates\ directory to the local server: template_01 and controlPanel/admin.
After that you may access Moto CMS control panel by specifying the correct path in the address bar and adding "/admin" to the end.
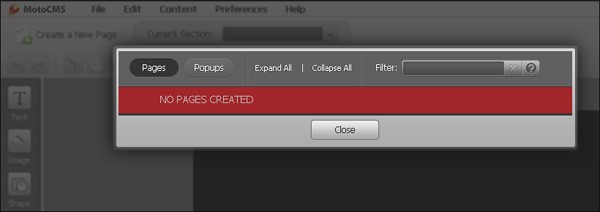
Note: at the moment you won't be able to preview your website, as it doesn't yet have any pages. A 404 error will be shown.
Step 4: Edit config.xml
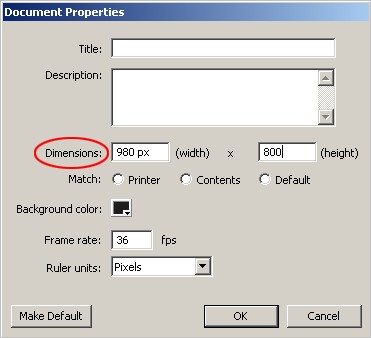
All we need to do is to edit the website width and height, set the website minimal width and height and specify the background color.
The size of our design is 980x800 px. In order to make it resizable on a big screen, we need to put "100%" for website width and height. And in order to make it visible on the small screen resolution, we have to specify the minimal website width and height (This will make the scroll bars appear). The background color is black (#000000).
	<item name="ALLOW_FULL_SCREEN"><![CDATA[true]]></item>

	<item name="WEBSITE_WIDTH"><![CDATA[100%]]></item>

	<item name="WEBSITE_HEIGHT"><![CDATA[100%]]></item>

	<item name="WEBSITE_MIN_WIDTH"><![CDATA[980]]></item>

	<item name="WEBSITE_MIN_HEIGHT"><![CDATA[800]]></item>

	<item name="FLASH_PLAYER_VERSION_REQUIRED"><![CDATA[9.0.23]]></item>

	<item name="BACKGROUND_COLOR"><![CDATA[#000000]]></item>
Step 5: Edit Style CSS
Now we have to open the Style CSS file and specify the background color (black). Everything else will be edited via the Moto control panel.
Step 6: Create the Preloader
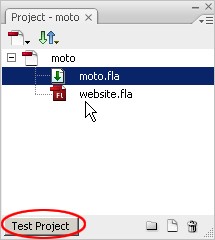
Open moto.flp (Flash Project) file in Adobe Flash CS3. In the Project panel you can see two files: moto.fla and website.fla. Set moto.fla file as a default one and compile both files by pressing the "Test Project" button.
After that open moto.fla file and create a preloader for the website. The Website preloader can be a simple movie clip consisting of 100 frames.
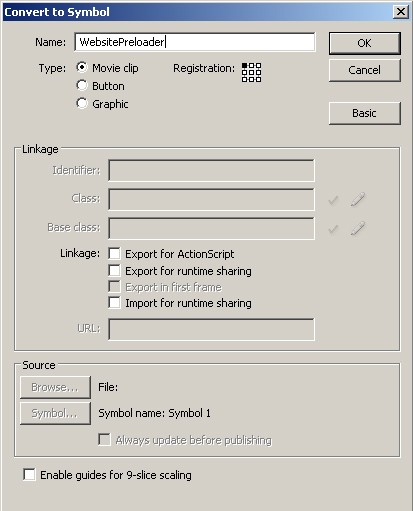
In the Actions panel of this movie clip we write: "stop();" for the first frame. Then, we use the rest of the frames to animated the preloader however we wish.
We also write "stop();" in the actions of the first frame of the FLA's main timeline.
Don't forget to specify the website dimensions (minimal width and height) in the moto.fla file properties.
Our next step is to create an attractive animation of the preloader disappearance. On the last frame we should launch the website by activating the 'showWebsite()' function.
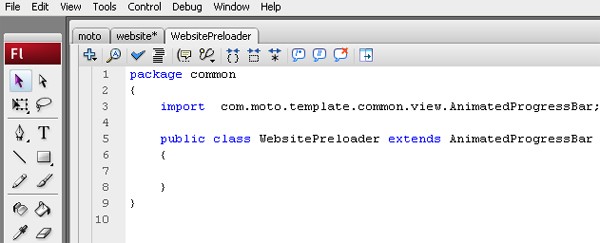
Open the website.fla file and update the preloader.
Step 7: Website Background
Open the Moto CMS Media Library (Preferences > Media Library) and alongside with the other necessary images (Home page, Gallery Page and About Page designs, and Content plane) upload a background image using the 'Upload Files' button.
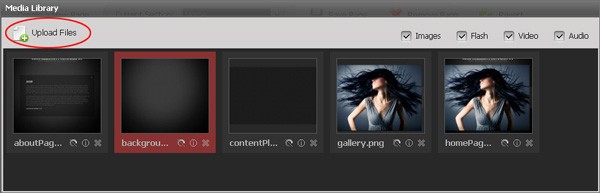
After that come back to the control panel and insert the background image using the 'Add New Image' button. Drag the image to center it.
Step 8: Title and Tag Line
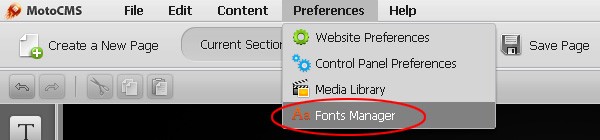
Upload a new font.
In order to follow the design we have to upload a new font - Myriad Pro Ultra-Bold. For this go to the Preferences and choose Fonts Manager.
Fonts Manager allows users to manage the website fonts that are stored as SWF files and can be loaded at a runtime.
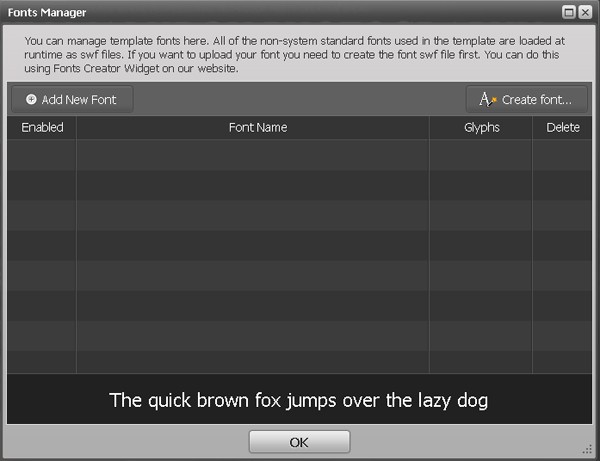
Before uploading any font, we have to convert it into SWF format first. For this we are going to use the Online Font Creator - a handy online application developed by Moto CMS team that enables to quickly convert .ttf and .otf files to .swf. All we need to do is to choose necessary font file with .ttf or .otf extension, add it to the Online Font Creator, click the 'Create fonts' button and download the ready *.swf file that we will then add to our portfolio.

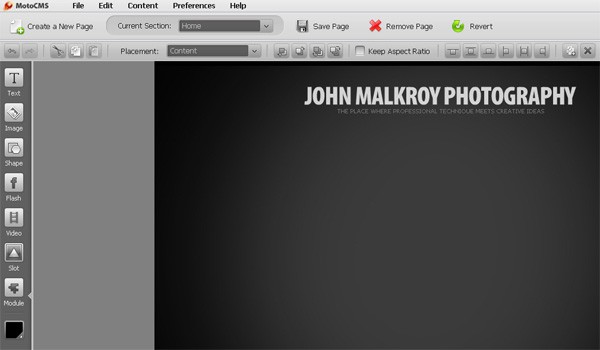
Create the website title and tag line.
Once the new font is uploaded, you may create the website title and tag line using the Text Tool and applying the necessary font. To create the tag line we use Tahoma font, size: 10, color: #727272. After that adjust the website title and tag line according to the .PSD design.
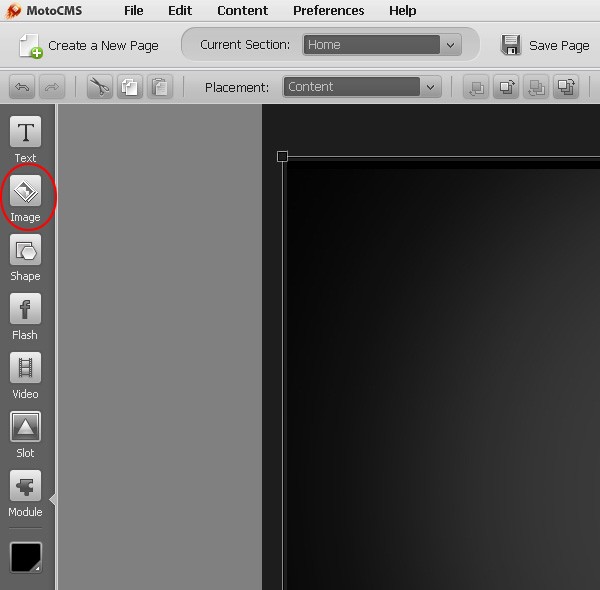
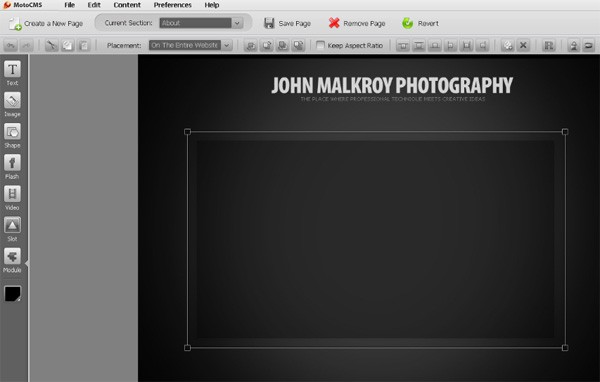
Step 9: Add the Home Page Image
We will temporarily place the gallery image on the Home page. for this choose the image from the Media Libarry and add it to the page by clicking on the 'Add New Image' button on the left. Adjust the image position according to the Home page design.
Step 10: Create the Bottom Menu
With the help of the Shape Tool create a gray narrow rectangle and then using the Text Tool create the menu buttons on it. Adjust everything according to the Home page design. I must admit, this is the most simple menu realization. Moto CMS does provide a special menu widget, on the basis of which you may create your own custom menu.
Save all changes and preview the website design by clicking on the Preview button.
Step 11: Create the Content Holders
Note: Content holders are movie clips in website.fla where content can be added dynamically. They can be of 4 types: 1) website content holder; 2) layout content holder; 3) page content holder; 4) pop-up content holder.
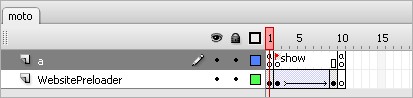
The website template # 1, which we are working with, has two content holders by default: a website content holder and a page content holder. If we open the website.fla file we will see them:
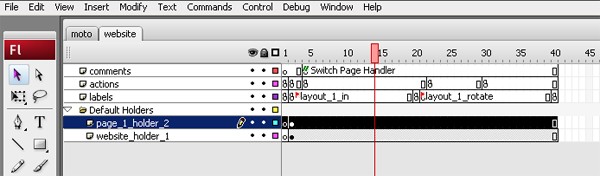
These content holders are described in the structure.xml file. Make sure the width is 980 px and the height is 800 px.
Website content holder:
	<contentHolders>
		<holder id="1" type="website" x="0" y="0" width="980" height="800" locked="false" depth="10">
			<name><![CDATA[On The Entire Website]]></name>
		</holder>
	</contentHolders>
Page content holder:
	<contentHolders>
		<holder id="2" type="page" x="0" y="0" width="980" height="800" locked="false" depth="20">
			<name><![CDATA[Content]]></name>
		</holder>
	</contentHolders>
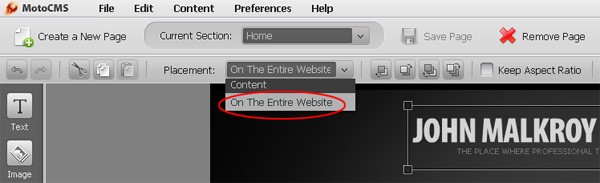
In order to make the following website elements: the website background, title with the tag line and bottom menu bar with gray rectangular - visible on all pages, we should place them into the website content holder. And we can easily do it though the convenient Moto control panel. Simply click on each necessary element and choose the placement: On The Entire Website.
Step 12: Create the About Page
Create an empty page.
By clicking on the 'Create New Page' button, you will be able to create an empty page.

Link the menu buttons to the proper pages.
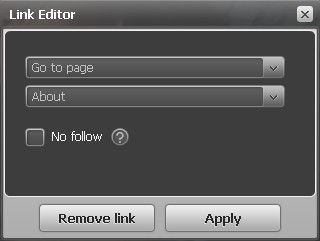
After that go back to the Home page and link the menu buttons to the proper pages. Simply highlight the menu button text and click on the Link icon on the right to open the Link Editor. In our case the Portfolio menu button links to the Home page and the About Me button links to the About page.
Add the Content Plane.
Add the content plane (that has already been uploaded to the Media Library) to the About page using the 'Add New Image' button and center it according to the design.
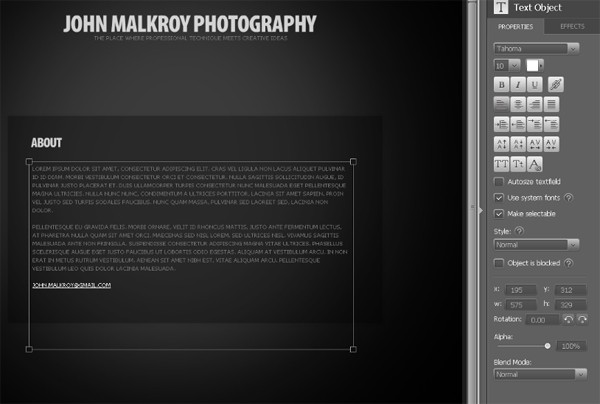
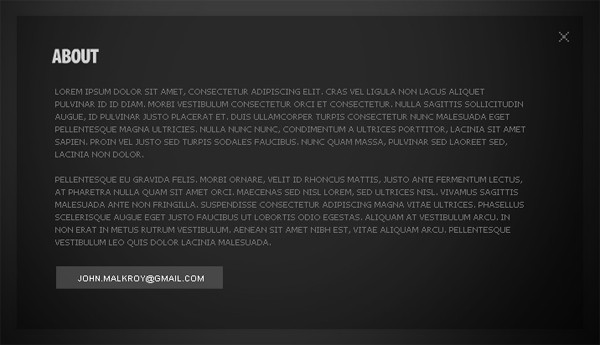
Add Content to the About Page.
Add content to the About page by using the Text Tool. The built-in WYSIWYG editor visualizes everything what you are producing, so applying formatting to your text won't cause difficulties. A mail-to link can also be easily added: simply open the Link Editor and specify the e-mail address.
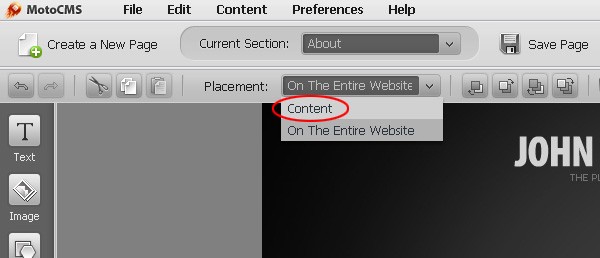
When everything is ready, don't forget to place the elements of the About page into the page content holder. Highlight each element one by one and choose the placement: Content.
Step 13: Edit the Image Preloader
You might have noticed when previewing the website and moving from one page to another, white circular image preloaders appear. In order to customize them, open the website.fla file and go to the Library. Right click on the preloader and choose Properties.

In the Symbol Properties window you may click the 'Edit Base class' icon and then animate the preloader in any way you want. But in our case, let's leave it empty and delete the graphic preloader image at all.
Step 14: Website Animation
Now we have reached the most interesting part of our tutorial: the website animation. As you can see, at the moment the website looks static, as the content holders are not animated at all. So, our next step is to animate the default content holders and add the new ones to enhance the website animation.
Animate the default content holders.
The default content holders can be easily animated on the timeline. For this open the website.fla file and create a fade-in animation for each holder.
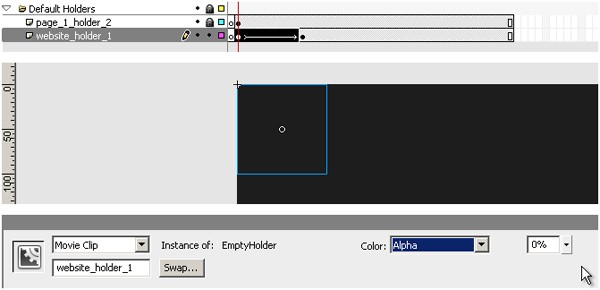
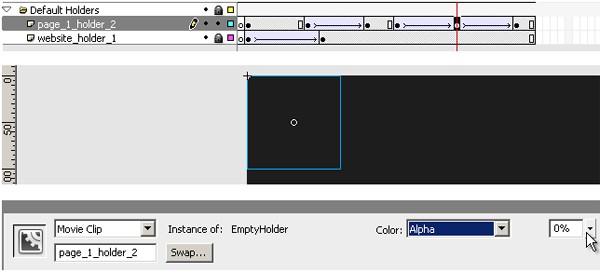
First, let’s animate the main container of the entire website. It lays on the website_holder_1 layer. We make a simple animation with transparency, but anything we do will ornament its appearance. We create the second keyframe on the layer, set Alpha 0% for the first keyframe (make it transparent), create a motion tween from the first keyframe to the second, and add an easing.
Let’s create the same animation of the page content (page_1_holder_2 layer), but make appearance a little bit later.
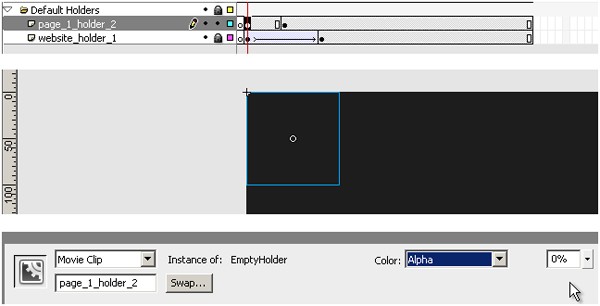
So, we add two more keyframes on the layer, make the holder transparent in the first and the second frames, and create a motion tween with easing from the second keyframe to the third.
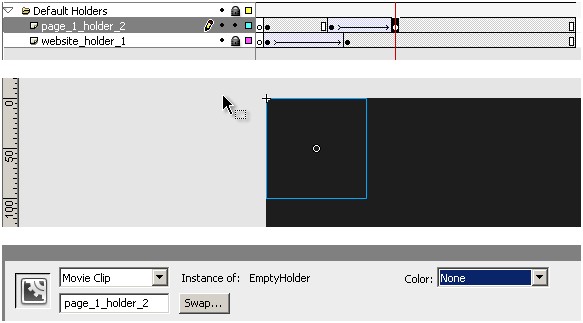
When we compile our project and load the site we can see that every element already appears with animation. But when moving from page to page there is still no animation, only unusual blinking. The second part of the timeline is responsible for this.
So we make animation of hiding and showing the holder there.
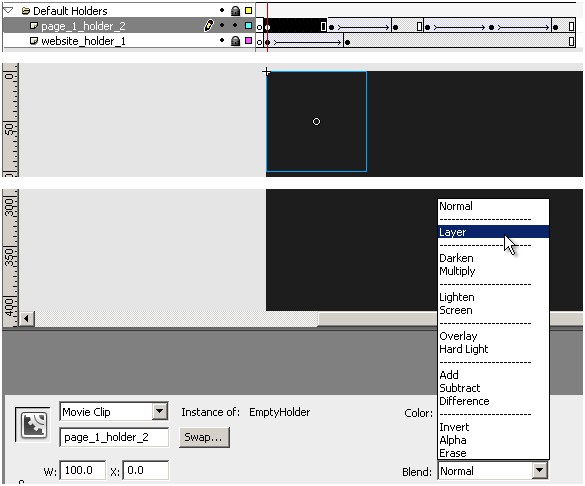
As the text font is a System Font, we have to change the Blend mode from Normal to Layer for all MovieClip instances on the holder layers.
Create additional content holders and animate them.
For a good Flash site such appearance is not enough, and it’s better to make separate the animation for different parts, for example the top (yellow selection on the image below), the bottom (green selection) and the content (red selection).
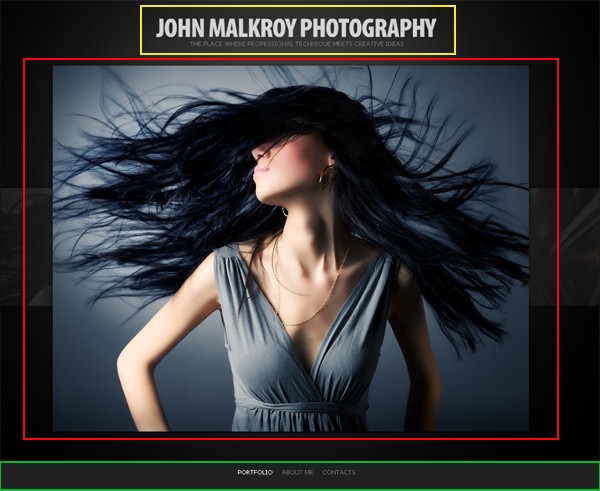
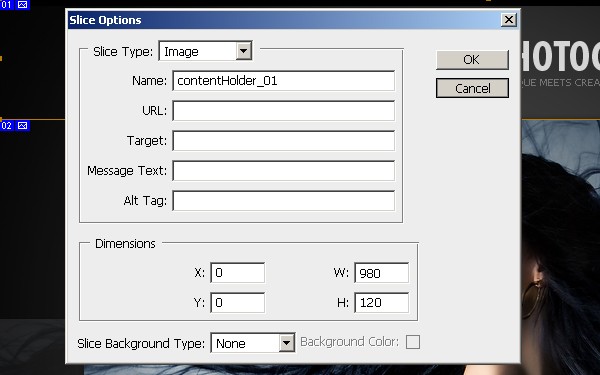
As the top and the bottom parts lie on the entire website, we’ll add two holders for these two parts of the site. Before adding content holders we have to define their size and position. It’s easy to do using the slice tool in Photoshop.
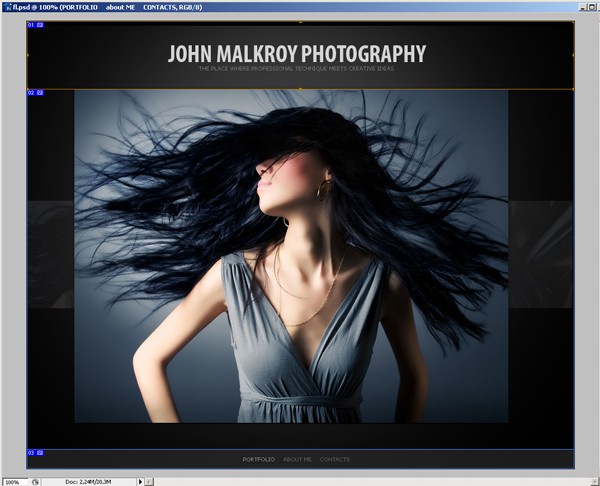
The top zone has the following dimensions: x=0, y=0, width=980, height=120.
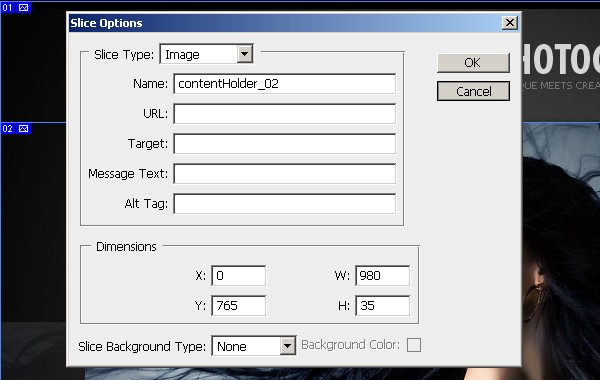
The bottom zone: x=0, y=765, width=980, height=35.
The top holder will contain the site name, the bottom holder will contain the menu, and they will appear in different ways. Also they will stick to the top and the bottom of the screen in full screen mode.
After determining the holders’ dimensions we should open the structure.xml and add the new containers (on the website level) specifying their coordinates, width, height and depth.
	<contentHolders>
		<holder id="1" type="website" x="0" y="0" width="980" height="800" locked="false" depth="10">
			<name><![CDATA[On The Entire Website]]></name>
		</holder>
                <holder id="3" type="website" x="0" y="0" width="980" height="120" locked="false" depth="12">
			<name><![CDATA[Top Holder]]></name>
		</holder>
                <holder id="4" type="website" x="0" y="765" width="980" height="35" locked="false" depth="14">
			<name><![CDATA[Bottom Holder]]></name>
		</holder>
	</contentHolders>
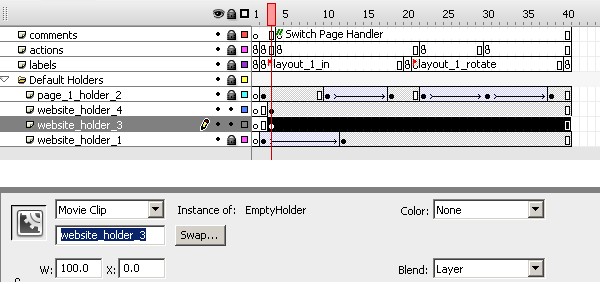
After adding containers to the xml file we have to create them in the website.fla file. So, we open the website.fla and create the new layers for our containers. The order of layers must conform to the depth values that we have set in the xml file.
We can copy the empty MovieClip from the website_holder_1 layer and paste it to the website_holder_3 and website_holder_4.
We set the same coordinates of MovieClips that are specified in the structure.xml.
For the 3rd holder: X=0, Y=0;
For the 4th holder: X=0, Y=765.
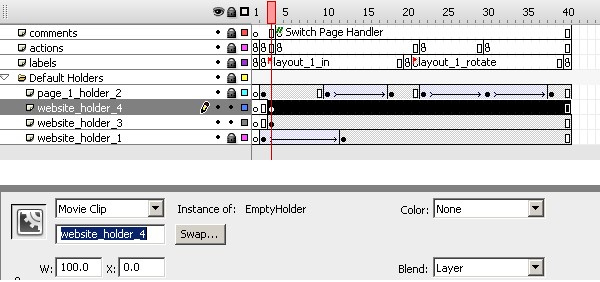
As we copied MovieClips, the old names were left. We change the instance names according to their id numbers, so that it’s easy to find them.
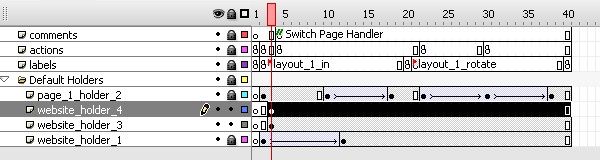
The same should be done for the website holder 4.
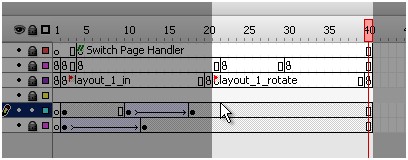
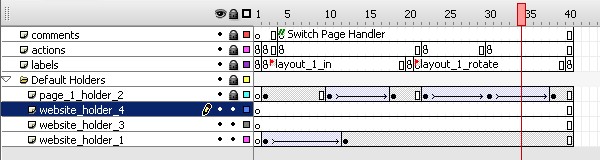
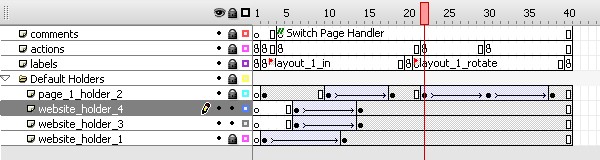
On the timeline move the first keyframes for the holders 3 and 4 forward, so that they start appearance later than the entire website holder. Then we create the second keyframes and motion tweens. The first keyframes contain the start position of holders, and the second keyframes contain the final position of holders on the site. The top holder will appear from top side of screen, so we move it up in the first keyframe; bottom holder – from bottom side, so we move it down in its first keyframe. And we also add easings to the motion tweens.
You should get something like this:
After that we should add the following code for the first animation keyframes of our holders.
Moto.getInstance().getWebsiteHolder(3, website_holder_3);
Moto.getInstance().getWebsiteHolder(4, website_holder_4);
Then compile the website and refresh the control panel.
Assign objects to the content holders.
If you choose any object, you will see that the Placement drop-down menu has been enlarged with two more holders: Top Holder and Bottom Holder.
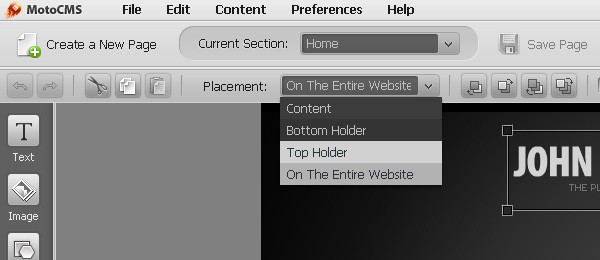
The website title with the tagline should be assigned to the Top content holder, while the website menu with a gray rectangle - to the Bottom content holder.
Edit the bottom content holder.
Now it’s desirable that on a big screen the bottom holder sticks to the screen bottom. To implement this we have to move the bottom holder animation into another movie clip, because as you know, we can't move tweened movie clips programmatically (animation will not work). Let's name this movie clip website_holder_4_c.
After that go to the main scene, click on the first keyframes of the website holder 3 and 4 and edit the code.
Moto.getInstance().getWebsiteHolder(3, website_holder_3);
Moto.getInstance().getWebsiteHolder(4, website_holder_4_c.website_holder_4);

// Stage resize handler
stage.addEventListener(Event.RESIZE, resizeHandler);
resizeHandler(null);

function resizeHandler(event:Event):void
{
    website_holder_4_c.y = Math.max(765, Math.round(stage.stageHeight - 35));
}
After compiling a website, you can see that the bottom holder sticks to the screen bottom, no matter how we resize the screen. If the screen resolution is too small, the bottom holder won't overlay the website content and will stay in place.
Step 15: Animate the Website Content
In order to make the website content appear from the above, we should animate the page content holder in the same way as we did for the Top and Bottom holders.
Step 16: Create the Contacts Page
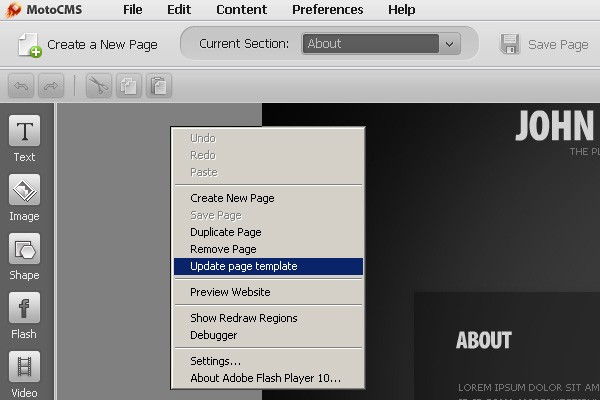
Before creating a new page we need to update a page template. Let's take the design of the About page as a template. Right-click on the About page and choose 'Update page template'.
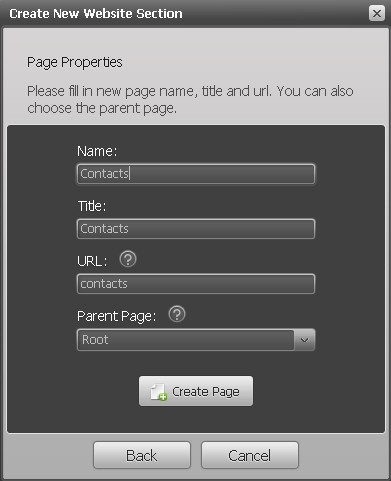
After the page template is updated, click on the 'Create a New Page' button, specify a page name, title and URL as it is shown on the screenshot below.
Now the Contacts page is ready. Edit its content using the convenient WYSIWYG editor and link it to the menu button.
Step 17: Create a Simple Slot
In Moto Flash CMS the slots play the role of the animated objects. The slots can contain a great number of custom features, which can be managed directly from the control panel.
At first we will try to create a simple slot and then enhance it.
Let's start with the Close button inserted as a picture into the website and add some rollover/rollout effects to it. An action 'Go to page' > 'Home' is assigned to it.
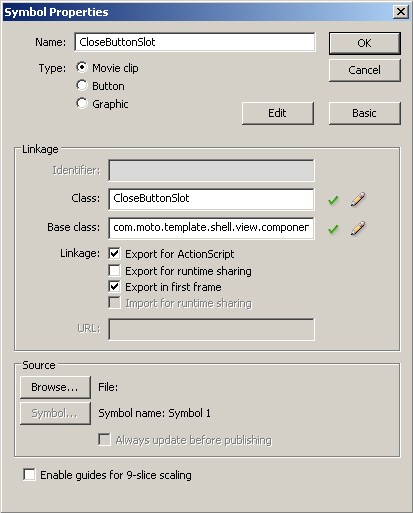
To animate the Close button is not a difficult task, as we are going to realize it via using a slot. Next, let's create a slot in the website.fla file. For this import the Close button image to the Library. In the Slots section we have to create a new symbol as a Movie Clip named CloseButtonSlot.
Set the Class as CloseButtonSlot. It’s not necessary to create a new class, it’s just enough to inherit an AbstractMotoSlot Class. So, simply copy the following: com.moto.template.shell.view.components.AbstractMotoSlot, and paste it into Base Class field.
Then we add the Close button image to the stage (the CloseButtonSlot MovieClip must be open) and convert it to a movie clip named CloseButtonIcon. As we have inherited our slot from AbstractMotoSlot class, it gives us a basic animation. But what we are going to do now is to create an attractive rollover/rollout effect.
Well, our next step is to create a new layer and make keyframes in which to put stop(); code. We give basic frame labels "over" (between the first and the second stop frames) and "out" (between the second and the third stop keyframes) -- see the screenshot:

We make the same keyframes and create motion tweens on the layer with our MovieClip.
For example, our Close button will be rotating clockwise when rolled over and counter-clockwise several times when rolled out.
Let's add brightness while rotating and easings to the motion tweens.
After the animation is made, we compile the website.fla with our new slot (Ctrl+Enter).
In order to work with the slot via Moto CMS, we have to specify its parameters in the structure.xml file:
-
librarySymbolLinkage=" "– the export name of the slot’s MovieClip (Class name). -
animated="true"– an attribute which states whether the slot is animated or not. -
resizable="false"– states whether there is the logic for resizing inside the slot or not. -
locked="false"– states whether the slot should be displayed in the panel for adding or not. -
<name><![CDATA[]]></name>- a name of the slot in the admin panel. -
<properties/>- properties of the slot which extend functionality; we won’t use it in this example. -
<template/>- default values of all properties of the slot; it’s necessary to add an attributealpha=""- transaprency of the slot, from 0 to 1.
In our case it will be:
<slot id="1" librarySymbolLinkage="CloseButtonSlot" animated="true" resizable="false" locked="false">
	<name><![CDATA[Close Button]]></name>
	<properties/>
	<template alpha="1" />
</slot>
After that go to the control panel and open any page. In the Slot section you will see the available slots. Choose the Close button slot and place it on the page instead of the Close button image.
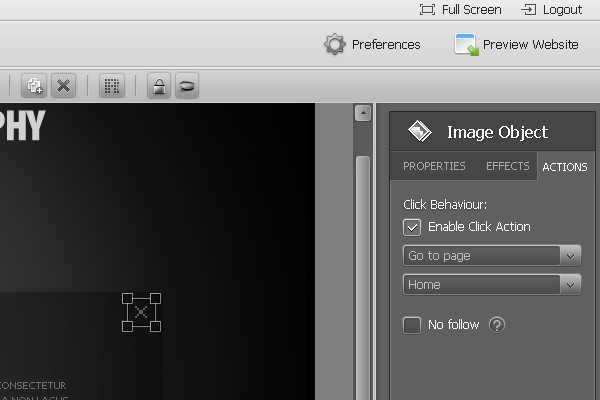
There is the Slot Object panel on the right when the slot is selected. Go to the Actions, check the 'Enable Click Action' box and choose: 'Go to page' > 'Home'.
Then copy the slot and paste it on the other pages where the Close button is needed. Save changes and verify the result.
Step 18: Create an Advanced Slot
Create the SimpleButtonSlot movie clip. Edit structure.xml.
An advanced slot in our case is a slot with dynamically changing parameters. Let's create a button slot with some variable parameters. For this open the website.fla file and create a new symbol as a Movie Clip named SimpleButtonSlot. Base class is the same as in Step 17.
Base class: com.moto.template.shell.view.components.AbstractMotoSlot.
Then add the text field named 'Label' and a plane to this button. Convert the plane into a Movie Clip named 'ButtonLabelPlane'.
For our convenience let's convert the Label into a Movie Clip and call it 'labelHolder', and then convert the ButtonLabelPlane into another Movie Clip and call it 'planeHolder'.
Open the structure.xml file and add a new slot with 2 properties. Simply copy and paste the following code into the slots section:
<slot id="2" librarySymbolLinkage="SimpleButtonSlot" animated="true" resizable="true" locked="false">
	<name><![CDATA[Simple Button]]></name>
        <properties>
           <property id="1" type="htmlText">
              <name><![CDATA[Label]]></name>
           </property>
           <property id="2" type="color">
              <name><![CDATA[Color]]></name>
           </property>
		</properties/>
		<template alpha="1">
           <properties>
              <item propertyType="1">
              <item propertyType="2">
           </properties>
        </template>
</slot>
Create the SimpleButtonSlot class.
In order to handle these two properties, the Base class is not enough. That's why we need to create a new class. So create a new ActionScript file called SimpleButtonSlot.as in the src/slots folder and add this code to it.
package slots
{
        import com.moto.template.shell.view.components.AbstractMotoSlot;

        public class SimpleButtonSlot extends AbstractMotoSlot
        {
                public function SimpleButtonSlot()
                {

                }
        }
}
Go back to the SimpleButtonSlot movie clip and specify another Base class:
slots.SimpleButtonSlot.
After that we have to import the Movie Clip there:
package slots
{
        import com.moto.template.shell.view.components.AbstractMotoSlot;
        import flash.display.MovieClip;

                public class SimpleButtonSlot extends AbstractMotoSlot
                {
                         public function SimpleButtonSlot()
                         {

                         }

                }
}
In order to handle both properties, we have to override the function updateProperty(). In the next snippet of code, PropertyVO appears with its value, type, parameter and function getParameter(). We use "switch" structure, as we have two properties: htmlText and color.
package slots
{
	import com.moto.template.shell.model.vo.PropertyVO;
	import com.moto.template.shell.view.components.AbstractMotoSlot;
	import flash.text.TextField;

	import flash.display.MovieClip;

	public class SimpleButtonSlot extends AbstractMotoSlot
	{
		public function SimpleButtonSlot()
		{

		}

		override public function updateProperty(propertyVO:PropertyVO):void
		{
			switch(propertyVO.propertyType)
			{
				case 1:
				{
					// htmlText
                                        labelHolder.label
					break;
				}

				case 2:
				{
					// color
					break;
				}
			}
		}
	}
}
Now let's describe our TextField (labelHolder) and the plane (planeHolder).
package slots
{
	import com.moto.template.common.utils.MotoUtils;
	import com.moto.template.shell.model.vo.PropertyVO;
	import com.moto.template.shell.view.components.AbstractMotoSlot;
	import flash.text.TextField;

	import flash.display.MovieClip;

	public class SimpleButtonSlot extends AbstractMotoSlot
	{
                private var _label:TextField;
                private var _plane:MovieClip;

		public function SimpleButtonSlot()
		{
		        _label = labelHolder.label;
                        _plane = planeHolder.plane;
		}

		override public function updateProperty(propertyVO:PropertyVO):void
		{
			switch(propertyVO.propertyType)
			{
				case 1:
				{
					// htmlText
					_label.htmlText = propertyVO.value;
					_label.embedFonts = MotoUtils.convertToBoolean(propertyVO.getParameter("embedFonts"));
					break;
				}

				case 2:
				{
					// color
					MotoUtils.setColor(_plane, uint(propertyVO.value));
					break;
				}
			}
		}
	}
}
After that we need to add function autosize:
package slots
{
	import com.moto.template.common.utils.MotoUtils;
	import com.moto.template.shell.model.vo.PropertyVO;
	import com.moto.template.shell.view.components.AbstractMotoSlot;
        import flash.text.TextField;
        import flash.text.TextFieldAutoSize;

	import flash.display.MovieClip;

	public class SimpleButtonSlot extends AbstractMotoSlot
	{
                private var _label:TextField;
                private var _plane:MovieClip;

		public function SimpleButtonSlot()
		{
		        _label = labelHolder.label;
                        _plane = planeHolder.plane;

                        _label.autoSize = TextFieldAutoSize.LEFT;
		}

		override public function updateProperty(propertyVO:PropertyVO):void
		{
			switch(propertyVO.propertyType)
			{
				case 1:
				{
					// htmlText
					_label.htmlText = propertyVO.value;
					_label.embedFonts = MotoUtils.convertToBoolean(propertyVO.getParameter("embedFonts"));
					break;
				}

				case 2:
				{
					// color
					MotoUtils.setColor(_plane, uint(propertyVO.value));
					break;
				}
			}
		}
	}
}
As our slot is resizable, let's center text within the plane. For this we have to override the setSize() function. Also, we need to resize the plane according to the label text width. We need to call setSize() method to updateProperty() function when the label property is updated.
package slots
{
	import com.moto.template.common.utils.MotoUtils;
	import com.moto.template.shell.model.vo.PropertyVO;
	import com.moto.template.shell.view.components.AbstractMotoSlot;
	import flash.text.TextField;
	import flash.text.TextFieldAutoSize;

	import flash.display.MovieClip;

	public class SimpleButtonSlot extends AbstractMotoSlot
	{
                private var _label:TextField;
                private var _plane:MovieClip;

		public function SimpleButtonSlot()
		{
		        _label = labelHolder.label;
                        _plane = planeHolder.plane;

                        _label.autoSize = TextFieldAutoSize.LEFT;
		}

		override public function updateProperty(propertyVO:PropertyVO):void
		{
			switch(propertyVO.propertyType)
			{
				case 1:
				{
					// htmlText
					_label.htmlText = propertyVO.value;
					_label.embedFonts = MotoUtils.convertToBoolean(propertyVO.getParameter("embedFonts"));
                                        setSize(_plane.width, _plane.height);
					break;
				}

				case 2:
				{
					// color
					MotoUtils.setColor(_plane, uint(propertyVO.value));
					break;
				}
			}
		}


		override public function setSize(newWidth:Number, newHeight:Number):void
		{
                 	_plane.width = newWidth;
			_plane.height = newHeight;

			_label.x = Math.round((newWidth - _label.textWidth) / 2);
			_label.y = Math.round((newHeight - _label.textHeight) / 2);
		}
	}
}
Compile the website to save changes.
Animate the slot.
Open the website.fla file, go to the main scene and then the SimpleButtonSlot Movie Clip. On Layer3, make three keyframes and insert stop(); code. We give basic frame labels "over" (between the first and the second stop frames) and "out" (between the second and the third stop keyframes).
Let's animate the planeHolder (i.e. the background). For example it may brighten up while hovering over it. On the timeline it may have the following look:

Compile the website and preview changes. Now we can easily work with the slot object. Using the slot control panel (on the right) we may edit the slot properties and apply different effects to it.
And here is a good example of how we may use this slot in our website. I have impletented it on the About page instead of a simple mail-to addres:
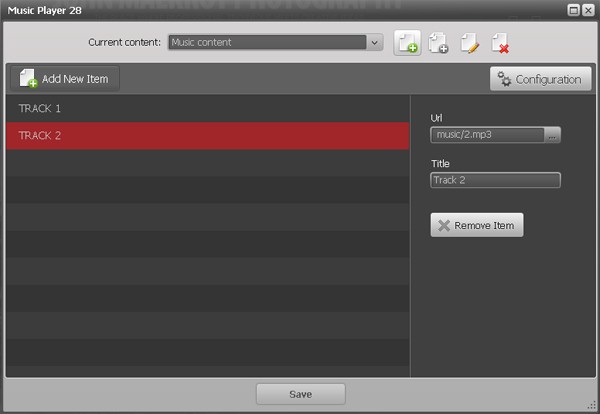
Step 19: Create a Flash Music Player
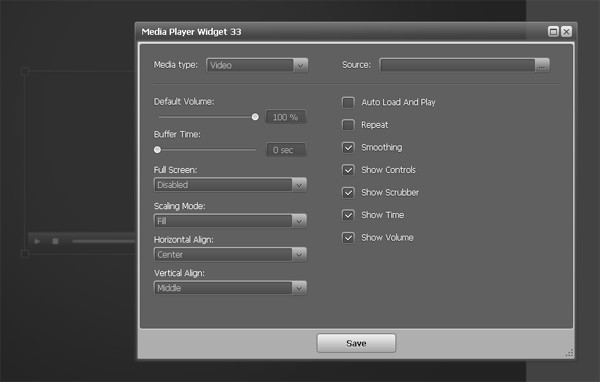
Note: Modules are animated elements derived from the slots, which are available in the library or can be loaded from an external SWF file. They possess a set of properties, which allows users to easily manage them. Comparing to the slots, modules have a great advantage: each module has its own control panel. Moto Flash CMS provides five types of control panels for creating your own custom modules. This means that Flash developers only have to create a frontend; the backend has already been created by Moto CMS developers.
For example, the template # 1 we are using here has a built-in Media player module by default. You can easily add this module to the scene and open its control panel by double clicking on it.
Create the MusicPlayerModule movie clip. Edit structure.xml.
Let's create a simple music player with on/off controls. Open the website.fla file and create a new movie clip called 'MusicPlayerModule' specifying a new Base class: modules.MusicPlayerModule. Then add a player icon to the scene and convert it to a movie clip named 'musicPlayerIcon'.
Open the structure.xml file and add a new module. Add the following code to the modules section:
<module id="2" type="mp3Player" librarySymbolLinkage="MusicPlayerModule" external="false" resizable="false" icon="images/modules/musicplayer_icon.png" smallIcon="images/modules/mp3_small_icon.png">
			<name><![CDATA[Music Player]]></name>
			<properties/>
			<template alpha="1">
				<properties/>
				<data>
					<playlist isDataProvider="true"/>
					<autoLoadAndPlay>true</autoLoadAndPlay>
					<repeat>true</repeat>
					<defaultVolume>0.3</defaultVolume>
				</data>
			</template>
		</module>
Create the MusicPlayerModule class.
Creare a new Actionscript file called 'MusicPlayerModule' in the src/modules folder and add this code to create the empty shell for the class:
package modules
{
	import com.moto.template.modules.mediaPlayer.SimpleMusicPlayerModule;
        import flash.events.Event;

        import flash.display.MovieClip;

        public class MusicPlayerModule extends SimpleMusicPlayerModule
	{
		private var _icon:MusicPlayerModule;

                public function MotoWebsite()
		{
			_icon = icon;

                        addEventListener(INITIALIZATION_ERROR, moduleInitializationErrorHandler);
                }

                private function moduleInitializationErrorHandler(event:Event):void
		{
			//
		}

                override protected function getCurrentTrackURL():String
                {
			if (getCurrentTrackData())
				return pathPrefix + getCurrentTrackData().getPropertyValueByID(1);
			else
				return "";
                }
        }
}
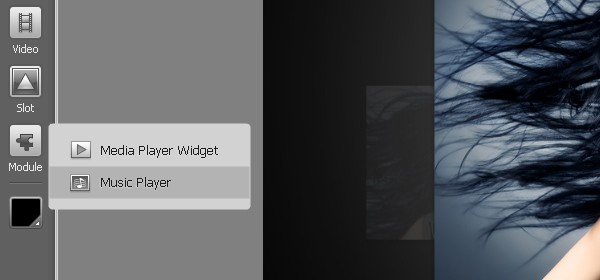
Compile the website and reload Moto control panel. Go to the Modules and drag the Music player to the scene.
Double click on the Music player to open its control panel and upload a couple of tracks (using the 'Add New Item' button). Now we can hear the music, but cannot stop it yet.
Let's proceed. Go to the MusicPlayerModule movie clip and create a shape. Convert it to a movie clip called 'button'. We will use it to process click events to turn on/off the sound.
package modules
{
	import com.moto.template.modules.mediaPlayer.SimpleMusicPlayerModule;
        import flash.events.Event;
        import flash.events.MouseEvent;

        import flash.display.MovieClip;

        public class MusicPlayerModule extends SimpleMusicPlayerModule
	{
		private var _icon:MovieClip;
                private var _button:MovieClip;

                public function MusicPlayerModule()
		{
			_icon = icon;
                        _button = button;

			_button.buttonMode = true;
			_button.addEventListener(MouseEvent.CLICK, iconClickHandler);

                        addEventListener(INITIALIZATION_ERROR, moduleInitializationErrorHandler);
                }

                private function moduleInitializationErrorHandler(event:Event):void
		{
			//
		}

                private function iconClickHandler(event:MouseEvent):void
		{
			switchVolume();

			if (_muteSound)
				_icon.alpha = 0.3;
			else
				_icon.alpha = 1;
		}

                override protected function getCurrentTrackURL():String
                {
			if (getCurrentTrackData())
				return pathPrefix + getCurrentTrackData().getPropertyValueByID(1);
			else
				return "";
                }
        }
}
As the Music player module uses the 'shared object' logics and remembers whether sound is turned on or off, then when the module starts, it should check whether the music has played or not.
package modules
{
	import com.moto.template.modules.mediaPlayer.SimpleMusicPlayerModule;
	import com.moto.template.shell.model.vo.MotoObjectVO;
	import flash.events.Event;
	import flash.events.MouseEvent;

	import flash.display.MovieClip;

	public class MusicPlayerModule extends SimpleMusicPlayerModule
	{
		private var _icon:MovieClip;
		private var _button:MovieClip;

		public function MusicPlayerModule()
		{
			_icon = icon;
			_button = button;

			_button.buttonMode = true;
			_button.addEventListener(MouseEvent.CLICK, iconClickHandler);

			addEventListener(INITIALIZATION_COMPLETE, moduleInitializationCompleteHandler);
			addEventListener(INITIALIZATION_ERROR, moduleInitializationErrorHandler);
		}

		private function moduleInitializationErrorHandler(event:Event):void
		{
			//
		}

		private function iconClickHandler(event:MouseEvent):void
		{
			switchVolume();

			if (_muteSound)
				_icon.alpha = 0.3;
			else
				_icon.alpha = 1;
		}

		override protected function getCurrentTrackURL():String
        {
			if (getCurrentTrackData())
				return pathPrefix + getCurrentTrackData().getPropertyValueByID(1);
			else
				return "";
        }

		private function moduleInitializationCompleteHandler(event:Event):void
		{
			if (_muteSound)
				_icon.alpha = 0.3;
			else
				_icon.alpha = 1;
		}
	}
}
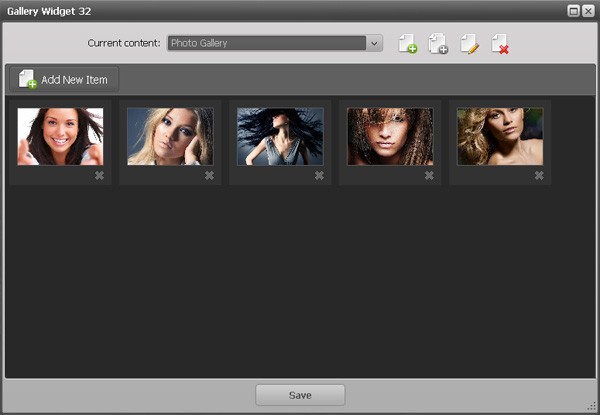
Step 20: Create a Flash Image Gallery
This step is rather extensive. For now I would like to quickly describe how to insert an image gallery providing all necessary source files.
Open the structure.xml file and paste a gallery module there:
<module id="3" type="simpleGallery" librarySymbolLinkage="GalleryModule" resizable="false" locked="false" icon="images/modules/gallery_icon.png" smallIcon="images/modules/gallery_small_icon.png" isContent="true">
			<name><![CDATA[Gallery Widget]]></name>
			<properties/>
			<template alpha="1">
				<data>
					<galleryData isDataProvider="true"/>
				</data>
				<properties/>
			</template>
		</module>
Once the module is added, it should appear in the control panel. But in order to work with it we need to create three classes: GalleryModule.as, Monitor.as and Scroll_bar.as, which can be found in the \gallery_sources\ folder inside the Source download.
Upload these classes (GalleryModule.as, Monitor.as and Scroll_bar.as) to the src/modules folder.
In the zip archive you can also find the gallery.fla file. Copy the gallery movieclip from the gallery.fla to the website.fla.
Once everything is uploaded to the local server, you may start working with the gallery. Go to the Modules, choose Gallery widget and add it to the scene. Double click on it to open its control panel. Upload a couple of photos using the 'Add New Item' button.
You may also specify title and alt attribute for each image, add description or link an image to a page, pop-up or external URL.
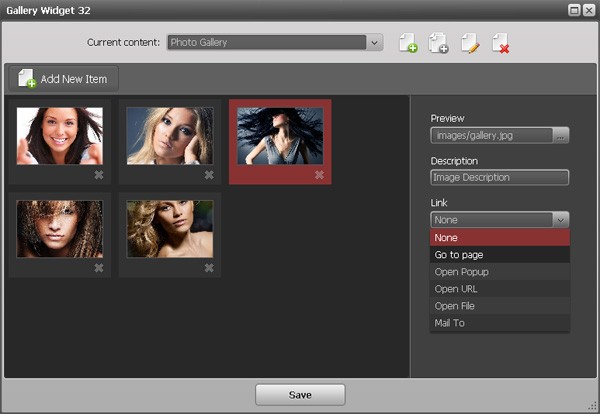
Save changes and preview the website.
Conclusion
This tutorial has gradually come to an end, but there is no end in improving your website; adding some striking and useful features and then promoting it. I should also say that Moto CMS provides a bunch of additional modules and widgets, on the basis of which you may create your own custom modules, thus saving your time and cutting down the costs. Moreover, this Flash CMS also provides all necessary SEO tools that can help you optimize your website and get higher ranking on search engines. Just give it a try!
I hope you liked this tutorial, thanks for reading!

Comments