We are building a simple music player app for Android in this series. So far, we have presented a list of the songs on the device and allowed the user to make selections from it, starting playback using the MediaPlayer class in a Service class. In this final part of the series, we will let the user control playback, including skipping to the next and previous tracks, fast-forwarding, rewinding, playing, pausing, and seeking to particular points in the track. We will also display a notification during playback so that the user can jump back to the music player after using other apps.
Looking for a Shortcut?
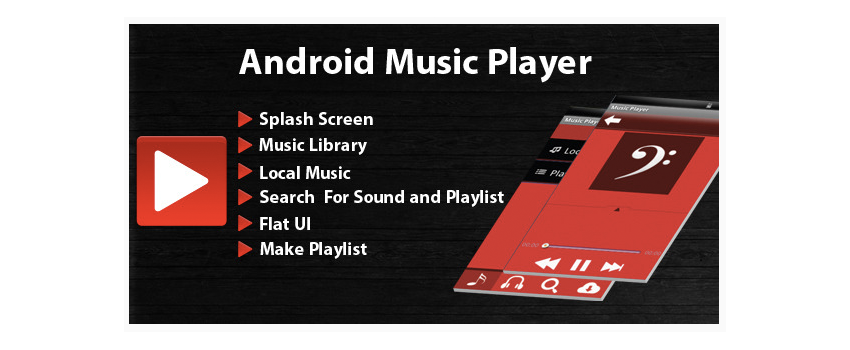
This series of tutorials is taking you through the process of building a music player app from scratch. If you want a ready-made solution, try Android Music Player, an advanced music player for Android devices. It lets you browse and play your music by albums, artists, songs, playlists, folders, and album artists, and has a range of other features.
Or if you want something completely customised to your specifications, you can hire an Android developer on Envato Studio to do anything from tweaks and bug fixes to creating a whole app from scratch.
Introduction
The music player control functionality will be implemented using the MediaController class, in which a SeekBar instance displays the progress of playback as well as letting the user skip to particular locations in a track. We will use the Notification and PendingIntent classes to display the title of the currently playing track and let the user navigate back to the app.
This is how the app should look when you complete this tutorial:

After this series we will also explore related functionality you may wish to use to enhance the music player app. This will include video playback, streaming media, managing audio focus, and presenting media data in different ways.
1. Create a Controller
Step 1
Open your main Activity class and add the following import statement:
import android.widget.MediaController.MediaPlayerControl;
Extend the opening line of the class declaration as follows, so that we can use the Activity class to provide playback control:
public class MainActivity extends Activity implements MediaPlayerControl {
Hover over the class name and select Add unimplemented methods. Eclipse will add various methods for playback control, which we will tailor as we go along.
Step 2
The MediaController class presents a standard widget with play/pause, rewind, fast-forward, and skip (previous/next) buttons in it. The widget also contains a seek bar, which updates as the song plays and contains text indicating the duration of the song and the player's current position. So that we can configure the details of the control, we will implement a class to extend it. Add a new class to your project, naming it MusicController. In Eclipse, choose android.widget.MediaController as the superclass when creating it.
Give the class the following content:
public class MusicController extends MediaController {

  public MusicController(Context c){
    super(c);
  }

  public void hide(){}

}
You can tailor the MediaController class in various ways. All we want to do is stop it from automatically hiding after three seconds by overriding the hide method.
Step 3
Back in your main Activity class, add a new instance variable:
private MusicController controller;
We will be setting the controller up more than once in the life cycle of the app, so let's do it in a helper method. Add the following code snippet to your Activity class:
private void setController(){
  //set the controller up
}
Inside the method, instantiate the controller:
controller = new MusicController(this);
You can configure various aspects of the MediaController instance. For example, we will need to determine what will happen when the user presses the previous/next buttons. After instantiating the controller set these click listeners:
controller.setPrevNextListeners(new View.OnClickListener() {
  @Override
  public void onClick(View v) {
    playNext();
  }
}, new View.OnClickListener() {
  @Override
  public void onClick(View v) {
    playPrev();
  }
});
We will implement playNext and playPrev a bit later, so just ignore the errors for now. Still inside the setController method, set the controller to work on media playback in the app, with its anchor view referring to the list we included in the layout:
controller.setMediaPlayer(this);
controller.setAnchorView(findViewById(R.id.song_list));
controller.setEnabled(true);
Back in onCreate, call the method:
setController();
We will also call it elsewhere in the class later.
2. Implement Playback Control
Step 1
Remember that the media playback is happening in the Service class, but that the user interface comes from the Activity class. In the previous tutorial, we bound the Activity instance to the Service instance, so that we could control playback from the user interface. The methods in our Activity class that we added to implement the MediaPlayerControl interface will be called when the user attempts to control playback. We will need the Service class to act on this control, so open your Service class now to add a few more methods to it:
public int getPosn(){
  return player.getCurrentPosition();
}

public int getDur(){
  return player.getDuration();
}

public boolean isPng(){
  return player.isPlaying();
}

public void pausePlayer(){
  player.pause();
}

public void seek(int posn){
  player.seekTo(posn);
}

public void go(){
  player.start();
}
These methods all apply to standard playback control functions that the user will expect.
Step 2
Now let's add methods to the Service class for skipping to the next and previous tracks. Start with the previous function:
public void playPrev(){
  songPosn--;
  if(songPosn<0) songPosn=songs.size()-1;
  playSong();
}
We decrement the song index variable, check that we haven't gone outside the range of the list, and call the playSong method we added. Now add the method to skip to the next track:
//skip to next
public void playNext(){
  songPosn++;
  if(songPosn>=songs.size()) songPosn=0;
  playSong();
}
This is analogous to the method for playing the previous track at the moment, but we will amend this method later to implement the shuffle functionality.
Step 3
Now switch back to your Activity class so that we can make use of these methods. First add the methods we called when we set the controller up:
//play next
private void playNext(){
  musicSrv.playNext();
  controller.show(0);
}

//play previous
private void playPrev(){
  musicSrv.playPrev();
  controller.show(0);
}
We call the methods we added to the Service class. We will be adding more code to these later to take care of particular situations. Now let's turn to the MediaPlayerControl interface methods, which will be called by the system during playback and when the user interacts with the controls. These methods should already be in your Activity class, so we will just be altering their implementation.
Start with the canPause method, setting it to true:
@Override
public boolean canPause() {
  return true;
}
Now do the same for the canSeekBackward and canSeekForward methods:
@Override
public boolean canSeekBackward() {
  return true;
}

@Override
public boolean canSeekForward() {
  return true;
}
You can leave the getAudioSessionId and getBufferPercentage methods as they are. Amend the getCurrentPosition method as follows:
@Override
public int getCurrentPosition() {
  if(musicSrv!=null && musicBound && musicSrv.isPng())
    return musicSrv.getPosn();
  else return 0;
}
The conditional tests are to avoid various exceptions that may occur when using the MediaPlayer and MediaController classes. If you attempt to enhance the app in any way, you will likely find that you need to take such steps since the media playback classes throw lots of exceptions. Notice that we call the getPosn method of the Service class.
Amend the getDuration method similarly:
@Override
public int getDuration() {
  if(musicSrv!=null && musicBound && musicSrv.isPng())
    return musicSrv.getDur();
  else return 0;
}
Alter the isPlaying method by invoking the isPng method of our Service class:
@Override
public boolean isPlaying() {
  if(musicSrv!=null && musicBound)
    return musicSrv.isPng();
  return false;
}
Do the same for the pause, seekTo and start methods:
@Override
public void pause() {
  musicSrv.pausePlayer();
}

@Override
public void seekTo(int pos) {
  musicSrv.seek(pos);
}

@Override
public void start() {
  musicSrv.go();
}
3. Handle Navigation Back Into the App
Step 1
Remember that we are going to continue playback even when the user navigates away from the app. In order to facilitate this, we will display a notification showing the title of the track being played. Clicking the notification will take the user back into the app. Switch back to your Service class and add the following additional imports:
import java.util.Random;
import android.app.Notification;
import android.app.PendingIntent;
Now move to the onPrepared method, in which we currently simply start the playback. After the call to player.start(), add the following code:
Intent notIntent = new Intent(this, MainActivity.class);
notIntent.addFlags(Intent.FLAG_ACTIVITY_CLEAR_TOP);
PendingIntent pendInt = PendingIntent.getActivity(this, 0,
  notIntent, PendingIntent.FLAG_UPDATE_CURRENT);

Notification.Builder builder = new Notification.Builder(this);

builder.setContentIntent(pendInt)
  .setSmallIcon(R.drawable.play)
  .setTicker(songTitle)
  .setOngoing(true)
  .setContentTitle("Playing")
  .setContentText(songTitle);
Notification not = builder.build();

startForeground(NOTIFY_ID, not);
We will add the missing variables next. The PendingIntent class will take the user back to the main Activity class when they select the notification. Add variables for the song title and notification ID at the top of the class:
private String songTitle="";
private static final int NOTIFY_ID=1;
Now we need to set the song title, in the playSong method, after the line in which we retrieve the song from the list (Song playSong = songs.get(songPosn);):
songTitle=playSong.getTitle();
Since we have called setForeground on the notification, we need to make sure we stop it when the Service instance is destroyed. Override the following method:
@Override
public void onDestroy() {
  stopForeground(true);
}
4. Shuffle Playback
Step 1
Remember that we added a shuffle button, so let's implement that now. First add new instance variables to the Service class:
private boolean shuffle=false;
private Random rand;
Instantiate the random number generator in onCreate:
rand=new Random();
Now add a method to set the shuffle flag:
public void setShuffle(){
  if(shuffle) shuffle=false;
  else shuffle=true;
}
We will simply toggle the shuffle setting on and off. We will check this flag when the user either skips to the next track or when a track ends and the next one begins. Amend the playNext method as follows:
public void playNext(){
  if(shuffle){
    int newSong = songPosn;
    while(newSong==songPosn){
      newSong=rand.nextInt(songs.size());
    }
    songPosn=newSong;
  }
  else{
    songPosn++;
    if(songPosn>=songs.size()) songPosn=0;
  }
  playSong();
}
If the shuffle flag is on, we choose a new song from the list at random, making sure we don't repeat the last song played. You could enhance this functionality by using a queue of songs and preventing any song from being repeated until all songs have been played.
Step 2
Now we can let the user select the shuffle function. Back in your main Activity class in the onOptionsItemSelected method, amend the section for the shuffle action to call the new method we added to the Service class:
case R.id.action_shuffle:
  musicSrv.setShuffle();
  break;
Now the user will be able to use the menu item to toggle the shuffling functionality.
5. Tidy Up
Step 1
We are almost done, but still need to add a few bits of processing to take care of certain changes, such as the user leaving the app or pausing playback. In your Activity class, add a couple more instance variables:
private boolean paused=false, playbackPaused=false;
We will use these to cope with the user returning to the app after leaving it and interacting with the controls when playback itself is paused. Override onPause to set one of these flags:
@Override
protected void onPause(){
  super.onPause();
  paused=true;
}
Now override onResume:
@Override
protected void onResume(){
  super.onResume();
  if(paused){
    setController();
    paused=false;
  }
}
This will ensure that the controller displays when the user returns to the app. Override onStop to hide it:
@Override
protected void onStop() {
  controller.hide();
  super.onStop();
}
Step 2
If the user interacts with the controls while playback is paused, the MediaPlayer object may behave unpredictably. To cope with this, we will set and use the playbackPaused flag. First amend the playNext and playPrev methods:
private void playNext(){
  musicSrv.playNext();
  if(playbackPaused){
    setController();
    playbackPaused=false;
  }
  controller.show(0);
}

private void playPrev(){
  musicSrv.playPrev();
  if(playbackPaused){
    setController();
    playbackPaused=false;
  }
  controller.show(0);
}
We reset the controller and update the playbackPaused flag when playback has been paused. Now make similar changes to the playSong method:
public void songPicked(View view){
  musicSrv.setSong(Integer.parseInt(view.getTag().toString()));
  musicSrv.playSong();
  if(playbackPaused){
    setController();
    playbackPaused=false;
  }
  controller.show(0);
}
Now set playbackPaused to true in the pause method:
@Override
public void pause() {
  playbackPaused=true;
  musicSrv.pausePlayer();
}
As you work with the MediaPlayer and MediaController classes, you will find that this type of processing is a necessary requirement to avoid errors. For example, you will sometimes find that the controller's seek bar does not update until the user interacts with it. These resources behave differently on different API levels, so thorough testing and tweaking is essential if you plan on releasing your app to the public. The app we are creating in this series is really only a foundation.
Step 3
Let's take some final steps to make the app behave consistently. Back in the Service class, amend the onError method:
@Override
public boolean onError(MediaPlayer mp, int what, int extra) {
  mp.reset();
  return false;
}
We simply reset the player, but you may of course wish to enhance this approach.
The onCompletion method will fire when a track ends, including cases where the user has chosen a new track or skipped to the next/previous tracks as well as when the track reaches the end of its playback. In the latter case, we want to continue playback by playing the next track. To do this we need to check the state of playback. Amend your onCompletion method:
@Override
public void onCompletion(MediaPlayer mp) {
  if(player.getCurrentPosition()>0){
    mp.reset();
    playNext();
  }
}
We call the playNext method if the current track has reached its end.
Service class implement the AudioManager.OnAudioFocusChangeListener interface. In the onCreate method, create an instance of the AudioManager class and call requestAudioFocus on it. Finally, implement the onAudioFocusChange method in your class to control what should happen when the application gains or loses audio focus. See the Audio Focus section in the Developer Guide for more details.
That is the basic app complete! However, you may well need to carry out additional enhancements to make it function reliably across user devices and API levels. The controls should appear whenever you interact with the app.
The notification should allow you to return to the app while playback continues.

Conclusion
We have now completed the basic music player for Android. There are many ways in which you could enhance the app, such as adding support for streaming media, video, audio focus, and providing different methods to interact with the music tracks on the device. We will look at some of these enhancements in future tutorials, outlining how you can add them to the app or to other media playback projects. In the meantime, see if you can extend the app to build additional functionality or to improve reliability on different devices. See the Media Playback section of the Android Developer Guide for more information.

Comments