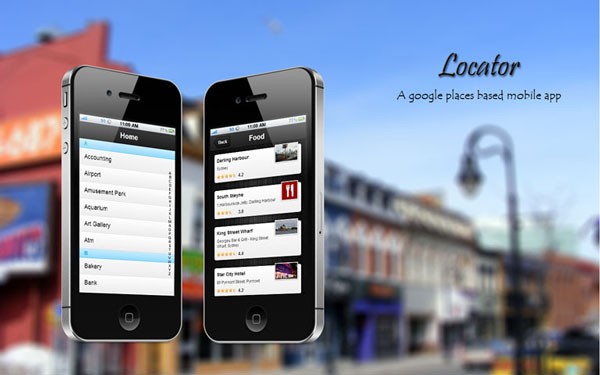
This tutorial will guide you through the development of a Location-based mobile website using the Google Place search engine and Sencha Touch 2.1 . This is a two part tutorial and in this first part we'll learn how to create a project with Sencha cmd, create a cool theme using SASS/Compass, and find services close to the user's location.
1. Google Place Search API
Google provides a set of APIs for searching different services by types and user location. At the present time, Google supports a total of 96 service types. There are 30 more services that can only be retrieved via search. Google has a full list of them.
To access the Places API, the primary goal is to register the application at Google's API console. Once we authenticate, we'll get an API key which is required for each API request. Google has a step by step guide.
The Google Places API uses an API key to identify your application. API keys are managed through the Google APIs Console. You'll need your own API Key before you can begin using the API. To activate the Places API and create your key:
- Visit the API Console at https://code.google.com/apis/console and log in with your Google Account.
- A default project called API Project is created for you when you first log in to the API Console. You can use the project, or create a new one by clicking the API Project button at the top of the window and selecting Create. Maps API for Business customers must use the API project created for them as part of their Places for Business purchase.
- Click the Services link from the left-hand menu.
- Click the Status switch next to the Places API entry. The switch slides to On.
- Click API access from the left navigation. Your key is listed in the Simple API Access section.
2. Create and Structure the App
I'm assuming that you've got a local server and Sencha setup is done. If not, please go through the detail documentation here with all the steps. We generate the Locator app using this command inside our local server.
sencha -sdk /path/to/sdk generate app Locator c:/xampp/htdocs/locator
Once we're done, we'll open the app in the browser with the url http://localhost/locator and see a basic tabbed application.

Now we need to structure the app with the MVC components.
Controllers
- App.js
Views
- Main.js
- Categories.js
- PlaceList.js
Stores
- Categories.js
- Places.js
Models
- Category
- Place
A Sencha application can have multiple controller files. However, for a small application like this, one controller will be okay. We'll keep all the event's bindings and related functionality inside this controller.
The views represent the pages of the application.
- Main view works like a parent of all the views.
- Categories will list all the services Google supports.
- PlaceList view will show a list of all the places near the user's location and based on a particular service.
Since we have two lists, we maintain two models: Category and Place. Similarly, two storage Categories and Places are needed for retrieving and saving related data. We need to add all these component details in app.js so that the Sencha engine can load them up on start.
Ext.Loader.setPath({
  'Ext': 'touch/src',
  'Locator': 'app'
});

Ext.application({
  name: 'Locator',

  requires: [
    'Ext.MessageBox',
    'Locator.util.Util'],

  views: [
    'Main',
    'Categories',
    'PlaceList'],

  controllers: ['App'],

  models: ['Category', 'Place'],

  stores: ['Categories', 'Places'],

  icon: {
    '57': 'resources/icons/Icon.png',
    '72': 'resources/icons/Icon~ipad.png',
    '114': 'resources/icons/[email protected]',
    '144': 'resources/icons/[email protected]'
  },

  isIconPrecomposed: true,

  startupImage: {
    '320x460': 'resources/startup/320x460.jpg',
    '640x920': 'resources/startup/640x920.png',
    '768x1004': 'resources/startup/768x1004.png',
    '748x1024': 'resources/startup/748x1024.png',
    '1536x2008': 'resources/startup/1536x2008.png',
    '1496x2048': 'resources/startup/1496x2048.png'
  },

  launch: function () {
    // Destroy the #appLoadingIndicator element
    Ext.fly('appLoadingIndicator').destroy();

    // Initialize the main view
    Ext.Viewport.add(Ext.create('Locator.view.Main'));
  },

  onUpdated: function () {
    Ext.Msg.confirm(
      "Application Update",
      "This application has just successfully been updated to the latest version. Reload now?",

    function (buttonId) {
      if (buttonId === 'yes') {
        window.location.reload();
      }
    });
  }
});
3. Common Functions
For every application, we need a set of common functions and properties that will be used throughout the application. We create a Util singleton class for the same thing and put the file under the app/util/ directory. You do not need to understand the functions of this file at present. We'll keep discussing these functions as we move forward.
Ext.define('Locator.util.Util', {
  singleton: true,
  // Whether the application views will have a animation while changing on=r not
  enablePageAnimations: true,
  // User's current location is saved here
  userLocation: null,
  // Google place api key
  API_KEY: 'AIzaSyBmbmtQnXfq22RJhJfitKao60wDgqrC5gA',

  // All the api urls
  api: (function () {
    //var baseUrl = 'https://maps.googleapis.com/maps/api/place/';
    var baseUrl = 'php/action.php';
    return {
      baseUrl: baseUrl,
      categories: 'resources/data/categories.json',
      nearestPlaces: baseUrl + '',
      nearBySearch: 'nearbysearch',
      photo: 'photo',
      details: 'details'
    }
  })(),

  // Destroy a Sencha view
  destroyCmp: function (child, parent) {
    parent = parent || Ext.Viewport;

    if (child) {
      Ext.defer(function () {
        parent.remove(child);
      }, Locator.util.Util.animDuration);
    }
  },

  // Show general message alert
  showMsg: function (msg, title, cb, scope) {
    if (msg) {
      Ext.Msg.alert(title || 'Error', msg.toString(), cb || function () {}, scope || window);
    }

    return this;
  },

  // Animate the active item
  showActiveItem: function (parentPanel, childPanel, animation) {
    animation = Ext.apply({
      type: 'slide',
      duration: LocatrConfig.amimationDuration
    }, animation || {});

    if (parentPanel && childPanel) {
      if (this.enablePageAnimations && animation && animation.type) {
        parentPanel.animateActiveItem(childPanel, animation);
      } else {
        parentPanel.setActiveItem(childPanel);
      }
    }

    return this;
  },

  // Show a loading box on a
  showLoading: function (panel, doShow, message) {
    panel = panel || Ext.Viewport;
    if (panel) {
      if (doShow) {
        panel.setMasked({
          xtype: 'loadmask',
          message: message || 'Loading...'
        });
      } else {
        panel.setMasked(false);
      }
    }

    return this;
  },

  // Capitalize first character of each word of a string
  toTitleCase: function (str) {
    if (!str) {
      return '';
    }

    return str.replace(/\w\S*/g, function (txt) {
      return txt.charAt(0).toUpperCase() + txt.substr(1).toLowerCase();
    });
  }

});
4. Categories List
We set up the Main view, which is the wrapper of all the views. We use Navigation View for the same thing, which is pretty useful for simple Card layout and back button management. At launch, it only has the categories list as its child.
/**
 * Main view - holder of all the views.
 * Card layout by default in order to support multiple views as items
 */
Ext.define('Locator.view.Main', {
  extend: 'Ext.NavigationView',
  xtype: 'main',
  config: {
    cls: 'default-bg',
    items: [{
      xtype: 'categories'
    }]
  }
});
Now application setup is done. We have the Google Places API key and we're ready to create a list of all the types and show it in the home page. There's a problem, though. Google doesn't provide an API for retrieving all these types. We have to manually create a data file listing all the types. I've created a json file named categories.json listing all the available types, and put it inside the resources/data directory.
{categories:[{type:"accounting"},{type:"airport"},{type:"amusement_park"},{type:"aquarium"},{type:"art_gallery"},{type:"atm"},{type:"bakery"},{type:"bank"},{type:"bar"},{type:"beauty_salon"},{type:"bicycle_store"},{type:"book_store"},{type:"bowling_alley"},{type:"bus_station"},{type:"cafe"},{type:"campground"},{type:"car_dealer"},{type:"car_rental"},{type:"car_repair"},{type:"car_wash"},{type:"casino"},{type:"cemetery"},{type:"church"},{type:"city_hall"},{type:"clothing_store"},{type:"convenience_store"},{type:"courthouse"},{type:"dentist"},{type:"department_store"},{type:"doctor"},{type:"electrician"},{type:"electronics_store"},{type:"embassy"},{type:"establishment"},{type:"finance"},{type:"fire_station"},{type:"florist"},{type:"food"},{type:"funeral_home"},{type:"furniture_store"},{type:"gas_station"},{type:"general_contractor"},{type:"grocery_or_supermarket"},{type:"gym"},{type:"hair_care"},{type:"hardware_store"},{type:"health"},{type:"hindu_temple"},{type:"home_goods_store"},{type:"hospital"},{type:"insurance_agency"},{type:"jewelry_store"},{type:"laundry"},{type:"lawyer"},{type:"library"},{type:"liquor_store"},{type:"local_government_office"},{type:"locksmith"},{type:"lodging"},{type:"meal_delivery"},{type:"meal_takeaway"},{type:"mosque"},{type:"movie_rental"},{type:"movie_theater"},{type:"moving_company"},{type:"museum"},{type:"night_club"},{type:"painter"},{type:"park"},{type:"parking"},{type:"pet_store"},{type:"pharmacy"},{type:"physiotherapist"},{type:"place_of_worship"},{type:"plumber"},{type:"police"},{type:"post_office"},{type:"real_estate_agency"},{type:"restaurant"},{type:"roofing_contractor"},{type:"rv_park"},{type:"school"},{type:"shoe_store"},{type:"shopping_mall"},{type:"spa"},{type:"stadium"},{type:"storage"},{type:"store"},{type:"subway_station"},{type:"synagogue"},{type:"taxi_stand"},{type:"train_station"},{type:"travel_agency"},{type:"university"},{type:"veterinary_care"},{type:"zoo"}]}
Category Model: Model/Category.js
Ext.define('Locator.model.Category', {
  extend: 'Ext.data.Model',
  config: {
    fields: [
      "type", {
      name: "name",
      type: "string",
      convert: function (v, record) {
        // Converts to title case and returns
        return Locator.util.Util.toTitleCase(record.get('type').split('_').join(' '));
      }
    }, "size"]
  }
});
The "name" property of this model uses the same "type" value of the category. Since most of the types have an "underscore", this convert function creates a value omitting the "_" and converting the string into title case. So, "travel_agency" becomes "Travel Agency" and we save it under the name property of this model.
Categories Store: Store/Categories.js
Ext.define('Locator.store.Categories', {
  extend: 'Ext.data.Store',
  config: {
    model: 'Locator.model.Category',
    autoLoad: true,
    sorters: 'name',
    grouper: {
      groupFn: function (record) {
        return record.get('name')[0];
      }
    },
    proxy: {
      type: 'ajax',
      url: Locator.util.Util.api.categories,
      reader: {
        type: 'json',
        rootProperty: 'categories'
      }
    }
  }
});
We auto-load the store because it should be the first request in the app. We use a grouper function for a grouped list, and sort by the first character of each service name.
Categories View: View/Categories.js
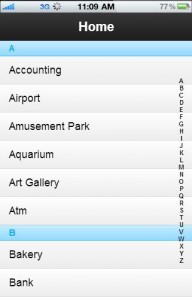
Category view is a plain list. We use indexBar and grouped functionality for easy accessing all the types.
Ext.define('Locator.view.Categories', {
  extend: 'Ext.List',
  xtype: 'categories',
  config: {
    cls: 'default-bg category-list',
    itemTpl: '{name}',
    store: 'Categories',
    grouped: true,
    indexBar: true,
    title: Lang.home
  }
});
The list looks like this:
5. Tweaking the Existing Theme
We can add certain sets of pre-existing variables to change the existing Sencha theme and get a new look. The following is the SASS file. If you don't have SASS setup already done, please follow this blog post for a step-by-step guide.
// Basic color definitions
$base-color: #333;
$base-gradient: 'matte';
$active-color: #36B8FF;

// Toolbar styles
$toolbar-base-color: #444;

// List styles
$list-header-bg-color : #ABE2FF;

@import 'sencha-touch/default/all';

// You may remove any of the following modules that you
// do not use in order to create a smaller css file.
@include sencha-panel;
@include sencha-buttons;
@include sencha-sheet;
@include sencha-picker;
@include sencha-tabs;
@include sencha-toolbar;
@include sencha-toolbar-forms;
@include sencha-indexbar;
@include sencha-list;
@include sencha-layout;
@include sencha-carousel;
@include sencha-form;
@include sencha-msgbox;
@include sencha-loading-spinner;
@include sencha-list-pullrefresh;
We change the top toolbar color and list header color, and add the list plugin mix-in.
6. Geolocation and Retrieving API Data
Once we click one of the category items, we'll want to view all the businesses near the user's current location in that category. We must follow this set of tasks:
- Fetch user's current location using GeoLocation API
- With the latitude and longitude, send a request to Google API to fetch the data
- Show the place list page
Geolocation
We can either use the navigator's geolocation function directly or use Sencha's Ext.device.Geolocation. We save the latitude and longitude in the Util instance for future use.
Ext.device.Geolocation.getCurrentPosition({
  success: function (position) {
    me.util.userLocation = position.coords.latitude + ',' + position.coords.longitude;
  },
  failure: function () {
    me.util.showMsg(Lang.locationRetrievalError);
  }
});
Data Retrieval
Google Places API doesn't support JSONP requests yet, so we won't be able to retrieve the data directly from the client side. We have to use a server proxy to retrieve the data. This problem can be solved using PHP and cURL.
The Config file holds a number of constants. We set the base API url, data output type, and image size details.
define("BASE_API_URL", "https://maps.googleapis.com/maps/api/place/");
define("DATA_OUTPUT_TYPE", "json");
define("IMAGE_MAX_HEIGHT", 500);
define("IMAGE_MAX_WIDTH", 500);
Locator.php
This is a PhP class which holds the functionality for setting up the URL, sending cURL requests, and retrieving data.
class Locatr {

  /**
   * Sets up the url according to passed parameters
   * @return String A complete url with all the query strings
   */
  private static function getFinalUrl() {
    return html_entity_decode(BASE_API_URL.$_REQUEST["action"].
    "/".DATA_OUTPUT_TYPE.
    "?".$_SERVER['QUERY_STRING']);
  }

  /**
   * A generic function to send all the cURL requests
   * @return String Response for that cURL request
   */
  private static function sendCurlRequest() {
    // Get cURL resource
    $curl = curl_init();

    // Set some options - we are passing in a useragent too here
    curl_setopt_array($curl, array(
    CURLOPT_RETURNTRANSFER = > 1,
    CURLOPT_URL = > self::getFinalUrl(),
    CURLOPT_SSL_VERIFYPEER = > false,
    CURLOPT_USERAGENT = > 'Codular Sample cURL Request'));

    // Send the request & save response to $resp
    $response = curl_exec($curl);

    // Close request to clear up some resources
    curl_close($curl);

    return $response;
  }

  /**
   * Retrieves all the nearby places and one image of each if available
   * @return String Returns all the places in json
   */
  public static function getNearBySearchLocations() {
    try {
      $data = json_decode(self::sendCurlRequest());
      $item = "";

      for ($i = 0; $i < count($data -> results); $i++) {
        $item = $data -> results[$i];
        if (isset($item -> photos)) {
          $imageUrl = BASE_API_URL.
          "photo?photoreference=".$item -> photos[0] -> photo_reference.
          "&sensor=false&maxheight=300&maxwidth=300&key=".$_GET["key"];
          $data -> results[$i] -> photos[0] -> url = $imageUrl;
        }
      }

      return json_encode($data);
    } catch (Exception $e) {
      print "Error at getNearBySearchLocations : ".$e -> getMessage();
    }
  }
}
Here's the functionality of each method in this class:
- getFinalUrl: This sets up the complete URL with the base URL, the response data type, and the query strings sent from the client side. We call this function from the action.php file.
-
sendCurlRequest: This is a basic cURL GET request for retrieving the data. You can use the
file_get_contents()method as well to get the data here. -
getNearBySearchLocations: This fetches the data from Google API for the related type within a certain radius. However, there is a trick: Google doesn't pass the photos of a business with this data. Instead they send references to the images. You need to construct a URL with the image height, width, API key, and photo reference to get that image.
This URL is constructed with the first image reference and passed with the response data for every place. This helps us show at least one image available for every business.
action.php
This file is just used to call the getNearBySearchLocations function of the Locator class. We send the ajax requests from our client side directly to this file.
include_once 'config.php';
include_once 'Locatr.php';

$action = $_REQUEST["action"];

if (!isset($action)) {
  throw new Exception("'action' parameter is not supplied");
}

switch ($action) {
  case "nearbysearch":
    print Locatr::getNearBySearchLocations();
    break;
}
7. Place List
For the Place list, we need a store and a model similar to the categories list.
Place Model: Model/Place
Ext.define('Locator.model.Place', {
  extend: 'Ext.data.Model',
  config: {
    fields: [
      "formatted_address",
      "geometry",
      "icon",
      "id",
      "name",
      "rating",
      "reference",
      "types",
      "vicinity",
      "photos"]
  }
});
Places Store : Store/Places
Ext.define('Locator.store.Places', {
  extend: 'Ext.data.Store',
  config: {
    model: 'Locator.model.Place',
    proxy: {
      type: 'ajax',
      url: Locator.util.Util.api.nearestPlaces,
      reader: {
        type: 'json',
        rootProperty: 'results'
      }
    }
  }
});
Main Controller: Controller/App.js
Until now, we didn't need a controller for any functionality because the category list was populated automatically by its store. Now we need the controller to handle the events. We'll list all the required components under the controller refs property.
refs: {
  categoriesList: 'categories',
  main: 'main',
  placeList: 'placelist'
}
The list click event in controls:
control: {
  categoriesList: {
    itemtap: 'loadPlaces'
  }
}
When clicking on a category, we want to show the list of places available under that category. As we discussed earlier, first we'll fetch the user's current location and then, with the latitude and longitude, we'll send an ajax request to the action.php file. The controller with the "loadPlaces" function looks like this:
Ext.define('Locator.controller.App', {
  extend: 'Ext.app.Controller',
  requires: ['Ext.device.Geolocation', 'Ext.Map'],
  util: Locator.util.Util,
  config: {
    refs: {
      categoriesList: 'categories',
      main: 'main',
      placeList: 'placelist'
    },

    control: {
      categoriesList: {
        itemtap: 'loadPlaces'
      }
    }
  },

  /**
   * Retrieve all the places for a particlur category
   */
  loadPlaces: function (list, index, target, record) {
    var me = this,
      loadPlaces = function () {
        // Show the place list page
        me.showPlaceList(record);

        // Load the store with user's location, radius, type and api key
        store.getProxy().setExtraParams({
          location: me.util.userLocation,
          action: me.util.api.nearBySearch,
          radius: me.util.defaultSearchRadius,
          sensor: false,
          key: me.util.API_KEY,
          types: record.get('type')
        });

        store.load(function (records) {
          me.util.showLoading(me.getPlaceList(), false);
        });
      },
      store = Ext.getStore('Places');

    // If user's location is already not set, fetch it.
    // Else load the places for the saved user's location
    if (!me.util.userLocation) {
      Ext.device.Geolocation.getCurrentPosition({
        success: function (position) {
          me.util.userLocation = position.coords.latitude + ',' + position.coords.longitude;
          loadPlaces();
        },
        failure: function () {
          me.util.showMsg(Lang.locationRetrievalError);
        }
      });
    } else {
      // Clean the store if there is any previous data
      store.removeAll();
      loadPlaces();
    }
  },

  /**
   * Show place list
   */
  showPlaceList: function (record) {
    this.getMain().push({
      xtype: 'placelist',
      title: record.get('name')
    });
  }
});
Place List View: View/PlaceList
The PlaceList view is also a plain list. We use XTemplate here in order to use some filtering functions. The getImage function receives the image of the business. If the image is not available, it returns the icon for that business.
Ext.define('Locator.view.PlaceList', {
  extend: 'Ext.List',
  xtype: 'placelist',
  config: {
    cls: 'default-bg placelist',
    store: 'Places',
    emptyText: Lang.placeList.emptyText,
    itemTpl: Ext.create('Ext.XTemplate',
      '{[this.getImage(values)]}',
      '<div class="item" data-placelistitem-id="{id}">',
      '<div class="name">{name}</div>',
      '<div class="vicinity">{vicinity}</div>',
      '{rating:this.getRating}',
      '</div>', {

      // Returns the business image if available. Else shows the icon available for that business
      getImage: function (data) {
        if (data.photos && data.photos.length > 0) {
          return '<div class="photo"><img src="' + data.photos[0].url + '" /></div>';
        }

        return '<div class="icon-wrapper"><div class="icon" style="-webkit-mask-image:url(' + data.icon + ');" ></div></div>';
      },

      // Shows a star based rating. The functional details is given in the Util class
      getRating: function (rating) {
        return Locator.util.Util.getRating(rating);
      }
    })
  }
});
We get a rating from zero to five for businesses. Instead of showing the rating number, we can write a simple function to show the ratings as stars. We add the getRating function to the util file, which can be used inside this PlaceList template functions:
There are three images: no-star, half-star and full-star. The CSS is given below:
getRating: function (rating, max, hideRatingValue) {
  if (rating !== undefined) {
    var str = '<div class="ratings">';
    rating = parseFloat(rating);
    max = max || 5;

    // We divide the rating into a part upto maximum value

    for (var i = 1; i < = max; i++) {
      // For each 1 rating, add a full star
      if (i < = rating) {
        str += '<div class="star full-star"></div>';
      }

      if (i > rating) {
        // If the part rating is a decimal between 0 & 1, add half star
        if (rating % 1 !== 0 &&; (i - rating) < 1) {
          str += '<div class="star half-star"></div>';
        }
        // For all part rating value 0, add no star
        else {
          str += '<div class="star no-star"></div>';
        }
      }
    }

    if (!hideRatingValue) {
      str += '<div class="value">' + rating + '</div>';
    }

    str += '</div>';

    return str;
  }

  return Lang.noRating;
}
Rating CSS:
.ratings{
    overflow: auto;
}

.ratings div.star{
    float: left;
    height: 14px;
    width: 14px;
    background-size: 12px !important;
    background-position: 50%;
}

.ratings .full-star{
    background: url(../images/full_star.png) no-repeat;
}

.ratings .half-star{
    background: url(../images/half_star.png) no-repeat;
}

.ratings .no-star{
    background: url(../images/no_star.png) no-repeat;
}

.ratings .value{
    float: left;
    font-size: 13px;
    font-weight: bold;
    margin-left: 5px;
}
Here is the final PlaceList view.

CSS for the PlaceList Page:
/****************************** Place List ******************************/ .placelist.x - list - emptytext {
  font - size: 14px;
  color: #fff;
  padding: 20px;
}

.x - list.placelist.x - list - item.x - dock - horizontal {
  border: 0!important;
}

.x - list.placelist.x - list - item.item {
  /*				background: rgba(255, 255, 255, 0.8);
                                    font-size: 14px;
                                    padding: 8px;*/

  /*				background: rgba(255, 255, 255, 0.8);*/
  background: -webkit - gradient(linear, left top, left bottom, color - stop(0 % , #ffffff), color - stop(47 % , #f6f6f6), color - stop(100 % , #ededed)); /* Chrome,Safari4+ */
  background: -webkit - linear - gradient(top, #ffffff 0 % , #f6f6f6 47 % , #ededed 100 % ); /* Chrome10+,Safari5.1+ */
  font - size: 14px;
  border - radius: 5px;
  padding: 8px; - webkit - box - shadow: 0 0 10px 2px rgba(0, 0, 0, 0.6);
  padding - right: 82px;
}

.x - list.placelist.x - list - item.item.name {
  font - weight: bold;
  margin: 3px 0 8px 0;
}

.x - list.placelist.x - list - item.item.vicinity {
  font - size: 12px;
  color: #222;
    margin-bottom: 10px;
}

.x-list.placelist .x-list-item .item .rating{

}

.x-list.placelist .x-list-item .photo,
.x-list.placelist .x-list-item .icon-wrapper{
    position: absolute;
    display: -webkit-box;
    -webkit-box-align: center;
    -webkit-box-pack: center;
    right: 25px;
    top: 6px;
}

.x-list.placelist .x-list-item .photo img{
    max-width: 75px;
    max-height: 63px;
    border: 2px solid white;
    -webkit-box-shadow: 0 0 5px 0px rgba(0, 0, 0, 0.5);
    background: black;
}

.x-list.placelist .x-list-item .icon-wrapper{
    background: # 960000;
  border: 2px solid white; - webkit - box - shadow: 0 0 5px 0px rgba(0, 0, 0, 0.5);
}

.x - list.placelist.x - list - item.icon {
  width: 50px;
  height: 50px;
  background: white; - webkit - mask - image: url(http: //maps.gstatic.com/mapfiles/place_api/icons/restaurant-71.png);
  -
  webkit - mask - size: 35px; - webkit - mask - repeat: no - repeat; - webkit - mask - position: 50 % ;
  }

  /****************************** Place List ENDS ******************************/
</code>

<p>We can add a pull-to-refresh plugin to this place list. Just add the code below in the <strong>PlaceList</strong> array config.</p>

<code>
plugins: [{
  xclass: 'Ext.plugin.PullRefresh',
  pullRefreshText: Lang.placeList.pullToRefresh
}]</pre>
And because we are using a dark background, we need to change the pull-to-refresh css a bit. So, add following css in locator.css file:
<pre lang="css">/* Pull to refresh plugin */
.x-list-pullrefresh {
  color: #fff;
}

.x-list-pullrefresh-arrow {
  -webkit - mask: center center url(data: image / png; base64, iVBORw0KGgoAAAANSUhEUgAAACgAAAA8CAYAAAAUufjgAAAAGXRFWHRTb2Z0d2FyZQBBZG9iZSBJbWFnZVJlYWR5ccllPAAAAjFJREFUeNrsmU8oREEYwOexdtNuKBfFwdVhCyfuysnFiXISS + 1BLopyUpKLXETkRLaUi1LK3Q2lpPbiQLnIn03a / Hm + z86Ttv0zM++bfbOar36Hbad5v535Zp7v47iuy0wOpyoEHccRHV9L9NxPkUE / bhKCOKiOSPAdn69DsJ5I8E2HYA0QJRJ8Bb50CDYRCT7pEMQD0kwk + CByUFQEW4gE73UIhoA2IsFb4ENEMCQ5MdU1IxwygpT3oKNLMGyyYFVscdhusc8tDpu + xRG7xf95BW0O2kNiV1AgIvaQ2BzUJNgJNJYZGyUU7OG1cal4Bi68oqkDPszy2teEwJp5Cdyu / lZ1g8CwIYJ7wEF + 2YmrNw90Byx3BizgKhaqizEP1wg7CLLxCEzy / CtauMeBlQDyEfNuGrgU6SyM8F9SyVgHdmRaH6tAb4XkToEp2d4M5mOK0TWMigU2koa8vJMRZPxEb2ss2LEVPMpPLlMRxBgDZjQJLgNbxb6Uab9tAn3EcifAeKkBMoLY + j0GWonk7oB + lmsFkwhidAGHBPmIeTcAnJcbKCuIMQEs + hScAzZEBqoIYuzyFVCJI36lMJ2CDfxibZeUu + EX / 4uMIFP8ZyLejxkgK0hG5a8kP4IYSZbr1IuQVHmAX0HGX4VuGfZVJ6cQxPd1uoRcWqDW0SroFVzZAnJZ / h0LWhAjUUAw4XdSSsH8fExRTEgtGAOuOTETBb16Jk412e + bxOSwglYw6PgWYABvLk8P7zGJFwAAAABJRU5ErkJggg == ) no - repeat;
  background: #fff;
}
Here it goes:

Conclusion
This is the first part of the tutorial. We created a list of services provided by the Google Places API and then for a particular service, and we showed a list of all the nearby places. In the next and final part of this tutorial, we'll cover the following functionality:
- Showing all the places for a category in Google Maps
- Showing the details of each place. This will include showing an individual map for a certain place, creating a mosaic Sencha-based photo gallery, a full screen image carousel, and a list of reviews.
Sencha is at present one of the strongest HTML5-based mobile libraries. Once you set it up, you'll be able to write great, smooth mobile applications. These applications can either be used as mobile websites or can be wrapped in Phonegap to create iOS and Android hybrid apps.
UPDATE!
The second part of this tutorial is available now. Find it here: Create a Location-Aware Site with Sencha Touch – Displaying Locations.

Comments