In this tutorial series, we will create a flight simulator application using ShiVa3D Suite. In order to build this application, we will cover all the topics necessary for creating 3D games, educational applications, and novelty 3D apps. This tutorial, part 3 of the series, will focus on programming the simulator functions.
Also available in this series:
- Create a 3D Flight Simulator App for iOS and Android - Theoretical Overview
- Create a 3D Flight Simulator App for iOS and Android - Environment Creation
- Create a 3D Flight Simulator App for iOS and Android - Simulator Programming
- Create a 3D Flight Simulator App for iOS and Android – Project Export
Enter Code For MainAI
Before entering the code for MainAI, let us first introduce the basic concepts of Handler and Function in the Shiva3D environment. (this follows the Shiva3D Editor help documentation).
- A handler is a method to process a particular event, e.g. sent by a user or the game engine.
- A function is a 'private' method that is accessible via other functions or handlers.
Two important handlers are onInit and onEnterFrame. Those are built-in handlers, in other words, they always exist and are called by the game engine as needed. By default, a built-in handler has no statements in its body.
The onInit handler is called once when the application starts. This is where you would do necessary initialization tasks. The onEnterFrame handler is called at every frame of the game. In the Simulator, onEnterFrame calls various other functions for particular tasks, like moving the plane forward.
The following three handlers, which are also built-in handlers, work in conjunction:
- onTouchSequenceBegin handler notifies the application that the touch events have started.
- onTouchSequenceChange handler provides detailed information about the number of touches on the screen by user and the coordinates of each touch.
- onTouchSequenceEnd handler notifies the application when the touch event ends.
For those touch event handlers to work, multitouch must be enabled in the application via input.enableMultiTouch(). This is done in the onInit handler.
In the Simulator, in addition to the built-in handlers we also have several custom handlers.
- onRestart is the entry point when the application needs to be restarted. It displays a descriptive message on the screen notifying the user that the application is restarting. It then queues an event to call the onRequestRestart handler below, to actually restart the application.
- onRequestRestart handler restarts the application.
- onManeuverRequest is an event handler called by the HUD buttons on the screens. It interprets the input parameter as one of up, down, left or right and then calls the appropriate function to start the maneuver.
Having discussed the handlers in the Simulator, a summary of the functions are given below.
- displayMessage function displays a message on the screen. The message is passed as an input parameter.
- reset function resets the variables used in onTouchSequenceChange handler.
- startBanking function starts a banked turn maneuver to left or right.
- startPitching function starts a pitch maneuver up or down.
- bank function performs a particular succession of a banked turn maneuver at each frame.
- pitch function performs a particular succession of pitch maneuver at each frame.
- move function moves the plane at each frame.
For individual details of each of the methods, please see the comments in method definitions.
The following is a list of global variables used by the functions and handlers in our code.
- counter is a variable used to keep track of sequence of movements during pitch or banked turn maneuvers.
- dP is a constant that determines rate of change of the pitch angle, mainly used in pitch() function.
- dR is a constant that determines rate of change of the bank and yaw angles, mainly used in bank() function.
- prevTouchCount stores number of screen touches received previously and is needed to compare that variable to the current number of screen touches received in onTouchSequenceChange event handler.
- prevX0 and prevY0 are used in the onTouchSequenceChange event handler to determine direction of user's thumb movement.
- V is a constant and represents speed of the plane.
- yg stores the rotation of the plane around the global Y axis.
- isAppRestarting is a boolean. It is set to true when application restart operation is initiated.
- isBanking is a boolean. It is set to true when the plane starts making a banked turn maneuver.
- isBankingLeft is a boolean. It is set to true when the plane starts making a banked turn maneuver to left.
- isBThresholdReached is a boolean. It is set to true if the plane is currently making a banked turn and has reached a maximum absolute value of the bank angle (either left or right).
- isPitching is a boolean. It is set to true when the plane starts making a pitch maneuver.
- isPitchingUp is a boolean. It is set to true when the plane starts making a pitch maneuver upwards.
- isPThresholdReached is a boolean. It is set to true when the plane is currently making a pitch maneuver and has reached a maximum absolute value of the pitch angle (either up or down).
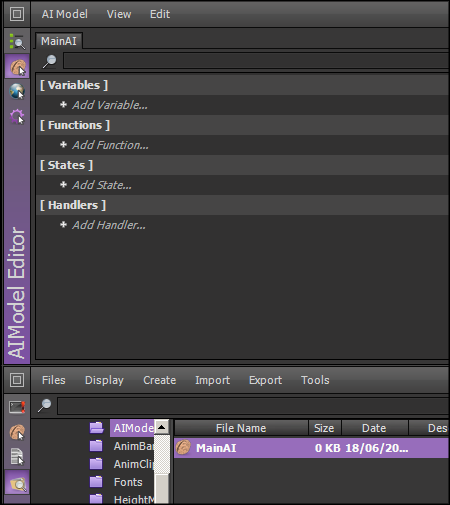
Now, we are ready to enter the code. Bring up the AIModel editor. In Data Explorer AIModel's folder, double click MainAI. The MainAI is now loaded in the AIModel Editor as shown below:
In the Variables section click on Add Variable. In the Variable dialog, name the variable counter, select its type as number and set the init value as 0, as shown below (For number types, even if you enter an Init Value of 0, the value will show up as a float, that is, with decimals).

Press OK to create the variable. In a similar way, create the other variables.
- Name: dP
- Type: number
- Init Value: 0.040
- Name: dR
- Type: number
- Init Value: 0.050
- Name: prevTouchCount
- Type: number
- Init Value: 0
- Name: prevX0
- Type: number
- Init Value: 0
- Name: prevY0
- Type: number
- Init Value: 0
- Name: V
- Type: number
- Init Value: 0.25
- Name: yg
- Type: number
- Init Value: 0
- Name: isAppRestarting
- Type: boolean
- Init Value: false
- Name: isBanking
- Type: boolean
- Init Value: false
- Name: isBankingLeft
- Type: boolean
- Init Value: false
- Name: isBThresholdReached
- Type: boolean
- Init Value: false
- Name: isPitching
- Type: boolean
- Init Value: false
- Name: isPitchingUp
- Type: boolean
- Init Value: false
- Name: isPThresholdReached
- Type: boolean
- Init Value: false
Now, having all the variables created, we will create the functions for the Simulator. In AIModel Editor's Functions section click on Add Function. In the dialog, enter the name as "bank".

Bring up the AIModel Editor and the Script Editor side-by-side. Double-click on the newly created function bank() on the AIModel Editor. In the Script Editor, the skeleton code for the function will be displayed.

Copy the following and paste it into the Script Editor. Press Ctrl+S to save.
--------------------------------------------------------------------------------
function MainAI.bank ( )
--------------------------------------------------------------------------------
    -- This function performs the banked turn. It is executed at each frame of the simulation during
    -- a turn cycle.

    -- To avoid errors, return immediately unless isBanking is true.
    if(this.isBanking ( ) == false)
    then
        return
    end

    -- During a banked turn to left, the roll angle starts increasing, i.e., the left wing of
    -- the plane starts going down and the right wing starts going up. At the same time the plane
    -- starts turning to left. At some point, the roll angle reaches a maximum and the roll continues
    -- in the opposite direction, i.e., the left wing starts going up and the right wing starts going
    -- down until the wings become parallel to the surface again. To simulate this behavior, we will
    -- initially increase the roll in small increments as many times as the value of threshold variable
    -- below. Once the threshold is reached, we will start rolling the plane in the opposite direction
    -- in the same increments as many times as threshold. At this point the plane will be parallel to
    -- the surface again as it started. (Banked turn to right is symmetric and handled similarly.)
    local threshold = 55
    local increment = 1

    -- Get a handle to the camera (i.e., the plane we are simulating).
    local lCamera = application.getCurrentUserActiveCamera ( )

    -- Get rotation of the camera with respect to local coordinates.
    local X, Y, Z = object.getRotation ( lCamera, object.kLocalSpace )

    -- Get rotation of the camera with respect to global coordinates.
    local Xg, Yg, Zg = object.getRotation ( lCamera, object.kGlobalSpace )


    if(not this.isBThresholdReached ( ))
    then
    -- This is the first half of the turn maneuver, e.g., if turning left, the left wing is going down
    -- and the right wing is going up.

    -- Increment the counter
        this.counter (this.counter()+increment )

    -- Have we reached the max roll angle?
        if(this.counter () > threshold)
        then
    -- If so, set the global boolean variable isBThresholdReached to true so that the second
    -- half could start
            this.isBThresholdReached (true )
            return
        end

        if(this.isBankingLeft ( ))
    -- Not yet reached the max roll angle and we are turning left.
        then
    -- Rotate the camera around the global y axis to turn left.
            object.setRotation ( lCamera, Xg, Yg+(1.5*this.dR()), Zg, object.kGlobalSpace )

    -- Rotate the camera around the local z axis to roll (bank).
            object.setRotation ( lCamera, X, Y, Z+(2*this.dR()), object.kLocalSpace )

    -- Display message to user.
            this.displayMessage ("Banking left" )

    -- Move the camera in global coordinates.
            this.move ( )
        else
    -- Not yet reached the max roll angle and we are turning right.

    -- Rotate the camera around the global y axis to turn right.
            object.setRotation ( lCamera, Xg, Yg-(1.5*this.dR()), Zg, object.kGlobalSpace )

    -- Rotate the camera around the local z axis to roll (bank).
            object.setRotation ( lCamera, X, Y, Z-(2*this.dR()), object.kLocalSpace )

    -- Display message to user.
            this.displayMessage ("Banking right" )

    -- Move the camera in global coordinates.
            this.move ( )
        end
    else
    -- We must have reached the max roll angle and this is the second half of the turn maneuver, e.g.,
    -- if turning left, the left wing is going up and the right wing is going down.

    -- Decrement the counter
        this.counter (this.counter()-increment)

    -- Have we reached 0 yet?
        if(this.counter () <= 0)
        then
    -- If so, the turn has been completed. Reset global variables
            this.counter (0)
            this.isBanking (false )
            this.displayMessage ("" )
            this.isBThresholdReached (false )

    -- Set rotation so that plane is parallel to surface.
            object.setRotation ( lCamera, 0, Yg, 0, object.kGlobalSpace )
            return
        end

        if(this.isBankingLeft ( ))
    -- Turn has not been completed yet and we are in second half of a left turn.
        then
    -- Rotate camera in global coordinates so that it continues to turn to left around the
    -- global y axis. At the same time compensate angles with respect to global x and z axes
    -- to smoothly bring back both wings to a parallel position to surface.
            object.setRotation ( lCamera, Xg-(Xg/this.counter()), Yg+(0.25*this.dR()), Zg-(Zg/this.counter()), object.kGlobalSpace )

    -- Display message to user.
            this.displayMessage ("Banking left" )

    -- Move the camera in global coordinates.
            this.move ( )
        else
    -- Turn has not been completed yet and we are in second half of a right turn.

    -- Rotate camera in global coordinates so that it continues to turn to right around the
    -- global y axis. At the same time compensate angles with respect to global x and z axes
    -- to smoothly bring back both wings to a parallel position to surface.
            object.setRotation ( lCamera,  Xg-(Xg/this.counter()), Yg-(0.25*this.dR()), Zg-(Zg/this.counter()), object.kGlobalSpace )

    -- Display message to user.
            this.displayMessage ("Banking right" )

    -- Move the camera in global coordinates.
            this.move ( )
        end
    end
--------------------------------------------------------------------------------
end
--------------------------------------------------------------------------------
In a similar way, create each of the following functions in the AIModel Editor and copy and paste the corresponding code in the Script Editor. Press Ctrl+S to save after creating each function.
displayMessage
--------------------------------------------------------------------------------
function MainAI.displayMessage (messageToDisplay )
--------------------------------------------------------------------------------
    -- This function is used to display a message in the HUD named Hud.disp. That
    -- particular HUD is created as a label. The message to be displayed is the input
    -- variable messageToDisplay.

    -- Get a handle to HUD.
    local lComp = hud.getComponent (application.getCurrentUser ( ) , "HUD.disp" )
    if(lComp)
    then
    -- Set text of the label.
        hud.setLabelText (lComp, messageToDisplay  )
    end
--------------------------------------------------------------------------------
end
--------------------------------------------------------------------------------
move
--------------------------------------------------------------------------------
function MainAI.move (d)
--------------------------------------------------------------------------------
    -- This function defines position of the plane in global coordinates. It is
    -- executed at every frame of the simulation.

    -- Get a handle to the camera (i.e., the plane we are simulating).
    local lCamera = application.getCurrentUserActiveCamera ( )

    -- Get rotation of the camera with respect to global coordinates.
    local Xg, Yg, Zg = object.getRotation ( lCamera, object.kGlobalSpace )

    -- Get current global coordinates of the camera.
    local tx,ty,tz = object.getTranslation ( lCamera, object.kGlobalSpace)

    -- Determine increment of the motion along the global x coordinate. Note that V represents
    -- absolute value of the velocity.
    local Tx = (-1)*this.V() * math.sin(Yg)

    -- Initialize increment of the motion along the global y coordinate.
    local Ty = 0

    -- Determine increment of the motion along the global z coordinate.
    local Tz = (-1)*this.V() * math.cos(Yg)

    -- If plane is changing altitude, adjust the motion along the global y coordinate. Otherwise,
    -- there is no change, i.e. Ty=0.
    if(d=="up")
    then
        Ty = this.dP ( )
    elseif(d=="down")
    then
        Ty = -1*this.dP ( )
    end

    -- Define new position of the plane in global coordinates.
    object.setTranslation ( lCamera, tx+Tx, ty+Ty, tz+Tz, object.kGlobalSpace  )
    return tx, tz

--------------------------------------------------------------------------------
end
--------------------------------------------------------------------------------
pitch
--------------------------------------------------------------------------------
function MainAI.pitch ( )
--------------------------------------------------------------------------------
    -- This function is executed at each frame of the simulation during a pitch maneuver.

    -- To avoid errors, return immediately unless isBanking is true.
    if(this.isPitching ( )==false)
    then
        return
    end


    -- When the plane starts pitching up, its nose starts going up, i.e. the pitch angle starts
    -- increasing. At the same time, the plane starts moving up, gaining altitude. When a maximum pitch
    -- angle is reached, the nose of the plane starts going down, i.e. the pitch angle starts
    -- decreasing. The plane continues to move up, gaining altitude. When the pitch angle becomes zero,
    -- i.e. the plane becomes parallel to the surface, the pitch maneuver will end and the plane will
    -- stop going further up.
    --
    -- To simulate this behavior, we will initially increase the pitch in small increments as many times
    -- as the value of threshold variable below. Once the threshold is reached, we will start decreasing
    -- the pitch angle in the same increments as many times as threshold. At this point the plane will be
    -- parallel to the surface again as it started. (Pitching down is symmetric and handled similarly.)
	local threshold = 15
	local increment = 0.25

    -- Get a handle to the camera (i.e., the plane we are simulating).
    local lCamera = application.getCurrentUserActiveCamera ( )

    -- Get rotation of the camera with respect to local coordinates.
    local X, Y, Z = object.getRotation ( lCamera, object.kLocalSpace )

    -- Get rotation of the camera with respect to global coordinates.
    local Xg, Yg, Zg = object.getRotation ( lCamera, object.kGlobalSpace )

    -- Get current global coordinates of the camera.
    local tx,ty,tz = object.getTranslation ( lCamera, object.kGlobalSpace)

    if(not this.isPThresholdReached ( ))
    then
    -- This is the first half of the pitch maneuver, e.g., if pitching up, the nose goes up.

    -- Increment the counter.
        this.counter (this.counter()+increment )

    -- Have we reached the max pitch angle?
        if(this.counter () > threshold)
        then
    -- If so, set the global boolean variable isPThresholdReached to true so that the second
    -- half could start
            this.isPThresholdReached (true )
            return
        end

        if(this.isPitchingUp ( ))
    -- Not yet reached the max pitch angle and we are moving up.
        then
    -- Rotate the plane around its local x axis to increase the pitch angle.
            object.setRotation ( lCamera, X+this.dP(), Y, Z, object.kLocalSpace )

    -- Display message to user.
            this.displayMessage ("Pitching up")

    -- Call the move function to increase altitude of the plane.
            this.move ("up" )
        else
    -- Not yet reached the max pitch angle and we are moving down.

    -- Rotate the plane around its local x axis to decrease the pitch angle.
            object.setRotation ( lCamera, X-this.dP(), Y, Z, object.kLocalSpace )

    -- Display message to user.
            this.displayMessage ("Pitching down")

    -- Call the move function to decrease altitude of the plane.
            this.move ("down" )
        end
    else
    -- We must have reached the max pitch angle and this is the second half of the pitch maneuver, e.g.,
    -- if pitching up, the nose is going up.

    -- Decrement the counter
        this.counter (this.counter()-increment)

    -- Have we reached 0 yet?
        if(this.counter () <= 0)
        then
    -- If so, the maneuver has been completed. Reset global variables
            this.counter (0)
            this.displayMessage ("" )
            this.isPitching (false )
            this.isPThresholdReached (false )

    -- In global space, the plane must be parallel to surface. We restore the rotation
    -- of the plane, i.e., its angle around the y axis. However, the rotation angles
    -- around the x and z axes should be 0.
            object.setRotation ( lCamera, 0, this.yg(), 0, object.kGlobalSpace )
            return
        end

        if(this.isPitchingUp ( ))
    -- Maneuver has not been completed yet and we are in second half of a 'pitch up'.
        then

    -- Compensate angles with respect to global x and z axes to smoothly bring back plane to
    -- a parallel position to surface.
            object.setRotation ( lCamera, Xg-(Xg/this.counter()), this.yg(), Zg-(Zg/this.counter()), object.kGlobalSpace )

    -- Display message to user. As plane approaches its new altitude, display the altitude as well.
            this.displayMessage (string.format ( "Pitching up %2i",ty ))

    -- Call the move function to increase altitude of the plane.
            this.move ("up" )
        else

    -- Compensate angles with respect to global x and z axes to smoothly bring back plane to
    -- a parallel position to surface.
            object.setRotation ( lCamera, Xg-(Xg/this.counter()), this.yg(), Zg-(Zg/this.counter()), object.kGlobalSpace )

    -- Display message to user. As plane approaches its new altitude, display the altitude as well.
            this.displayMessage (string.format ( "Pitching down %2i",ty ))

    -- Call the move function to decrease altitude of the plane.
            this.move ("down" )
        end
    end
--------------------------------------------------------------------------------
end
--------------------------------------------------------------------------------
reset
--------------------------------------------------------------------------------
function MainAI.reset ( )
--------------------------------------------------------------------------------
    -- Set to zero the variables used in onTouchSequenceChange handler.
    this.prevTouchCount (0)
    this.prevX0 (0)
    this.prevY0 (0)
--------------------------------------------------------------------------------
end
--------------------------------------------------------------------------------
startBanking
--------------------------------------------------------------------------------
function MainAI.startBanking (direction)
--------------------------------------------------------------------------------
    -- This function is called when a turn cycle starts. The direction variable must be
    -- either left or right.

    -- Set the global boolean variable isBanking true to indicate that turn cycle has started.
    this.isBanking ( true)

    -- Set value of the global boolean variable isBankingLeft according to direction.
    if(direction=="left")
    then
        this.isBankingLeft ( true)
    else
        this.isBankingLeft ( false)
    end
--------------------------------------------------------------------------------
end
--------------------------------------------------------------------------------
startPitching
--------------------------------------------------------------------------------
function MainAI.startPitching (direction)
--------------------------------------------------------------------------------
    -- This function is called when a pitch cycle starts. The direction variable must be
    -- either up or down.

    -- Set the global boolean variable isPitching true to indicate that pitch cycle has started.
    this.isPitching ( true)

    -- Set value of the global boolean variable isPitchingUp according to direction.
    if(direction=="up")
    then
        this.isPitchingUp ( true)
    else
        this.isPitchingUp ( false)
    end

    -- Obtain the current rotation, just before pitch maneuver starts, around the global y axis and
    -- store it in global variable yg. We need that variable to make some adjustments during the pitch
    -- maneuver.
    local lCamera = application.getCurrentUserActiveCamera ( )
    local Xg, Yg, Zg = object.getRotation ( lCamera, object.kGlobalSpace )
    this.yg(Yg)
--------------------------------------------------------------------------------
end
--------------------------------------------------------------------------------
Having created the functions, now we will create the handlers. In the AIModel Editor, under the Handlers section click on Add Handler. In the menu, choose Custom:

In the text field, enter ManeuverRequest. Because of the preceding 'on', the name of the handler will be onManeuverRequest:

In Script Editor, copy and paste the following for the code of onManeuverRequest handler. Make sure to save the code via Ctrl+S:
--------------------------------------------------------------------------------
function MainAI.onManeuverRequest ( d )
--------------------------------------------------------------------------------

    -- This handler is called by the HUD buttons on the screens. It interprets the input parameter
    -- as one of up, down, left or right and then calls the appropriate function to start the maneuver.
    if(this.isBanking ( ))
    then
        return
    end
    if(this.isPitching ( ))
    then
        return
    end
	if(d=="L")
    then
        this.startBanking ( "left" )
        return
    elseif(d=="R")
    then
        this.startBanking ( "right" )
        return
    elseif(d=="U")
    then
        this.startPitching ( "up" )
        return
    elseif(d=="D")
    then
        this.startPitching ( "down" )
        return
    end
--------------------------------------------------------------------------------
end
--------------------------------------------------------------------------------
In a similar way, create each of the following custom handlers in the AIModel Editor and copy and paste the corresponding code in the Script Editor. Press Ctrl+S to save after creating each handler.
onRequestRestart
--------------------------------------------------------------------------------
function MainAI.onRequestRestart (  )
--------------------------------------------------------------------------------
    -- This function restarts the application.
    application.restart ( )
--------------------------------------------------------------------------------
end
--------------------------------------------------------------------------------
onRestart
--------------------------------------------------------------------------------
function MainAI.onRestart (  )
--------------------------------------------------------------------------------
    -- This function requests restart of the application. It can be called by any other function that
    -- needs to restart the application.

    -- First, set a global variable that application is about to restart.
    this.isAppRestarting(true)

    -- Display an informational message to user for notification.
    this.displayMessage ("Simulation restarting" )

    -- Queue an event to call function onRequestRestart() after a 1 second delay. The
    -- onRequestRestart function makes a system call to restart the application.
    this.postEvent (1,"onRequestRestart" )
--------------------------------------------------------------------------------
end
--------------------------------------------------------------------------------
We will create several more handlers. However, those are built-in handlers in Shiva3D, rather than custom handlers. In the Handlers section, click on Add Handler and select onInit from the menu.

Copy and paste the following code for onInit handler in Script editor. Save the code via Ctrl+S.
--------------------------------------------------------------------------------
function MainAI.onInit (  )
--------------------------------------------------------------------------------
    -- Define Scene1 as the current user scene
    application.setCurrentUserScene ("Scene1")

    -- According to Wikipedia (http://en.wikipedia.org/wiki/Viewport), viewport
    -- is defined as 'the 2D rectangle used to project the 3D scene to the position of a virtual camera.'
    -- We rotate the view 90 degrees (http://www.stonetrip.com/developer/doc/api/application-kOptionViewportRotation)
    -- so that the simulation is best viewed by rotating the mobile device -90 degrees, i.e.
    -- its 	left side faces downward. In this position, held between hands, user's left thumb will be
    -- near the device's top and the right thumb will be near the device's bottom.
    application.setOption ( application.kOptionViewportRotation,3 )

    -- Get a handle to the default camera.
    local lCamera = application.getCurrentUserActiveCamera ( )

    -- The camera will capture the pilot's view of the simulation from the cockpit. Its position
    -- is the position of the plane. We place it (x=0,y=50,z=2050) in global coordinates. At this
    -- point, camera is positioned 50 units above the z-axis, and its distance from the
    -- y-axis is 2050 units.
    object.setTranslation ( lCamera, 0, 50, 2050, object.kGlobalSpace )

    -- We adjust the global and local rotations so that they are all zero. At this point, the plane
    -- is facing toward the y-axis.
    object.setRotation ( lCamera, 0,0,0, object.kGlobalSpace )
    object.setRotation ( lCamera, 0,0,0, object.kLocalSpace )

    -- We enable the multi-touch input on the application. This will allow us to process user
    -- screen touch events for pitch and turn maneuvers as well as restarting the simulation.
    input.enableMultiTouch ( this.getUser ( ), true )

    -- We create a HUD (head up display) for the application and name it as Hud.disp.
    local lUser = application.getCurrentUser ( )
    local lComp = hud.newComponent (lUser, hud.kComponentTypeLabel,"HUD.disp" )

    -- This particular HUD named HUD.disp is a label and will be used to display various messages
    -- to user during the simulation, while turning, pitching and restarting the simulation.
    if ( lComp ~= nil )
    then
    -- Set the position and size of the label.
        hud.setComponentPosition (lComp, 50, 10 )
        hud.setComponentSize (lComp, 100, 10 )

    -- Define background and border colors of the label. In each case, the last parameter is
    -- passed as 0, which defines the respective element (background or border color) to be
    -- completely transparent.
        hud.setComponentBackgroundColor (lComp, 0, 0, 0, 0 )
        hud.setComponentBorderColor (lComp, 0, 0, 0, 0 )

    -- Make sure the label visible.
        hud.setComponentVisible (lComp, true )

    -- The setComponentZOrder() function defines how the label is situated in the front. The
    -- parameter should be between 0 and 255, and larger the parameter is the component is placed
    -- further in the foreground.
        hud.setComponentZOrder (lComp, 255 )

    -- Initially, the label is empty, i.e., there is no message to display to user.
        hud.setLabelText (lComp, "" )

    -- Define default font to be font of the label.
        hud.setDefaultFont (lUser, "DefaultFont" )

    -- Define height of the label text as a percentage of the height of the label itself. We set
    -- this to be 100%.
        hud.setLabelTextHeight (lComp, 100 )

    -- Align the text at the center of the label.
        hud.setLabelTextAlignment (lComp, hud.kAlignCenter, hud.kAlignCenter )
    end

    -- This is the other HUD we use in the simulator and it represents the five buttons atop the
    -- screen. The buttons are created using a HUD template named 'buttons'. We now create an
    -- instance of the template and name the instance 'buttons' as well.
    hud.newTemplateInstance ( this.getUser ( ), "buttons","buttons" )

    -- Call the reset() function to reset several global variables used in the application.
    this.reset()


--------------------------------------------------------------------------------
end
--------------------------------------------------------------------------------
Now, we will create onEnterFrame handler. In the Handlers section, click on Add Handler and select onEnterFrame from the menu.

Copy and paste the following code for onEnterFrame handler in Script editor. Save the code via Ctrl+S.
--------------------------------------------------------------------------------
function MainAI.onEnterFrame (  )
--------------------------------------------------------------------------------
    -- This handler is called every frame.

    -- If the plane is currently performing a roll or pitch maneuver, return. The respective bank()
    -- or pitch() functions will perform the necessary logic.
    if(this.isBanking ( ))
    then
        this.bank ( )
        return
    elseif(this.isPitching ( ))
    then
        this.pitch()
        return
    end

    -- The plane is not currently performing a roll or pitch maneuver. Determine new position of the
    -- plane in global coordinates.
    local tx,tz = this.move ( )

    -- If plane is out of bounds, i.e., boundaries of the terrain has been reached, we need to display
    -- an informational message and restart the simulation. Note that if the global variable
    -- isAppRestarting is true then the application is already restarting. Therefore we do not need to
    -- request a restart.
    if(this.isAppRestarting()==false)
    then
    -- Check if plane is out of bounds.
        if(tz < -1900 or tz > 2100 or math.abs(tx) > 1900)
        then
    -- Display an informational message.
            this.displayMessage ("Out of bounds" )

    -- Queue an event to call function onRestart() after a 1 second delay.
            this.postEvent (1,"onRestart" )
        end
    end
--------------------------------------------------------------------------------
end
--------------------------------------------------------------------------------
Three more handlers are left, onTouchSequenceBegin, onTouchSequenceChange, and onTouchSequenceEnd, which are all user handlers. In the Handlers section, click on Add Handler. In the menu, select User Handler -> onTouchSequenceBegin.

In a similar way, create the other two handlers, onTouchSequenceChange and onTouchSequenceEnd. Now, in the AIModel editor, double click on the onTouchSequenceBegin handler. Copy and paste the following code in the Script Editor for the corresponding code.
--------------------------------------------------------------------------------
function MainAI.onTouchSequenceBegin (  )
--------------------------------------------------------------------------------
    -- This handler notifies our application that the touch events have started. We
    -- call reset() function to reset values of several variables used in
    -- onTouchSequenceChange() handler.
    this.reset ( )
--------------------------------------------------------------------------------
end
--------------------------------------------------------------------------------
Similarly, copy and paste the following code for onTouchSequenceChange and onTouchSequenceEnd, respectively.
--------------------------------------------------------------------------------
function MainAI.onTouchSequenceChange ( nTaps0, nX0, nY0, nTaps1, nX1, nY1, nTaps2, nX2, nY2, nTaps3, nX3, nY3, nTaps4, nX4, nY4 )
--------------------------------------------------------------------------------
    -- This handler is called in conjunction with onTouchSequenceBegin and onTouchSequenceEnd. It
    -- provides detailed information on the number of 'taps' (touches) and the coordinates of each tap.
    -- We will use this handler to receive input from the user for banked turn, pitch and restart
    -- requests. (User could use the respective buttons for the same requests and this handler is
    -- independent of how those button handlers are implemented.)

    -- If the plane currently executing a banked turn or pitch maneuver or if the application is
    -- restarting do not take any further action; return.
    if(this.isBanking ( ) or this.isPitching ( ) or this.isAppRestarting ( ))
    then
        return
    end

    -- Let us first explain the parameters in the event handler.
    -- If there is only one tap on the screen, nTaps0 is 1 and nTapsi = -1, i = 1,...,4
    -- If there are only two taps on the screen, nTaps0, nTaps1 are 1 and nTapsi = -1, i = 2,...,4
    -- If there are only three taps on the screen, nTaps0, nTaps1 and nTaps2 are 1 and nTapsi = -1, i = 3, 4
    -- ...

    -- Depending on number of taps, nXi, nYi give the coordinates of the corresponding tap. For example,
    -- if there are two taps, (nX0, nY0) and (nX1, nY1) are the coordinates of the first and second
    -- taps. Note that, the framework ensures the coordinates are in sequence with the previous call
    -- to the onTouchSequenceChange. In other words, let us assume there is a double touch sequence,
    -- i.e., nTaps0, nTaps1 are 1 and nTapsi = -1, i = 2,...,4. You are moving both your thumbs on
    -- the screen. Between onTouchSequenceBegin and onTouchSequenceEnd, every call to onTouchSequenceChange
    -- will provide (nX0, nY0) for the unique motion of one of your thumbs and similarly for (nX1, nY1).
    local touchCount = 0
    if(nTaps0 > 0) then touchCount = 1 end
    if(nTaps1 > 0) then touchCount = 2 end
    if(nTaps2 > 0) then touchCount = 3 end
    if(nTaps3 > 0) then touchCount = 4 end
    if(nTaps4 > 0) then touchCount = 5 end

    -- We are interested in only single touch and double touch events. If there is a single touch
    -- event, this will be interpreted as user is moving one thumb on the screen for a banked turn or
    -- pitch maneuver. A double touch event will be interpreted as an application restart request.

    -- The variable touchCount stores number of taps. The variable prevTouchCount stores number of
    -- taps we had received in the previous call to onTouchSequenceChange. If the previous and
    -- current numbers of taps are equal then we continue processing the information.
    if ( touchCount == this.prevTouchCount())
    then
        if ( touchCount == 1 )
        then
    -- This is a single touch event. We need to determine if user is requesting a banked turn
    -- maneuver or a pitch maneuver.
    -- If user is moving a thumb from left to right of the screen, this must be a bank turn to right.
    -- If user is moving a thumb from right to left of the screen, this must be a bank turn to left.
    -- If user is moving a thumb top down, this must be a pitch request down.
    -- If user is moving a thumb bottom up, this must be a pitch request up.

    -- Note that the 2-dimensional screen coordinates are such that the y axis is vertical,
    -- with increasing values from bottom up and the x axis is horizontal, with increasing values from
    -- left to right.
            if(math.abs(nX0-this.prevX0()) > math.abs(nY0-this.prevY0()))
    -- This must be a banked turn maneuver because the motion of user's thumb along x axis
    -- is greater than that of y axis (more horizontal motion than vertical).
            then
                if(nX0 > this.prevX0())
    -- thumb is moving to right
                then
                    this.startBanking ( "right" )
                elseif(nX0 < this.prevX0())
    -- thumb is moving to left
                then
                    this.startBanking ( "left" )
                end
            elseif(math.abs(nX0-this.prevX0()) < math.abs(nY0-this.prevY0()))
    -- This must be a pitch maneuver because the motion of user's thumb along y axis
    -- is greater than that of x axis (more vertical motion than horizontal).
            then
                if(nY0 > this.prevY0())
    -- thumb is moving up
                then
                    this.startPitching ( "up" )
                elseif(nY0 < this.prevY0())
    -- thumb is moving down
                then
                    this.startPitching ( "down" )
                end
            end
        elseif(touchCount == 2)
    -- This could be a restart request. However, sometimes a single thumb motion could generate
    -- double touch count. To filter out such erroneous conditions, we check the difference
    -- between the y-coordinates of the two tap events. Note that it is always true that
    -- -1 <= nYi <= 1, i=0,1. We execute game restart only if absolute value of the difference
    -- between nY0 and nY1 is 0.2, i.e. 10% of the entire length of the 2-dimensional Y coordinate.
    -- (By experiment, if the double touch event is fired by a single thumb then the touch points
    -- on the y-axis will be less apart.)
        then
            if(math.abs (nY0 - nY1) > 0.2 and this.isAppRestarting()==false)
            then
                this.sendEvent ( "onRestart" )
            end
        end
    end

    -- Store the touchCount and nY0 in prevTouchCount and prevY0, respectively, to be used in the
    -- next call to onTouchSequenceChange. (This step is not important if the game is restarting.)
    this.prevTouchCount (touchCount)
    this.prevX0 (nX0)
    this.prevY0 (nY0)

--------------------------------------------------------------------------------
end
--------------------------------------------------------------------------------
onTouchSequenceEnd
--------------------------------------------------------------------------------
function MainAI.onTouchSequenceEnd (  )
--------------------------------------------------------------------------------
    -- onTouchSequenceEnd handler notifies our application when the touch event ends. We
    -- call reset() function to reset values of several variables used in
    -- onTouchSequenceChange() handler.
    this.reset ( )
--------------------------------------------------------------------------------
end
--------------------------------------------------------------------------------
Having created all the code we need, click inside the Script Editor and press F7 to compile. You should see 0 errors and 0 warnings, as below.

Create The Control Buttons
There are a few other UI elements we need to create before we start playing the Simulator. Those are the buttons displayed on top of the screen. We will create those buttons and hook them up with some of the previously created event handlers using the HUD Editor. There are three main steps we will follow:
- Using the HUD Editor, we will create a template that consists of the buttons. This step has two sub-sections in it:
- For every button, define an action to take place, i.e. an event to fire. When the button is pressed, specify the event handler to handle that event.
- Create each button, specify its visual attributes, and associate it with the corresponding action created.
- We will then add the newly created buttons template to the Simulator game.
- Finally, in our code we will initiate an instance of the buttons template. This is already done in the onInit handler (see the section named 'Enter Code For MainAI' above). Note that the onInit handler successfully compiled when we created the code even though the template it referenced did not exist at the time. This is because the template was referenced by its name and the compiler only checks the correct call syntax not the existence of the template with the referenced name. However, had we attempted to run the code without the template actually existing, we would get a run time error.
Create The Buttons Template
Bring up the HUD Editor. From HUD menu, select Create.

Name the template buttons.

Right click on Actions, select Add Action.

Name the action goDownAction.

Right click on goDownAction and select the Add Command.

In the Action Command dialog, select
- Command type: SendEventToUser
- User: RuntimeValue CurrentUser
- AIModel: String MainAI
- Event: String onManeuverRequest
- Call Parameter0: String D

Press OK. You should see the following in HUD Editor.

Similar to above, create the actions goUpAction, leftTurnAction and rightTurnAction, with the only difference being value of the Call Parameter0. You should use string values U, L and R for goUpAction, leftTurnAction and rightTurnAction, respectively.
The final Action we need to create is restartAction. This is created similarly to above with the only exceptions that the Event is onRestart and there are no Call parameters.

With all the actions created, you should see the following in the HUD Editor.

Now we will create the button components to utilize those actions. Right click on Components and select Add Component.

Name the component goDown. In the General section, select the type as Button. Set the position as 64 and 88. Set the size as 11 and 19. Do not change the other selections.

Select the Appearance section. Set the shape to be RoundRectangle. In BackTexture, select top_crop. Let Opacity be 100. Change the ForeColor and BorderColor values as seen below.

Note: Setting opacity to 100 makes the button semi-transparent. We also let the top_crop.jpg be the background image for the button. This and the semi-transparency of the button creates a blending effect for the button and the sky.
Select the Button section. Type D in the Text area. Make the following changes and press OK.
- Text Height: 85
- Text Alignment: Center Center
- Click Action: goDownAction.

Repeat the steps above to create the following components (buttons).
- Name: goUp
- General section
- Type: Button
- Position: 36 and 88
- Size: 11 and 19
- Appearance section:
- Shape RoundRectangle
- Opacity 100
- BackTexture: top_crop
- BackColor: 127 127 127
- ForeColor R:255 G:0 B:0
- BorderColor: R:0 G:127 B:0
- Button Section:
- Text: U
- Text Height: 85
- Text Alignment: Center Center
- Click Action: goUpAction
- Name: leftTurn
- General section
- Type: Button
- Position: 7 and 88
- Size: 11 and 19
- Appearance section:
- Shape RoundRectangle
- Opacity 100
- BackTexture: top_crop
- BackColor: 127 127 127
- ForeColor R:255 G:0 B:0
- BorderColor: R:0 G:127 B:0
- Button Section:
- Text: L
- Text Height: 85
- Text Alignment: Center Center
- Click Action: leftTurnAction
- Name: rightTurn
- General section
- Type: Button
- Position: 93 and 88
- Size: 11 and 19
- Appearance section:
- Shape RoundRectangle
- Opacity 100
- BackTexture: top_crop
- BackColor: 127 127 127
- ForeColor R:255 G:0 B:0
- BorderColor: R:0 G:127 B:0
- Button Section:
- Text: R
- Text Height: 85
- Text Alignment: Center Center
- Click Action: rightTurnAction
- Name: restart
- General section
- Type: Button
- Position: 50 and 88
- Size: 11 and 19
- Appearance section:
- Shape RoundRectangle
- Opacity 100
- BackTexture: top_crop
- BackColor: 127 127 127
- ForeColor R:255 G:255 B:0
- BorderColor: R:255 G:255 B:0
- Button Section:
- Text: Re
- Text Height: 85
- Text Alignment: Center Center
- Click Action: restartAction
Add The Buttons Template To The Simulator
Now, we have to add the newly created buttons template to the Simulator. Bring up Game Editor and Data Explorer side by side. In Data Explorer, under the Games folder double click on Simulator. The game is loaded in Game Editor. Select the Resources tab in Game Editor. You should see that it is empty.

In Data Explorer, open the HUD folder under Resources folder. You will see that the newly created buttons template is there.

Now, drag and drop buttons from HUD folder into the Resources tab in Game Editor.

Add Default Font
We need to add to the Simulator game a font. The font is needed because we display text messages on the screen and also the control buttons have text in them. ShiVa Editor provides a default font which should be sufficient for our purposes. While the Resources tab in Game Editor is open, in Data Explorer open the Fonts folder under Resources folder. You should see the DefaultFont.

Drag and drop DefaultFont from Fonts folder into the Resources tab in Game Editor.

Unit Testing
Everything must be ready to perform a unit test. From the Shiva Editor top level menu, select Preview.

From the display menu, select View Mode -> Runtime.

From the display menu, select Size -> Android -> 480x800. (You could select other display sizes; 480x800 is an example.)

In the top menu, press on the start button (or simply hit F9) to start Simulator game.

You should see that the Simulator will start as seen below.

Note: If, at any point during preview, you need to make changes, stop the game by pressing the stop button. After making the changes, press the Restart button and then press the Start button again. The stop and restart buttons are shown below.

Closing Remarks
Part 3 continued with adding the code and unit testing the end product. In part 4, the last installment of the series, we will export the application from the ShiVa Editor and import into the ShiVa Authoring Tool. Then, we will explain how to convert the application into a platform specific executable via the ShiVa Authoring Tool. The platforms we will consider are Android, iPad and iPhone. We will give screen images of the Simulator from actual devices used for testing, a Motorola Droid phone with Android OS 2.2, an iPad2 with iOS 4.3 and an iPod Touch with iOS 4.3. Finally, in 'Concluding Remarks', we will give conclusions of the series.

Comments