Welcome to part 1 of 2 in the tutorial series on using the Facebook Graph API and the Corona SDK to make native, social applications for mobile devices. The Facebook API has many features and can be used to create powerful social applications. As a starting point, the most basic and primary function of the Facebook API is to allow for a user to authenticate themselves with an application using their Facebook credentials. This requires a two-step process where a user will not only login to an application with their Facebook username and password, but they will also approve a set permissible activities that an application can engage in with their social data.
For example, an application might only be allowed to access their name and profile picture, but the rest of their personal data will remain private. As another example, an application may be granted access to post to their friend's walls. The scope of this API feature is really dependent on the type of application being built to interact with Facebook.
In our application we are going to start by allowing the user to authenticate themselves with their Facebook credentials to get an access token that we can use for the duration of our session. The session in this case is defined as a single use of the application. To start this process we need to register an application with Facebook in order to get an API Key.
If you haven't already joined the Facebook developer application program, you should do so now.
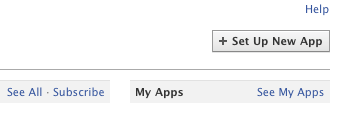
Once you have installed the application to your account, you need to click the button that says "Set Up New App" in the upper right hand corner.
Each application in Facebook needs a unique name, so think of something that is specific to your project.
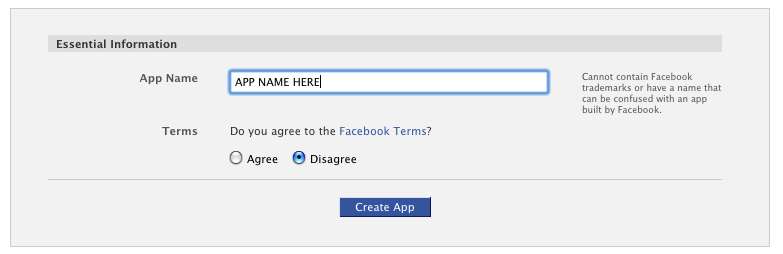
Facebook may ask you to fill out a CAPTCHA form in the next step. If so, just complete it to continue.

Once the app is created, you will see a list of tabs on the left hand side of the screen that contain different application settings. Click on "Mobile and Devices"
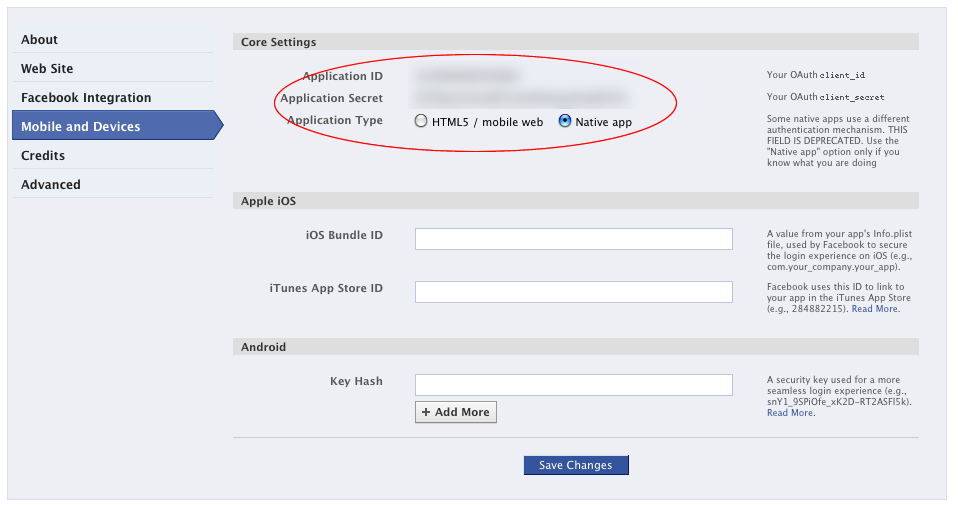
On this screen, make a note of your "Application ID" which is a long number that we will use later on. Also, make sure to click the radio button marked Native app and then click "Save Changes" below.
Now that we have our Facebook application setup, let's start by setting up our Corona app. As basic starting items, we are going to create 2 files called build.settings and config.lua. These contain basic configuration data that informs the compiler about the display orientation of our app. They are as follows:
build.settings:
settings =
{
        orientation =
        {
                default = "portrait",
        },

        iphone =
        {
                plist =
                {
                        UIPrerenderedIcon = true,
                },
        }
}
config.lua
application =
{
        content =
        {
                width = 320,
                height = 480,
                scale = "letterbox",
        },
}
Next, we are going to start coding our application in the main.lua file of the project. The code from here on in will be placed in main.lua.
ui = require("ui")
local facebook = require "facebook
[/lua]

Begin by including the main libraries. The UI library is a useful library developed by a Corona user that can be downloaded from Ansca Mobile's Code Exchange page. I have included it in the source code in the file ui.lua. This library will assist us in cleanly creating buttons and other simple UI elements.  The Facebook library is actually an internal library to Corona that acts as a wrapper to different functionality within the Facebook API. We will obviously include that here as well.

[sourcecode language="lua]
local appId = "APPLICATION ID HERE"
Next we'll create a variable called appId and store in it the "Application ID" we got when we created our Facebook Application. Even though it is a big integer, we will store it here as a string.
Our next step will be to create a nice looking button that the user can click to Sign into our application with their Facebook credentials:
local myButton = ui.newButton {
        defaultSrc = "fb.png" , defaultX = "300" , defaultY = "50",
        onEvent = onClick,
        id = "myButton"
}

myButton.x = display.contentWidth / 2
myButton.y = display.contentHeight / 2
Creating buttons with the UI library is very easy. In the above call you'll notice that we are passing 5 things to the newButton method of the UI library:
- defaultSrc: the image file we will use as our button
- defaultX: the width
- defaultY: the height
- onEvent: we pass a method called "onClick" which is the function that will be called when the button is clicked. We will define this later.
- id: a unique identifier for this button object
After that, we will simply place the button by setting the x and y properties of our myButton object. You'll notice that we are using the Corona specific "display" object to get the contentWidth and contentHeight of the screen. Since the default reference point for objects in Corona is the center, by placing this button at half the width and height of the screen, it will appear right in the dead center.
For the purposes of this tutorial, it makes sense to define the button first before the actions. In real life, however, we need to define our functions above the button creation code so that the compiler is aware of them as it interprets the code procedurally. Our first function will be to define our button clicking action called "onClick".
local function onClick( event )
	if(event.phase == "release") then
		facebook.login( appId, listener )
	end
end
In this simple function, we are calling the Facebook library that we required above and we are passing 2 things to the login method. The first being the Facebook Application ID that we got from Facebook.com when we created the app, and the second being a function that will be fired upon any callback event from the Facebook API. We are also checking for the event phase released to prevent any accidental double clicking of the button.
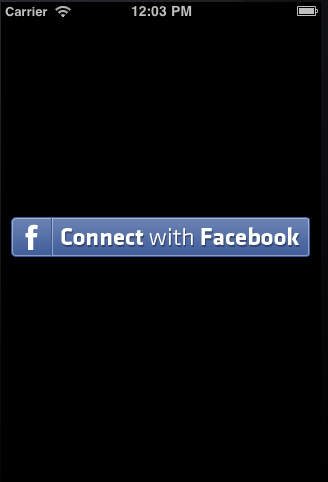
This listener method can be fired multiple times so we will have to detect not only the "type" of event, but the "phase" of the event as well. When the Facebook login method is called, the library will connect to Facebook and display a mobile friendly web view of the Facebook login and authentication screens, as seen below:
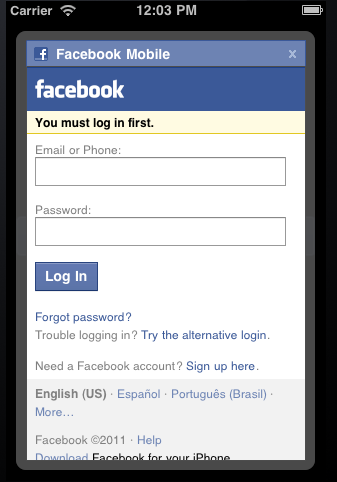
Once a user completes the login process, the Facebook API will start making callbacks to our listener function. Here is our listener function as it stands for the first part of this tutorial:
function listener( event )
    if ( "session" == event.type ) then
        if ( "login" == event.phase ) then
            facebook.request( "me" )
        end
    elseif ( "request" == event.type ) then
        local response = event.response
		print( response )
    end
end
As you can see, when we get our first callback from the Facebook API we are looking for an event type of "session." This means that the user has completed a session action. To ensure that he/she is logging in, and not some other type of session action, we check that the phase is of type "login." If these checks pass, we will now instantiate a separate "request" to the Facebook Graph API for a data object. In this case, we are going to ask for the "me" object which is shorthand for the currently logged in user. See below:
...
facebook.request( "me" )
...
This event will fire and then our same listener will be called back upon completion of the event. This time, we will check for an event type of "request" and handle the "response" object that is passed back to us as JSON. Printing this object out will yield something like this (taken from the FB API Sample):
{
   "id": "220439",
   "name": "Bret Taylor",
   "first_name": "Bret",
   "last_name": "Taylor",
   "link": "http://www.facebook.com/btaylor",
   "username": "btaylor",
   "gender": "male",
   "locale": "en_US"
}
Now the Facebook API is very powerful and can do tons of cool things. In part 2 of our tutorial, we are going to add functionality to request friend data and display some of their profile images in a collage like fashion. Until then, I encourage you to read up on all the possibilities of the Facebook Graph API: FB Graph Documentation.

Comments