With everything about Cora Data data models still fresh in your mind, it's time to start working with Core Data. In this article, we meet NSManagedObject, the class you'll interact with most when working with Core Data. You'll learn how to create, read, update, and delete records.
You'll also get to know a few other Core Data classes, such as NSFetchRequest and NSEntityDescription. Let me start by introducing you to NSManagedObject, your new best friend.
Prerequisites
What I cover in this series on Core Data is applicable to iOS 7+ and OS X 10.10+, but the focus will be on iOS. In this series, I will work with Xcode 7.1 and Swift 2.1. If you prefer Objective-C, then I recommend reading my earlier series on the Core Data framework.
1. Managed Objects
Instances of NSManagedObject represent a record in Core Data's backing store. Remember, it doesn't matter what that backing store looks like. However, to revisit the database analogy, an NSManagedObject instance contains the information of a row in a database table.
The reason Core Data uses NSManagedObject instead of NSObject as its base class for modeling records will make more sense a bit later. Before we start working with NSManagedObject, we need to know a few things about this class.
NSEntityDescription
Each NSManagedObject instance is associated with an instance of NSEntityDescription. The entity description includes information about the managed object, such as the entity of the managed object as well its attributes and relationships.
NSManagedObjectContext
A managed object is also linked to an instance of NSManagedObjectContext. The managed object context to which a managed object belongs, monitors the managed object for changes.
2. Creating a Record
With the above in mind, creating a managed object is pretty straightforward. To make sure a managed object is properly configured, it is recommended to use the designated initializer for creating new NSManagedObject instances. Let's see how this works by creating a new person object.
Open the project from the previous article or clone the repository from GitHub. Because we won't be building a functional application in this article, we'll do most of our work in the application delegate class, AppDelegate. Open AppDelegate.swift and update the implementation of application(_:didFinishLaunchingWithOptions:) as shown below.
func application(application: UIApplication, didFinishLaunchingWithOptions launchOptions: [NSObject: AnyObject]?) -> Bool {
    // Create Managed Object
    let entityDescription = NSEntityDescription.entityForName("Person", inManagedObjectContext: self.managedObjectContext)
    let newPerson = NSManagedObject(entity: entityDescription!, insertIntoManagedObjectContext: self.managedObjectContext)

    return true
}
The first thing we do, is creating an instance of the NSEntityDescription class by invoking entityForName(_:inManagedObjectContext:). We pass the name of the entity we want to create a managed object for, "Person", and an NSManagedObjectContext instance.
Why do we need to pass in a NSManagedObjectContext object? We specify the name that we want to create a managed object for, but we also need to tell Core Data where it can find the data model for that entity. Remember that a managed object context is tied to a persistent store coordinator and a persistent store coordinator keeps a reference to a data model. When we pass in a managed object context, Core Data asks its persistent store coordinator for its data model to find the entity we're looking for.
In the second step, we invoke the designated initializer of the NSManagedObject class, init(entity:insertIntoManagedObjectContext:). We pass in the entity description and an NSManagedObjectContext instance. Wait? Why do we need to pass in another NSManagedObjectContext instance? Remember what I wrote earlier. A managed object is associated with an entity description and it lives in a managed object context, which is why we tell Core Data which managed object context the new managed object should be linked to.
This isn't too complex. Is it? We've now created a new person object. How do we change its attributes or define a relationship? This is done by leveraging key-value coding. To change the first name of the new person object we just created we do the following:
// Configure New Person
newPerson.setValue("Bart", forKey: "first")
newPerson.setValue("Jacobs", forKey: "last")
If you're familiar with key-value coding, then this should look very familiar. Because the NSManagedObject class conforms to the NSKeyValueCoding protocol, we set an attribute by invoking setValue(_:forKey:). It's that simple.
One downside of this approach is that you can easily introduce bugs by misspelling an attribute or relationship name. Also, attribute names are not autocompleted by Xcode like, for example, property names are. This problem is easy to solve, but that's something we'll take a look at a bit later in this series.
Before we continue our exploration of NSManagedObject, let's set the age attribute of newPerson to 44.
newPerson.setValue(44, forKey: "age")
3. Saving a Record
Even though we now have a new person instance, Core Data hasn't saved the person to its backing store yet. At the moment, the managed object we created only lives in the managed object context in which it was inserted. To save the person object to the backing store, we need to save the changes of the managed object context by calling save() on it.
The save() method is a throwing method and returns a boolean to indicate the result of the save operation. Take a look at the following code block for clarification.
do {
    try newPerson.managedObjectContext?.save()
} catch {
    print(error)
}
Build and run the application to see if everything works as expected. Did you also run into a crash? What did the console output tell you? Did it look similar to the output below?
Core Data[8560:265446] *** Terminating app due to uncaught exception 'NSInvalidArgumentException', reason: 'Unacceptable type of value for attribute: property = "first"; desired type = NSDate; given type = Swift._NSContiguousString; value = Bart.'
*** First throw call stack:
(
  0   CoreFoundation                      0x000000010c3f1f45 __exceptionPreprocess + 165
  1   libobjc.A.dylib                     0x000000010e118deb objc_exception_throw + 48
  2   CoreData                            0x000000010bf8d840 _PFManagedObject_coerceValueForKeyWithDescription + 2864
  3   CoreData                            0x000000010bf660d1 _sharedIMPL_setvfk_core + 177
  4   Core Data                           0x000000010be82200 _TFC9Core_Data11AppDelegate11applicationfS0_FTCSo13UIApplication29didFinishLaunchingWithOptionsGSqGVSs10DictionaryCSo8NSObjectPSs9AnyObject____Sb + 624
  5   Core Data                           0x000000010be82683 _TToFC9Core_Data11AppDelegate11applicationfS0_FTCSo13UIApplication29didFinishLaunchingWithOptionsGSqGVSs10DictionaryCSo8NSObjectPSs9AnyObject____Sb + 179
  6   UIKit                               0x000000010cc07034 -[UIApplication _handleDelegateCallbacksWithOptions:isSuspended:restoreState:] + 272
  7   UIKit                               0x000000010cc081da -[UIApplication _callInitializationDelegatesForMainScene:transitionContext:] + 3415
  8   UIKit                               0x000000010cc0ead3 -[UIApplication _runWithMainScene:transitionContext:completion:] + 1750
  9   UIKit                               0x000000010cc0bcb3 -[UIApplication workspaceDidEndTransaction:] + 188
  10  FrontBoardServices                  0x0000000110000784 -[FBSSerialQueue _performNext] + 192
  11  FrontBoardServices                  0x0000000110000af2 -[FBSSerialQueue _performNextFromRunLoopSource] + 45
  12  CoreFoundation                      0x000000010c31e011 __CFRUNLOOP_IS_CALLING_OUT_TO_A_SOURCE0_PERFORM_FUNCTION__ + 17
  13  CoreFoundation                      0x000000010c313f3c __CFRunLoopDoSources0 + 556
  14  CoreFoundation                      0x000000010c3133f3 __CFRunLoopRun + 867
  15  CoreFoundation                      0x000000010c312e08 CFRunLoopRunSpecific + 488
  16  UIKit                               0x000000010cc0b605 -[UIApplication _run] + 402
  17  UIKit                               0x000000010cc1041d UIApplicationMain + 171
  18  Core Data                           0x000000010be8377d main + 109
  19  libdyld.dylib                       0x000000010ec3092d start + 1
  20  ???                                 0x0000000000000001 0x0 + 1
)
libc++abi.dylib: terminating with uncaught exception of type NSException
Xcode tells us that it expected an NSDate instance for the first attribute, but we passed in a String. If you open the Core Data model we created in the previous article, you'll see that the type of the first attribute is indeed Date. Change it to String and run the application one more time.
Another crash? Even though this is a more advanced topic, it's important to understand what's going on.
Data Model Compatibility
The output in Xcode's console should look similar to the output shown below. Note that the error is different from the previous one. Xcode tells us that the model to open the store is incompatible with the one used to create the store. How did this happen?
Core Data[8879:267986] CoreData: error: -addPersistentStoreWithType:SQLite configuration:(null) URL:file:///Users/Bart/Library/Developer/CoreSimulator/Devices/A263775B-4D73-48C8-BD79-825E0BED5128/data/Containers/Data/Application/D7298848-FC36-46EF-8C35-F890F2DB0C89/Documents/SingleViewCoreData.sqlite options:(null) ... returned error Error Domain=NSCocoaErrorDomain Code=134100 "(null)" UserInfo={metadata={
    NSPersistenceFrameworkVersion = 640;
    NSStoreModelVersionHashes =     {
        Address = <268460b1 0507da45 f37f8fb5 b17628a9 a56beb9c 8666f029 4276074d 11160d13>;
        Person = <c9bed257 c4bca383 38cd682a 227f38a8 c1a5bb27 fb02932c 42c62714 47463637>;
    };
    NSStoreModelVersionHashesVersion = 3;
    NSStoreModelVersionIdentifiers =     (
        ""
    );
    NSStoreType = SQLite;
    NSStoreUUID = "818D6962-8576-4F35-A334-A1A470561950";
    "_NSAutoVacuumLevel" = 2;
}, reason=The model used to open the store is incompatible with the one used to create the store} with userInfo dictionary {
    metadata =     {
        NSPersistenceFrameworkVersion = 640;
        NSStoreModelVersionHashes =         {
            Address = <268460b1 0507da45 f37f8fb5 b17628a9 a56beb9c 8666f029 4276074d 11160d13>;
            Person = <c9bed257 c4bca383 38cd682a 227f38a8 c1a5bb27 fb02932c 42c62714 47463637>;
        };
        NSStoreModelVersionHashesVersion = 3;
        NSStoreModelVersionIdentifiers =         (
            ""
        );
        NSStoreType = SQLite;
        NSStoreUUID = "818D6962-8576-4F35-A334-A1A470561950";
        "_NSAutoVacuumLevel" = 2;
    };
    reason = "The model used to open the store is incompatible with the one used to create the store";
}
Core Data[8879:267986] Unresolved error Error Domain=YOUR_ERROR_DOMAIN Code=9999 "Failed to initialize the application's saved data" UserInfo={NSLocalizedDescription=Failed to initialize the application's saved data, NSLocalizedFailureReason=There was an error creating or loading the application's saved data., NSUnderlyingError=0x7fde6d9acc00 {Error Domain=NSCocoaErrorDomain Code=134100 "(null)" UserInfo={metadata={
    NSPersistenceFrameworkVersion = 640;
    NSStoreModelVersionHashes =     {
        Address = <268460b1 0507da45 f37f8fb5 b17628a9 a56beb9c 8666f029 4276074d 11160d13>;
        Person = <c9bed257 c4bca383 38cd682a 227f38a8 c1a5bb27 fb02932c 42c62714 47463637>;
    };
    NSStoreModelVersionHashesVersion = 3;
    NSStoreModelVersionIdentifiers =     (
        ""
    );
    NSStoreType = SQLite;
    NSStoreUUID = "818D6962-8576-4F35-A334-A1A470561950";
    "_NSAutoVacuumLevel" = 2;
}, reason=The model used to open the store is incompatible with the one used to create the store
When we first launched the application a few moments ago, Core Data inspected the data model and, based on that model, created a store for us, a SQLite database in this case. Core Data is clever though. It makes sure that the structure of the backing store and that of the data model are compatible. This is vital to make sure that we get back from the backing store what we expect and what we put there in the first place.
During the first crash, we noticed that our data model contained a mistake and we changed the type of the first attribute from Date to String. In other words, we changed the data model even though Core Data had already created the backing store for us based on the incorrect data model.
After updating the data model, we launched the application again and ran into the second crash. One of the things Core Data does when it creates the Core Data stack is making sure the data model and the backing store—if one exists—are compatible. That was not the case in our example hence the crash.
How do we solve this? The easy solution is to remove the application from the device or from the simulator, and launch the application again. However, this is something you cannot do if you already have an application in the App Store that people are using. In that case, you make use of migrations, which is something we'll discuss in a future article.
Because we don't have millions of users using our application, we can safely remove the application from our test device and run it again. If all went well, the new person is now safely stored in the store, the SQLite database Core Data created for us.
Inspecting the Backing Store
You can verify that the save operation worked by taking a look inside the SQLite database. If you ran the application in the simulator, then navigate to /Users/<USER>/Library/Developer/CoreSimulator/Devices/<DEVICE_ID>/data/Containers/Data/Application/<APPLICATION_ID>/Documents/SingleViewCoreData.sqlite. Because the location of application data changes with every release of Xcode, the above path is only valid for Xcode 7.
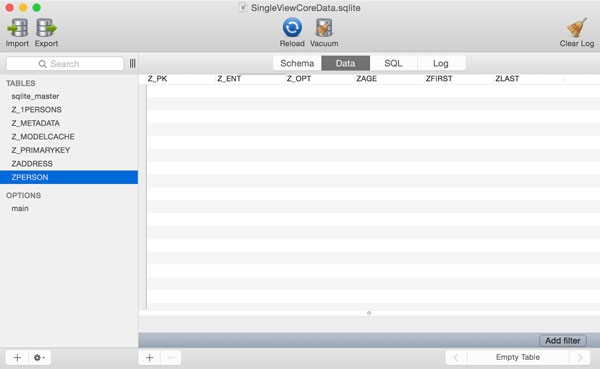
Open the SQLite database and inspect the table named ZPERSON. The table should have one record, the one we inserted a minute ago.

You should keep two things in mind. First, there's no need to understand the database structure. Core Data manages the backing store for us and we don't need to understand its structure to work with Core Data. Second, never access the backing store directly. Core Data is in charge of the backing store and we need to respect that if we want Core Data to do its job well. If we start interacting with the SQLite database—or any other store type—there is no guarantee Core Data will continue to function properly. In short, Core Data is in charge of the store so leave it alone.
4. Fetching Records
Even though we'll take a close look at NSFetchRequest in the next article, we need the NSFetchRequest class to ask Core Data for information from the object graph it manages. Let's see how we can fetch the record we inserted earlier using NSFetchRequest.
// Initialize Fetch Request
let fetchRequest = NSFetchRequest()

// Create Entity Description
let entityDescription = NSEntityDescription.entityForName("Person", inManagedObjectContext: self.managedObjectContext)

// Configure Fetch Request
fetchRequest.entity = entityDescription

do {
    let result = try self.managedObjectContext.executeFetchRequest(fetchRequest)
    print(result)

} catch {
    let fetchError = error as NSError
    print(fetchError)
}
After initializing the fetch request, we create an NSEntityDescription object and assign it to the entity property of the fetch request. As you can see, we use the NSEntityDescription class to tell Core Data what entity we're interested in.
Fetching data is handled by the NSManagedObjectContext class. We invoke executeFetchRequest(_:), passing in the fetch request. Because executeFetchRequest(_:) is a throwing method, we wrap the method call in a do-catch statement.
The method returns an array of results if the fetch request is successful. Note that Core Data always returns an array if the fetch request is successful, even if we expect one result or if Core Data didn't find any matching records.
Run the application and inspect the output in Xcode's console. Below you can see what was returned, an array with one object of type NSManagedObject. The entity of the object is Person.
[<NSManagedObject: 0x7fab71e0cee0> (entity: Person; id: 0xd000000000040000 <x-coredata://E9E9FE9D-D000-4F1D-BF2C-F37CEDF5FC39/Person/p1> ; data: <fault>)]
To access the attributes of the record, we make use of key-value coding like we did earlier. It's important to become familiar with key-value coding if you plan to work with Core Data.
do {
    let result = try self.managedObjectContext.executeFetchRequest(fetchRequest)

    if (result.count > 0) {
        let person = result[0] as! NSManagedObject

        print("1 - \(person)")

        if let first = person.valueForKey("first"), last = person.valueForKey("last") {
            print("\(first) \(last)")
        }

        print("2 - \(person)")
    }

} catch {
    let fetchError = error as NSError
    print(fetchError)
}
You may be wondering why I log the person object before and after logging the person's name. This is actually one of the most important lessons of this article. Take look at the output below.
1 - <NSManagedObject: 0x7f930b924210> (entity: Person; id: 0xd000000000040000 <x-coredata://E9E9FE9D-D000-4F1D-BF2C-F37CEDF5FC39/Person/p1> ; data: <fault>)
Bart Jacobs
2 - <NSManagedObject: 0x7f930b924210> (entity: Person; id: 0xd000000000040000 <x-coredata://E9E9FE9D-D000-4F1D-BF2C-F37CEDF5FC39/Person/p1> ; data: {
    addresses = "<relationship fault: 0x7f930b924150 'addresses'>";
    age = 44;
    first = Bart;
    last = Jacobs;
})
The first time we log the person object to the console, we see data: <fault>. The second time, however, data contains the contents of the object's attributes and relationships. Why is that? This has everything to do with faulting, a key concept of Core Data.
5. Faulting
The concept that underlies faulting isn't unique to Core Data. If you've ever worked with Active Record in Ruby on Rails, then the following will certainly ring a bell. The concept isn't identical, but similar from a developer's perspective.
Core Data tries to keep its memory footprint as low as possible and one of the strategies it uses to accomplish this is faulting. When we fetched the records for the Person entity a moment ago, Core Data executed the fetch request, but it didn't fully initialize the managed objects representing the fetched records.
What we got back is a fault, a placeholder object representing the record. The object is of type NSManagedObject and we can treat it as such. By not fully initializing the record, Core Data keeps its memory footprint low. It's not a significant memory saving in our example, but imagine what would happen if we fetched dozens, hundreds, or even thousands of records.
Faults are generally nothing that you need to worry about. The moment you access an attribute or relationship of a managed object, the fault is fired, which means that Core Data changes the fault into a realized managed object. You can see this in our example and that's also the reason why the second log statement of the person object doesn't print a fault to the console.
Faulting is something that trips up many newcomers and I therefore want to make sure you understand the basics of this concept. We'll learn more about faulting later in this series. If you want to learn more about Core Data faults, then you may want to read this in-depth look at faulting in Core Data.
6. Updating Records
Updating records is just as simple as creating a new record. You fetch the record, change an attribute or relationship, and save the managed object context. Because the managed object, the record, is linked to a managed object context, the latter is aware of any changes, insertions, updates, and deletes. When the managed object context is saved, everything is propagated to the backing store by Core Data.
Take a look at the following code block in which we update the record we fetched by changing the person's age and saving the changes.
let person = result[0] as! NSManagedObject

person.setValue(54, forKey: "age")

do {
    try person.managedObjectContext?.save()
} catch {
    let saveError = error as NSError
    print(saveError)
}
You can verify that the update was successful by taking another look at the SQLite store like we did earlier.

7. Deleting Records
Deleting a record follows the same pattern. We tell the managed object context that a record needs to be deleted from the persistent store by invoking deleteObject(_:) and passing the managed object that needs to be deleted.
In our project, delete the person object we fetched earlier by passing it to the managed object context's deleteObject(_:) method. Note that the delete operation isn't committed to the backing store until we call save() on the managed object context.
let person = result[0] as! NSManagedObject

self.managedObjectContext.deleteObject(person)

do {
    try self.managedObjectContext.save()
} catch {
    let saveError = error as NSError
    print(saveError)
}
You can verify that the delete operation was successful by taking another look at the SQLite store.
Conclusion
In this tutorial, we've covered a lot more than just creating, fetching, updating, and deleting records. We've touched on a few important concepts on which Core Data relies, such as faulting and data model compatibility.
In the next installment of this series, you'll learn how to create and update relationships, and we take an in-depth look at the NSFetchRequest class. We'll also start using NSPredicate and NSSortDescriptor to make our fetch requests flexible, dynamic, and powerful.

Comments