In the first two parts of this series, you learned how to install WooCommerce and configure its settings. Now it's time to add some products to your store!
But before you can add any products, you need to configure your product settings, which is what this tutorial will work . Let's take a look at the options in the WooCommerce Products menu:
What You'll Need
To complete this tutorial you'll need:
- An installation of WordPress, with Administrator access
- The WooCommerce plugin installed and activated
- WooCommerce settings configured.
Configuring Product Settings
Let's take a look at the options in the WooCommerce Products menu:
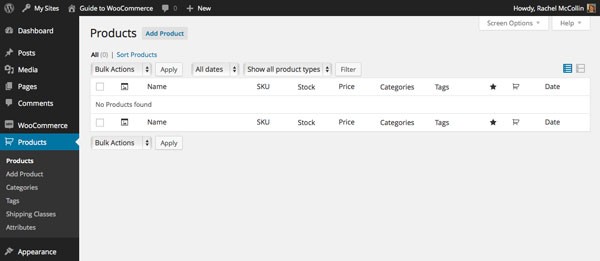
The screens available to you in the Products section of the WooCommerce admin are:
- Products are where your products are listed
- Add Product is where you add new products
- Categories are where you add and configure product categories (which are distinct from the categories elsewhere in your site)
- Tags are where you add and configure product tags (again these are distinct from the tags in the rest of your site)
- Shipping Classes are where you add shipping classes which you can then apply to products
- Attributes are where we add attributes and give each of them a set of terms. These work in a similar way to taxonomies.
I'll start by working through the last four of these and demonstrating what you need to add.
Adding Product Categories
Product categories work in a similar way to categories in your main WordPress site, but they are not the same thing - when a visitor looks at your product category pages in your store, they won't see blog posts, and when they look at your category archives in your blog, they won't see products. Product categories have one feature which normal categories don't: You can give them a featured image.
The Product Categories screen lets you add new categories, define a slug and description for each, and identify a parent category if you are using hierarchical product categories:
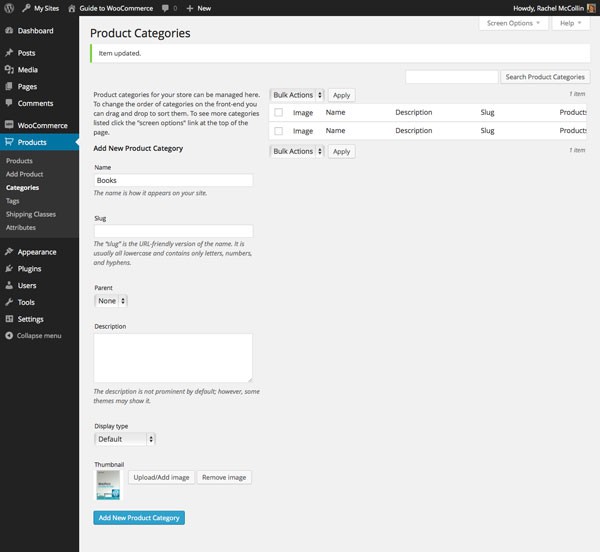
As you can see above, you can also add a thumbnail to each category, which will be used in the main shop page.
My store will be selling the books that I've written, so I'm adding Books as my product category. I add a category, click on Add New Product Category and then it's displayed on the right hand side:

Note that as with normal categories, you can also add new product categories when you're adding products, from the product editing screen.
Adding Product Tags
Product tags work in a similar way to tags in the rest of your site, but again they are separate. You can add as many tags as you want, either in the Product Tags screen or when adding your products:
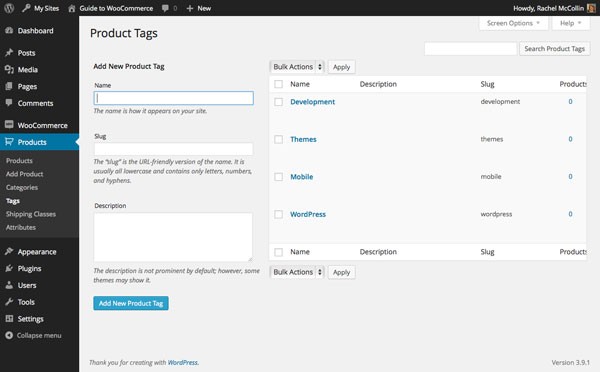
Add the information for your tag, click on Add New Product Tag and it will appear in the list.
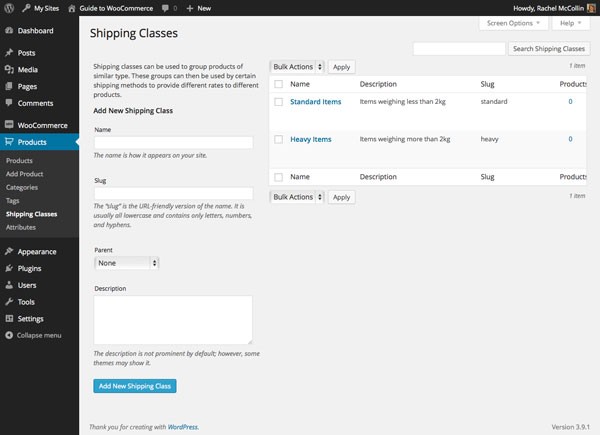
Adding Shipping Classes
You may remember I touched on shipping classes in the previous tutorial but explained that you would need to add them when configuring product settings. In the Shipping Classes screen you add classes which you then assign to individual products. I'm going to add two classes: standard and heavy. If a book is particularly heavy, I can give it the heavy class and then buyers will be charged extra postage.
Start by adding your classes in the Shipping Classes screen:
Having done that, you need to return to the shipping settings to define costs for each class. Go to WooCommerce > Settings > Shipping > Flat Rate:
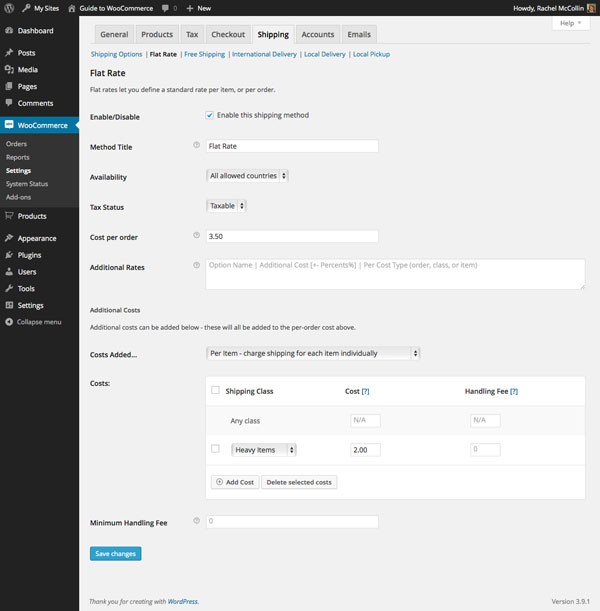
As you can see I've added an extra £2.00 to the Heavy Items class. I've also selected Per Item from the drop down menu, meaning that the extra £2.00 will be added for each heavy item purchased and not for the order as a whole. If you want to just apply the extra charge once, select Per Order instead.
Save your changes by clicking Save Changes and the rate for that class will be saved and automatically added to any orders containing items which you assign the class to.
Adding Attributes
Attributes work like taxonomies and not categories: each attribute you add to WooCommerce is a taxonomy which you then add terms to.
In my site, I'm going to add two attributes: publisher and level. This means that each term in 'Publisher', for example, is equivalent to a category.
First, add the attributes in the Attributes screen:
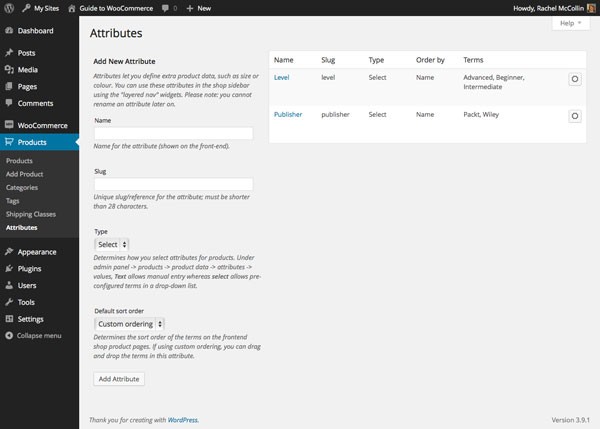
The Type field is important and gives you two options:
- Text allows administrators and other users who are able to add products to your store to type in the text for the attribute's term when adding a product. This gives more flexibility but runs the risk of having lots of similar terms created.
- Select is for when users will only be able to select terms for an attribute from a predefined list in a drop down box. You need to predefine the terms first. This is less flexible but allows for greater control and accuracy and is what I've done here.
To define the terms for each of my attributes, I click the symbol to the right of the attribute's name in the list on the right: if you hover over the symbol, you'll see a link saying Configure terms.
This takes me to the terms screen for my attribute:
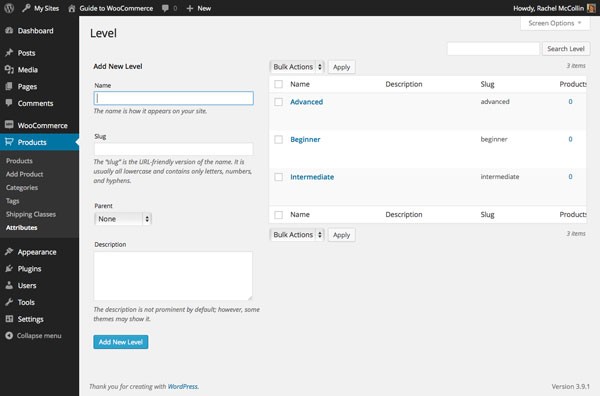
Simply add your terms in the same way as you would add categories: note that like categories, these are hierarchical.
Summary
So that's all of the product settings configured. You have attributes, categories and tags ready to assign to your products, as well as shipping classes. The next step is to add the first product.
In the next two tutorials I'll work through the process of adding physical products to your store and adding virtual or downloadable products to your store.

Comments