In this Nettuts+ mini-series, we'll build a web application from scratch, while diving into a great new PHP framework that's rapidly picking up steam, called Laravel — a simple and elegant PHP 5.3 framework.
First up, we'll learn more about Laravel, and why it's such a great choice for your next PHP-based web application.
If you find yourself needing extra help at any stage, consider contacting one of the PHP developers on Envato Studio.

Introduction: What is Laravel
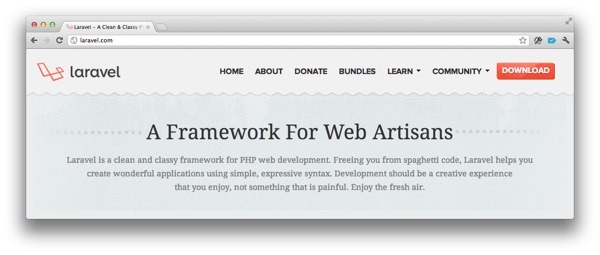
Laravel is a clean and classy framework for PHP web development. Freeing you from spaghetti code, it helps you create wonderful applications, using simple, expressive syntax. Development should be a creative experience that you enjoy, not something that is painful. Enjoy the fresh air!
Laravel is a PHP 5.3 framework that describes itself as a “A Framework For Web Artisans”. According to its author, Taylor Otwell, Laravel strives to bring back the joy to programming by making Laravel simple, elegant, and, most importantly, well-documented.
From my experience with the framework, I would definitely agree that Laravel hits these three points dead-on:
- Simple - Laravel's functionalities are easy to understand and implement. If you enjoy how simple and easy CodeIgniter is, then you'll love Laravel
- Elegant - most of Laravel's functions work seamlessly with very little configuration, relying on industry-standard conventions to lessen code-bloat
- Well-documented - Laravel's documentation is complete and always up-to-date. The framework creator makes it a point to update the documentation before releasing a new version, ensuring that people who are learning the framework always have the latest documentation.
What Makes Laravel Different?
As with any PHP framework, Laravel boasts a multitude of functions that differentiates it from the rest of the pack. Here are some, which I feel are the most important (Based on http://laravel.com/docs).
Bundles
Bundles are to Laravel as PEAR is to PHP.
Bundles are to Laravel as PEAR is to PHP; they are add-on packages that you can download and plug into your Laravel installation. At the moment, there are quite a few bundles in the Laravel Bundle Repository, with more being added all the time. Laravel comes with a command-line tool called Artisan, which makes it incredibly easy to install bundles.

One of my favorite Laravel Bundles, called Bob the Builder adds a useful scaffolding tool to Laravel, and lets you generate different kinds of files and classes suited for Laravel, such as controllers, models, migrations and tests. This functionality is quite similar to what you might expect from Rails generators. To install Bob, simply use the Artisan command-line utility, like so:
php artisan bundle:install bob
Eloquent ORM
The Eloquent ORM is the most advanced PHP ActiveRecord implementation available.
The Eloquent ORM is, by far, one of the best ORM implementations I've used. Similar to how Doctrine ORM functions, it makes any work on database records simple and easy. It abstracts most functions that you'll have on models (i.e. CRUD operations) and provides a flexible way to add more. Additionally, the Eloquent ORM gives you the ability to define model relationships to retrieve records, based on their relationship to another record. For example, you can retrieve all related file records associated with a user by doing:
foreach( $user->Files as $file ) {
    echo $file->name;
}
Migrations
Database migrations are a great utility in any project's arsenal - especially for projects where multiple developers are involved - by making it easy to keep your database schema up-to-date with other team member's changes. In Laravel, migrations are built into the framework; they can be executed, via the Artisan command-line utility. Laravel's own Schema Builder functions are simple enough that anybody should be able to quickly write up a database schema change.
Here's an example, taken from the Laravel documentation:
Schema::table('users', function($table)
{
    $table->create();
    $table->increments('id');
    $table->string('username');
    $table->string('email');
    $table->string('phone')->nullable();
    $table->text('about');
    $table->timestamps();
});
Unit-Testing

As a believer in Test-Driven Development (Read for more info: The Newbie's Guide to Test-Driven Development), I love it when a framework has some sort of unit-testing utility baked in. Laravel's own beautifully integrates with PHPUnit, relying on its status as one of the industry's best PHP unit testing frameworks. To build a test, simply extend the PHPUnit_Framework_TestCase class, like so:
class MyUnitTest extends PHPUnit_Framework_TestCase
{
    public function somethingShouldBeTrue()
    {
        $this->assertTrue(true);
    }
}
To run your Laravel application's tests, let's, again, use the Artisan command-line utility:
php artisan test
That command will run all tests, which are found within the application/tests directory of your Laravel application.
Redis
Redis is a key-value database, similar to CouchDB and MongoDB. It's used by many web applications to store non-relational data, as opposed to conventional databases (like MySQL), which store records that usually relate to one another. Redis support in Laravel is executed so elegantly to the point that I can't even begin to describe how easy it is to get up and running.
Once you have your Redis server set up, simply open the database.php file and add your Redis configuration, like so:
'redis' => array(
    'default' => array('host' => '127.0.0.1', 'port' => 6379),
    'staging' => array('host' => 'redis-db-staging.host', 'port' => 6379),
    'production' => array('host' => 'redis-db-production.host', 'port' => 6379),
)
Right off the bat, we can see that Laravel supports multiple Redis configurations, based on your application's environment. Once you have your Redis configuration in, you can start making calls to Redis, like so:
$redis = Redis::db(); //this gets a Redis object connected to the 'default' configuration
$redis = Redis::db('staging'); //this gets a Redis object connected to the 'staging' configuration
$redis = Redis::db('production'); //this gets a Redis object connected to the 'production' configuration

$redis->set('site', 'Nettuts+');
$site = $redis->get('site');
$sites = $redis->lrange('sites', 0, -1);
Laravel provides a thin client for us, so all Redis commands can be called on the Redis class - Laravel takes care of converting it into the proper Redis query.
Building a Web Application from Scratch with Laravel

Now that we know more about Laravel, it's time to start building our web application with it! Throughout this mini-series, we'll be creating our very own Instagram copy, called Instapics. This little app lets you post, like, and comment on photos, as well as follow other users. With that in mind, let's dive in!
Step 1: Download Laravel and Other Project Files
Before we begin, let's first ensure that we have a system that can support Laravel. According to the documentation, Laravel requires the following:
- PHP 5.3.x - Laravel makes use of a lot of PHP 5.3-specific features, like closures, late-static binding and namespaces.
-
The FileInfo library - this is enabled by default in PHP 5.3, but on Windows systems, you might need to add the extension in your
PHP.iniconfiguration file. - Mcrypt library - this is used by Laravel for encryption and hash generation, and typically comes pre-installed with PHP.
Once we're done setting up the environment, let's download Laravel and all the libraries we'll be using for Instapics. Download the following files and place them within a web-accessible folder:
- Laravel - http://laravel.com (Currently v3.2.1)
- Twitter Bootstrap - http://twitter.github.com/bootstrap/ (Currently v2.0.4)
- jQuery - http://jquery.com (Currently v1.7.2)
Inside Laravel's root folder, you'll find a public folder - this is where all publicly accessible files should be stored. Laravel v3.2.1 has some premade folders inside the public folder for our assets, css, img, and js folders. Place the Twitter Bootstrap and jQuery files in their corresponding folders. At this point, your folder structure should look similar to the following:
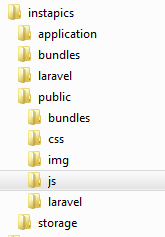
Twitter Bootstrap will have some files inside the css, img, and js folders, and jQuery will be inside the js folder.
Step 2: Setup Laravel's Encryption Key, Pretty URLs and Virtual Host
Before we write any code, we need to set an encyption key for Laravel to use for our application. Laravel uses this to encrypt any data we might need encryption for, such as cookies. Open the application/config/application.php file and find the key setting. Inside, the default value will be YourSecretKeyGoesHere!. Set this to blank; it should look like so:
/*
|--------------------------------------------------------------------------
| Application Key
|--------------------------------------------------------------------------
|
| This key is used by the encryption and cookie classes to generate secure
| encrypted strings and hashes. It is extremely important that this key
| remain secret and should not be shared with anyone. Make it about 32
| characters of random gibberish.
|
*/

'key' => '',
Next, open up a Terminal/Command Prompt, browse to Laravel's root directory, and use Artisan to generate a key:
php artisan key:generate
This should automatically generate a random 32 character encryption key for Laravel. If you did this correctly, it should now look like the following:
/*
|--------------------------------------------------------------------------
| Application Key
|--------------------------------------------------------------------------
|
| This key is used by the encryption and cookie classes to generate secure
| encrypted strings and hashes. It is extremely important that this key
| remain secret and should not be shared with anyone. Make it about 32
| characters of random gibberish.
|
*/

'key' => 'e9Vo0SQDe5HjsvXWcTogqKluVfEqnfEu',
If you want to regenerate your key, just repeat the steps!
Next, we need to change the configuration so that it can accept pretty-urls and work even without pointing our requests to index.php. In the application/config/application.php file, look for the following:
/*
|--------------------------------------------------------------------------
| Application Index
|--------------------------------------------------------------------------
|
| If you are including the "index.php" in your URLs, you can ignore this.
| However, if you are using mod_rewrite to get cleaner URLs, just set
| this option to an empty string and we'll take care of the rest.
|
*/

'index' => 'index.php',
If we want to enable pretty-urls, just make sure that the index setting is blank, like so:
/*
|--------------------------------------------------------------------------
| Application Index
|--------------------------------------------------------------------------
|
| If you are including the "index.php" in your URLs, you can ignore this.
| However, if you are using mod_rewrite to get cleaner URLs, just set
| this option to an empty string and we'll take care of the rest.
|
*/

'index' => '',
If you're using this, you need to ensure that you have mod_rewrite enabled on your web server (if you're on Apache).
Lastly, we'll need to setup a virtual host for Laravel. This isn't really necessary in a development environment, but, for production, it's important that we don't allow access to the Laravel library and application files. As mentioned above, in the Laravel files you should see a folder, called public, which is where all publicly accessible files should go. In addition to that, we need to make sure that our domain, http://instapics.com only points to the public folder and nowhere else.
Configuring a virtual host depends on which web server you're using. Here's an example for the Apache Web Server:
<VirtualHost *:80>
    ServerName instapics.com
	DocumentRoot "D:/Development/htdocs/instapics/public"
	<Directory "D:/Development/htdocs/instapics/public">
	</Directory>
</VirtualHost>
We should also add the domain, instapics.com, to our hosts files (since this domain doesn't really exist). In Windows, edit the file C:\Windows\System32\drivers\etc\hosts; in Linux/OSX, you usually edit /etc/hosts. Add this line to the file:
127.0.0.1 instapics.com
This will inform our machine that the domain instapics.com will resolve to 127.0.0.1, which is the local computer.
Step 3: Setup Routing
In Laravel, all requests to the application are mapped to specific functions or controller by Routes. They are responsible for instructing the application where URLs go. For example, if we wanted http://instapics.com/home to render the home view file, we can create the following route within routes.php, found inside the application folder:
Route::any('home', function()
{
    return View::make('home.index');
})
Alternatively, if we instead need to route http://instapics.com/home to a Controller, say, the home.php controller, we might do something like this:
Route::controller('home');
This would route to the home.php contoller file. Any action method there will be made available as well.
An important thing to note here is that by default, Laravel does NOT route to the controllers like other PHP-frameworks do. This is by design. By doing so, we can actually create simple pages without the need to create a controller for it. For example, if we wanted to create a static Contact Us page that just lists down contact information, we can simply do something like this:
Route::any('contact-us', function()
{
    return View::make('home.contact-us');
})
This will route http://instapics.com/contact-us and render the application/views/home/contact-us.php file. Since we don't really have any dynamic processing on this page, we can just automatically render the view file, saving us the time to create and configure a controller to do so.
There is so much more that we can do with Routes in Laravel that it can stand on its own as its own tutorial. Stuff like:
- HTTP Verbs - Laravel gives us the ability to create routes, based on the HTTP verb that was used in the request. For example, we can have a GET request to the /home route go somewhere different from where the POST request would go.
- Wildcards - this lets us route a URL with a wildcard value attached to it (e.g. /user/(:num) where (:num) is the user's ID)
- Filters - these let us run some functionality before or after a route is executed, depending on the route that was called. For example, we can create an auth filter that will be called before all routes, except the home and about routes. In CodeIgniter, these are similar to Hooks, but much easier to implement, due to the fact that the filters are based on the routes - so we can implement them for all requests or just some.
For the purposes of this web application, though, we only need a couple of routes. First, a route that maps all requests to controllers by default. Open up the routes.php file, and comment out the default route to the Home controller:
/*
Route::get('/', function()
{
	return View::make('home.index');
});
*/
Below this bit of code, add the following line:
Route::controller(Controller::detect());
This line will map all our requests to all the controllers. If the controller or actions don't exist, the system will return a 404 response.
Now, we create a route for http://instapics.com/about. Technically, we can just create a about controller, but that would be a waste, since we can just put that within the Home controller. Add the following line after the route we just created:
Route::controller(Controller::detect());
Route::get('about', 'home@about');
This route will direct all requests to http://instapics.com/about to the Home controller, and the About action.
Step 3. Create your First Laravel Controller

Controllers anyone?
Controllers in Laravel are found inside the application/controllers folder. By default, the Home controller will accept requests sent to the root of the Laravel application. For example, going to http://instapics.com/ will go to the Home->action_index() method.
To create a controller, simply create a file inside the application/controllers folder. By convention, we'll want to name the file something descriptive that will also be the name of the controller class. For now, let's create a new controller for our login mechanism, called "Login":
class Login_Controller extends Base_Controller
{
    public function action_index()
    {
        //do our login mechanisms here
        echo 'test'; //echo test so we can test this controller out
    }
}
Next, open your browser and visit http://instapics.com/login. From here, you should see the "test" debug message that we placed. Since, in the routes.php file, we set it to enable routes to all the controller, this should work without any additional configuration. Once you've confirmed that it's working, just remove the debug message. We'll return to this controller in a future article.
For now, congratulate yourself; you've just created your first Laravel controller!
More Controller Fun
Filters
There's a lot more that we can do with controllers, rather than them just being gateways to the view files. For example, remember the Filters feature that I mentioned earlier in the routes section? Aside from being attached to specific Routes, we can also attach them to specific controllers! Simply create a __constructor method for the controller, and setup the filter there. For example, if we need to ensure that a user is authenticated for all the methods in a controller, we can make use of our example auth filter:
public function __construct() {
    $this->filter('before', 'auth');
}
This will call the auth filter on all actions in this controller. If we wanted to target some specific actions, we can refer to the only method, like so:
public function __construct() {
    $this->filter('before', 'filter_name')->only(array('action', 'actionagain'));
}
We can alternatively use the except method to implement the filter on all actions, except a few:
public function __construct() {
    $this->filter('before', 'filter_name')->except(array('action', 'actionagain'));
}
Notice how expressive this code is?
We can even target a specific HTTP verb:
public function __construct() {
    $this->filter('before', 'filter_name')->except(array('action', 'actionagain'))->on('post');
}
The Base_Controller
Most, if not all, controllers extend the Base_Controller. This gives us a way to define methods that will be the same for all our controllers. For example, if we need to create a logging method to log any controller request:
class Base_Controller extends Controller {

    /**
     * Catch-all method for requests that can't be matched.
     *
     * @param  string    $method
     * @param  array     $parameters
     * @return Response
     */
    public function __call($method, $parameters)
    {
        return Response::error('404');
    }

    public function logRequest()
    {
        $route = Request::route();
        Log::log('request', "Controller: {$route->controller} / Action: {$route->controller_action} called at ". date('Y-m-d H:i:s'));
    }
}
Any time we want to log a request, we can just call $this->logRequest(); in any controller.
RESTful Controllers
Laravel's RESTful controllers makes it easy to add RESTful responses to any Laravel controller. This makes it easy to create, for instance, a RESTful API. To do so, simply add the $restful flag to your controller:
class Api_Controller extends Base_Controller
{

    public $restful = true;

    public function post_authenticate()
    {
        //all POST requests to /api/authenticate will go here
        //any other requests that are NOT POST will NOT go here.
    }

    public function get_user()
    {
        $user_id = Input::get('id');
        //get the USER based on $user_id and return it for whoever requested it
    }

    public function post_user()
    {
        $email = Input::get('email');
        $password = Input::get('password');

        //Create a new User
        $user = User::create($email, $password);
    }
}
We'll dive into all of these cool features in future tutorials, but, for now, let's update the Home controller. We'll need to add an an action_about method, since we created the http://instapics.com/about route to direct to this method. Open application/controllers/home.php, and update it, like so:
We append
action_to all action methods in our controllers (e.g. action_about). This signals to Laravel that these actions are viewable on the website. Any other methods, which don't have theaction_prefix, will not be publicly accessible.
class Home_Controller extends Base_Controller {

    public function action_index()
    {
        return View::make('home.index');
    }

    public function action_about()
    {
        return View::make('home.about');
    }
}
Step 4. Create your first Laravel View with the Blade Templating Engine
Laravel supports two ways to generate views for an application:
- PHP-based Views - these are views that make use of PHP as a templating language.
- Blade-based Views - these are views that make use of Laravel's built-in templating engine, called Blade.
The Blade Templating Engine is a templating framework that, similar to how the Smarty Templating Engine works, makes use of customized tags and functions to allow for better separation of presentation logic and application code.
For the sake of simplicity, we'll be utilizing the Blade Templating Engine, as opposed to the PHP-based views.
All view files that will make use of the Blade Templating Engine needs to have a
.blade.phpextension. This tells Laravel to use the engine on the view file.
First, let's create a general purpose layout that we'll use for all our views. Create the application/views/layouts folder, and inside, create a file, named main.blade.php:
<!DOCTYPE html>
<html lang="en">
<head>
<meta charset="utf-8">
<title>Instapics</title>
{{ Asset::styles() }}
{{ Asset::scripts() }}
</head>
<body>
<div class="navbar navbar-fixed-top">
<div class="navbar-inner">
<div class="container">
<a class="brand" href="home">Instapics</a>
<div class="nav-collapse">
<ul class="nav">
@section('navigation')
<li class="active"><a href="home">Home</a></li>
@yield_section
</ul>
</div><!--/.nav-collapse -->
</div>
</div>
</div>
<div class="container">
@yield('content')
<hr>
<footer>
<p>© Instapics 2012</p>
</footer>
</div> <!-- /container -->
</body>
</html>
Now that we have our main layout, let's update the index file. Open application/views/home/index.blade.php and update it:
@layout('layouts/main')
@section('navigation')
@parent
<li><a href="/about">About</a></li>
@endsection
@section('content')
<div class="hero-unit">
<div class="row">
<div class="span6">
<h1>Welcome to Instapics!</h1>
<p>Instapics is a fun way to share photos with family and friends.</p>
<p>Wow them with your photo-filtering abilities!</p>
<p>Let them see what a great photographer you are!</p>
<p><a href="about" class="btn btn-primary btn-large">Learn more »</a></p>
</div>
<div class="span4">
<img src="http://nettuts.s3.amazonaws.com/2064_laravel/img/phones.png" alt="Instapics!" />
</div>
</div>
</div>
<!-- Example row of columns -->
<div class="row">
<div class="span3">
</div>
<div class="span4">
<a href="#"><img src="http://nettuts.s3.amazonaws.com/2064_laravel/img/badge_ios.png" alt="Get it on iOS" /></a>
</div>
<div class="span4">
<a href="#"><img src="http://nettuts.s3.amazonaws.com/2064_laravel/img/badge_android.png" alt="Get it on Android" /></a>
</div>
</div>
@endsection
Let's review our view files. In the main layout template, we make use of three functions:
- The Assets manager (
Assets::styles(), Assets::scripts()) - The @section Blade function (with @yield_section)
- And the @yield Blade function
Managing Assets
Laravel provides a robust way to load CSS and JS files, via its Assets management functionality. The syntax for adding an asset is Assets::add('[asset name]', '[relative url from the public folder'], '[name of dependency, array of dependencies if multiple]'). The Assets manager also provides support for asset dependencies, which are used to tell Laravel to load the dependency first, before loading the asset.
We'll need to register our assets so that the view files will be able to use them. Open application/controllers/base.php, and add the following code:
public function __construct()
{
    //Assets
    Asset::add('jquery', 'js/jquery-1.7.2.min.js');
    Asset::add('bootstrap-js', 'js/bootstrap.min.js');
    Asset::add('bootstrap-css', 'css/bootstrap.min.css');
    Asset::add('bootstrap-css-responsive', 'css/bootstrap-responsive.min.css', 'bootstrap-css');
    Asset::add('style', 'css/style.css');
    parent::__construct();
}
By doing this, we make it easier to add, remove or update any assets that we need. We put it inside the Base controller's __construct() method to add the assets to all our controllers. To take advantage of this within a view, we simply call Assets::styles() for CSS files, and Assets::scripts() for the JS files in any view file. Laravel automatically determines what the asset type is, based on the file extension, and loads it with the appropriate asset group.
@section (and @yield_section)
Sections let us inject content into the main layout from within a view. To define which part of our main layout is a section, we surround it with @section and @yield_section Blade tags.
In our main view file, we've marked the navigation items as a @section (called navigation). Looking now at the index view file, we append the <>About> navigation link to the navigation bar with the following code:
@section('navigation')
@parent
<li><a href="about">About</a></li>
@endsection
By calling the @parent function, we instruct the view file to inherit the contents of the original section from the main layout. If we were to remove the @parent function, like so:
@section('navigation')
<li><a href="/about">About</a></li>
@endsection
Now, the index view file's navigation section will replace the main layout's navigation entirely. This makes the process of changing the main layout's HTML even more flexible.
@yield
The @yield function is similar to the @section/@yield_section function, but, instead, lets the nested view fill the content entirely. In our index file, we have a @section('content') function that replaces @yield('content').
Now, let's try passing in some variables to our views. First, create a new view file in the application/views/home folder for the About page. Let's call it about.blade.php:
@layout('layouts/main')

@section('navigation')
@parent
<li><a href="about">About</a></li>
@endsection

@section('content')
<div class="row">
    <div class="span3">
        <div class="well sidebar-nav">
            <ul class="nav nav-list">
                <li class="nav-header">Navigation</li>
                @foreach ($sidenav as $sn)
                <li @if ($sn['active']) class="active" @endif>
                    <a href="{{ $sn['url'] }}">{{ $sn['name'] }}</a>
                </li>
                @endforeach
            </ul>
        </div>
    </div>
    <div class="span9">
        <h1>About Instapics</h1>
        <p>Lorem ipsum dolor sit amet, consectetur adipiscing elit. Praesent ullamcorper lectus et sapien volutpat iaculis. Phasellus arcu justo, commodo ac ornare at, pellentesque vitae nulla. Sed id justo mauris, et semper est. Mauris id dui vitae felis hendrerit sollicitudin ut vel nisi. Phasellus a dolor quis tellus sagittis commodo. Suspendisse potenti. Donec sagittis rhoncus sem in venenatis. Nam sit amet leo metus. Mauris eget nisi eu felis interdum venenatis nec sed ipsum. Integer lobortis, risus non pellentesque pharetra, massa augue vulputate sem, quis sagittis arcu tortor sit amet nisi. Ut quis nibh sem. Morbi malesuada, lorem ac tincidunt venenatis, quam erat rhoncus sapien, et tempus quam mauris sit amet metus. Pellentesque habitant morbi tristique senectus et netus et malesuada fames ac turpis egestas. Nam varius dictum lectus non placerat.</p>
        <p>Cras tincidunt, libero eu dignissim egestas, erat purus mattis urna, vitae pellentesque nisi turpis at velit. Vivamus vitae euismod nisi. Duis luctus ante nec neque fermentum vulputate. Phasellus in dolor quis mauris rhoncus consectetur ut quis lacus. Nulla facilisi. Nullam magna velit, accumsan vehicula consectetur a, vestibulum eget neque. Sed feugiat dui quis ligula convallis sed placerat dui dignissim. Aliquam interdum tempus leo, a hendrerit orci ultrices ut. Aliquam sem dolor, auctor eu mattis id, varius a massa. Fusce facilisis, massa id ultricies lacinia, urna nunc sollicitudin massa, sit amet posuere metus justo vitae metus. Vivamus in dolor quam, ut elementum libero. Proin vehicula diam eu diam consectetur ut imperdiet ipsum pulvinar. Cras eu est quis urna semper adipiscing ut et leo. Curabitur tristique consectetur aliquet. Phasellus quam neque, dapibus non eleifend quis, feugiat vel elit.</p>
    </div>
</div>
@endsection
Back in the Home controller, update the action_about() method:
public function action_about()
{
    return View::make('home.about', array(
        'sidenav' => array(
            array(
                'url' => 'home',
                'name' => 'Home',
                'active' => false
            ),
            array(
                'url' => 'about',
                'name' => 'About',
                'active' => true
            )
        )
    ));
}
Reviewing our code, we see that, in the Home controller, we pass in an array of parameters. Right now, these are hardcoded values, but they can come from anywhere - for example, from a model or database. These are passed to the view file, where we make use of some Blade tags to render the parameters.
@foreach ($sidenav as $sn)
...
@endforeach
This lets us loop through the array in our parameters.
<li @if ($sn['active']) class="active" @endif>
This is an if-statement. If we wanted to use an else, it would look like this:
@if ($sn['active'])
    class="active"
@else
    class="notactive"
@endif
<a href="{{ $sn['url'] }}">{{ $sn['name'] }}</a>
This is the most basic Blade tag - it just echoes the variable we set.
Take note that, within most of the Blade tags, we use good 'ol PHP. This makes it easier to write the Blade tags, since we'll be able to use native PHP functions, like isset() or count(). There are also other Blade tags that I wasn't able to use here; you can learn more about them in the Blade documentation. Trust me, it's pretty easy!
Conclusion
After reading this tutorial, we've learned:
- What Laravel is
- What makes Laravel different from other PHP frameworks
- Where to download Laravel
- How to setup Laravel
- How Laravel's Routing system works
- Some other features in Laravel's Routing system
- How to create your first Laravel Controller
- Some additional features with Laravel's Controllers
- How to create your first Laravel View
- How to use Laravel's Blade Templating Engine
Laravel is truly an amazing framework. It's fast, simple, elegant and so easy to use. It absolutely merits being considered as the framework to be used for your next project.
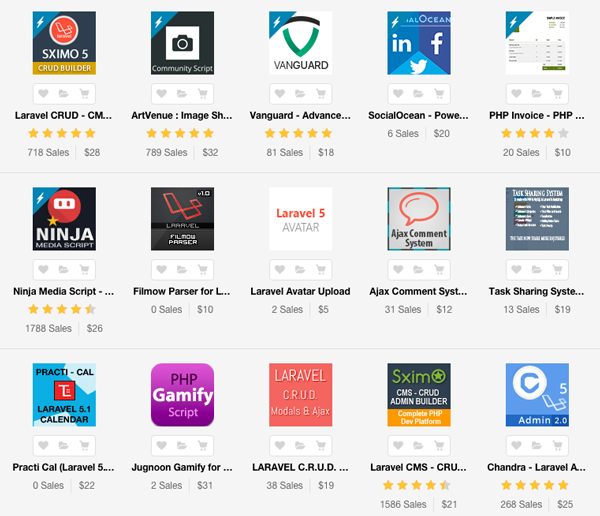
The Laravel category on Envato Market is growing fast, too. There's a wide selection of useful scripts to help you with your projects, whether you want to build an image-sharing community, add avatar functionality, or much more.
Next in our Building Web Application from Scratch with Laravel series, we'll learn about one of Laravel's best features: the Eloquent ORM and Fluent Query Builder.
What do you think about Laravel? Are you considering using it for your next project? Let me know in the comments! And, if you're a Tuts+ member, stay tuned for our upcoming Laravel Essentials course!

Comments