In the first three parts of this series, you've started creating your WordPress widget. In this part, I'll show you how to create the form for your widget and ensure that WordPress can update any settings on it.
This will mean writing two functions for your Tutsplus_List_Pages_Widget class: the form function and the update function.
To see all of the parts in this series, click the links:
- Introduction to widgets and the Widgets API
- Coding and registering your widget
- Constructing your widget
- Building the form for your widget
- Displaying your widget in the correct widget area
What You'll Need
To follow this tutorial, you'll need:
- A development installation of WordPress
- A code editor
- The code from the previous tutorial on constructing your widget.
Creating the Form
To create the form for your widget, you'll need to populate the form function that you've already added to your Tutsplus_List_Pages_Widget class.
Open your plugin file, find that function and edit it so it reads:
function form( $instance ) {

    $defaults = array(
		'depth' => '-1'
	);
	$depth = $instance[ 'depth' ];

	// markup for form ?>
	<p>
		<label for="<?php echo $this->get_field_id( 'depth' ); ?>">Depth of list:</label>
		<input class="widefat" type="text" id="<?php echo $this->get_field_id( 'depth' ); ?>" name="<?php echo $this->get_field_name( 'depth' ); ?>" value="<?php echo esc_attr( $depth ); ?>">
	</p>

<?php
}
This adds the markup for the field, including one input field ($depth), which will be used to set how deep into the page hierarchy the list should go. The default is -1 which will display all levels.
Now save your plugin file. You'll find that the widget now has a form:
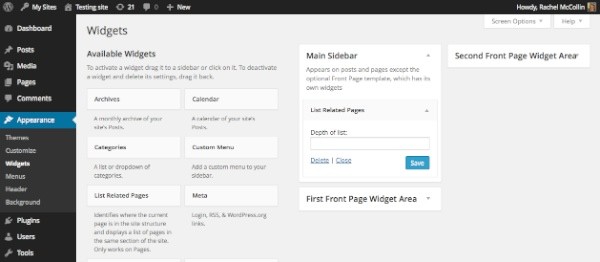
However if you type anything into it it won't save. So you need to allow the form to save what's input.
Allowing the Form to Update
To do this you need to work with the update function you created earlier on. Edit it so it reads:
function update( $new_instance, $old_instance ) {

    $instance = $old_instance;
	$instance[ 'depth' ] = strip_tags( $new_instance[ 'depth' ] );
	return $instance;

}
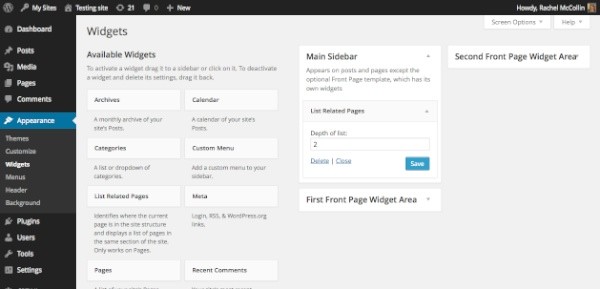
This replaces the old value of the depth field ($old_instance) with the new value ($new_instance), and sanitises it using strip_tags. Now when you type into the field, it will save:
Summary
You now have a working form for your widget, which means everything is in place expect actually displaying your widget's output on the site. That's covered in the next tutorial.

Comments