The idea behind the Wax framework is simple: anything Objective-C can do, Lua can do too! There are a lot of good reasons to consider creating native iPhone applications with a simple and efficient scripting language like Lua, and this tutorial series will dive into the benefits offered by Wax while demonstrating the practical steps necessary to integrate Lua with Xcode 4 and the iOS SDK.
What is Wax?
Wax for iPhone is a framework written in a way that bridges the Lua scripting language and the native Objective-C APIs. This means that you can use any and all Objective-C classes and frameworks from within Lua.
In technical terms, Wax is a combination of Objective-C classes and native, C code. The Lua language is embedded with C, and then the Objective-C classes are merged into the mix.
Why use Wax?
Wax is free and open-source. Unlike some other Lua based solutions for mobile development, Wax is an open-source framework that only requires you invest a little bit of time to get working, not money. Don't like the way Wax works or find a bug in the implementation? The source-code is freely available, and you can always modify it to fit your needs.
You can leverage native APIs. This means tutorials written to teach Objective-C can be easily adapted and written with Lua for Wax. This also means your app will always look and feel native, yet you still have the time-saving benefit of writing your code in Lua, an efficient scripting language.
You get to use Xcode. This means that both simulator and device deployment is a snap and shouldn’t break easily with a future iOS release.
You get to leverage all existing Objective-C libraries. If you have an Objective-C class that you have written before, you can use it in Lua--with no adaptations--you just toss it into Xcode. Same thing goes for libraries like Three20. Just add them per the normal instructions and you have access to them in your Lua code.
You get to leverage Wax Lua modules. Wax has a few built in Lua modules that make asynchronous HTTP requests and JSON creation/parsing incredibly easy and fast (because the modules are written in C).
You don’t have to manage memory. No more memory allocation and the like. Wax handles all of that for you.
Lua types are automatically converted to Objective-C equivalents and vice-versa. This means that when you call a method that needs an NSString and an NSInteger, but you pass a Lua string and a Lua integer, Wax will take care of it for you. This conversion is even powerful enough to handle complex Objective-C features like selectors.
You get to leverage ALL of the above. No need to pick and choose. You get it all!
Okay, this is awesome! How do I install Wax?
Well, first you need Xcode and the iPhone SDK. If you don’t have those yet, go get them!
Creating the project in Xcode
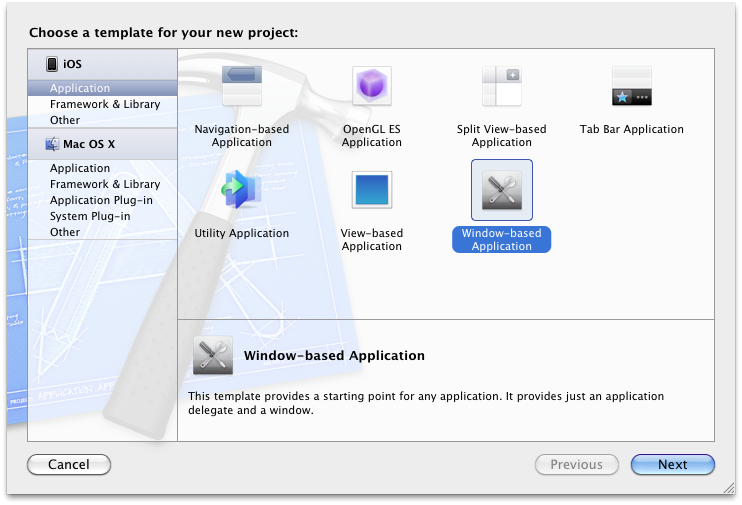
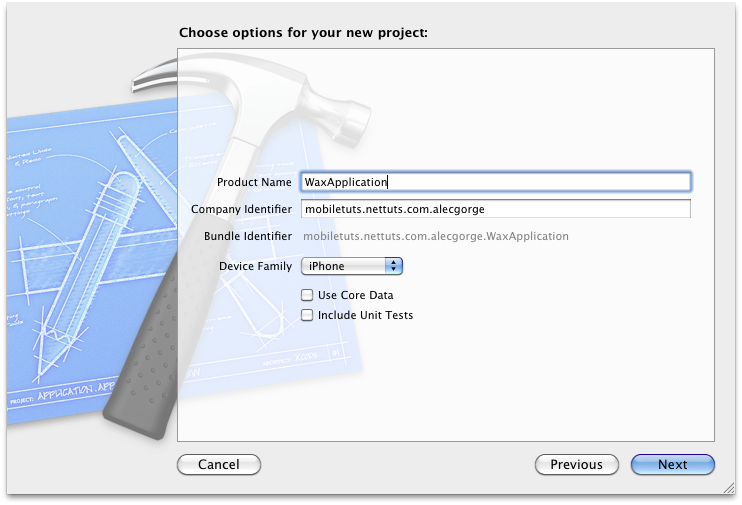
Let's start by creating a new "Window-based project" called "WaxApplication". Don't forget to set the device to iPhone:
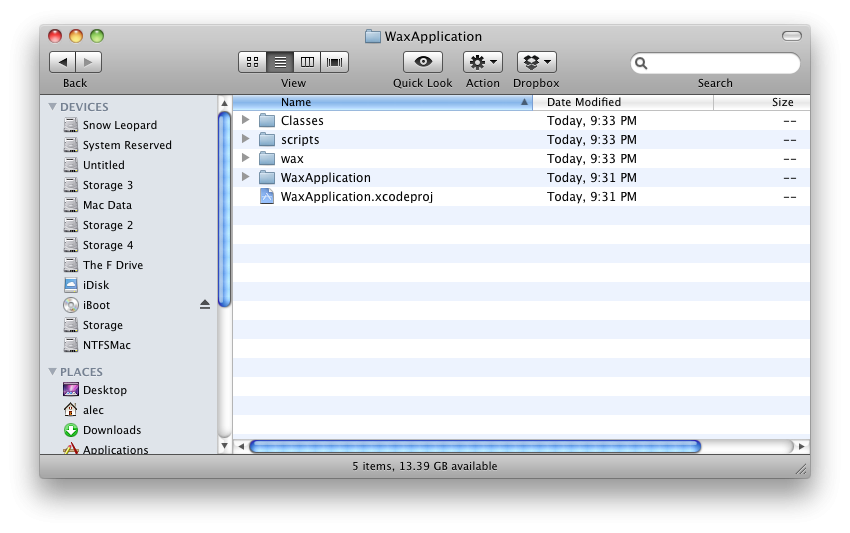
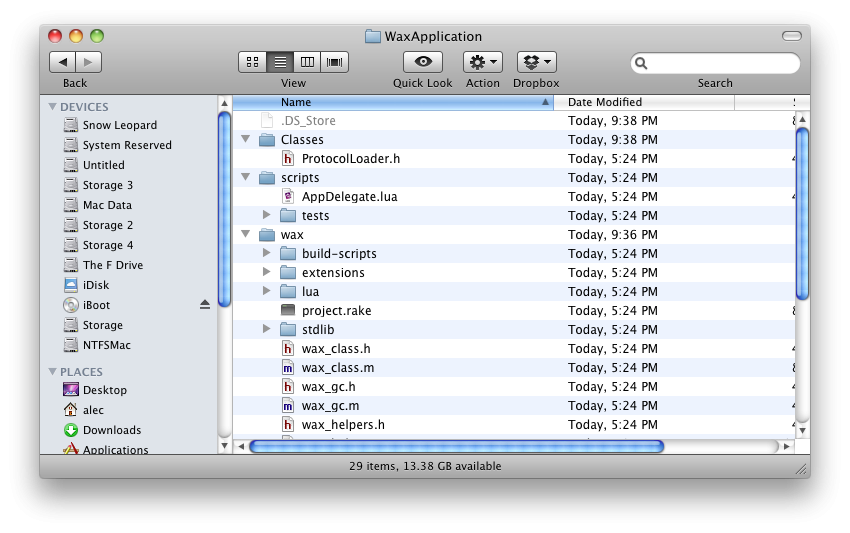
Navigate to the folder where you saved this project in Finder. Create three new folders: wax, scripts and Classes. Your folder should look like this:
Setting up Wax (part 1, file manipulations)
First, download a zip of the source code. Wax is hosted on GitHub so that makes downloading the source code very easy. Download the zip from here.
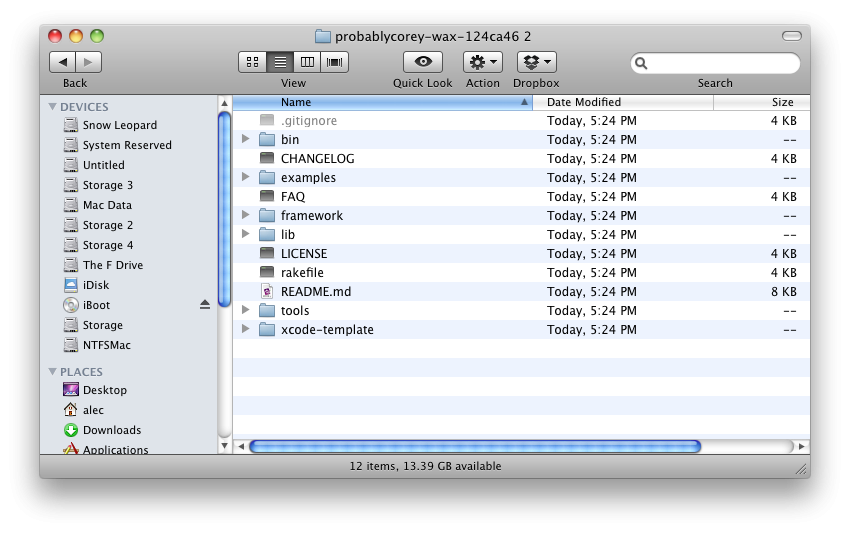
Now, unzip the newly downloaded file. Navigate to the newly extracted folder. It will be called something like "probablycorey-wax-124ca46".
Your screen should now look like this:
Now perform the following actions:
- Copy the lib and the bin folder and paste them in the wax folder located in your WaxApplication project folder.
- Copy xcode-template/Classes/ProtocolLoader.h to the WaxApplication project folder.
- Copy the xcode-template/scripts/ folder and place it in your WaxApplication project folder.
- Open the wax/lib/extensions/ folder in your WaxApplication project folder. Delete the SQLite & xml folder pictured below:
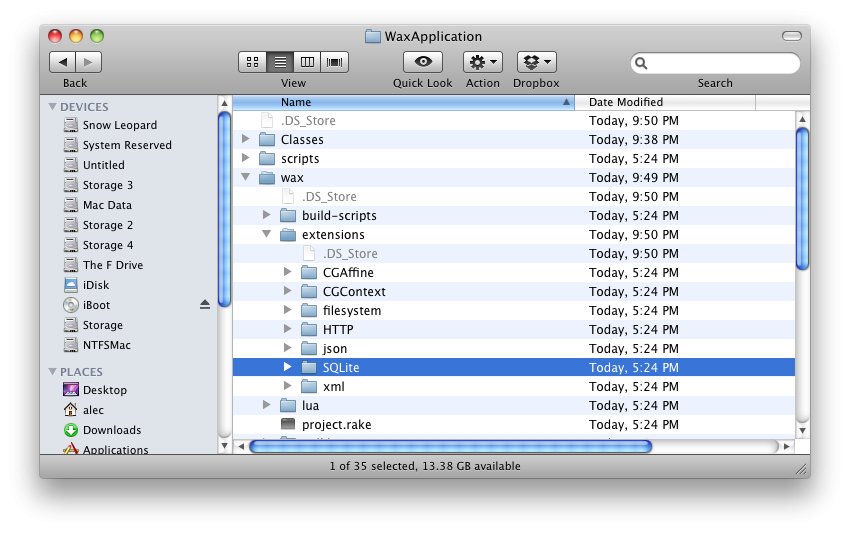
Your screen should look like this:
Setting up Wax (part 2, configuring the project)
Now select the Classes, scripts and wax folders in Finder and drag them into the Xcode project. Drop them right underneath the bar that says "Wax Application" and "1 target, iOS SDK X.X". Uncheck the checkbox that says "Copy items into destination group's folder (if needed)". Click finish.
Now click the bar that says "Wax Application" and "1 target, iOS SDK 4.3". Now do the following steps:
- In the righthand pane look for the "Targets" header and click "WaxApplication". Click the "Build Phases" tab. Click "Copy Bundle Resources" and remove all the lua files.
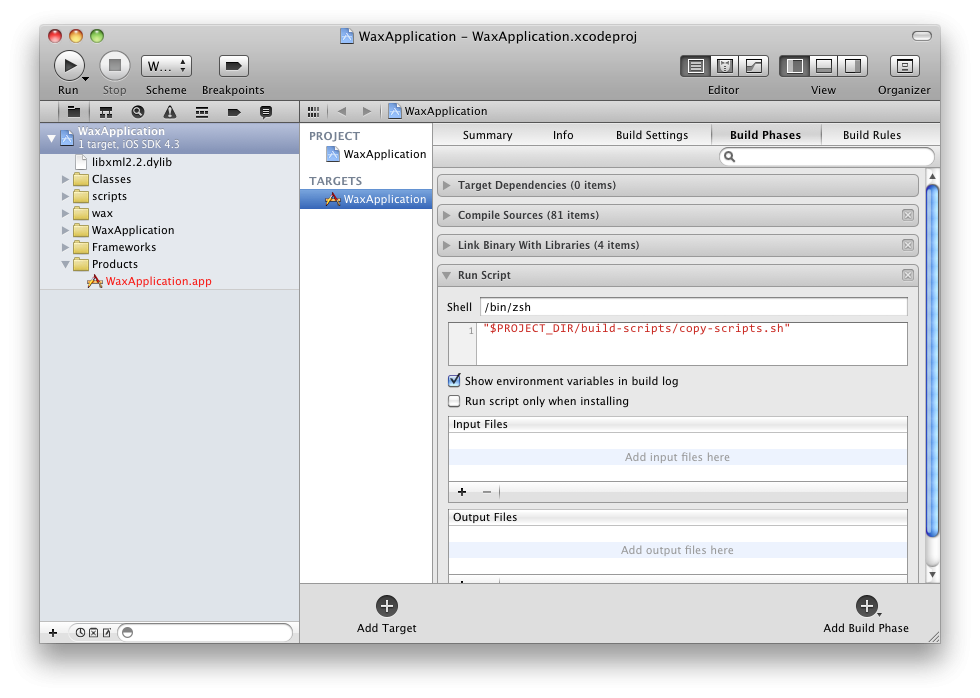
- In the lower right corner click "Add Build Phase" then "Add Run Script"
- Set Shell to /bin/zsh
- Set the text area below Shell to ""$PROJECT_DIR/wax/lib/build-scripts/copy-scripts.sh""
Your screen should now look like this:
Modifying main.m
In the left hand pane, open the folder called "WaxApplication". Next, open the "Supporting Files" folder. Next, open main.m and replace the contents of the file with this:
// This where the magic happens!
// Wax doesn't use nibs to load the main view, everything is done within the
// AppDelegate.lua file
#import <UIKit/UIKit.h>

#import "wax.h"
#import "wax_http.h"
#import "wax_json.h"
#import "wax_filesystem.h"

int main(int argc, char *argv[]) {
    NSAutoreleasePool * pool = [[NSAutoreleasePool alloc] init];

    wax_start("AppDelegate.lua", luaopen_wax_http, luaopen_wax_json, luaopen_wax_filesystem, nil);

    int retVal = UIApplicationMain(argc, argv, nil, @"AppDelegate");
    [pool release];
    return retVal;
}
Don't forget to save the file!
Deleting unnecessary files
Delete the MainWindow.xib, WaxApplicationAppDelegate.h and WaxApplicationAppDelegate.m files. Open "WaxApplication/Supporting Files/WaxPallication-Info.plist" and then delete the line where the key is "Main nib file base name".
Testing your Wax install
Press ⌘↵ (Command + Enter) or press “Run” in the upper left hand corner to run the app in the simulator. If everything worked, you will see a simple app that says "Hello Lua!".
If you do not see this message, review the previous steps and see if you missed a step.
Looking at the Lua
Expand the Scripts collection and open AppDelegate.lua. You now see the Lua code that powers this app.
The first thing you will probably notice is that there is no syntax highlighting. Unfortunately, I have not found a stable solution for Lua syntax highlighting in Xcode (but if you find one, please post one in the comments!).
The second thing you probably will notice is that there are no square brackets, yet classes like UIScreen and UIWindow are being used. This is because you are making an AppDelegate class in Lua, and as far as Apple and Apple’s code can tell, you are using Objective-C and making Objective-C classes!
Method names
You may also notice the odd method name "colorWithRed_green_blue_alpha". If you are familiar with Objective-C, you will know that the name of methods can have colons. You cannot have colons in function names in Lua. To compensate for this difference, at any place a method name is broken up in Objective-C, in Lua has a underscore. For example:
- colorWithRed:green:blue:alpha in Objective-C is colorWithRed_green_blue_alpha in Lua
- selectRowAtIndexPath:animated:scrollPosition: in Objective-C is selectRowAtIndexPath_animated_scrollPosition in Lua.
The object-oriented model
Another problem with Lua is that it does not have an inheritance system like Objective-C. There are no classes at all in Lua. To work around this problem, Wax exposes a function that goes at the top of every Wax Lua file: waxClass. In the default AppDelegate.lua, the line looks like this:
waxClass{"AppDelegate", protocols = {"UIApplicationDelegate"}}
To create an Objective-C class from Lua, the function waxClass{"CLASS NAME", "PARENT_CLASS"} is used. All subsequent functions (within the same file) you add to that Lua file will be automatically added to your new class as instance methods.
As the line from AppDelegate.lua shows, you can also define what protocols your "class" defines.
Although waxClass solves the problem of defining classes for use by Objective-C, there is still the problem that since Lua doesn't have classes, it doesn't have a dynamic "self" variable like Objective-C. To get around this, Wax automatically makes the first argument to every method the current instance of the class. You can see when you look at "applicationDidFinishLaunching" in AppDelegate.lua, the first argument is "self", event though the Objective-C version of this method only has 1 argument. However, it would be very annoying if you had to pass the current instance of the class as the first argument to every method, so some syntactical sugar was added. Instead of making a "method" call in Lua using the "." operator, the "colon" operator is used:
local view = UIView.initWithFrame(CGRect(0, 0, 100, 100))

-- the following are exactly the same
view:addSubview(someView)
view.addSubview(view, someView)
Another important thing to note is that Wax does not support Objective-C properties. Wax forces Lua and Objective-C to only communicate with methods.
-- This WILL NOT work.
someView.frame
-- You want to use the getter/setter methods instead
someView:frame()
someView:setFrame(someFrame)
Lua-only variables
You can dynamically create member variables for any Objective-C object using the dot . operator. Unlike the colon : operator (used to call methods on an Objective-C class/instance) the dot . operator dynamically creates member variables on the Lua side of the object (The Objective-C side of the object has no knowledge of these variables). The member variables are available throughout the lifetime of the object.
Outputting to the console
AppDelegate.lua also shows how you can write debugging text to the console. You use the function "puts".
Memory management
If you recall, I promised that you would never have to alloc, retain and release with Lua. You never need to call alloc before you call any of the initializers. In fact, if you do, your program will probably memory leak.
Awesome! What’s next?
Now that you have a strong grasp on the basics of Wax-specific Lua, you are ready to write an iPhone app!
In part 2 of this tutorial, we will make a sample Twitter app with a refresh button using only a few lines of Lua.

Comments