In the second part of this series, you saw how to collect the commit information from the git logs and send review requests to random developers selected from the project members list.
In this part, you'll see how to save the code review information to follow up each time the code scheduler is run. You'll also see how to read emails to check if the reviewer has responded to the review request.
Getting Started
Start by cloning the source code from the second part of the tutorial series.
git clone https://github.com/royagasthyan/CodeReviewer-Part2 CodeReviewer
Modify the config.json file to include some relevant email addresses, keeping the [email protected] email address. It's because the git has commits related to the particular email address which is required for the code to execute as expected. Modify the SMTP credentials in the schedule.py file:
FROM_EMAIL      = "[email protected]"
FROM_PWD        = "your_password"
Navigate to the project directory CodeReviewer and try to execute the following command in the terminal.
python scheduler.py -n 20 -p "project_x"
It should send the code review request to random developers for review.
Keeping the Review Request Information
To follow up on the review request information, you need to keep it somewhere for reference. You can select where you want to keep the code review request information. It can be any database or may be a file. For the sake of this tutorial, we'll keep the review request information inside a reviewer.json file. Each time the scheduler is run, it'll check the info file to follow up on the review requests that haven't been responded to.
Create a method called save_review_info which will save the review request information inside a file. Inside the save_review_info method, create an info object with the reviewer, subject, and a unique Id.
def save_review_info(reviewer, subject):
    info = {'reviewer':reviewer,'subject':subject,'id':str(uuid.uuid4()),'sendDate':str(datetime.date.today())}
For a unique Id, import the uuid Python module.
import uuid
You also need the datetime Python module to get the current date. Import the datetime Python module.
import datetime
You need to initialize the reviewer.json file when the program starts if it doesn't already exist.
if not os.path.exists('reviewer.json'):
    with open('reviewer.json','w+') as outfile:
        json.dump([],outfile)
If the file doesn't exist, you need to create a file called reviewer.json and fill it with an empty JSON array as seen in the above code.
This method will be called each time a review request is sent. So, inside the save_review_info method, open the reviewer.json file in read mode and read the contents. Append the new content information into the existing content and write it back to the reviewer.json file. Here is how the code would look:
def save_review_info(reviewer, subject):
    info = {'reviewer':reviewer,'subject':subject,'id':str(uuid.uuid4()),'sendDate':str(datetime.date.today())}

    with open('reviewer.json','r') as infile:
        review_data = json.load(infile)

    review_data.append(info)

    with open('reviewer.json','w') as outfile:
        json.dump(review_data,outfile)
Inside the schedule_review_request method, before sending the code review request mail, call the save_review_info method to save the review information.
def schedule_review_request(commits):
    date = time.strftime("%Y-%m-%d")

    for commit in commits:
        reviewer = select_reviewer(commit.Author, project_members)
        subject = date + " Code Review [commit:" + commit.Id + "]"
        body = "Hello '" + reviewer + "', you have been selected to review the code for commit\n"
        body += "done by '" + commit.Author + "'.\n"
        body += "\n"

        body += format_review_commit(commit)

        save_review_info(reviewer,subject);

        send_email(reviewer,subject,body)
Save the above changes and execute the scheduler program. Once the scheduler has been run, you should be able to view the reviewer.json file inside the project directory with the code review request information. Here is how it would look:
[{
    "reviewer": "[email protected]",
    "id": "8ca7da84-9da7-4a17-9843-be293ea8202c",
    "sendDate": "2017-02-24",
    "subject": "2017-02-24 Code Review [commit:16393106c944981f57b2b48a9180a33e217faacc]"
}, {
    "reviewer": "[email protected]",
    "id": "68765291-1891-4b50-886e-e30ab41a8810",
    "sendDate": "2017-02-24",
    "subject": "2017-02-24 Code Review [commit:04d11e21fb625215c5e672a93d955f4a176e16e4]"
}]
Reading the Email Data
You have collected all the code review request information and saved it in the reviewer.json file. Now, each time the scheduler is run, you need to check your mail inbox to see if the reviewer has responded to the code review request. So first you need to define a method to read your Gmail inbox.
Create a method called read_email which takes the number of days to check the inbox as a parameter. You'll make use of the imaplib Python module to read the email inbox. Import the imaplib Python module:
import imaplib
To read the email using the imaplib module, you first need to create the server.
email_server = imaplib.IMAP4_SSL(SERVER)
Log in to the server using the email address and password:
email_server.login(FROM_EMAIL,FROM_PWD)
Once logged in, select the inbox to read the emails:
email_server.select('inbox')
You'll be reading the emails for the past n number of days since the code review request was sent. Import the timedelta Python module.
import timedelta
Create the email date as shown:
email_date = datetime.date.today() - timedelta(days=num_days)
formatted_date = email_date.strftime('%d-%b-%Y')
Using the formatted_date, search the email server for emails.
typ, data = email_server.search(None, '(SINCE "' + formatted_date + '")')
It will return the unique IDs for each email, and using the unique IDs you can get the email details.
ids = data[0]

id_list = ids.split()

first_email_id = int(id_list[0])
last_email_id = int(id_list[-1])
Now you'll make use of the first_email_id and the last_email_id to iterate through the emails and fetch the subject and the "from" address of the emails.
for i in range(last_email_id,first_email_id, -1):
    typ, data = email_server.fetch(i, '(RFC822)' )
data will contain the email content, so iterate the data part and check for a tuple. You'll be making use of the email Python module to extract the details. So import the email Python module.
import email
You can extract the email subject and the "from" address as shown:
for response_part in data:
    if isinstance(response_part, tuple):
        msg = email.message_from_string(response_part[1])
        print 'From: ' + msg['from']
        print '\n'
        print 'Subject: ' + msg['subject']
        print '\n'
        print '------------------------------------------------'
Here is the complete read_email method:
def read_email(num_days):
    try:
        email_server = imaplib.IMAP4_SSL(SERVER)
        email_server.login(FROM_EMAIL,FROM_PWD)
        email_server.select('inbox')

        email_date = datetime.date.today() - timedelta(days=num_days)
        formatted_date = email_date.strftime('%d-%b-%Y')

        typ, data = email_server.search(None, '(SINCE "' + formatted_date + '")')
        ids = data[0]

        id_list = ids.split()

        first_email_id = int(id_list[0])
        last_email_id = int(id_list[-1])

        for i in range(last_email_id,first_email_id, -1):
            typ, data = email_server.fetch(i, '(RFC822)' )

            for response_part in data:
                if isinstance(response_part, tuple):
                    msg = email.message_from_string(response_part[1])
                    print 'From: ' + msg['from']
                    print '\n'
                    print 'Subject: ' + msg['subject']
                    print '\n'
                    print '------------------------------------------------'

    except Exception, e:
        print str(e)
Save the above changes and try running the above read_email method:
read_email(1)
It should print the email subject and "from" address on the terminal.
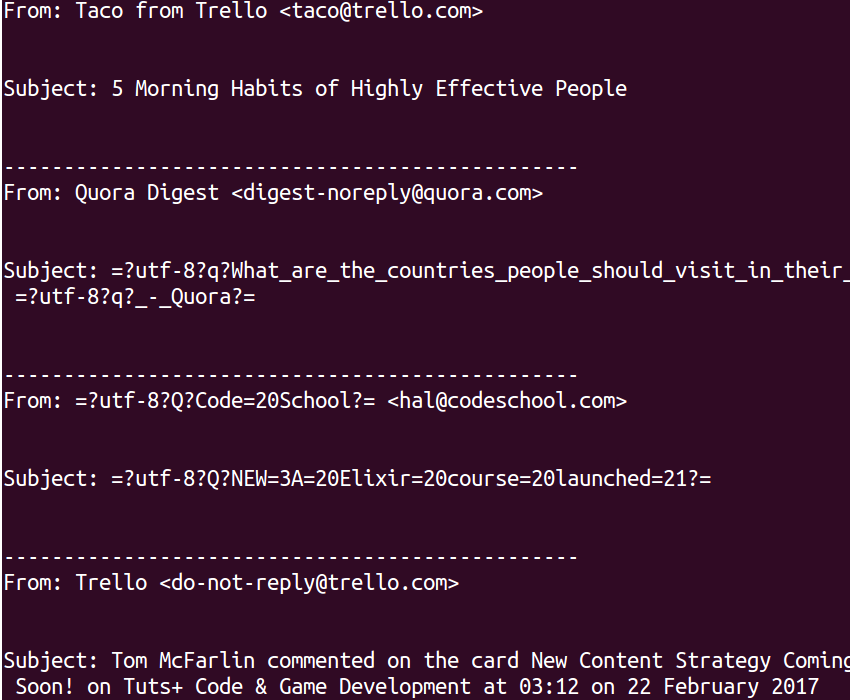
Now let's collect the "from" address and subject into an email_info list and return the data.
email_info = []
Instead of printing the subject and the "from" address, append the data to the email_info list and return the email_info list.
email_info.append({'From':msg['from'],'Subject':msg['subject'].replace("\r\n","")})
Here is the modified read_email method:
def read_email(num_days):
    try:
        email_info = []
        email_server = imaplib.IMAP4_SSL(SERVER)
        email_server.login(FROM_EMAIL,FROM_PWD)
        email_server.select('inbox')

        email_date = datetime.date.today() - timedelta(days=num_days)
        formatted_date = email_date.strftime('%d-%b-%Y')

        typ, data = email_server.search(None, '(SINCE "' + formatted_date + '")')
        ids = data[0]

        id_list = ids.split()

        first_email_id = int(id_list[0])
        last_email_id = int(id_list[-1])

        for i in range(last_email_id,first_email_id, -1):
            typ, data = email_server.fetch(i, '(RFC822)' )

            for response_part in data:
                if isinstance(response_part, tuple):
                    msg = email.message_from_string(response_part[1])
                    email_info.append({'From':msg['from'],'Subject':msg['subject'].replace("\r\n","")})

    except Exception, e:
        print str(e)

    return email_info
Adding Logging for Error Handling
Error handling is an important aspect of software development. It's really useful during the debugging phase to trace bugs. If you have no error handling, then it gets really difficult to track the error. Since you're growing with a couple of new methods, I think it's the right time to add error handling to the scheduler code.
To get started with error handling, you'll be needing the logging Python module and the RotatingFileHandler class. Import them as shown:
import logging
from logging.handlers import RotatingFileHandler
Once you have the required imports, initialize the logger as shown:
logger = logging.getLogger("Code Review Log")
logger.setLevel(logging.INFO)
In the above code, you initialized the logger and set the log level to INFO.
Create a rotating file log handler which will create a new file each time the log file has reached a maximum size.
logHandler = RotatingFileHandler('app.log',maxBytes=3000,backupCount=2)
Attach the logHandler to the logger object.
logger.addHandler(logHandler)
Let's add the error logger to log errors when an exception is caught. In the read_email method's exception part, add the following code:
logger.error(str(datetime.datetime.now()) + " - Error while reading mail : " + str(e) + "\n")
logger.exception(str(e))
The first line logs the error message with the current date and time to the log file. The second line logs the stack trace to the error.
Similarly, you can add the error handling to the main part of the code. Here is how the code with error handling would look:
try:
    commits = process_commits()

    if len(commits) == 0:
        print 'No commits found '
    else:
        schedule_review_request(commits)
except Exception,e:
    print 'Error occurred. Check log for details.'
    logger.error(str(datetime.datetime.now()) + " - Error while reading mail : " + str(e) + "\n")
    logger.exception(str(e))
Wrapping It Up
In this part of the series, you shelved the review request information in the reviewer.json file. You also created a method to read the emails. You'll be using both of these functions to follow up on the code review requests in the final part of this series.
Additionally, don’t hesitate to see what we have available for sale and for study in the marketplace, and don't hesitate to ask any questions and provide your valuable feedback using the feed below.
Source code from this tutorial is available on GitHub.
Do let us know your thoughts and suggestions in the comments below.

Comments