Welcome to the final tutorial in the Endless Runner series. In today’s tutorial, you will learn how to submit your app to the iOS App Store!
Congratulations on making it this far in the series! In today's lesson, we are going to go over how to submit your app to the iOS App Store so you can make some cash money from the millions of users that use iTunes everyday! It's a pretty easy process but can be a little daunting at first, especially when going through the Apple review process. However, fear not, because it is really not that hard. As long as you are thorough in your testing and adhere to the Apple interface guidelines and store policies, you should have nothing to worry about. So, let's do it!
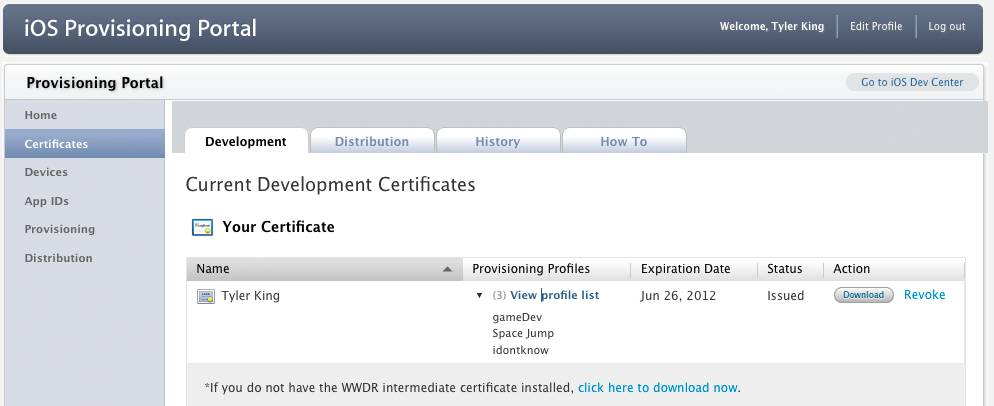
To get started, log into your Apple developer account at developer.apple.com and click on provisioning portal. This tutorial assumes that you have already done the following: A) installed Xcode, B) have a developer certificate ready, and C) have an app ready to submit.
We are going to deal with everything that you will be doing from the Corona SDK perspective. Apple makes thing pretty easy for you, but Corona makes things even easier! The first thing we are going to do is create an App ID. To do this, click on the App IDs tab on the left panel, then click the New App ID button on the right.

So now that you clicked new app id you should see this screen:
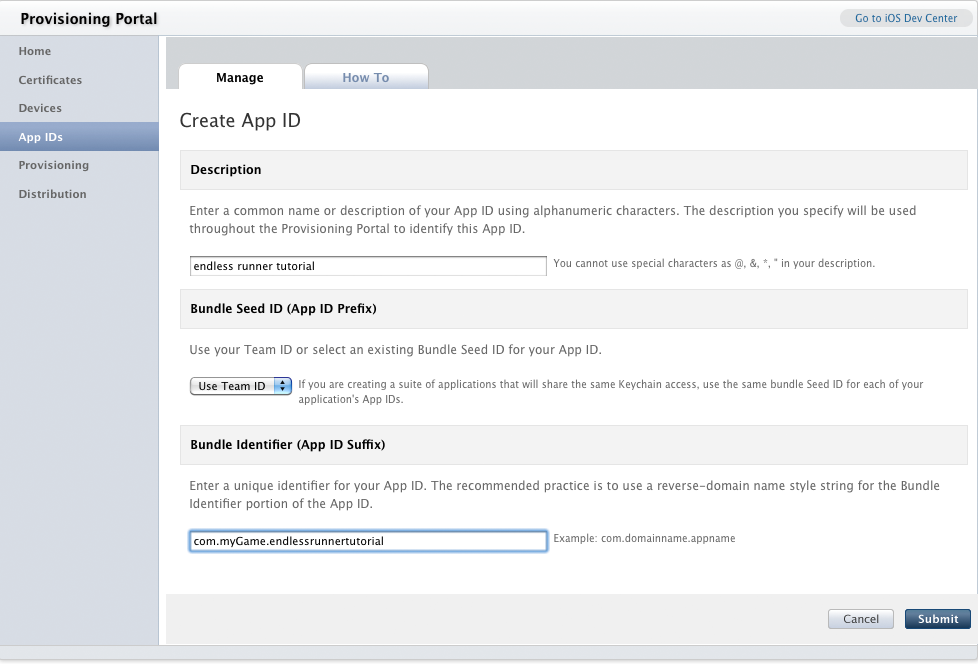
There are only a few things to fill out here (in fact most of these steps are pretty easy because these guides walk you right through the creation process). So, the only thing you really need to come up with is the app id, which is how your provisioning profile is going to identify the app. The most important thing for these naming conventions is to do something that makes sense to you and is unique. For example, we wouldn't to make the app id for this game "super star baseball', it just wouldn't make sense for anyone looking at it. Simple common sense is king!
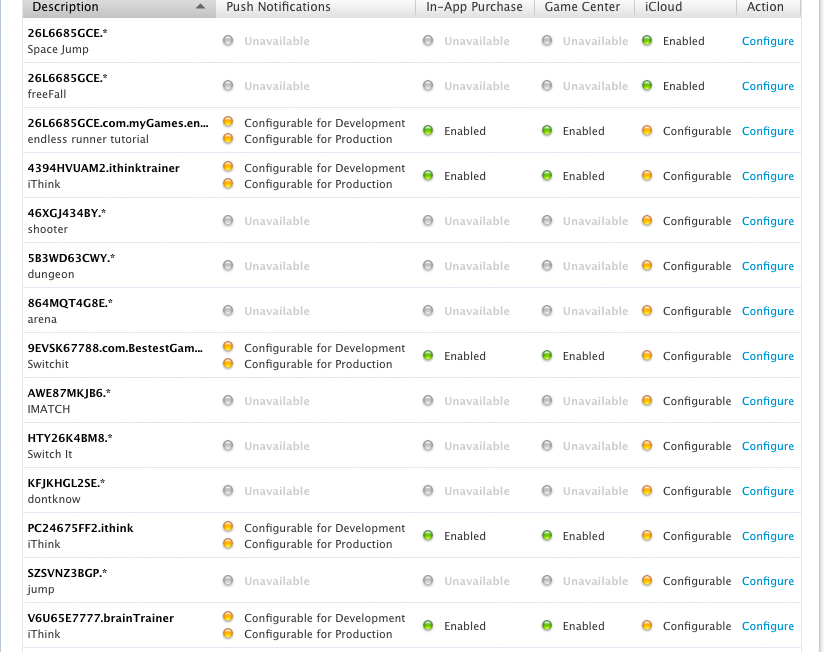
For your Bundle Seed ID go ahead and leave it blank, and you can see how I did the Bundle Identifier. These are both just used to describe your app. Below is an image of what mine looks like after creation. You can see I have lots of app ids, a lot of which are confusing. So take it from my experience, keep it simple, and do a good job naming everything. Click save and you should be able to find your app id in your app id list. One thing to notice about these images. They are, obviously, from my account. You will notice that there tons of profiles and app ids, most of which went unused by me. Do yourself a favor and make sure you do a good job naming things, so when you come back and look at your account years later you will remember what everything was. Also it makes finding you new stuff a lot easier.
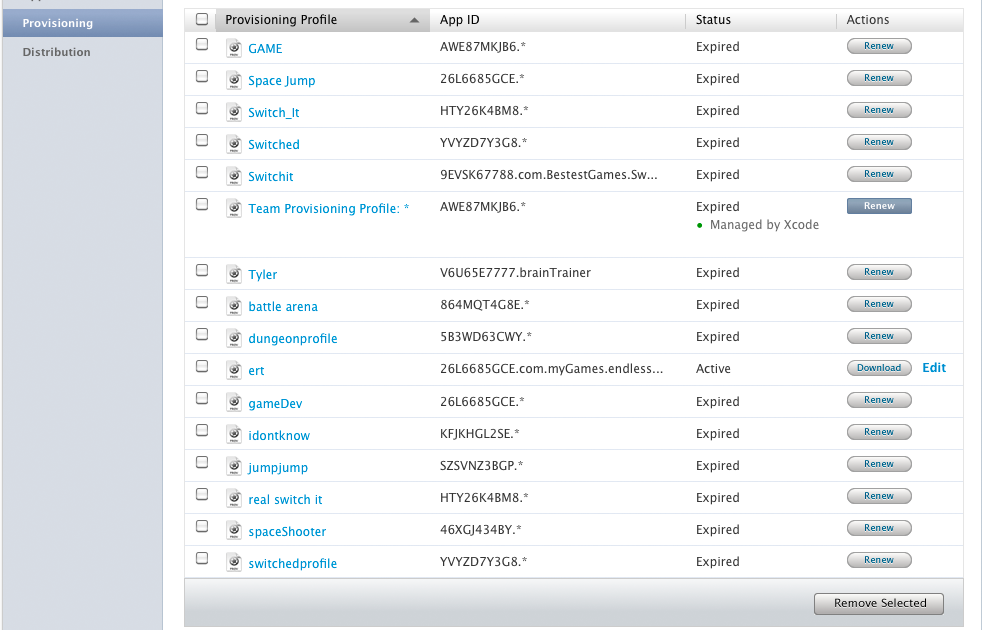
Now that we have our app id, click on the provisioning profile on the left tab again and click new profile. Next click on the provisioning profile tab and click create new profile.

Do the same thing here. Choose the provisioning profile name, choose the app id that we just made from the drop down box, the certificate you are going to use, and choose which devices you want the profile to work on(You will need to include every device that you want the app to be tested on. The device will know when the profile expires and will stop working on that device after that.).

Once that is complete you should again be able to view the provisioning profile in your main list. Now that it is in the list you can see that its status is Active and you can download it. Go ahead and download it now so we can move on!
Next launch Xcode if it isn't already open. From there, open up your organizer (window > organizer). The only thing you need to do in order to get your provisioning profile to your device is simply drag it over from the folder it was in to the main list in the provisioning profiles tab. You should be able to see it in the main list now, which means your device can run that app for testing!
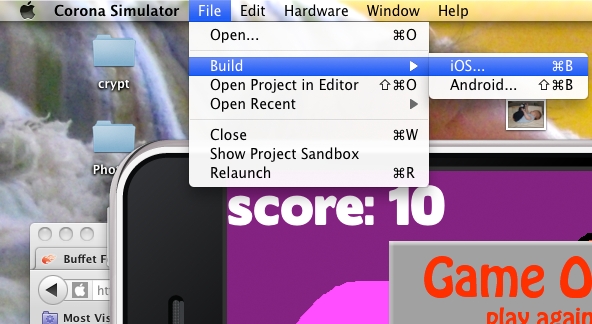
So now that it is in place let's run our game! Start up the app in the Corona Simulator, then from the menu that appears choose Build > iOS.
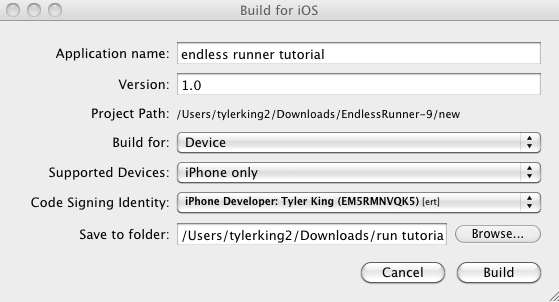
Everything here is pretty straight forward so far. Choose your application name, decide whether you are building for the Xcode simulator or building for a device. Then choose which device or devices you want to build for. I am going to build for the iPhone only. The code signing identity you will recognize from what we just made in the provisioning portfolio, but choose whichever one you made that you want to sign your app with. The final menu option to take care of is deciding where you want the finished app to be saved.
Once you are done with that, the only thing left to do is to make sure you have an icon in the same folder as your main.lua file. For the iPhone, your icon needs to be 57x57px. If you plan on your device supporting retina display then you need to include an icon that is 114x114px and if you are going to build for an iPad you will need to include an icon that is 72x72. All of these should be in the folder with main.lua. Here is what you will want to name them:
Icon.png <--- required for iPhone/iPod/iPad
[email protected] <--- required for iPhone/iPod
Icon-72.png <--- required for iPad
Now we need to make a quick change to our build.settings file. Open it up and add the following:
settings =
{
    iphone =
    {
        plist =
        {
            --start copying here
            CFBundleIconFile = "Icon.png",
            CFBundleIconFiles = {
                "Icon.png" ,
                "[email protected]" ,
                "Icon-72.png" ,
            },
           --stop copying here
         },
    },
}
For our game you would only need to copy out the CFBundleIconFile lines, as shown above. However, if you haven't changed your build.settings file at all you will need everything listed above.
Now you should be able to successfully build your app and get ready to distribute it to the store! The next step is going to involve going to the iTunes Connect web site, setting up an account, and gathering the resources that you will need to package together. The official developer page is a great resource for getting started, so be sure to check it out as you submit.
Log into iTunes Connect and you should see something like this:
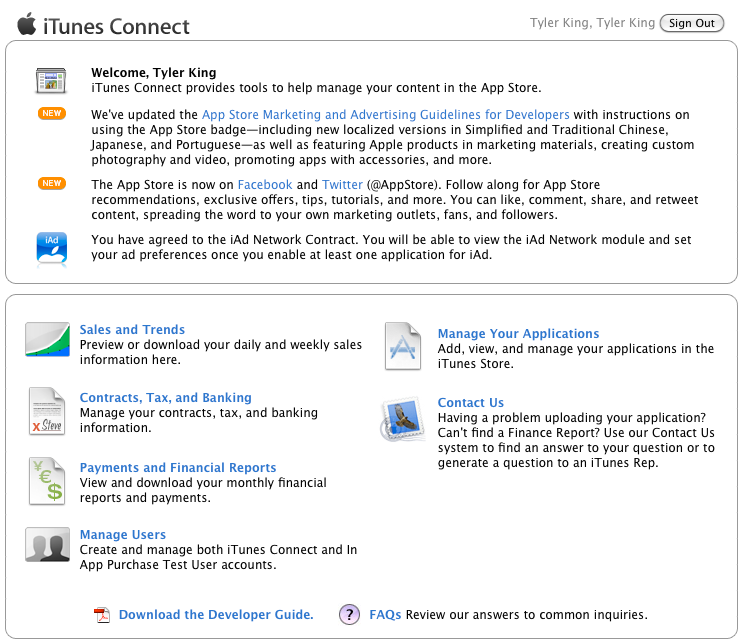
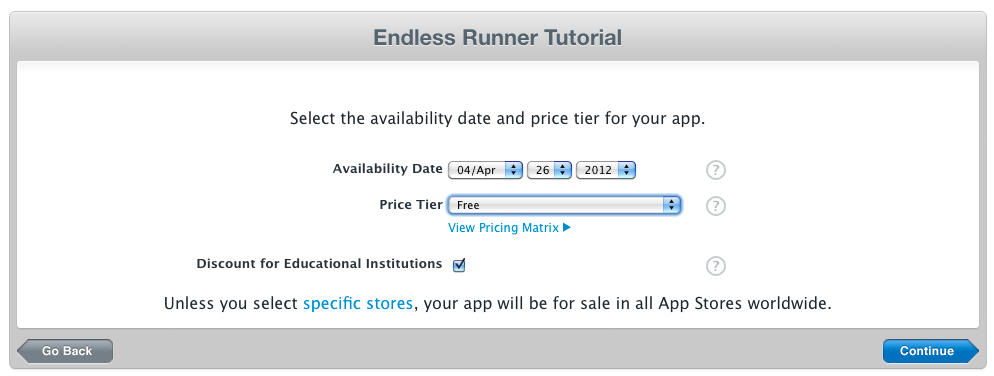
Click on "manage your applications" and let's submit our app! In the upper left side of your screen you should see a button that says "add new app", click on that and load up the next menu. By now this next menu should be pretty easy to follow. Simply choose the name of the app as it will appear in iTunes, designate an SKU (this can be any number that you want to use as it is for internal accounting), and the correct bundle id. Click continue and proceed to choose the desired release date as well as the price tier you want to sell the game for. Also, if you want to offer an educational discount, this is the place to do it!
The last step you are going to need to do is to set up the version number, copyright holder (you or your company), categories of your game, and any additional notes you might want to leave for the reviewers. After filling in that information, choose the settings that correctly describe the content of the game and be sure to be accurate or the reviewer will quickly reject your app. Next you will fill out your contact information and upload your icons and screen shots. They should be formatted in the following way:
Large App Icon: A large version of your app icon that will be used on the App Store. It must be at least 72 DPI, in the RGB color space, and 512x512px or 1024x1024px (it cannot be scaled up). The file type must be either .jpeg, .jpg, .tif, .tiff, or .png. It must be flat artwork without rounded corners.
iPhone and iPod Touch Screenshots: iPhone and iPod touch Screenshots must be .jpeg, .jpg, .tif, .tiff, or .png format with dimensions of 960x640px, 960x600px, 640x960px or 640x920px and at least 72 DPI in the RGB color space.
iPad Screenshots: iPad Screenshots must be .jpeg, .jpg, .tif, .tiff, or a .png file that is 1024x768, 1024x748, 768x1024, 768x1004, 2048x1536, 2048x1496, 1536x2048 or 1536x2008 pixels, at least 72 DPI, and in the RGB color space.
So, be sure to upload some good screenshots! Do all of the steps listed above and then click save. Congratulations! You have submitted your app to the iTunes App Store! Unfortunately, now you have to play the waiting game as the app is reviewed by Apple. So, sit back, relax, and be proud of your hard work!
Hopefully everything has gone well up until now. Thanks for sticking through the entire series. As always if you have any questions or comments let me know. Also feel free to post links to the amazing apps that you make! Good luck and happy coding!

Comments