Integrating slideshow functionality into WordPress is a highly required feature for almost any theme, but how hard is it to include and how flexible is it? In this tutorial we are going to, in different ways, include one of the most popular and used jQuery slideshows, Nivo Slider.
There is, actually, already a coded WordPress plugin for the Nivo Slider, right on the official Nivo Slider page. But we are going to build one in this tutorial anyway, and we are most definitely going to do it differently. In this tutorial we are going to create a Nivo slider plugin that will have widget functionality, short code functionality and you will even be able to integrate it as a simple function call and hard-code it into your theme where ever the user wishes.
By following this tutorial, it is implied that you are running an Apache and MySQL server locally or remotely in order to be able to install WordPress. Also, that you have a 3.1+ version of WordPress installed that you have access to its file system, and that you have basic PHP, CSS, JavaScript and HTML knowledge.
Step 1 Creating the Plugin
One of the easiest parts of this tutorial. We are going to create a folder named nivoplugin inside the wp-content/plugins directory inside your WordPress installation. Inside that directory we will create a nivoplugin.php file with the following code:
<?php
/*
	Plugin Name: Nivo Plugin
	Description: Simple implementation of a nivo slideshow into WordPress
	Author: Ciprian Turcu
	Version: 1.0
*/
?>
This is the basic plugin information used by WordPress to identify the plugin name and details. Things like Plugin Name, Description, Author and Plugin version are required parameters that are added as commented text at the top of each plugin so that WordPress can identify the plugin, manage it, run it and show the required information about it in the plugins page.
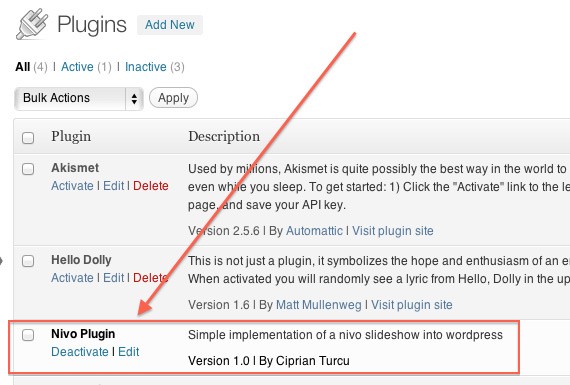
"For more information on plugin header text and other options that can be added to it please read Writing a Plugin in the WordPress Codex."
Step 2 Creating the Admin Slideshow Management Functionality
The slideshow is made out of pictures, so in order to make a simple implementation of the jQuery Nivo Slider we need a way to add and manage pictures in the admin panel. Our approach is going to make good use of the custom post type WordPress functionality. Custom post types will be used to create a new custom page where each post contains all the required image details: the name and of course the most important part, the image itself. We are going to use the title and editor for the name and description information and the featured image functionality to upload the picture, manage and identify it.
function np_init() {
	$args = array(
		'public' => true,
		'label' => 'Nivo Images',
		'supports' => array(
			'title',
			'thumbnail'
		)
	);
	register_post_type('np_images', $args);
}
add_action('init', 'np_init');
In the above example we are adding a hook to the np_init function using the init hook tag that will run before the headers run. We need to do this so we can then include inside the register_post_type function with its parameters. This function is the function used to add and manage a new custom post type. Basically we include a new custom post type named np_images with some arguments.
The arguments are an array of values that represent the settings of that new custom post type. Things like if it is intended to be used publicly, we set public to true, we give it a label with the name Nivo Images and we set the fact that each post has a title and a featured image with the variables title and thumbnail as an array to the main attribute supports.
This creates the custom post type and it looks like this:
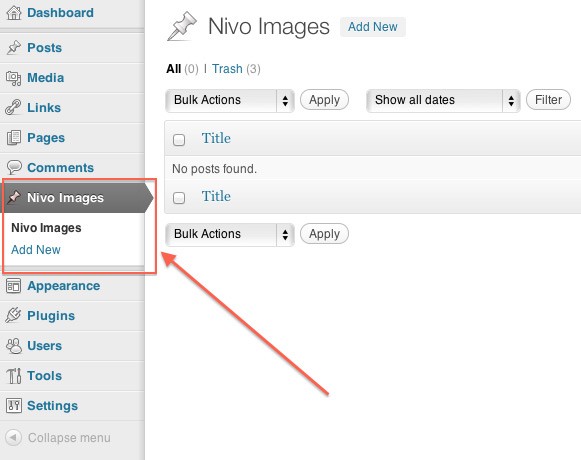
At this point we have a registered and working custom post type by the name of np_images. We can add new posts, delete them, and edit them as with regular posts, but custom made for our purpose to manage images for the slideshow. Basically this is the place where we add pictures for the Nivo slideshow as posts.
Step 3 Including the Nivo Slider Scripts and Styles
This might sound like something slightly complicated or time consuming a little more than usual. It's not. We are going to download the free jQuery version of the Nivo Slider and include its necessary scripts and styles so that we may later use them with some custom code and images.
To download the sources we will go to the Pricing page on nivo.dev7studios.com and click on the jQuery Plugin (Free version) Download button on the left to download the sources.
For the purposes of this tutorial, we are going to keep things very simple. We unzip the file and include the whole directory inside our plugin directory. Inside the nivo-slider folder we have another folder named demo. We are going to delete that as we have no use for it and we don't want a cluttered plugin with unnecessary stuff in it.
Registering and Including Scripts and Styles
The next part of this step is including the necessary Nivo Slider files. In our nivoplugin.php file we will add the following:
add_action('wp_print_scripts', 'np_register_scripts');
add_action('wp_print_styles', 'np_register_styles');
This is going to hook to some functions (the second parameter is the function name). We need these hooks to properly include the scripts and styles into the front-end. Let's look at the callback functions of our previous hooks.
function np_register_scripts() {
	if (!is_admin()) {
		// register
		wp_register_script('np_nivo-script', plugins_url('nivo-slider/jquery.nivo.slider.js', __FILE__), array( 'jquery' ));
		wp_register_script('np_script', plugins_url('script.js', __FILE__));

		// enqueue
		wp_enqueue_script('np_nivo-script');
		wp_enqueue_script('np_script');
	}
}

function np_register_styles() {
	// register
	wp_register_style('np_styles', plugins_url('nivo-slider/nivo-slider.css', __FILE__));
	wp_register_style('np_styles_theme', plugins_url('nivo-slider/themes/default/default.css', __FILE__));

	// enqueue
	wp_enqueue_style('np_styles');
	wp_enqueue_style('np_styles_theme');
}
The script callback function registers and includes 3 important javascript files: jQuery (as a dependancy of Nivo Slider), nivo-slider base file (jquery.nivo.slider.js) and our custom script file (script.js). Nivo Slider requires jQuery to work and we need a custom script to activate it.
The script.js File:
jQuery(document).ready(function($) {
	$('#slider').nivoSlider();
});
The script is pretty simple, it requires jQuery to attach the nivoSlider function to the tag with the id of slider. That tag is going to take the nivo-slider properties and functionality.
Lastly in our previous step, the style callback function registers and includes 2 more important files: the nivo-slider.css file that has all the styles needed to make the slider look and work accordingly, and a default.css file inside the themes/default folder that we use to theme the slideshow with the default nivo-slider theme.
Step 4 New Image Sizes
As mentioned in the beginning, this tutorial is going to cover the implementation of a widget, a shortcode and a function for hard-coding the slider if needed by using the plugin we are building. For the shortcode and function we need pretty much the same image sizes and for the widget a smaller size for the height and width of the images.
First, we must take into consideration the fact that we are using featured images in custom posts for our slideshow images. So how do we resize and crop those pictures to fit our required needs? We are going to add new image sizes that WordPress will resize and crop to on each new image upload. To add the new image sizes we will use the add_image_size function by adding the following code inside the np_init function:
	add_image_size('np_widget', 180, 100, true);
	add_image_size('np_function', 600, 280, true);
In the above source code we implemented 2 image sizes that we will call later on using the names np_widget for widget and np_function for shortcode and PHP function to identify them.
One More Thing
In order to enable post thumbnails in the plugin the following line of code needs to be added in our plugin. We are going to add it above the add_action lines.
add_theme_support( 'post-thumbnails' );
"Image sizes added with
add_image_sizewill only work for new pictures that are uploaded after the function is activated."
Step 5 The PHP Function
One of the main features of the plugin is a PHP function that you can use anywhere in your theme code to insert the large 600x280 Nivo slideshow.
Because we are using custom posts to manage our pictures for the slideshow, we need to query those posts and get the titles and pictures from the custom post type. For that we are going to use a new WP_Query loop with the parameters of the $args variable that selects the custom post type and creates a slideshow of maximum 5 images from the query. Next we create a variable $result that has all the HTML code needed for the Nivo slideshow. We are using the demo HTML code wrappers from our Nivo script download folder.
function np_function($type='np_function') {
	$args = array(
		'post_type' => 'np_images',
		'posts_per_page' => 5
	);
	$result = '<div class="slider-wrapper theme-default">';
	$result .= '<div id="slider" class="nivoSlider">';

	//the loop
	$loop = new WP_Query($args);
	while ($loop->have_posts()) {
		$loop->the_post();

		$the_url = wp_get_attachment_image_src(get_post_thumbnail_id($post->ID), $type);
		$result .='<img title="'.get_the_title().'" src="' . $the_url[0] . '" data-thumb="' . $the_url[0] . '" alt=""/>';
	}
	$result .= '</div>';
	$result .='<div id = "htmlcaption" class = "nivo-html-caption">';
	$result .='<strong>This</strong> is an example of a <em>HTML</em> caption with <a href = "#">a link</a>.';
	$result .='</div>';
	$result .='</div>';
	return $result;
}
Inside the loop we are using the wp_get_attachment_image_src function to retrieve the featured image from our custom post. We use the np_function value for the size of the image that we previously added in np_init. Because we are inside the loop, we can use $post->ID to identify the post. The function has one parameter, $type, that is used to set the images size from wp_get_attachment_image_src with one of the previously set image sizes. The variable has the default value of np_function. If no parameter is given when calling the function the default variable will kick in.
The titles of the posts are added as values to the title HTML parameter of the image tag and are visible at the bottom of the image slideshow as floating text over the images inside a transparent dark background.
The slider is automatically resized like the image sizes inside it, so whatever image sizes we use, we are going to have a slideshow of that size.
The slideshow in the np_function size looks like this:
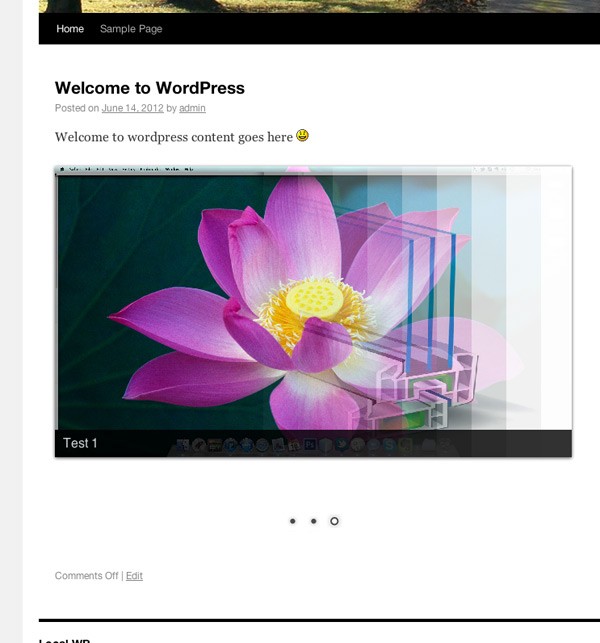
This preview of the slideshow is the shortcode implementation that will be covered next.
Step 6 The Shortcode
Another main feature is the shortcode implementation. This is actually extremely easy to implement and can be done with one line of code. Just add this line in the np_init function above everything that is in there already:
add_shortcode('np-shortcode', 'np_function');
The shortcode hook will actually use our PHP function to return the contents of the slideshow. That is all, very simple and fast implementation of the shortcode. To use it, just add [np-shortcode] in the content of any post or page. That text will be replaced with the actual slideshow.
Step 7 Building the Widget
In this step we are going to build a simple widget that will have the sole purpose of showing a small slideshow in the sidebar where ever it is placed.
We already have the size set for it in step 4 and we have all the other functionality that includes and generates the Nivo slideshow that we can use to integrate into the widget. So all that remains now is to build the widget and integrate the previous code.
function np_widgets_init() {
	register_widget('np_Widget');
}

add_action('widgets_init', 'np_widgets_init');
In this first part we are going to implement a new hook that you should add amongst the others. This hook uses the widgets_init tag and uses a function that we are going to name np_widgets_init. This function runs when the widgets are created. As a result we are going to register the widget under the name of np_Widget as in the example above.
The Class
To create a new widget, we are implementing a new class named np_Widget that extends the WP_Widget class. As a first function the __construct is the primary and most important function of the class and of our widget functionality. The function has parameters that we use to give the widget an unique ID that in our case is named np_widget, a name, Nivo Slideshow, and even a description as the following code shows:
class np_Widget extends WP_Widget {

	public function __construct() {
		parent::__construct('np_Widget', 'Nivo Slideshow', array('description' => __('A Nivo Slideshow Widget', 'text_domain')));
	}
}
This is of course just the start of our widget, there are a few other functions we need to implement and configure as we need them to work.
Widget Backend
The widget looks as any other widget in the back end. We need to give the widget a title that has the possibility to be input by the user and later saved by the plugin. To do this we need to write the form function extended from the WP_Widget class. In this function we are going to use the $instance parameter that the function provides to get the title which is a variable later implemented, saved and updated. So we create the form input element using the following code:
	public function form($instance) {
		if (isset($instance['title'])) {
			$title = $instance['title'];
		}
		else {
			$title = __('Widget Slideshow', 'text_domain');
		}
		?>
			<p>
				<label for="<?php echo $this->get_field_id('title'); ?>"><?php _e('Title:'); ?></label>
				<input class="widefat" id="<?php echo $this->get_field_id('title'); ?>" name="<?php echo $this->get_field_name('title'); ?>" type="text" value="<?php echo esc_attr($title); ?>" />
			</p>
		<?php
	}
This code runs only in the back end and is required by the following functions in order to submit the title name for saving and later use in the front end. The $instance variable has the value of the title and is used directly like the above example with no other query or function call.
Saving the Data
After the form is submitted from the previous function it needs to be processed and saved. This is done in the update function that we also need to add to the class with the following code:
	public function update($new_instance, $old_instance) {
		$instance = array();
		$instance['title'] = strip_tags($new_instance['title']);

		return $instance;
	}
The value of the field is passed through the $new_instance variable that is stripped of tags, inserted in the $instance variable so that it can be returned by the function and saved by WordPress as part of its extended widget functionality.
Widget Front-End
Last but not least, another very important and also representative part of our widget is the front end functionality. Obviously, every piece is important for the end result to work, but this part is what you see in your theme.
The widget function is managing the front end of the widget and has two parameters: $args and $instance. The $args parameter is used to get variables like $before_widget, $after_widget and $before_title, $after_title that we are going to use in our implemented code. The widget function looks like this:
	public function widget($args, $instance) {
		extract($args);
		// the title
		$title = apply_filters('widget_title', $instance['title']);
		echo $before_widget;
		if (!empty($title))
			echo $before_title . $title . $after_title;
		echo np_function('np_widget');
		echo $after_widget;
	}
To implement the slideshow we are using the function np_function but in this case we are giving it the parameter np_widget so that we get the image sizes we want for the widget.
This covers the widget implementation of the Nivo Slider in our plugin. At this point you can go into the admin panel and add a few posts in the Nivo images menu and attach featured images to them so that they appear in the slideshow.
"For more information about WordPress Widgets API check the WordPress Codex Widgets API."
Conclusion
It's very easy and fast to implement a slideshow in WordPress if you know what you are doing and especially if the slideshow functionality is already built and you are just integrating it. Still you have to be careful not to use some functionality that's already there and of course, it's easy if you implement it in a very basic manner like we just did, as a more flexible approach with many options and features might complicate things a little, depending on what the features are.

Comments