Introduction
In the first tutorial of this short series on UIKit Dynamics, we learnt the basics of the API by creating an animated menu component. In this tutorial, we'll continue working on our project and implement another animated component, a custom alert view.
1. Overview
The default alert view on iOS is great, but it's not very customizable in terms of appearance and behavior. If you need an alert view that is customizable, then you need to create your own solution and that's what we'll do in this tutorial. The focus of this tutorial is on the behavior of the alert view and not so much on its functionality. Let's see what the result is that we're after
The alert view will be a UIView instance to which we'll add the following subviews:
- a
UILabelobject for displaying the alert view's title - a
UILabelobject for displaying the alert view's message - one or more
UIButtoninstances for letting the user interact with the alert view
We'll use the UISnapBehavior class to present the alert view. As its name indicates, this UIDynamicBehavior subclass forces a dynamic item to snap to a point as if it were magnetically drawn to it.
The UISnapBehavior class defines one additional property, damping, that defines the amount of oscillation when the dynamic item has reached the point to which it is attracted.
We'll use a gravity behavior, in combination with a collision and push behavior, to dismiss the alert view. Remember that we already used these behaviors in the previous tutorial.
The alert view will animate in from the top of the screen. When the alert view is about to appear, the snap behavior will make it drop into view and snap to the center of the screen. To dismiss the alert view, a push behavior will briefly push it to the bottom of the screen and a gravity behavior will then pull it to the top of the screen and make it animate off-screen.
We'll create a custom initialization method for the alert view component that accepts the alert's title, message, button titles, and its parent view. We won't be implementing a delegate protocol for the alert view. Instead, we'll make use of blocks, which makes for a more elegant and modern solution. The block or handler will accept two parameters, the index and the title of the button the user tapped.
We'll also display a semi-transparent view behind the alert view to prevent the user from interacting with its parent view as long as the alert view is visible. Let's start by taking a look at the alert view's properties and the custom initializer.
2. Properties and Initialization
Step 1: Creating the Alert View Class
Press Command-N on your keyboard to create a new file and select Objective-C class from the list of iOS templates. Make it a subclass of NSObject and name it AlertComponent.
Step 2: Declaring Properties
The next step is to declare a few private properties. Open AlertComponent.m, add a class extension at the top, and declare the following properties:
@interface AlertComponent ()

@property (nonatomic, strong) UIView *alertView;
@property (nonatomic, strong) UIView *backgroundView;
@property (nonatomic, strong) UIView *targetView;
@property (nonatomic, strong) UILabel *titleLabel;
@property (nonatomic, strong) UILabel *messageLabel;
@property (nonatomic, strong) UIDynamicAnimator *animator;
@property (nonatomic, strong) NSString *title;
@property (nonatomic, strong) NSString *message;
@property (nonatomic, strong) NSArray *buttonTitles;
@property (nonatomic) CGRect initialAlertViewFrame;

@end
The function of each property will become clear as we implement the alert component. It's time to create the component's custom initializer.
Step 3: Initialization
As I already mentioned, we're going to use a custom initializer to make working with the alert component as easy as possible. The initializer accepts four parameters, alert's title, its message, the button titles, and the view to which the alert component will be added, its parent view. Open AlertComponent.h and add the following declaration:
@interface AlertComponent : NSObject

- (id)initAlertWithTitle:(NSString *)title andMessage:(NSString *)message andButtonTitles:(NSArray *)buttonTitles andTargetView:(UIView *)targetView;

@end
3. Setting Up the Alert View
Step 1: Declaring Setup Methods
In this part the alert view is going to be set up, and all its subviews will be added to it. Also, the background view, as well as the dynamic animator will be set up too.
Open AlertComponent.m and declare the following private methods in the private class extension:
@interface AlertComponent()

...

- (void)setupBackgroundView;
- (void)setupAlertView;

@end
The method names are self-explanatory. Let's start by implementing the setupAlertView method first since most of the alert's setup takes place in this method.
Step 2: Setting Up the Alert View
In setupAlertView, we do three things:
- initialize and configure the alert view
- initialize and configure the alert view's labels
- initialize and configure the alert view's buttons
Let's start by calculating the alert view's size and position as shown in the code snippet below.
- (void)setupAlertView {
    // Set the size of the alert view.
    CGSize alertViewSize = CGSizeMake(250.0, 130.0 + 50.0 * self.buttonTitles.count);

    // Set the initial origin point depending on the direction of the alert view.
    CGPoint initialOriginPoint = CGPointMake(self.targetView.center.x, self.targetView.frame.origin.y - alertViewSize.height);
}
We start by setting the alert view's size. To make the alert view dynamic, we add 50.0 points to its height for every button. Also note that the initial origin of the alert view is off-screen. The next step is initializing and setting up the alert view:
self.alertView = [[UIView alloc] initWithFrame:CGRectMake(initialOriginPoint.x, initialOriginPoint.y, alertViewSize.width, alertViewSize.height)];

// Background color.
[self.alertView setBackgroundColor:[UIColor colorWithRed:0.94 green:0.94 blue:0.94 alpha:1.0]];

// Make the alert view with rounded corners.
[self.alertView.layer setCornerRadius:10.0];

// Set a border to the alert view.
[self.alertView.layer setBorderWidth:1.0];
[self.alertView.layer setBorderColor:[UIColor blackColor].CGColor];

    // Assign the initial alert view frame to the respective property.
    self.initialAlertViewFrame = self.alertView.frame;
Using alertViewSize and initialOriginPoint, we initialize the alertView object and set its background color. We round the alert view's corners by setting its layer's cornerRadius to 10.0, its borderWidth to 1.0, and its borderColor to black. We also store the alert view's initial frame in its initialAlertViewFrame property as we'll be needing it later.
If Xcode tells you it doesn't know about the alertView's layer property, then add the following import statement at the top of the implementation file:
#import <QuartzCore/QuartzCore.h>
It's time to add the labels. Let's start with the title label.
// Setup the title label.
self.titleLabel = [[UILabel alloc] initWithFrame:CGRectMake(0.0, 10.0, self.alertView.frame.size.width, 40.0)];
[self.titleLabel setText:self.title];
[self.titleLabel setTextAlignment:NSTextAlignmentCenter];
[self.titleLabel setFont:[UIFont fontWithName:@"Avenir-Heavy" size:14.0]];

// Add the title label to the alert view.
[self.alertView addSubview:self.titleLabel];
Setting up the message label is pretty similar.
// Setup the message label.
self.messageLabel = [[UILabel alloc] initWithFrame:CGRectMake(0.0, self.titleLabel.frame.origin.y + self.titleLabel.frame.size.height, self.alertView.frame.size.width, 80.0)];
[self.messageLabel setText:self.message];
[self.messageLabel setTextAlignment:NSTextAlignmentCenter];
[self.messageLabel setFont:[UIFont fontWithName:@"Avenir" size:14.0]];
[self.messageLabel setNumberOfLines:3];
[self.messageLabel setLineBreakMode:NSLineBreakByWordWrapping];

// Add the message label to the alert view.
[self.alertView addSubview:self.messageLabel];
Note that the numberOfLines property is set to 3 and lineBreakMode is set to NSLineBreakByWordWrapping.
The last thing we need to set up are the alert view's buttons. Even though the number of buttons can vary, setting up and positioning the buttons is pretty simple. We separate the buttons by 5 points and use a for loop to initialize them.
CGFloat lastSubviewBottomY = self.messageLabel.frame.origin.y + self.messageLabel.frame.size.height;

for (int i=0; i<[self.buttonTitles count]; i++) {
    UIButton *button = [[UIButton alloc] initWithFrame:CGRectMake(10.0, lastSubviewBottomY + 5.0, self.alertView.frame.size.width - 20.0, 40.0)];
    [button setTitle:[self.buttonTitles objectAtIndex:i] forState:UIControlStateNormal];
    [button.titleLabel setFont:[UIFont fontWithName:@"Avenir" size:13.0]];
    [button setTitleColor:[UIColor whiteColor] forState:UIControlStateNormal];
    [button setTitleColor:[UIColor yellowColor] forState:UIControlStateHighlighted];
    [button setBackgroundColor:[UIColor colorWithRed:0.0 green:0.47 blue:0.39 alpha:1.0]];
    [button addTarget:self action:@selector(handleButtonTap:) forControlEvents:UIControlEventTouchUpInside];
    [button setTag:i + 1];

    [self.alertView addSubview:button];

    lastSubviewBottomY = button.frame.origin.y + button.frame.size.height;
}
Note that each button invokes the handleButtonTap: method when it's tapped. We can determine which button the user tapped by inspecting the button's tag property.
Finally, add the alert view to the target or parent view by adding the following line at the bottom of the setupAlertView method:
// Add the alert view to the parent view.
[self.targetView addSubview:self.alertView];
Step 3: Setting Up the Background View
The second method we need to implement is setupBackgroundView. The background view will prevent the user from interacting with the alert view's parent view as long as the alert view is shown. We initially set its alpha property to 0.0, which means it's transparent.
- (void)setupBackgroundView {
    self.backgroundView = [[UIView alloc] initWithFrame:self.targetView.frame];
    [self.backgroundView setBackgroundColor:[UIColor grayColor]];
    [self.backgroundView setAlpha:0.0];
    [self.targetView addSubview:self.backgroundView];
}
Step 4: Implementing the Initializer
With setupAlertView and setupBackgroundView ready to use, let's implement the custom initializer we declared earlier.
- (id)initAlertWithTitle:(NSString *)title andMessage:(NSString *)message andButtonTitles:(NSArray *)buttonTitles andTargetView:(UIView *)targetView {
    if (self = [super init]) {
        // Assign the parameter values to local properties.
        self.title = title;
        self.message = message;
        self.targetView = targetView;
        self.buttonTitles = buttonTitles;

        // Setup the background view.
        [self setupBackgroundView];

        // Setup the alert view.
        [self setupAlertView];

        // Setup the animator.
        self.animator = [[UIDynamicAnimator alloc] initWithReferenceView:self.targetView];
    }

    return self;
}
We set the title, message, targetView, and buttonTitles properties, invoke setupBackgroundView and setupAlertView, and initialize the dynamic animator, passing in self.targetView as its reference view.
4. Showing the Alert View
To show the alert view after it's been initialized, we need to declare and implement a public method that can be called by, for example, the view controller hosting the alert view. Open AlertComponent.h and add the following method declaration:
- (void)showAlertView;
Head back to AlertComponent.m to implement showAlertView. As I mentioned earlier in this tutorial, we'll be using a new UIDynamicBehavior subclass to show the alert view, UISnapBehavior. Let's see how we use this class in showAlertView.
- (void)showAlertView {
    [self.animator removeAllBehaviors];

    UISnapBehavior *snapBehavior = [[UISnapBehavior alloc] initWithItem:self.alertView snapToPoint:self.targetView.center];
    snapBehavior.damping = 0.8;
    [self.animator addBehavior:snapBehavior];


    [UIView animateWithDuration:0.75 animations:^{
        [self.backgroundView setAlpha:0.5];
    }];
}
We start by removing any existing dynamic behaviors from the dynamic animator to ensure that no conflicts pop up. Remember that some dynamic behaviors can only be added once to the dynamic animator, such as a gravity behavior. Also, we'll add other dynamic behaviors to dismiss the alert view.
As you can see, using a snap behavior isn't difficult. We specify which dynamic item the behavior should be applied to and set the point to which the dynamic item should snap. We also set the behavior's damping property as we discussed earlier. Also note that we animate the alpha property of the background view.
To test the alert view, we need to make some changes to the ViewController class. Let's start by adding a UIButton instance to the view controller's view to show the alert view. Open Main.storyboard and drag a UIButton instance from the Object Library to the view controller's view. Position the button near the bottom of the view and give it a title of Show Alert View. Add an action to ViewController.h as shown below.
@interface ViewController : UIViewController

- (IBAction)showAlertView:(id)sender;

@end
Head back to the storyboard and connect the view controller's action to the button. Open ViewController.m and import the header file of the AlertComponent class.
#import "AlertComponent.h"
Next, declare a property in the private class extension of type AlertComponent and name it alertComponent.
@interface ViewController ()

@property (nonatomic, strong) MenuComponent *menuComponent;
@property (nonatomic, strong) AlertComponent *alertComponent;

- (void)showMenu:(UIGestureRecognizer *)gestureRecognizer;

@end
We then initialize the alert component in the view controller's viewDidLoad method.
- (void)viewDidLoad {
    ...

    // Initialize Alert Component
    self.alertComponent = [[AlertComponent alloc] initAlertWithTitle:@"Custom Alert"
                                                          andMessage:@"You have a new e-mail message, but I don't know from whom."
                                                     andButtonTitles:@[@"Show me", @"I don't care", @"For me, really?"]
                                                       andTargetView:self.view];
}
To show the alert component, invoke showAlertView: in the action we just created, showAlertView:.
- (IBAction)showAlertView:(id)sender {
    [self.alertComponent showAlertView];
}
Run your application and tap the button to show the alert view. The result should look similar to the one below.
5. Hiding the Alert View
As we saw earlier, the handleButtonTap: method is invoked when the user taps a button of the alert view. The alert view should hide when one of the buttons is tapped. Let's see how this works.
Revisit AlertComponent.m and, in the private class extension, declare the handleButtonTap: method.
@interface AlertComponent()

...

- (void)handleButtonTap:(UIButton *)sender;

@end
In this method, we create a number of dynamic behaviors and add them to the dynamic animator object. The dynamic behaviors we need are:
- a gravity behavior that pulls the alert view towards the top of the screen
- a collision behavior with an off-screen boundary that stops the alert view
- a push behavior that gives the alert view little nudge towards the bottom of the screen
After removing the existing behaviors from the dynamic animator and initialize the push behavior as shown below.
- (void)handleButtonTap:(UIButton *)sender {
    // Remove all behaviors from animator.
    [self.animator removeAllBehaviors];

    UIPushBehavior *pushBehavior = [[UIPushBehavior alloc] initWithItems:@[self.alertView] mode:UIPushBehaviorModeInstantaneous];
    [pushBehavior setAngle:M_PI_2 magnitude:20.0];
    [self.animator addBehavior:pushBehavior];
}
The angle property of the push behavior defines the direction of the push. By setting the angle to M_PI_2, the force of the push behavior is directed towards the bottom of the screen.
The next step is adding the gravity behavior. The vector we pass to setGravityDirection will result in a force towards the top of the screen, pulling the alert view upwards.
UIGravityBehavior *gravityBehavior = [[UIGravityBehavior alloc] initWithItems:@[self.alertView]];
[gravityBehavior setGravityDirection:CGVectorMake(0.0, -1.0)];
[self.animator addBehavior:gravityBehavior];
What's interesting about the collision behavior is that we define a boundary that is off-screen.
UICollisionBehavior *collisionBehavior = [[UICollisionBehavior alloc] initWithItems:@[self.alertView]];
[collisionBehavior addBoundaryWithIdentifier:@"alertCollisionBoundary"
                                   fromPoint:CGPointMake(self.initialAlertViewFrame.origin.x, self.initialAlertViewFrame.origin.y - 10.0)
                                     toPoint:CGPointMake(self.initialAlertViewFrame.origin.x + self.initialAlertViewFrame.size.width, self.initialAlertViewFrame.origin.y - 10.0)];

[self.animator addBehavior:collisionBehavior];
We also need a dynamic item behavior for setting the elasticity of the collision. The result is that the alert view will bounce a little when it collides with the off-screen boundary.
UIDynamicItemBehavior *itemBehavior = [[UIDynamicItemBehavior alloc] initWithItems:@[self.alertView]];
itemBehavior.elasticity = 0.4;
[self.animator addBehavior:itemBehavior];
We also need to make the background view transparent again. We do this by setting the background view's alpha property to 0.0 in an animation block.
[UIView animateWithDuration:2.0 animations:^{
    [self.backgroundView setAlpha:0.0];
}];
Run your application once more to see the result.
6. Handling User Interaction
Even though the alert view responds to user interaction, we currently don't know which button the user has tapped. That's what we'll focus on in this section.
As we did with the menu component, we're going to make use of blocks to solve this problem. Blocks make for an elegant solution and can often be easier to use than a delegate protocol.
We start by updating the public showAlertView method. The method needs to accept a completion handler that the alert view invokes when the user has tapped one of the buttons. In AlertComponent.h, update the declaration of the showAlertView method from:
- (void)showAlertView;
to:
- (void)showAlertViewWithSelectionHandler:(void(^)(NSInteger buttonIndex, NSString *buttonTitle))handler;
The completion handler accepts two parameters, the index, of type NSInteger, and the title, of type NSString, of the button that was tapped by the user. If we want to invoke the completion handler when the user taps a button of the alert view, we need to keep a reference to the completion handler. This means we need to declare a property for the completion handler. We do this in the private class extension in AlertComponent.m.
@interface AlertComponent ()

...

@property (nonatomic, strong) void(^selectionHandler)(NSInteger, NSString *);

...

@end
Still in AlertComponent.m, update the method description like we did in the header file a moment ago and store the completion handler in the selectionHandler property, which just we declared.
- (void)showAlertViewWithSelectionHandler:(void (^)(NSInteger, NSString *))handler {
    self.selectionHandler = handler;

    ...
}
The last piece of the puzzle is invoking the completion handler in handleButtonTap:, passing in the button's tag and title.
- (void)handleButtonTap:(UIButton *)sender {
    // Call the selection handler.
    self.selectionHandler(sender.tag, sender.titleLabel.text);

    ...
}
The AlertComponent is complete. It's time to test everything. Head back to ViewController.m and update the showAlertView: action as shown below. As you can see, we invoke the new showAlertViewWithSelectionHandler: method and pass in a block, which will be called when a button in the alert view is tapped by the user.
- (IBAction)showAlertView:(id)sender {
[self.alertComponent showAlertViewWithSelectionHandler:^(NSInteger buttonIndex, NSString *buttonTitle) {
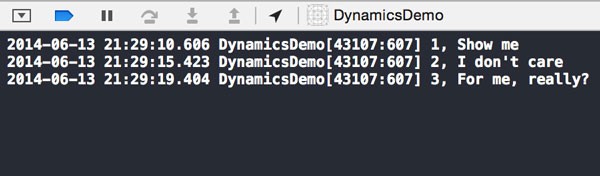
NSLog(@"%ld, %@", (long)buttonIndex, buttonTitle);
}];
}
That's it. Run your application once more and inspect Xcode's console to see the result of our work.
Conclusion
UIKit Dynamics was first introduced in iOS 7 and can help you create realistic animations quickly. This short series has illustrated that leveraging UIKit Dynamics in your projects isn't difficult and you don't need to be an expert in math or physics.
Note that UIKit Dynamics is primarily meant for using in view based applications. If you're looking for a similar solution for games, then I recommend taking a look at Apple's Sprite Kit, which is aimed at game development.

Comments