You’ve read about how linear layouts work in Android. Test your new skills with these progressive challenges involving linear layout controls and solidify your knowledge of the Java programming language and Android user interface design and development.
Setup
To prepare for this challenge, you’ll want to start with a basic Android application. Simply create an Android application within Eclipse and edit its default Activity, specifically the onCreate() method, to test the code you create for this challenge.
If what we've just asked of you is already too challenging, we would recommend taking a step back. Start with some of the Android tutorials, such as Introduction to Android Development or Beginning Android: Getting Started with Fortune Crunch. Once you’ve mastered setting up an Android project, return and try these progressive exercises.
A Progressive Challenge
This is a progressive challenge. It involves numerous skills that beginning Android developers must master in order to design and develop applications. By following each of the steps below, which grow in difficulty, you will solidify your knowledge of linear layouts and Android user interface design in general.
Step 0: Define Your String
Now that you have created a proper Android project, you’re going to need to create some resources for use within your user interface.
Create:
- Create seven string resources, one for each color in the spectrum (“Red”, “Orange”, “Yellow”, “Green”, “Blue”, “Indigo”, “Violet”)
- Create seven color resources, one for each color in the spectrum (Red=>#f00, Orange=>#ffa500, Yellow=>#ffff00, Green=>#0f0, Blue=>#00f, Indigo=>#4b0082, Violet=>#ee82ee)
- Create two more color resources for the text colors (Black=>#000, White=>#fff)
Stumped by creating string or color resources? Check out this tutorial on string formatting.
Challenge 1: Define Your Layout Resource
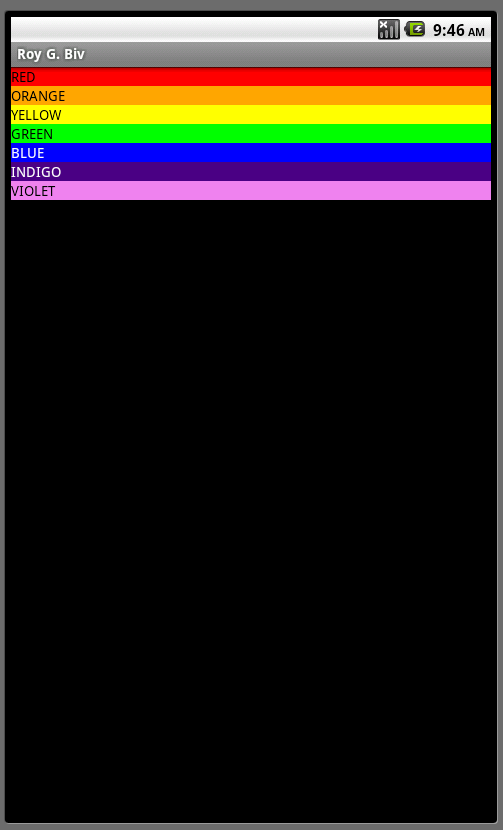
Begin by creating a new layout resource file called rainbow.xml. Within this XML file, add a vertically-oriented linear layout control that fills the entire screen. Next, add seven TextView controls as child controls within the linear layout: one for each color in the spectrum. Set the text of each TextView control to the appropriate color string in the spectrum and the background color to the appropriate color value. Also, set each control’s layout_width attribute to fill_parent and its layout_height attribute to wrap_content.
If you’ve completed this step correctly, your layout should look like this:
Challenge 2: Adjust Your Alignments
In this step, you’ll focus your attention on the various gravity properties available to controls, including those used by the linear layout.
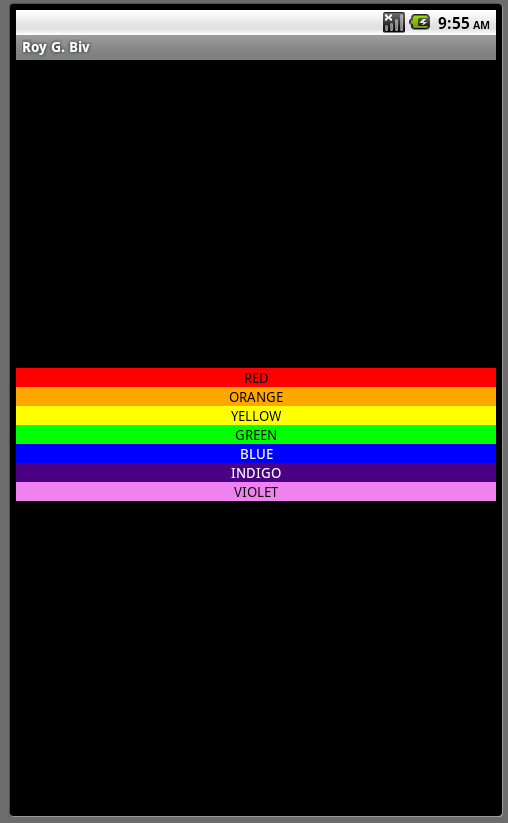
Update the rainbow.xml layout resource with the following changes: center the TextView controls in the screen, and center the text within each control. HINT: This will require two different XML attributes to be set, one on the linear layout, and one on each TextView control.
If you’ve completed this step correctly, your layout should look like this:
Challenge 3:
Modifying Linear Layout Child Controls
Linear layouts are very flexible. If you make modifications to child controls within a parent linear layout, the layout adjusts, when possible.
The TextView control text is small and somewhat hard to read. Begin by making a change to the TextView controls themselves. Update the rainbow.xml layout resource with the following changes: First, add a dimension value called textsize. In this case, we set it to 22dp.
Now your layout should look something like this:
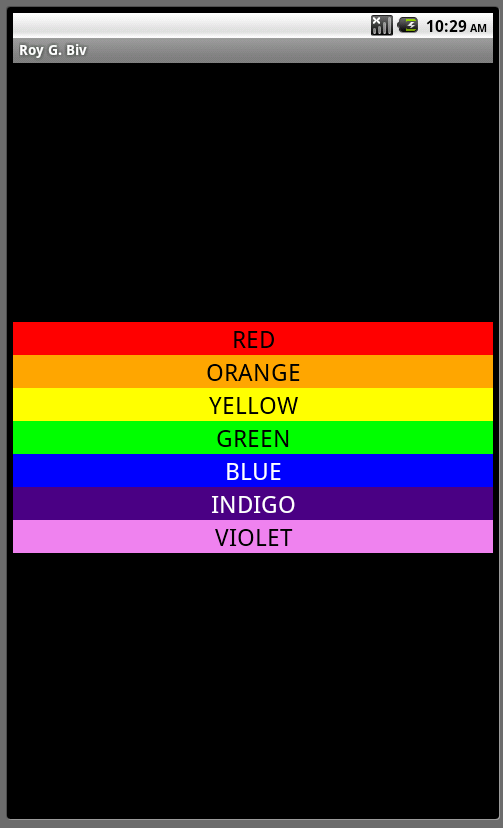
Note how the linear layout is flexible enough to accommodate the larger TextView controls, but they still don’t quite use up the available space on the screen and the black bands still exist.
ADVANCED TIP: You may want to consider creating alternate dimension resource values for use with different screen sizes. For example, for larger screens, a text size of 22dp looks nice, whereas on smaller screens, a text size of 14dp or 16dp may be more appropriate. For more information about creating alternative resources, see Supporting Multiple Screens.
Challenge 4: Using Screen Space Effectively
Notice all that unused black space? In this step, you’ll focus your attention on using the entire screen effectively. The TextView controls within the linear layout are appropriately sized, but they could grow slightly to use that unused black space.
We want the TextView controls to expand to all available space, regardless of what orientation the device is in, or what size the device screen is.
Do this by adjusting the layout_weight attributes for the child controls within the linear layout in order to give each control specific boundaries to grow into. The effectiveness of the layout_weight attribute is more obvious when the device is in a certain orientation: for vertical linear layouts, you’ll see how weight works best when the device is in portrait mode, whereas for horizontal linear layouts, you’ll see how weight works best in landscape mode.
First, try setting weights that allow each TextView color band equal area on the screen. Hint: weights of 0.14 for 5 controls and 0.15 for 2 controls sum to 1.0.
If you’ve configured the weights of your controls correctly, your screen should look something like this:
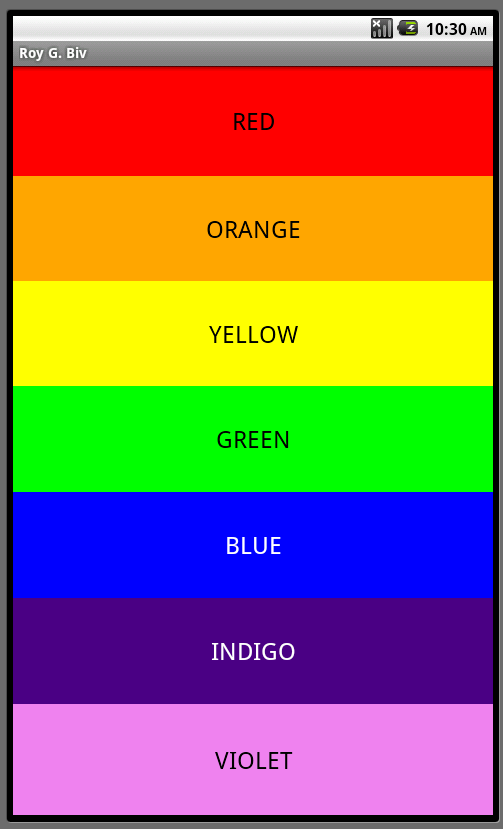
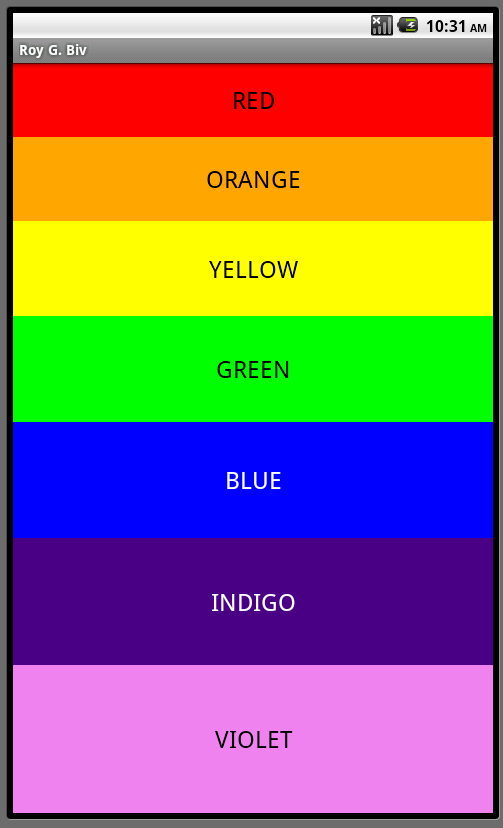
Next, try setting the weights to something that allows each TextView control band gradually increasing area on the screen such that the RED band is the smallest area and the VIOLET band is the largest. HINT: a good distribution is: 0.08, 0.10, 0.12, 0.14, 0.16, 0.18, 0.22.
If you’ve completed this step correctly, your layout should look like this:
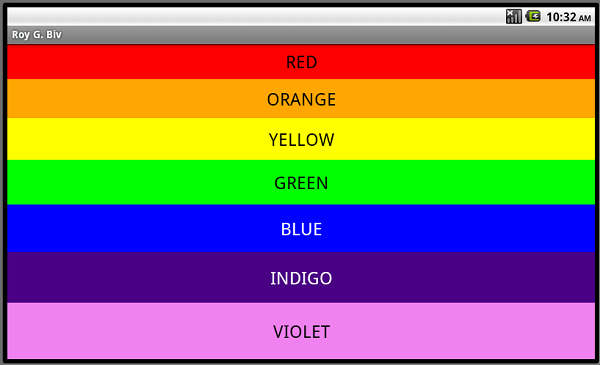
Just for kicks, switch to landscape mode and check out what the same layout looks like:
Bonus Challenge: Recreate the Layout Used in Step 4b Programmatically in Java
If you’ve found the previous challenges reasonably straightforward, consider the following bonus challenge: recreate your final layout resource (with the progressive weights on the individual TextView controls) programmatically in Java, as opposed to in a layout XML resource.
You will need to comment out the setContentView() call in your Activity’s onCreate() method and build up your LinearLayout, as discussed in Android User Interface Design: Linear Layouts.
Here are some hints for implementing the rainbow layout programmatically:
- Begin by constructing each of the TextView controls.
- To configure the layout parameters for each TextView control, construct a set of LinearLayout.LayoutParams, to set the layout_width, layout_height and weight of each control.
- Use the setText() method of the TextView class to load and display the appropriate string resource.
- Use the setTextSize() method of the TextView class to configure the font size of the text. You can use the getResources().getDimension() method to load the dimension resource.
- Use the setTextColor() method of the TextView class to configure the font color of the text. You can use the getResources().getColor() method to load the color resource.
- Use the setBackgroundColor() method of the TextView class to configure the background color of the control. Again, you can use the getResources().getColor() method to load the color resource.
- Use the setGravity() method of the TextView class configure the text alignment. The Gravity class contains definitions for different gravity types.
- Next, construct a LinearLayout control.
- Use the setOrientation() method of the LinearLayout class to configure the orientation of the layout. The LinearLayout class contains definitions for both orientations.
- Use the setGravity() method of the LinearLayout class to configure the alignment of all child controls of the layout. The Gravity class contains definitions for different gravity types.
- When you set child weights programmatically, you must also set the total weight sum using the setWeightSum() method of the LinearLayout class. E.g. setWeightSum(1.0f);
- Don’t forget to construct a LayoutParams object to set the height and width attributes of the linear layout itself.
- Add each TextView control to your LinearLayout object using the addView() method.
- Finally, use the setContentView() method to display the LinearLayout you just configured.
You’ll find the Java solution in the download provided with this tutorial.
Conclusion
Android user interface designers use linear layouts all the time to display controls in an orderly fashion horizontally or vertically. You can control where the layout’s child controls display using the gravity attribute of the linear layout. You can control how much space each child control is allotted using the layout_weight attribute.
Best of luck!
About the Authors
Mobile developers Lauren Darcey and Shane Conder have coauthored several books on Android development: an in-depth programming book entitled Android Wireless Application Development and Sams TeachYourself Android Application Development in 24 Hours. When not writing, they spend their time developing mobile software at their company and providing consulting services. They can be reached at via email to [email protected], via their blog at androidbook.blogspot.com, and on Twitter @androidwireless.
Need More Help Writing Android Apps? Check out our Latest Books and Resources!


Comments