The Android SDK comes with a number of useful tools to help you design, develop and test Android applications. One tool that comes in handy for designing, debugging, and profiling your layouts and Android application user interfaces is called the Hierarchy Viewer. The Hierarchy Viewer is available as a standalone executable and from within Eclipse using the ADT plug-in for Android development. In this tutorial, learn how to get up and running with this handy tool.
The Hierarchy Viewer is a visual tool that can be used to inspect your application user interfaces in ways that allow you to identify and improve your layout designs.
Step 1: Getting Started
We’ve whipped up a very simple application with three screens that combine controls in different ways to illustrate how one might use the Hierarchy Viewer. Each screen uses LinearLayout and FrameLayout controls as well as TextView and ImageView controls. Three underlying drawable graphics are used: a cat, a bowl, and a fish. Figure 1 shows our simple Fishbowl app, with its three screens:
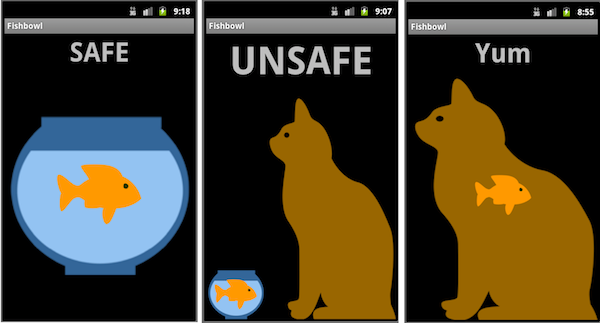
Screen #1 uses a vertical LinearLayout control with two “cells”: A TextView control that says “Safe” and a FrameLayout which contains two ImageView controls: a bowl and a fish.
Screen #2 uses a vertical LinearLayout control with two “cells”: A TextView control that says “Unsafe” and another horizontally-oriented LinearLayout control. The inner LinearLayout has two cells: the FrameLayout which contains two ImageView controls: a bowl and a fish and a second cell with an ImageView of the cat.
Screen #3 uses a vertical LinearLayout control with two “cells”: A TextView control that says “Yum” and a FrameLayout which contains two ImageView controls: a cat and a fish. (very similar to Screen #1 in terms of layout design)
Step 2: Launch Your App
Your application must be running in order for you to inspect it using the Hierarchy Viewer. For this example, I had an emulator running, so I simply launched the Fishbowl app.
Very Important Note: You cannot have your debugger attached to the application while using Hierarchy Viewer. Make sure Eclipse isn’t trying to debug your application when using Hierarchy Viewer, or it won’t work.
Step 3: Launch the Hierarchy Viewer
The Hierarchy Viewer is now incorporated into the ADT plug-in for Eclipse as a perspective, but it can also be launched from the command-line like many of the other Android tools (it’s in the tools directory of your Android SDK installation). We personally prefer using the standalone app, and have done so for the screenshots provided in this tutorial.
When you first launch the app version, it takes a moment to load up. The first screen you will see shows the device sources available to Hierarchy Viewer. I’ve got one emulator running, with my app running in the foreground. I can simply select my running activity: FishbowlActivity. Now I am ready to use the Hierarchy Viewer.
Once you have selected your activity, as shown in Figure 2, you have two different features of the Hierarchy Viewer that you can use:
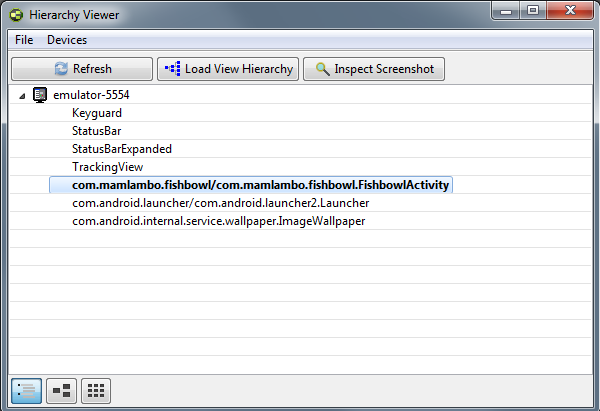
- Load View Hierarchy (Inspect your layout controls)
- Inspect Screenshot (Enter pixel perfect mode)
You can switch between the main screen, the inspect screenshot screen, and the view hierarchy screen using the three buttons in the bottom left-hand corner of the application.
Step 4: Inspecting Screenshots
First, let’s click on the Inspect Screenshot button. This enters pixel perfect screen mode, which allows you to magnify your screen and get a hyper-accurate look at what is being displayed, as shown in Figure 3:
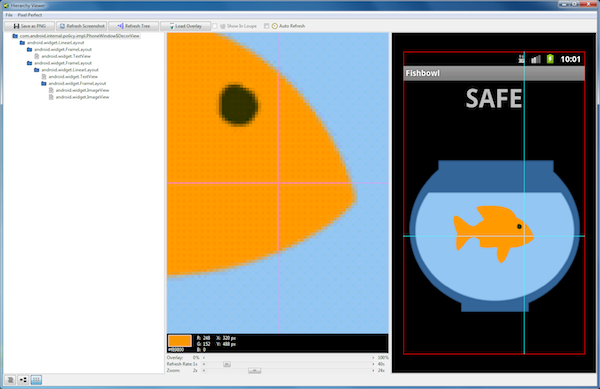
You can zoom in and out on specific areas of the screen, examine specific views, and so on. You can save off screenshots as PNG files. You can also use this mode to design your user interface using overlays (bitmap images of what your UI will look like).
Step 5: Loading the View Hierarchy
The rest of this tutorial will focus on the basics of using the Load View Hierarchy feature of the Hierarchy Viewer. You can click the middle button in the bottom left-hand corner of the screen, or return to the main screen and press the Load View Hierarchy button to enter this mode.
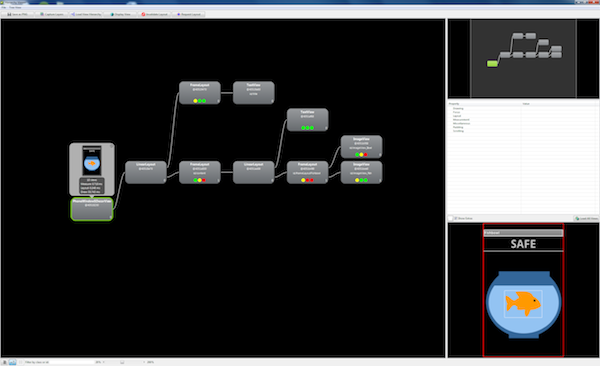
The View Hierarchy mode has a number of different panes, as shown in Figure 4 above.
- Left-hand side: The Tree Hierarchy
- Right-hand top: The Loupe Pane
- Right-hand middle: The Properties Pane
- Right-hand bottom: The Wire-Frame Pane
Step 6: Understanding the Tree Hierarchy
The left-most pane provides maps the controls in your app layouts into a tree view. All controls within your current layout are shown, from left-to-right, in terms of how they are encapsulated.
So, for example, if you start at the far right-hand side, you’ll see the lowest level child controls. Since we are inspecting Screen #1, this means we are looking at two ImageView controls: bowl and fish. Move left (up) a level, and you’ll see that these two controls are within the FrameLayout called @id/frameLayoutFishbowl. Move up another level, and you’ll see your application’s “root” LinearLayout control, which contains both a TextView (that displays the text “Safe”) and the FrameLayout @id/frameLayoutFishbowl.
Note:
When you create an application, by default your layouts are not at the root of the hierarchy. In fact, there are several layers of controls above your content that will usually display the system status bar (battery life, time of day, signal strength, etc.) as well as a title bar, and then your contents are part of a FrameLayout control called @id/content. When you load layout contents using the setContentView() method within your Activity class, you are specifying what to load within this high-level FrameLayout. This is important to know when you start using the Hierarchy Viewer, since it shows the layout controls as they dictate the entire screen, not just the portion of the screen your application normally runs in.
Step 7: Inspecting Individual Controls in the Tree Hierarchy
You can click on individual controls in the Tree Hierarchy. Several things will happen.
First, a bubble will appear with some important information about that view. For example, if you click on the TextView control in Screen #1, you will then see what is shown in Figure 5. Note that the type (TextView), identifier (system generated in this case), and what is displayed in the View (some text) are easily identified. Many of the other fields, including the colored dots, help you determine view performance (beyond the scope of this basic tutorial).

Similarly, you might look at an ImageView control of the fishbowl:
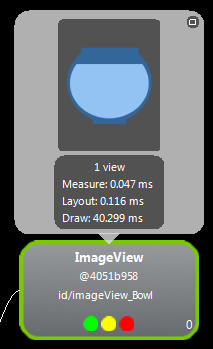
The specific view is also highlighted in the Loupe pane. When your tree gets too large to display in one screen, two things may be true:
- You’ll need to use the Loupe pane to navigate around and see different parts of the tree.
- You may be overloading your screen with too many controls. Simplify!
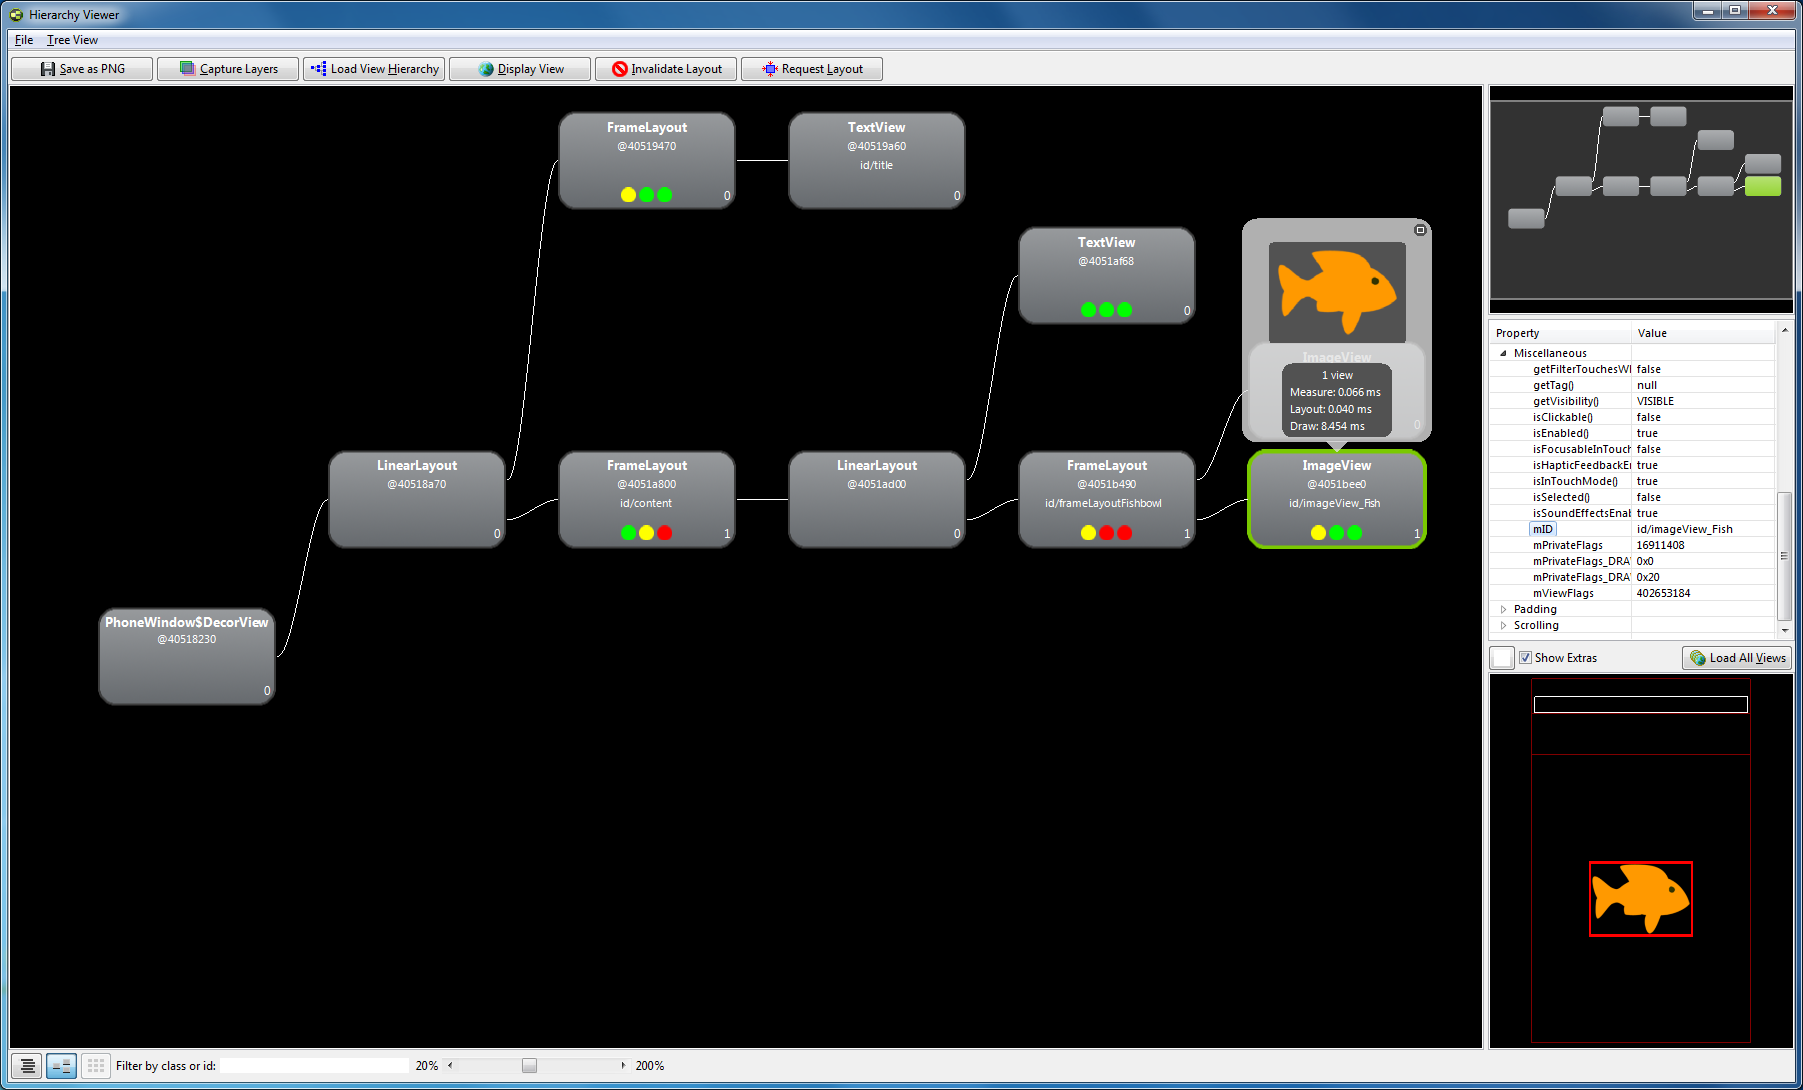
Let’s say we highlighted the ImageView of the fish itself. You can also inspect the property details of that view in the Properties Pane and see where that view falls within the Wire-Frame view, as shown in Figure 7.
Step 8: Refreshing
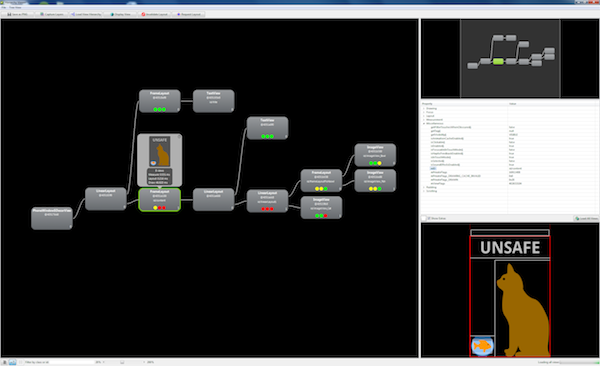
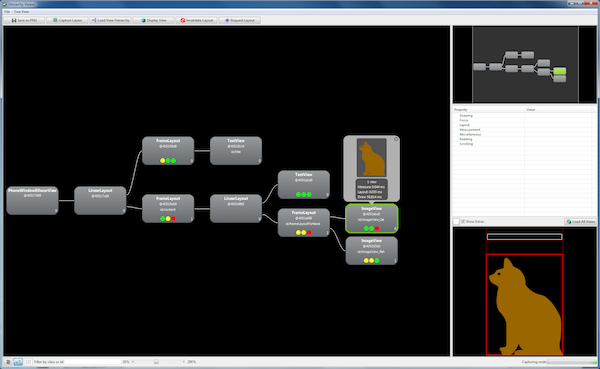
When you update your UI, the Hierarchy Viewer doesn’t update its contents—not unless you force it to refresh. Once you do, you can look at another screen. For example, let’s look at a slightly more complex layout, like Screen #2 (Figures 8 & 9):
Conclusion
This concludes your introduction to the Hierarchy Viewer application. The Hierarchy Viewer is a powerful tool for visualizing and inspecting the components that make up your Android app user interfaces. It can be used to help streamline layout design, debug layout problems, and determine where your UI performance bottlenecks are. Remember, you can use this tool from within Eclipse (provided you’ve installed the ADT plug-in) or you can simply run it from the command-line.
As always, we look forward to your feedback.
About the Authors
Mobile developers Lauren Darcey and Shane Conder have coauthored several books on Android development: an in-depth programming book entitled Android Wireless Application Development, Second Edition and Sams Teach Yourself Android Application Development in 24 Hours, Second Edition. When not writing, they spend their time developing mobile software at their company and providing consulting services. They can be reached at via email to [email protected], via their blog at androidbook.blogspot.com, and on Twitter @androidwireless.
Need More Help Writing Android Apps? Check out our Latest Books and Resources!


Comments