Our goal in this series is to learn about Android SDK development. So far we explored the development tools, looked at the structure of an Android app project, started to create a user interface, and responded to user interaction. In this tutorial, we will look at the basic structures and concepts in Java that you need to know in order to start developing apps for Android.
Introduction
If you are already familiar with Java you can ignore this section. If you have limited or no familiarity with the language, then this tutorial will indicate what you need to learn in order to go any further with Android. This tutorial is not enough in itself to teach you Java from scratch, but will act as a primer to get you started. You should follow the tutorial with additional Java learning as necessary.
We won't spend too long going over the details in this tutorial, but if you are struggling with any of the concepts check out the Oracle Java Tutorials. This is an extensive guide to the language that is accessible to beginners. Don't be too alarmed if you feel a little overwhelmed by what we cover in this tutorial at first, it will make a lot more sense once you start implementing the structures in Android projects.
1. Java Syntax
Step 1
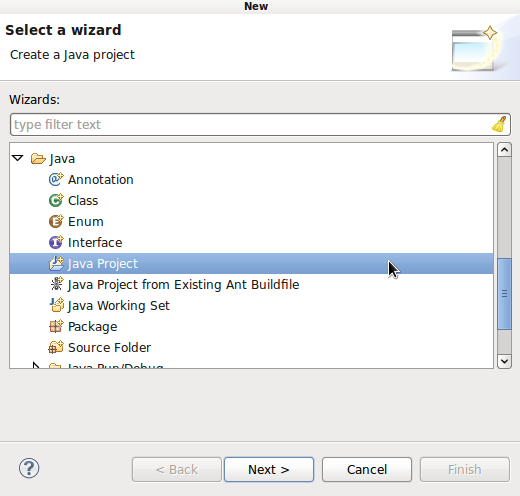
You already saw a little Java syntax in our Android project, but for clarity, let's start another project. Rather than an Android project, this time we will use a Java one, so that you can easily see the structures we use. Open Eclipse. Click the "New" button. In the wizard that appears, scroll down to the Java folder and expand it. Select "Java Project" and click "Next".
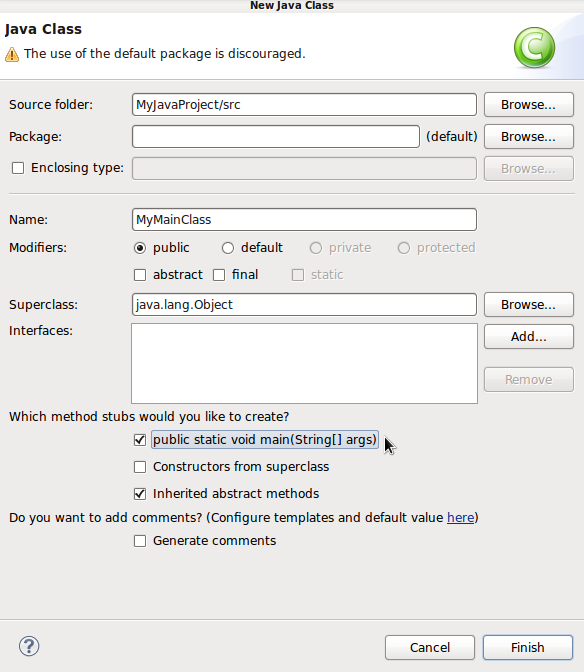
Enter "MyJavaProject" as the project name and click "Finish". Eclipse then creates your new project in the workspace. In the Package Explorer, expand the new project folder. Right-click on "src" and select "New" then "Class". Enter "MyMainClass" in the Name field. Check the checkbox with "public static void main" next to it and click "Finish".
Eclipse creates your class and opens it in the editor. Don't pay much attention to the structure of the project or the existing content of the class because your Android projects will be differently structured. You can use this project to work on your Java coding skills, it's easier to run and test the code you write here than with an Android app, and you can focus on the Java syntax.
The "public static void main" line you see in the class file is the main method. Whatever is inside this method executes when the application runs. The content of the method is what appears between the curly brackets after "public static void main(String[] args)". Eclipse may have generated a "to do" line - just ignore it. Create a new line after it and we will add our code there.
Step 2
In Java, a variable can store a data value such as a text string or number. When you create, or "declare" a variable in Java, you have to specify the type of the data within it and give it a name. Enter the following:
int myNum;
This line declares an integer variable. We can declare a variable and assign a value to it by extending the line:
int myNum = 5;
We can now refer to this variable using its name. Add the following line next, writing the variable value to the output console:
System.out.println(myNum);
You will not typically write to the system output like this in your Android apps, but will use the LogCat view instead. However, writing to the output in this way is a convenient way to test your Java code.
Step 3
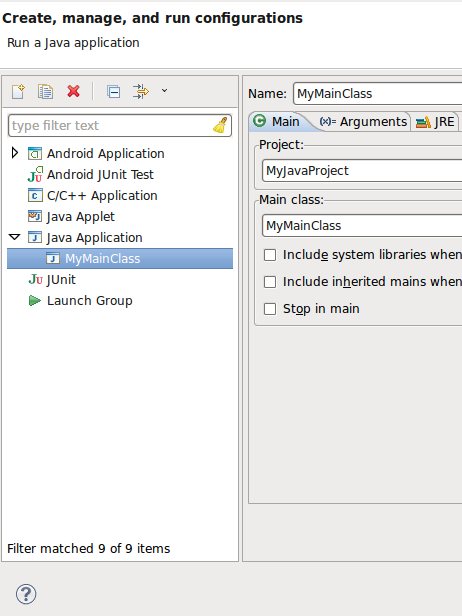
Let's run the application. The process is slightly different for Android apps, but we'll get to that later in the series. Select "Run" then "Run Configurations". Select "Java Application" in the list on the left and click the "New launch configuration" button above it. Eclipse automatically selects your new Java application if it is the only one you have. Otherwise, select it using the "Browse" button.
Click "Run" to run your application. You should see the number five written out to the Console view beneath the editor. You can use this technique to test your Java code as you learn it.

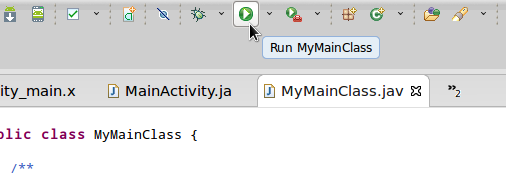
You can run the project you ran last at any time using the "Run" button in the toolbar.
Step 4
You'll use the same syntax whenever you declare a variable in Java. To assign a different value to the variable later in the program, you can refer to it by name:
myNum = 3;
This overwrites the existing value. In Java there are many different variable types. The int is referred to as a primitive type, along with a few other number types, char for character values and boolean, which stores either a true or false value. There are also Object types; we will explore Objects later. An essential Object type to familiarize yourself with is String, which stores a text string:
String myName = "Sue";
Text string values are enclosed in quotes. You can include these directly in some cases, for example:
System.out.println("number: " + myNum);
Add this code and run it, the console will display: "number: " followed by the variable value.
Step 5
Above we saw the assignment operator "=" - here are a few of the other common operators:
//add
myNum = 5+6;
//subtract
myNum = 7-3;
//multiply
myNum = 3*2;
//divide
myNum = 10/5;
//remainder
myNum = 10%6;
//increment (add one)
myNum++;
//decrement (subtract one)
myNum--;
The operators can be used on variables as well as hard-coded numbers (as above):
int myNum = 5;
int myOtherNum = 4;
int total = myNum+myOtherNum;//9
Step 6
One other Java structure that is essential to Android is the comment. You can add a comment in two ways:
//this is a single line comment

/* This is a multiline comment
* stretching across lines
* to give more information
*/
It is vital to get into the habit of commenting your code as you write it, for your own benefit as well as anyone else who reads the code.
2. Control Structures
Step 1
The code we added to the main method executes when the Java application runs. When the Android application we created runs, whatever is in the onCreate method of the main Activity is what runs. Each line inside these methods is executed after the previous line, but the flow of execution is not always linear. There are many control structures involved in Java, so let's look at some of the most common, starting with conditionals.
Conditional statements involve carrying out tests to determine the flow of execution. The simplest conditional structure in Java is the if statement:
if(myNum>3)
	System.out.println("number is greater than 3");
This tests determines whether the value of the variable is greater than three. If it is, the string will be written to output. If not, then nothing will be written out and processing simply moves to the next line in the program. We say that a conditional test "returns" a true or false value. True and false are boolean values. We can add an else, which only executes if the if returned false:
if(myNum>3)
	System.out.println("number is greater than 3");
else
	System.out.println("number is not greater than 3");
The else executes if the value is three or less. Try the code with different values for the integer variable to see the results of the conditional tests. We can also chain multiple tests:
if(myNum>10)
	System.out.println("number is greater than 10");
else if(myNum>7)
	System.out.println("number is greater than 7");
else if(myNum>3)
	System.out.println("number is greater than 3");
else
	System.out.println("number is 3 or less");
Each test performs only if all previous tests in the chain returned false. So for any number, only one string is output. You can chain as many else if statements together as you need. You can also use if statements chained with one or more else if blocks without a final else.
We tested for one number being greater than another. Try the following variations:
if(myNum<10)
	System.out.println("number less than 10");
if(myNum==10)
	System.out.println("number equals 10");
if(myNum!=10)
	System.out.println("number is not equal to 10");
if(myNum>=10)
	System.out.println("number either greater than or equal to 10");
if(myNum<=10)
	System.out.println("number either less than or equal to 10");
You can carry out similar tests on other variable types including strings. To carry out multiple tests at once, use the following syntax:
if(myNum>=10 && myNum<=50)
	System.out.println("number is between 10 and 50");
The "&&", known as the "and" operator, means that the whole statement will only return true if both tests return true. The "or" operator will return true if either test returns true:
if(myNum<0 || myNum!=-1)
	System.out.println("number is less than 0 or not equal to -1");
To group code into a block, we can use curly brackets - all of the code between the brackets executes if this test returns true:
if(myNum<10)
{
	System.out.println("number less than 10");
	myNum=10;
}
Such brackets group code in loops, methods, and classes.
Step 2
Let's look at loops now. The following for loop iterates ten times, meaning its content executes ten times:
for(int i=0; i<10; i++){
	System.out.println(i);
}
The first expression in the for outline initializes a counter integer variable to zero. The second expression is a conditional test, checking that the variable is less than ten. If this returns true, the content of the loop executes, if not the loop will end. Once the content of the loop has executed, the third expression executes, incrementing the counter.
The while loop uses slightly different syntax. The following example has the same effect as the for loop:
int i=0;
while(i<10){
	System.out.println(i);
	i++;
}
Loops can contain multiple lines of code, including other loops.
Step 3
We have already encountered the main method and the Android onCreate method. Let's look at creating your own methods. Place the following method after the closing bracket for your main method:
public static void doSomething(){
	System.out.println("something");
}
This method is defined as public, meaning any class in the project can call on its processing. If it was "private" it's only accessible inside the class (this is "visibility"). You will not typically have to include the "static" modifier in your first Android apps, so ignore it. The "void" represents the return type. In this case the method returns nothing. To execute the method, add a call to it back in your main method:
doSomething();
Run your application to see this function. Alter the method to return a value:
public static int doSomething(){
	return 5;
}
Alter the method call and run again:
System.out.println(doSomething());
The returned value is written out. Methods can also receive parameters:
public static int doSomething(int firstNum, int secondNum){
	return firstNum*secondNum;
}
When calling the method, you must pass parameters of the correct type and number:
System.out.println(doSomething(3, 5));
Methods can split application processing into logical chunks. They are particularly useful if you need to carry out the same tasks more than once; you simply define them in the method then call it whenever you need it. If you change the process, you only need to change it in the method code.
3. Classes and Objects
Step 1
We've seen how methods can be used to reuse code and to split it into logical sections. Classes and objects do this on a larger scale. You can divide the tasks in an application up between objects, with each object having a set of responsibilities defined by its class. This is similar to a method being responsible for a particular area of functionality, but an object can have multiple methods and also store data values.
Imagine you are creating a game - you can create a class dedicated to handling the details of the user. Select your application package, in "src", in the Package Explorer. Right-click and choose "New" then "Class". Enter "GameUser" as the class name, make sure the main method stub checkbox is unchecked this time and click "Finish". Eclipse then opens the class file, which initially only has the class declaration outline in it:
public class GameUser {
//class content
}
Everything you add is between these brackets (unless you add import statements, which are listed above this section). Your Android apps notice that the class files lists the package name at the top. It isn't listed here because we used the default package.
Step 2
Inside the class, add a couple of variables:
private String playerName;
private int score;
These are called "instance variables" because they are defined for each instance of the class we create. Add a constructor method after these. This is what executes when an object of the class is created:
public GameUser(String userName, int userScore){
	playerName=userName;
	score=userScore;
}
The constructor always has the same name as the class and may or may not require parameters. The constructor should typically assign values to the instance variables, often using the parameters.
Step 3
The class can also define methods. Add the following typical set after the constructor:
public String getName() {return playerName;}
public int getScore() {return score;}
public void setName(String newName) {playerName=newName;}
public void setScore(int newScore) {score=newScore;}
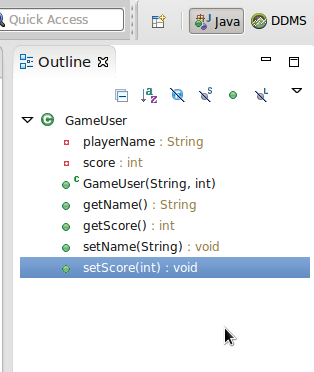
These are known as get and set methods, or getters and setters, because they provide code external to the class with the ability to retrieve and set the values of the instance variables. Have a look at the Outline view in Eclipse to see how it can help to navigate class content.
Step 4
Save your new class file. Back in your main class, create an object of the new class in the main method:
GameUser aUser = new GameUser("Jim", 0);
We pass the parameters listed in the constructor - the "new" keyword will make the constructor execute. We can now use this instance of the class to access the data values in it by calling its methods:
System.out.println(aUser.getScore());
aUser.setScore(5);
System.out.println(aUser.getScore());
Run the program to see how the value changes after calling the public methods on the object. You can create multiple instances of the object which will be managed separately:
GameUser anotherUser = new GameUser("Jane", 5);
4. Inheritance & Interfaces
Step 1
We've seen how a class defines the sets of responsibilities you can make use of by creating object instances. This applies not only to classes you create yourself, but also to existing Java and Android classes which you can also make use of. As well as creating instances of these platform classes, you can extend them using inheritance. With inheritance, you can create a class which inherits the functionality of an existing class while also providing its own processing. We saw an example of this in the first Android project we created, with the main Activity class.
Open the class now. In the opening line of the class declaration you will see "extends Activity". This means that the class is a subclass of the Android Activity class. Using the Activity class lets Android handle the details of presenting a screen to the user, with methods for when the screen is in various states (created, paused, destroyed, etc). This lets you focus on the unique aspects of the app, by adding code to the methods defined within the Android Activity class declaration and additional methods of your own if necessary.
This is a pattern you will often use on Android, extending defined classes for common aspects of apps. You can complement these with your own classes where appropriate.
Step 2
Look again at your Activity class opening line. Remember that we added "implements OnClickListener" to handle clicks on a button in the UI. This is referred to as implementing an Interface. An Interface is similar to a class you inherit from using "extends" except that the Interface declaration simply lists method outlines. You have to provide the method implementation for each of them. So when we implemented OnClickListener we committed the class to providing an onClick method, which we did. An Interface is therefore like a contract. With inheritance, extending classes inherits the method implementations provided in the class declaration for their superclass (the class being extended). You can override these implementations if you need to.
Conclusion
In this tutorial we outlined some of the essential features of Java syntax you need to understand. There are more structures and concepts to become familiar with. If you don't have Java experience and want to make sure you know enough to develop effectively for Android, use the Oracle Java Tutorials. Topics to consider learning about include arrays and switch statements. Later in the series we will look at some of the most common Android classes you are likely to use. In the next part, we will explore the resources in an Android app project.

Comments