Using Android Intents and the Gallery View, you can allow the user to select images from their device. In this tutorial we will combine user image selection with the Gallery View, which we will enhance a little to create an interactive display featuring the user's chosen images. If you have completed at least one Android application, you should be able to carry out the steps in the tutorial.
The app we will build in this tutorial is going to display a scrolling list of thumbnail images, using the Android Gallery View. The user will be able to import images to display by long-pressing the items in the Gallery, on which they will be taken to the default Android gallery application or their chosen file manager. When a selected image is returned to the app, we will resample it before display, so that we don't use unnecessary memory resources. On pressing a thumbnail, the app will display the selected image at a larger size.
Step 1: Create an Android Project
Start a new Android project in Eclipse. In your app's main Activity class, add the following import statements at the top, before the opening class declaration line:
import android.app.Activity;
import android.content.Context;
import android.content.Intent;
import android.content.res.TypedArray;
import android.database.Cursor;
import android.graphics.Bitmap;
import android.graphics.BitmapFactory;
import android.net.Uri;
import android.os.Bundle;
import android.provider.MediaStore;
import android.view.View;
import android.view.ViewGroup;
import android.widget.AdapterView;
import android.widget.AdapterView.OnItemClickListener;
import android.widget.AdapterView.OnItemLongClickListener;
import android.widget.BaseAdapter;
import android.widget.Gallery;
import android.widget.ImageView;
Your class declaration should begin something like this, but with your own Activity name:
public class PicSelectActivity extends Activity {
Inside the class declaration, before the "onCreate" method, which Eclipse should have automatically included, add these instance variable declarations:
//variable for selection intent
private final int PICKER = 1;
//variable to store the currently selected image
private int currentPic = 0;
//gallery object
private Gallery picGallery;
//image view for larger display
private ImageView picView;
The first variable, which is a constant, is for identifying the image chooser Intent when the user's chosen image is returned to the app. When the user long-presses a thumbnail item and is taken out of the app to choose an image, we will use the "currentPic" variable to keep track of which thumbnail they are selecting an image for. The other two variables are for user interface items we need to reference in the class.
In your manifest file, the only addition you should need is the following, added to your app's main Activity element:
android:configChanges="orientation|keyboardHidden"
This will allow the app to retain imported images on orientation changes. Now let's setup the text Strings we want to use within the user interface. Open your "res/values/strings.xml" file. Eclipse should have added your application name already, which you can alter if you wish. Include the following additional String elements:
<string name="picture">Picture</string>
<string name="select_intro">Long-press a thumbnail to add an image</string>
<string name="show_intro">Press a thumbnail to display at larger size</string>
These are all for use within the user interface. Now go back to your app Activity class.
Step 2: Design the App
Before we implement the app functionality in Java, let's complete the design elements. Open your "res/layout/main.xml" file. We will be using a Linear Layout, so include the following outline in your main XML:
<LinearLayout xmlns:android="http://schemas.android.com/apk/res/android"
    android:layout_width="fill_parent"
    android:layout_height="fill_parent"
    android:orientation="vertical" >

</LinearLayout>
We will be adding more elements inside the Linear Layout. Start with an informative Text View as the first item in the Linear Layout:
<TextView android:layout_width="fill_parent"
	android:layout_height="wrap_content"
	android:padding="5dp"
	android:text="@string/select_intro"
	android:gravity="center"
	android:textStyle="bold" />
Notice that we refer to a String we defined in the strings XML file. Next add the Gallery element as follows:
<Gallery
	android:id="@+id/gallery"
	android:layout_width="fill_parent"
	android:layout_height="wrap_content" />
We use an ID attribute so that we can refer to the Gallery in the Java code. Next add another informative Text View:
<TextView android:layout_width="fill_parent"
	android:layout_height="wrap_content"
	android:gravity="center"
	android:padding="5dp"
	android:textStyle="italic"
	android:text="@string/show_intro" />
Again, we use a string resource already defined. Finally, the last item in our Linear Layout is going to be an Image View for displaying one Gallery image at larger size:
<ImageView
	android:id="@+id/picture"
	android:layout_width="fill_parent"
	android:layout_height="fill_parent"
	android:contentDescription="@string/picture" />
We need to refer to this View in Java, so we use an ID attribute. We also use a string resource as the content description. Now we need to define some style attributes for the Gallery. Create a new file in your "res/values" directory, naming it "attrs.xml". Enter the following code:
<resources>
	<declare-styleable name="PicGallery">
		<attr name="android:galleryItemBackground" />
	</declare-styleable>
</resources>
We are going to use some of the Android platform style resources to style our Gallery items, and will refer to these in the Java code.
Now go back to your Activity class. Inside the "onCreate" method, your existing code should appear as follows:
super.onCreate(savedInstanceState);
setContentView(R.layout.main);
After these lines, add the following, retrieving references to two of the user interface items:
//get the large image view
picView = (ImageView) findViewById(R.id.picture);

//get the gallery view
picGallery = (Gallery) findViewById(R.id.gallery);
Now we are ready to build the Gallery and handle user interaction.
Step 3: Create a Base Adapter
To build the Gallery View, we're going to create a class which extends the Base Adapter class. In your Activity class, after the "onCreate" method, create a new inner class outline as follows:
public class PicAdapter extends BaseAdapter {

}
Inside this we will provide a few methods that are required by the Base Adapter and later will add some custom methods for this app. First, inside the new class, add some instance variables:
//use the default gallery background image
int defaultItemBackground;

//gallery context
private Context galleryContext;

//array to store bitmaps to display
private Bitmap[] imageBitmaps;

//placeholder bitmap for empty spaces in gallery
Bitmap placeholder;
The first variable represents the Android Gallery item background we referred to in our "attrs.xml" file. The Context is for referring to the user interface when adding elements. The Bitmap array will store the bitmaps we are going to display as part of the Gallery View. To start with, we will use a placeholder image, for Gallery items the user has not selected images for yet.
Let's go ahead and create the constructor method for our new PicAdapter class, after the instance variables:
public PicAdapter(Context c) {

	//instantiate context
	galleryContext = c;

	//create bitmap array
	imageBitmaps  = new Bitmap[10];

	//decode the placeholder image
	placeholder = BitmapFactory.decodeResource(getResources(), R.drawable.ic_launcher);

	//more processing

}
We will add more code to the constructor method next. Here we first instantiate the Context and Bitmap array variables - we are going to display a Gallery with 10 items in it but you can alter this if you like. For demonstration, we are using the launcher icon provided as standard when you create an Android project in Eclipse as our placeholder image, but you can of course create your own. If you do want to use your own image, save it to your drawable folders and alter the "decodeResource" line in the above code to reflect its name.
Now we can assign the placeholder image to each position in the array, so that all of the Gallery thumbnails will initially display it - still inside the constructor method:
//set placeholder as all thumbnail images in the gallery initially
for(int i=0; i<imageBitmaps.length; i++)
	imageBitmaps[i]=placeholder;
To complete the constructor method, we now set the Gallery item background image:
//get the styling attributes - use default Andorid system resources
TypedArray styleAttrs = galleryContext.obtainStyledAttributes(R.styleable.PicGallery);

//get the background resource
defaultItemBackground = styleAttrs.getResourceId(
	R.styleable.PicGallery_android_galleryItemBackground, 0);

//recycle attributes
styleAttrs.recycle();
Here we refer to the content of our "attrs.xml" file.
Now we need to provide a few standard methods for any class extending the Base Adapter class. First include the "getCount" method, after the constructor method:
//return number of data items i.e. bitmap images
public int getCount() {
	return imageBitmaps.length;
}
This method returns the number of items in the Gallery View. After this method, add the standard "getItem" method:
//return item at specified position
public Object getItem(int position) {
	return position;
}
Next add the "getItemId" method:
//return item ID at specified position
public long getItemId(int position) {
	return position;
}
You don't need to worry too much about the content of these methods as they are standard. Now we add a slightly more complex method required by the class:
//get view specifies layout and display options for each thumbnail in the gallery
public View getView(int position, View convertView, ViewGroup parent) {

	//create the view
	ImageView imageView = new ImageView(galleryContext);
	//specify the bitmap at this position in the array
	imageView.setImageBitmap(imageBitmaps[position]);
	//set layout options
	imageView.setLayoutParams(new Gallery.LayoutParams(300, 200));
	//scale type within view area
	imageView.setScaleType(ImageView.ScaleType.FIT_CENTER);
	//set default gallery item background
	imageView.setBackgroundResource(defaultItemBackground);
	//return the view
	return imageView;
}
In the "getView" method, we define what we want to appear within each Gallery item. Our Bitmap array is going to contain the images we want to display at each position, with an Bitmap's array index corresponding to its position within the Gallery. As well as creating the View, here we set the Bitmap to appear within it, together with a few display properties. We also set the item background we referred to earlier. You can alter the thumbnail size if you like. Each thumbnail image will appear centred if it is smaller than the item View - you can opt, for example, to stretch the image to fit the thumnbail if you prefer, by altering the "ScaleType".
Now scroll up to the top of your app's main Activity class declaration. Add a new instance variable representing an object instance of the new class you just created:
//adapter for gallery view
private PicAdapter imgAdapt;
Now, in the "onCreate" method, after the code you already added, instantiate your Base Adapter variable and set it as the adapter for the Gallery:
//create a new adapter
imgAdapt = new PicAdapter(this);

//set the gallery adapter
picGallery.setAdapter(imgAdapt);
When the app initially launches, it will look something like this:
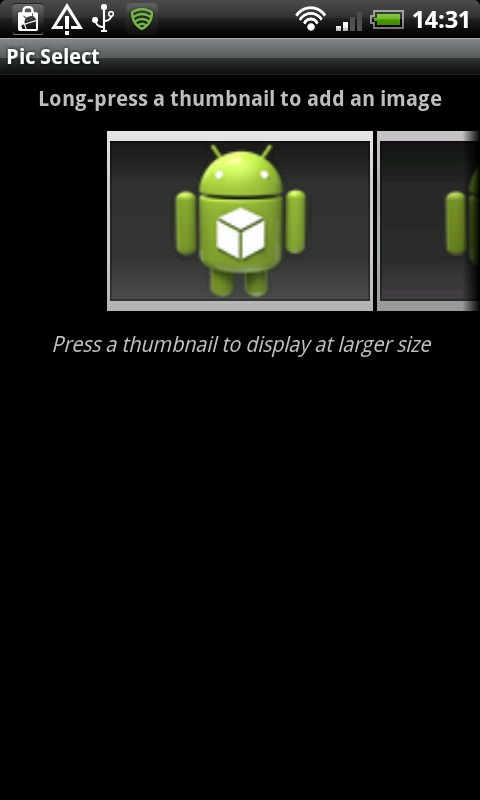
Now we are ready to handle user interaction.
Step 4: Allow the User to Choose Images
To select images to display in the Gallery, the user is going to long-press individual thumbnail items. In your "onCreate" method, after the existing code, add the following long-press listener for each item in the Gallery View:
//set long click listener for each gallery thumbnail item
picGallery.setOnItemLongClickListener(new OnItemLongClickListener() {
	//handle long clicks
	public boolean onItemLongClick(AdapterView<?> parent, View v, int position, long id) {
		//take user to choose an image

	}
});
Here we create a new "OnItemLongClickListener" with an "onItemLongClick" method inside it. Inside this method, add the following code:
//update the currently selected position so that we assign the imported bitmap to correct item
currentPic = position;

//take the user to their chosen image selection app (gallery or file manager)
Intent pickIntent = new Intent();
pickIntent.setType("image/*");
pickIntent.setAction(Intent.ACTION_GET_CONTENT);
//we will handle the returned data in onActivityResult
startActivityForResult(Intent.createChooser(pickIntent, "Select Picture"), PICKER);

return true;
Take a moment to look over this code. First, we record the currently selected item so that we know which Gallery item a new image is being chosen for. Then the code tells the app to take users to their chosen image selection app, which may be the Android image gallery or a file manager application. By specifying "ACTION_GET_CONTENT", we are instructing the app to return whatever the user selects. Since we start the chooser Intent using "startActivityForResult", we will be able to handle the returned image in the Activity "onActivityResult" method.
What happens when the image chooser Intent starts will depend on which applications the user has installed. On my device, I can choose between two apps for image selection:

Whichever image file I select in either of these applications will be returned to our app.
Step 5: Handle Returned Images
When the user selects an image from their gallery or file manager app, the data will be returned to the "onActivityResult" method. Add the method to your Activity class using the following outline:
protected void onActivityResult(int requestCode, int resultCode, Intent data) {

}
/java]

Inside the method, add the following:

[java]
if (resultCode == RESULT_OK) {
	//check if we are returning from picture selection
	if (requestCode == PICKER) {
            //import the image

	}
}
//superclass method
super.onActivityResult(requestCode, resultCode, data);
Here we check that we have received valid data and that the data has returned from the image selection Intent. We call the superclass method at the end of the method body. Inside the second "if" statement, we will add all of the code we need to import the user's chosen image, starting with the image URI:
//the returned picture URI
Uri pickedUri = data.getData();
We need to do a little more work to import the image. Start by declaring some helper variables:
//declare the bitmap
Bitmap pic = null;

//declare the path string
String imgPath = "";
Let's now attempt to retrieve the image path:
//retrieve the string using media data
String[] medData = { MediaStore.Images.Media.DATA };
//query the data
Cursor picCursor = managedQuery(pickedUri, medData, null, null, null);
if(picCursor!=null)
{
	//get the path string
	int index = picCursor.getColumnIndexOrThrow(MediaStore.Images.Media.DATA);
	picCursor.moveToFirst();
	imgPath = picCursor.getString(index);
}
else
	imgPath = pickedUri.getPath();
Here we retrieve the image media data, then query it using a cursor, passing the URI for the image chosen by the user. The "if" and "else" statements accommodate the user choosing their image using either the Android gallery app or another file manager. The end result of this code is that we have the path to the chosen image.
Step 6: Display Sampled Images to Minimize on Memory Usage
Rather than simply reading in the user's chosen image, we need to minimize on the amount of memory our app uses. In many cases, images on the device will be much larger than what we can display within the app. For this reason, we want to resample each image before reading it into the app. Still inside the second "if" statement in "onActivityResult", add the following:
//if we have a new URI attempt to decode the image bitmap
if(pickedUri!=null) {

}
Inside this statement we will resample and import the image. Begin by specifying the target width and height for your images, which should be the largest size you want each image to appear:
//set the width and height we want to use as maximum display
int targetWidth = 600;
int targetHeight = 400;
Now we need a Bitmap Options object to handle decoding the image:
//create bitmap options to calculate and use sample size
BitmapFactory.Options bmpOptions = new BitmapFactory.Options();
First we want to find out about the size of the image:
//first decode image dimensions only - not the image bitmap itself
bmpOptions.inJustDecodeBounds = true;
BitmapFactory.decodeFile(imgPath, bmpOptions);

//image width and height before sampling
int currHeight = bmpOptions.outHeight;
int currWidth = bmpOptions.outWidth;
We tell the Bitmap Options to decode the dimensions of the image, not the Bitmap itself. We are going to use this information to work out a good sample size to import the image at, start by initializing a variable to store it:
//variable to store new sample size
int sampleSize = 1;
Now calculate the sample size, if the target size is smaller than the image's default size:
//calculate the sample size if the existing size is larger than target size
if (currHeight>targetHeight || currWidth>targetWidth)
{
	//use either width or height
	if (currWidth>currHeight)
		sampleSize = Math.round((float)currHeight/(float)targetHeight);
	else
		sampleSize = Math.round((float)currWidth/(float)targetWidth);
}
Now we can set the Bitmap sample size:
//use the new sample size
bmpOptions.inSampleSize = sampleSize;
Now we need to alter the Bitmap Options settings in order to decode the file content itself, rather than just its dimensions:
//now decode the bitmap using sample options
bmpOptions.inJustDecodeBounds = false;
Finally we can decode the Bitmap using our chosen options:
//get the file as a bitmap
pic = BitmapFactory.decodeFile(imgPath, bmpOptions);
The "pic" variable now holds the Bitmap image we want to use in the app.
Step 7: Add Chosen Images to the Gallery
Now that we have the user's selected image imported, we can add it to the Gallery array. We need to add a custom method to our Base Adapter class to do this. Inside your "PicAdapter" inner class declaration, add the following method after the "getView" method:
//helper method to add a bitmap to the gallery when the user chooses one
public void addPic(Bitmap newPic)
{
	//set at currently selected index
	imageBitmaps[currentPic] = newPic;
}
Now go back to your "onActivityResult" method, after the line in which you decoded the image file, storing it in the "pic" variable, add the following:
//pass bitmap to ImageAdapter to add to array
imgAdapt.addPic(pic);
//redraw the gallery thumbnails to reflect the new addition
picGallery.setAdapter(imgAdapt);
First we call the new method to add a new image to the Gallery array, then we set the Adapter again so that the new image will instantly appear within the Gallery View.
Step 8: Display One Image at Larger Size
Finally, we want to display one image at larger size. An image will appear in the larger Image View when it is initially imported into the app and when the user selects it from the Gallery thumbnails. First, let's handle showing an image at larger size when the user initially imports it. In your "onActivityResult" method, after the line in which you called "setAdapter", add the following:
//display the newly selected image at larger size
picView.setImageBitmap(pic);
//scale options
picView.setScaleType(ImageView.ScaleType.FIT_CENTER);
We have an instance variable representing the larger Image View, so can simply set it together with scaling options. Now let's handle displaying the larger image when the user clicks a thumbnail. In your "PicAdapter" class, add another custom method after the "addPic" method:
//return bitmap at specified position for larger display
public Bitmap getPic(int posn)
{
	//return bitmap at posn index
	return imageBitmaps[posn];
}
This method simply returns the image at the specified position. Now go to your Activity "onCreate" method. After the long-press listener you added, include the following, implementing a click listener for each item in the Gallery View:
//set the click listener for each item in the thumbnail gallery
picGallery.setOnItemClickListener(new OnItemClickListener() {
	//handle clicks
	public void onItemClick(AdapterView<?> parent, View v, int position, long id) {
		//set the larger image view to display the chosen bitmap calling method of adapter class
		picView.setImageBitmap(imgAdapt.getPic(position));
	}
});
The "onItemClick" method will fire any time the user clicks an item in the Gallery. We call the new "getPic" method we added to the "PicAdapter" class to return the Bitmap at the clicked position, setting this as the Image View Bitmap to display it at larger size.
Conclusion
That's our image gallery app complete. Test it on an actual device, importing images by long-pressing thumbnails and pressing each thumbnail in turn to display it at larger size. When the user has selected a few images, the app will appear something like this:
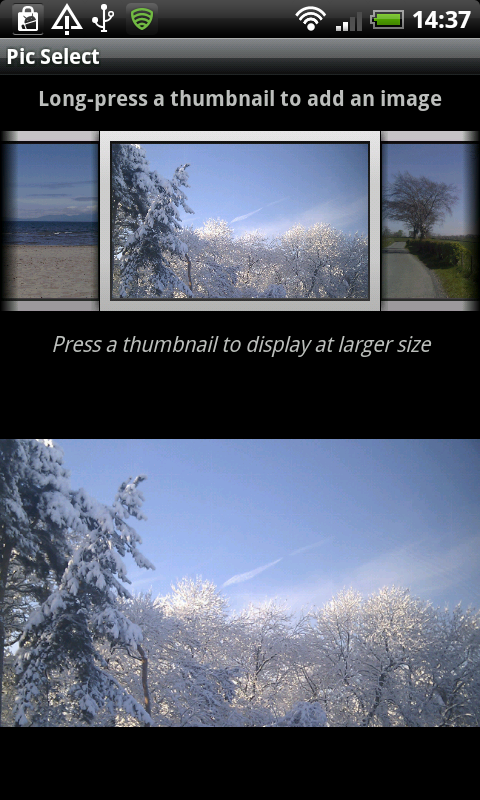
You can of course enhance the application to suit your own needs, for example to provide additional image interaction. The source code is provided for reference, so you cna make sure you have all the elements combined correctly.

Comments